PLA can be a real pain to get smooth, especially with sanding. Probably better to spray with a paint in light layers and sand that. I've never tried one of the chemical processes, though.
With PLA, I typically see people add layers of primer and sand that smooth between coats then paint.
The chemical method could work so long as you tape off the screw holes and back-sides.
Did you cost out a batch run on a carbon printer? Now that you have your geometry dialed, that might be an option. Or make a golden, smooth sample and cast them in polyurethane from silicone molds. Lots of ways you could make them over time.
I can print about 22 waveguides per 3KG spool, but we had some recent issues with adhesion that slowed us way down & sadly wasted a lot of filament.
I think I've finally got it figured out and the prints are finally sticking a lot better now.
Oh, you were targeting the old BG faceplates. Makes sense. I didn't realize that the NX-Treme has asymmetrical waveguides, thanks for mentioning it (although did Dannie say they're the same in the video?).
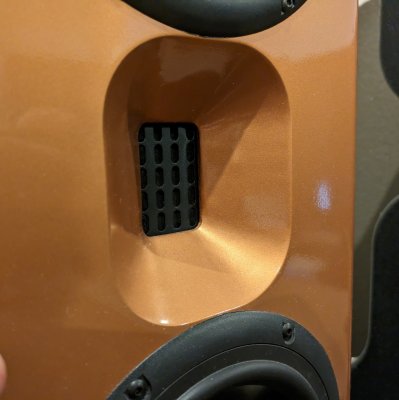
No, they are symmetrical but they are also a little different from the standard OB NX waveguides, the left/right edges were sanded down a bit extra on the edges
Standard:
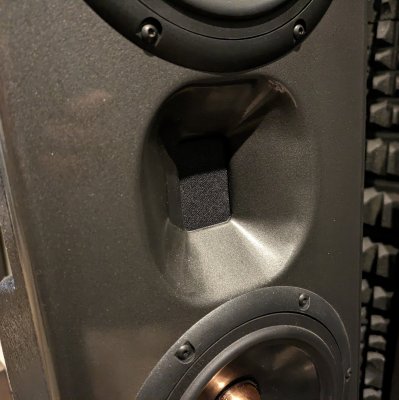
Danny's NX-Tremes
Those much larger, puffy waveguides looked really interesting. Did they get discarded as a concept too quickly?
It was just an idea we wanted to try, but we don't really have a place for them
[/quote]
It sounds as though it'd be worthwhile to explore a few of the other production methodologies, which might also enable you to optimize the waveguide for stiffness or damping. Reaction injection molding (RIM) is one that comes to mind... tooling is often quite a bit less since it's a low-pressure process, and you can have significant variation in your wall thicknesses (which is a challenge with standard plastic injection molding), at the expense of higher piece part cost. Or again, the urethane casting mentioned above. My guess is that if the orders ramp, you'll quickly find you have better things to do with your time than tend a 3D printer in production and answer customer requests about when their NX-Bravos will finally ship!

As an aside, your NX header on the website might need to change with the exciting NX-Bravo addition--currently it's "Reference Open Baffle".
[/quote]
It's certainly possible that we'll need to reconsider things if volume really picks up in the future.
I just noticed that the LGK 2.4 towers have a driver on the back for ambiance. Would it make sense to do something similar with the NX-Bravo, and if so, what would the impact be (or was it, if you've already tried it)?
This would of course only be for those who have their speakers 1' or more from the rear wall, so may an option on this monitor and possibly standard on the upcoming tower version.
We don't have any plans for a rear driver on these new NX models, plus that would be a really expensive use of a Neo 3. If we explore that option, we'll probably look at having a custom soft dome made that we can put on the back instead.
But that rear driver has done some amazing things when it comes to soundstage performance, especially on the new LGK prototypes.