Allen NX-Treme Build

0 Members and 1 Guest are viewing this topic. Read 5700 times.

allensound

Allen NX-Treme Build
« on: 18 Feb 2025, 04:01 am »
Hello all,

I'm hoping people find some inspiration, confidence and enjoyment in what I'll be sharing.  I do plan on doing a YouTube channel where I share this build as well as many other audio things as I progress.  That said, here's a little information about my build.

Front baffles: Satin black finish - think an automotive quality type of finish
Speaker sides: Bubinga veneer from https://www.veneersupplies.com - likely with a Danish Oil finish to a high gloss

One of the inspirations for the design was this - https://www.avluxurygroup.com/raidho-td48.html

Crossover: Upgraded Sonicaps and foil inductors for the mid circuits
Additional Crossover Upgrades (separate from gr-research) - I purchased a few different sets of bypass capacitors to experiment with along with the bypass caps that shipped with the NX-Tremes.  Each one of these below is a "replacement" I purchased to try them all out...
- Duelund Capacitor 0.1uF 630Vdc CAST-PIO-Sn/Cu Series Tinned Copper Foil Wax Paper Oil
- Vishay-Roederstein Capacitor 0.1uF 100Vac-160Vdc MKP-1837 Series Metalized Polypropylene
- Vishay-Roederstein Capacitor 0.015uF 100Vac-160Vdc MKP-1837 Series Metalized Polypropylene

Based off my research, the Duelunds should be the pinnacle of all bypass caps. 
On the Vishay's, they were cheap enough I just wanted to see if I could hear any real difference between a 0.1uF vs the 0.015uF. 

To be completely upfront here, I've NEVER painted anything to an automotive type of finish and I've NEVER attempted veneer.  So you might say I felt a little in over my head BUT, specifically these two videos gave me the confidence to push forward and give this whole thing a shot.

Getting a body shop type of automotive finish using spray cans:
https://www.youtube.com/watch?v=vwXJwhisYAE

X-LS Speaker Cabinet Veneering:
https://www.youtube.com/watch?v=pb5KiJmIWII

Last bit before I share some photos.  In order to gain a little confidence, I did go out and buy some 3/4" MDF, route off the edges and do some experimentation.  After watching too many videos to count on how to properly seal MDF grains to get a nice finish, I just said screw it and bought several materials and gave it all a shot myself.

Sealers tried:
- Zinsser Bulls Eye Clear Shellac  (paint / rub on) - https://www.amazon.com//dp/B000BZTIZW/
- Kilz Original Primer Interior/Exterior - https://www.homedepot.com/p/KILZ-Original-1-qt-White-Oil-Based-Interior-and-Exterior-Primer-Sealer-and-Stain-Blocker-10984/306777626
- Zinnser BIN Spray Primer Shellac Based - https://www.amazon.com/dp/B000ZYND0A/

Thoughts / Results?
All three worked perfectly well.  If you sand the MDF to at least 180 and then apply the primer/sealers, then sand those to 220 grit, all three did perfectly fine.  I ended up going with the paint on shellac simply because it was the easiest to work with.  I believe the Kilz actually did the absolute best, but because it's oil based, it was a touch more of a pain to clean up (being I used a roller).  I just could not spray the BIN primer without getting runs - and that's probably something I'd do better with now that I've practiced spray painting so much, but that's the only reason I didn't use it, plus it ends up being quite a bit more expensive than the other two options overall.

Here's a shot of the problems I had trying to spray the BIN


Here's several products I was experimenting with:


Gotta love UPS handling of "fragile" boxes:


Fortunately they were all packed so well that there was ZERO problems with the flat pack.  I was so worried too...
« Last Edit: 19 Feb 2025, 02:22 am by allensound »

nlitworld

  • Full Member
  • Posts: 2436
  • Strange things are afoot at the Circle K
Re: Allen NX-Treme Build
« Reply #1 on: 18 Feb 2025, 04:22 am »
My one word of caution comes from the rust-oleum. If that is the system you want to work with, no problemo. If you try and put anything other than rust-oleum over the top of that in the form of actual automotive paint products, you will have very very big problemo. You are right to test a proof of concept prior to really taking on the full scale speaker. Get exactly what you want on your sample, then scale up.

I know most people don't actually want the full rabbit hole of automotive finish , but if that is something you get set on just let me know. I'll show you the dark depths of OCD meticulous paint finishes.  8)

-Lloyd

allensound

Re: Allen NX-Treme Build
« Reply #2 on: 18 Feb 2025, 04:23 am »
Painted Front Baffles and Speaker Bases

Products Ultimately Used:
Ozark Traill 14x10x7.5 Tent (paint booth) - https://www.walmart.com/ip/Ozark-Trail-14-x-10-Family-Cabin-Tent-Sleeps-10-13-5-lbs/28911609
Zinsser Clear Shellac (1 quart) - https://amzn.to/412NnJ5
Quality paint brush (1 brush) - https://amzn.to/41kLZTp
Denatured Alcohol (1 can) - https://amzn.to/3EFiKlk
Rustoleum Automotive Filler / Primer (4 cans) - https://amzn.to/41jkWYx
Rustoleum Flat Black Enamel Spray Paint (3 cans) - https://amzn.to/413SGYH
SprayMax 2K Satin Clear Coat - (3 cans) - https://amzn.to/41jlJZw
Milescraft Multi Surface Sanding Block - Concave/Convex - https://amzn.to/4hGvYgs
Durablock Flexible Sanding Block - https://amzn.to/4hKOq7M
Sand Paper 80, 120, 150, 220, 320 - https://amzn.to/412QLDQ
Sand Paper 800 wet/dry (multi grit pack because cheaper) - https://amzn.to/3EC0klt
5" 8 hole sanding disc assortment 150 pieces (60, 80, 100, 120, 150,180, 240, 320, 400, 600)  - https://amzn.to/3ESxMnQ
Sprayway Glass Cleaner (3 cans) - https://amzn.to/411253b
Microfiber Towels (pack of 3) - https://amzn.to/4gHhJqd
Disposable Powder free Nitrile Gloves (medium my size) - https://amzn.to/41mUDRz
Dupont Tyvek 800J Hazmat Suit - https://amzn.to/4gOjfHk
Respirator / Goggles - https://amzn.to/4hHBRd4
20" Box fan - https://amzn.to/4hEjJB1
Pack of 6 air filters - https://amzn.to/4gTXC8E
LED work light / space light
Can light clamp - https://www.walmart.com/ip/Champion-Electronics-8-5-Aluminum-Clamp-Light-150-Watt-Max-Bulb-Not-Included/889980959
2 2x4x8's and 1 2x4x10 to create paint supports


It's crazy how much stuff I ended up getting to make my little paint booth work out :-)
« Last Edit: 18 Feb 2025, 03:30 pm by allensound »

allensound

Re: Allen NX-Treme Build
« Reply #3 on: 18 Feb 2025, 04:25 am »
My one word of caution comes from the rust-oleum. If that is the system you want to work with, no problemo. If you try and put anything other than rust-oleum over the top of that in the form of actual automotive paint products, you will have very very big problemo. You are right to test a proof of concept prior to really taking on the full scale speaker. Get exactly what you want on your sample, then scale up.

I know most people don't actually want the full rabbit hole of automotive finish , but if that is something you get set on just let me know. I'll show you the dark depths of OCD meticulous paint finishes.  8)

-Lloyd

OMG - I guess I'll find out soon enough - already painted the rustoleum flat black and put the Spraymax 2K clear satin over the top...I'll be keeping my eye on it, as I just did the clear today - so far it's looking pretty excellent, but now I'm probably not going to sleep well  :o

nlitworld

  • Full Member
  • Posts: 2436
  • Strange things are afoot at the Circle K
Re: Allen NX-Treme Build
« Reply #4 on: 18 Feb 2025, 04:29 am »
If it didn't wrinkle and blister already this afternoon, you may have squeaked away with it. There is a VERY narrow window it can kinda work OKish. Most of the time you will get serious wrinkling (think fried chicken skin) or massive blushing like the worst foggy car windows. But if you didn't see that and everything seems to be hardening up OK, then you squeaked one through.  :thumb:

All in all we love seeing NX-Treme builds so I'll be excited for photos!

Craig Young

  • Jr. Member
  • Posts: 48
Re: Allen NX-Treme Build
« Reply #5 on: 18 Feb 2025, 06:35 am »
UPS handling heavy packages could use better equipment which of course would slow them down and therefore would never happen. In June I had the completed build Bully's come and they are so heavy. The boxes were mush, but the product is good and I watch tv every night now and they sound very good.

AlexH

Re: Allen NX-Treme Build
« Reply #6 on: 18 Feb 2025, 01:41 pm »
My one word of caution comes from the rust-oleum. If that is the system you want to work with, no problemo. If you try and put anything other than rust-oleum over the top of that in the form of actual automotive paint products, you will have very very big problemo. You are right to test a proof of concept prior to really taking on the full scale speaker. Get exactly what you want on your sample, then scale up.

I know most people don't actually want the full rabbit hole of automotive finish , but if that is something you get set on just let me know. I'll show you the dark depths of OCD meticulous paint finishes.  8)

-Lloyd

This is good advice. I have refurbished several bikes with Rust-oleum and top coated with automotive 2k clear. The trick is to make sure the Rust-oleum is dry ( a month or 2), then the first coat of 2K goes on very lightly. I have no experience doing this with mdf.

I look forward to the finished product.

allensound

Re: Allen NX-Treme Build
« Reply #7 on: 18 Feb 2025, 04:13 pm »
The Process for the Baffles and Speaker Bases

First thing I did was sand everything with 150 grit and then 180 grit.  I started doing this with 150 grit sandpaper (by hand - dumb) and then I followed it up with a 180 grit sponge sanding block I bought at Home Depot for like $6.  I don't recommend the sponge sanding blocks - they wear out relatively quickly and those things add up fast.  Instead, I mentioned I bought a Dura-Block flexible sanding block - I was able to use regular sanding paper with those and it worked out fantastically.  Cheaper and works great. 

I did use the Milescraft to do the round-overs - I can't recommend it enough - I loved this sanding tool!


Also, for the flat surfaces that you might want to round just a touch to transition, I loved the Dura-Block sanding block. 


Here's a shot of one of the speaker bases after the initial sanding.


In hindsight, I would have used my random orbit sander for the flat surfaces as things would have gone MUCH faster.  I guess I was just nervous and didn't want to damage anything.   The more time I spent doing this stuff, the braver I got, and I switched over to the random orbit sander on future steps.

While sanding, I did find some things that needed some attention - that's one benefit of doing the first sanding by hand - you touch every single surface so you notice any problems.  Case in point - on one of the speaker bases, there was a section where it looks like the CNC gouged one of the edges - it was an odd section, so I just took some wood filler, filled and sanded several times to get it nice and smooth.


After getting everything sanded to 180, it was time to do some Shellac.  I used a high quality paint brush and brushed on very thin layers of Shellac - you don't want to do thick coats as it won't set up properly and you'd have to wait a VERY long time before you could do any sanding.  I'd do a coat, wait 45 minutes to an hour and then do another coat.  In-between coats I would wrap the brush in Saran Wrap and throw the brush in the refrigerator.  Minimizes the amount of cleaning you have to do.  Because I don't have a full blown woodworking shop or anything, this was a little time consuming because I didn't have the surface area to lay everything out at once. 

Here's some photos after doing the shellac on each of the pieces.


And here's one of the speaker bases where I had started sanding the shellac


I shared the last picture to show where you can still see the "shiny" parts.  The goal of sanding before spraying on the primer is to get rid of all those shiny spots - that means you've gotten the surface basically perfect before moving onto the next step. 

Alright, I'll be back with more a little later - it takes forever to resize and frame these photos to upload them to the gallery.

g3rain1

Re: Allen NX-Treme Build
« Reply #8 on: 18 Feb 2025, 11:14 pm »

I did use the Milescraft to do the round-overs - I can't recommend it enough - I loved this sanding tool!

Oof. that seems like a lot of work. I'd recommend a router and round over bit instead. Faster and way more consistent.

allensound

Re: Allen NX-Treme Build
« Reply #9 on: 19 Feb 2025, 12:29 am »
Oof. that seems like a lot of work. I'd recommend a router and round over bit instead. Faster and way more consistent.

Oh no - I didn't create the roundover by hand - those all came to me in exactly the shape you see - I just hand sanded them to 150 and 180.  I wouldn't even attempt to create a roundover by hand!  :-)


allensound

Re: Allen NX-Treme Build
« Reply #10 on: 19 Feb 2025, 02:03 am »
Now that the sanding was out of the way, it was onto the primer.

Before priming, I would spray down each piece with Sprayway Glass Cleaner - it's ammonia free so it works perfectly with all the coatings used.  I'd then wipe off the cleaner with a microfiber towel - it's critical you use a towel/cloth that doesn't leave lint or any "stuff" behind. 


This was the primer I used - Rustoleum Automotive Filler Primer - I used this as it fills in any tiny scratches nicely.  Makes for a great base to the paint.


The process of priming didn't take a ton of time, but, to prevent overspray, I would do one piece at a time in the tent.  As with every coating, I went for three coats of primer.  I say I went for, but, when wet-sanding, it turned out I didn't get enough primer on the round-overs and the very bottom edges of the speaker bases so I ended up wet-sanding through the primer and had to do another two coats, at least in the places I went through. 

To get the three coats of primer on there took a little over 30 minutes, but then I'd wait a good hour before taking the completed piece out and bringing a new one in.  I guess that's the thing you deal with when you don't have a real paint room with a drying section and all that.

The primer is very forgiving - when I was practicing painting, it gave me a false sense of confidence.  It's "thicker" than paint and it tends not to run / sag at all, even if you put it on heavier than you should.  If you took that habit of putting things on too thick, it'll really bite you in the butt when doing the paint and the clear coat.

Here are some photos of the various pieces I primed.   

Speaker base on the home-made paint stand.


Closeup of one of the speaker bases primed:


Both baffles primed:


A little closer on the baffles:


Closeup on the wave guides primed:


allensound

Re: Allen NX-Treme Build
« Reply #11 on: 19 Feb 2025, 02:21 am »
One thing I forgot to share was the setup inside the tent.  Here's a nice and messy shot of the whole operation. 


You can see I've got a filtering setup over on the right - on the front of that setup is a fan that's pulling air through five 20" filters that I taped together and to the back of the fan.  I keep that thing on high when I'm in there spraying and it does a remarkably good job of keeping the paint spray out of the air.  I've seen what it looks like when people spray paints (especially clear coats) without any type of filtration and it just ends up being a huge (and dangerous) cloud of chemicals.  I don't know that the picture makes it obvious, but I have it angled up to flow out the open flap of the tent to the great outdoors. 

Over on the left, that mess of wires is going to power the fan that's doing the filtration as well as the light I have hanging from the top of the tent - it's a pretty large LED bulb that acts as a work light - it'd be nearly impossible to work in the tent without some good lighting like it provides.  I was trying to find the one I use (I bought it from Walmart for $30) but I couldn't find it online.  I saw something similar at Costco the other day that was cheaper and looks like it may be even better.  I may have to buy it, just because :-)

I think I mentioned earlier in the post that the tent is a 10x14x7.5 - that 7.5 is so very key.  It gives enough height to walk around and not be constantly fighting with things getting in the way.  Also, when working with things like a 7' tall speaker, it's nice to have the height available, even though I did spray it horizontally!

Here's a shot from outside the tent after I was finished clear coating the two speaker bases tonight.


allensound

Re: Allen NX-Treme Build
« Reply #12 on: 19 Feb 2025, 02:33 am »
Unfortunately, I didn't get a ton of photos of the next step.  I think I was focused more on recording video during this part, but I do have one picture.


After finishing the priming of all the pieces, I was on to wet-sanding them.  I used 800 grit wet/dry sandpaper, and I used the Sprayway glass cleaner as my lubricant.  I mentioned one of the things that gave me confidence to do all of this was Brian from Paint Society's YouTube channel - he mentioned that with spray can primers he likes to use 800 grit instead of 600 because the spray can stuff tends to come off a little more aggressively with the 600.  As with any of the sanding I did throughout the process, I let the sandpaper do the work - I didn't push down hard, rather I'd let the stuff glide over the surfaces I was sanding.  After finishing the sanding, I'd spray the entire piece down again with Sprayway and then wipe it down completely with a microfiber towel.  If there was still anything remaining from the sanding, I'd repeat the process of spraying it down and wiping it off. 

One thing I caught on video that I didn't get any photos of (probably because I got frustrated and was just trying to get things done) - it turns out I didn't get enough primer on some of the edges or the round-overs and when gently wet sanding I went through the primer.   It's obviously frustrating to feel like you have to take a step back, BUT, on the other hand, when it comes to painting, just about anything up until the clear coat is pretty easy to just go back and do again.  It's just simple steps of sanding, re-doing that layer, and moving on.  All in all, it's a pretty forgiving process if you mess up.  While nobody likes to redo things, at least it's an option through most of the process!

allensound

Re: Allen NX-Treme Build
« Reply #13 on: 19 Feb 2025, 02:51 am »
One thing I should have mentioned before I even got to this point.

WEAR THE PROPER GEAR


When I sprayed the first coats of primer, I just went into the tent with jeans, shirt and shoes.  A few things to note here.

  • When you're done, you smell like a chemical plant (took many clothes washes to get the smell out)
  • It's super unhealthy - don't do it!
  • Wearing the hazmat suit keeps SO MANY particles and lint out of the air

All three of those points are super important.  Even if you don't care about your clothes - I promise you, it's so much better to just put on the gear.  It would take all of two minutes to slip in and out of the Tyvek suit, throw on the respirator and the goggles.  I can HIGHLY recommend all the products I used as they have been great so far. 

One funny thing I experienced is after painting one evening, I came back the next day to paint and I couldn't see ANYTHING well and for some dumb reason it didn't even dawn on me that OF COURSE there was spray particles dried on the goggles.  I simply washed them off with soap and water and everything was great again.  So, just give them a wash every day before you go back in to do some painting. 

Also, I can't tell you just how awesome it is to not have random particles get in your paint job.  I have plenty of hair on my arms and those hairs ALWAYS seem to find their way into everything I don't want them to.  That and the fibers in my shirts, jeans, etc.  Putting on the hazmat suit just keeps all of that contained.  I had very little problems with particles getting into the paint booth and onto the pieces I was finishing. 

allensound

Re: Allen NX-Treme Build
« Reply #14 on: 19 Feb 2025, 03:03 am »
Alright, it's getting late again and I'm sure I've got another hour of posts to catch up to where I am now, which is basically done with the entire painting / clear-coating process so I'll post those tomorrow assuming I have time.

The only reason I say "I'm basically done" is I don't know if I'm going to want to try and get rid of that orange peel I see in the clear coat or if I'm just going to let it be.  If you're not sitting a foot from the speakers, the baffles look pretty amazing.  However, the "perfectionist" side of me really wants those things to be crystal clear.  The only real problem with that is sanding, polishing and buffing will likely get rid of the satin finish I want and turn it into a high gloss finish.  So....I really don't know what I'm going to do there.

BUT, tomorrow I may actually tackle the next big thing I've never attempted - veneering the sides.  I'm super excited about what I THINK it could end up looking like, but it's going to be a learn as you go thing!

Like I said, I next plan to post the information about the painting process followed by the clear coating.  There were a few hiccups in the paint process along the way that should be fun to share :-)

allensound

Re: Allen NX-Treme Build
« Reply #15 on: 19 Feb 2025, 11:17 pm »
Onto the Paint!

Just like with the primer, I first sprayed down the entire piece with Sprayway and wiping off with a microfiber cloth before doing anything else. 

I think I mentioned previously that I used the Rustoleum Flat Black Enamel.


This process really just requires practice. 

The first coat needs to be a very fast stroke - just enough to get SOME paint on the piece but you're NOT trying to get full coverage - meaning it's totally ok if you see some of the primer coming through - DO NOT go back and try to fill those specks in!

Here's a picture of the front baffle on the first pass - like I mentioned, you might still see some primer coming through - perfectly ok.  You'll also notice that the top curve is a little more wet than the rest - that's because I would do a first pass across the edges so I wouldn't miss those, and then I'd go across the flat part of the piece.   As long as you go fast across the edges and don't linger at any spot you should be ok.


The second coat, which is applied about 10 minutes after the first, you still go very quickly, just like the first, but you can see things are filling in.  You can see on the very left of the photo that it's still not super wet there, even though, again, the top is much wetter.


Here's a shot about five minutes after spraying the second coat.


The, the last coat, applied about 10 minutes after the second, I would go slower which would get every area quite a bit wetter, and because the previous two coats are still tacky/sticky, the paint will hang and not run if you go at about half speed.  This was the case with MOST of the pieces I painted.  You'll see the baffle is very wet in this photo to the point to where it looks like it's going to be terrible when it dries.


Not to worry, when the paint dries, it turns out beautifully...


Now, for when things don't go perfectly...Here's a paint run in the speaker base - more or less what happened here is I did the edges of the base first, and then when I did the flat piece I was just moving too slow and so the paint sagged / ran.  This actually happened in two spots - one of the photos didn't turn out well so I only have the one to show here.


So, I just had to wait for it to dry, sand down the spots...here's one where I had to sand a sag near one of the screw holes:


Then the sag near the roundover:


Here's a shot of the entire base after fixing the sag spots and just scuffing up the surface again:


And then here's the base after repainting:


Frustrating, but just takes time to do.  I believe I did at least two coats on these spots.  I honestly can't remember - it's been a couple days since I did this :-)

ALSO, I forgot - there was suggestions / concerns/ questions regarding how the Rustoleum paint would work with a non-Rustoleum clear coat.  Here's a shot of one of the practice pieces I did before doing any of the painting next to one of the baffles that was finished with the paint and the Spraymax 2k clear.  As you can see in this photo - the Spraymax on top of the Rustoleum worked out perfectly fine.  I think I waited maybe a day, possibly two after painting before I applied the clear coat.

Both the practice piece and the baffle are flat black Rustoleum enamel.  Top left is the satin Rustoleum clear coat, bottom left is Rustoleum gloss clear coat, and the right baffle is Spraymax 2k satin clear.  In my opinion, the Spraymax looks better than both the Rustoleum finishes.


In the next post, I'll share the clear coat steps and photos. 

allensound

Re: Allen NX-Treme Build
« Reply #16 on: 20 Feb 2025, 12:42 am »
Clear Coat Time

Now the paint was dried on all the baffles and speaker bases, and it was onto clear coating.  After I let the paint dry for at least a day, maybe two for some of the pieces, all I'd do is spray some Sprayway and wipe off everything with a clean microfiber towel.  Then I'd spray the first coat of clear.  If you're not familiar with the SprayMax 2k clear coat product, it's a two part clear similar to what's used in real automotive paint shops - it has a hardener that mixes in with the clear once you puncture a thing on the bottom of the can.  Once you do that, you basically have 2 days that you can use the clear (per manufacturer information) so the clock is ticking.

Similar to the paint process, the very first coat of clear coat needs to go on very quickly.  In the videos I took you can see how fast I go back and forth - you're really moving as to just create a nice tacky dusting across the entire surface.  You do NOT want to see a nice glossy clear area while you're spraying this first coat - if you have, you're putting it on too thick and it absolutely WILL run. 

Here's a closeup of the first layer of clear I put on, and I was spraying 8-10" away from the piece while moving very quickly in 50-75% overlapping passes.  You can see it's just a nice misting of the clear coat - this first pass is all about giving the clear coat something to stick to in the second and third layers.

Here's a closeup of the baffle.


And a closeup of the wave guide.


Wait roughly ten minutes until the first coat has flashed off and is tacky.  This time I'm also moving pretty quickly across the piece, again about 8-10" away with 50% overlaps.  Here's some shots of the second coat of the SprayMax 2k clear satin.  First up is the baffle:


And the wave guide:


Third coat, again waiting about 10 minutes or until the second coat tacks up nicely, and then I sprayed this on at about half speed and this time I moved a little closer to the piece I was spraying, maybe 6" away.  Still overlapping about 50%.  This coat goes on pretty wet and that works out just fine because the second coat makes the clear adhere very well.

Here's the baffle after drying:


Here's the speaker bases both drying on the stands:


And after waiting several hours, here's what that clear looked like on the baffle:


And the speaker bases after drying:


Here's the baffle up next to some trim and a wall just for contrast:


And I wanted to share again another picture of the Rustoleum clear coats on the left vs the SprayMax clear coat on the right.  The Rustoleum satin on top left and the gloss on the bottom left.  Even to the naked eye, the SprayMax clear just makes the black look blacker.  It's an awesome look.


And last, I wanted to show a comparison of a store bought speaker finish vs what I had with my spray job. 


One thing to note - in some of my pictures the black looks gray and that's just because of the bright light and camera contrast adjustments to pick up the subtleties on the pieces.  Just know everything does look truly black.

And that will lead me nicely into my next post, and we're almost caught up to real time.

allensound

Re: Allen NX-Treme Build
« Reply #17 on: 20 Feb 2025, 01:18 am »
Pursuit of Perfection - a Better Finish

Alright...it was really that last picture I shared where I compared a purchased speaker's finish with the finish I currently had that made me just want to go a step further.  I mean, I've already invested several hours in this and I just don't ever want to think "I wish I'd gone ahead and done it better".  Now's the time before I put all this stuff together.

So, that said, I decided I was going to go ahead and get rid of the orange peel.  I don't believe I have a ton of photos here because I was mostly recording the process.  So, because I don't have a ton of photos, I'll share what I did, what went right, what went wrong, and the next steps (plus a few photos of the aftermath).

I started out sanding by hand with 800 because it's about the safest thing you can do - it'd be nearly impossible to burn through any clear with just that.  Turns out I couldn't do more than about 3 square inches before needing a new piece of sandpaper so I moved up to a lower grit (more aggressive sanding).  Let's just say I did this several times - I worked my way from 800, to 600, to 400, to 320.  Also, note that most 600's and 800's can be wet or dry sanded.  I opted for dry sanding so I could easily see what was happening as I worked.  Well, with 800 and 600, they couldn't do much before the sandpaper was completely clogged and I'd have to get another piece.  400 got quite a bit better but it still took quite a bit of effort to get down to where a spot I was working on wouldn't have any shiny spots.  So, I opted to drop down to 320 grit and that seemed to be the right starting point at least for the flat surfaces.   

I spent a LOT of time trying to do the tweeter wave guide by hand and really being careful about all the edges.  Unfortunately, I didn't realize that I was using a few inch long piece of sandpaper and while I was sanding the middle of the wave guide, I was hitting the inside most part of it and ended up sanding down to the primer!!!  Frustrated  :cry: :( :?

I chalked that up to learning, folded the sandpaper down to a smaller piece so I didn't inadvertently hit areas I wasn't trying to hit.  That worked out well for the rest of the inside of the wave guide.  I then moved up to the flat surface and was making slow but steady progress - the clear coat really fills up the sheets of sandpaper quickly.

It was about this time I got brave and decided to switch from hand sanding to using my random orbit sander - this'll go much faster....HUGE MISTAKE - I don't know that I had that thing on for more than a minute and I'd already burned down to the primer along a couple of spots in next to the round-overs on the side of the baffle.  I think the real problem is you can't ensure you have consistently, perfectly flat downward force to the sander so it can (and will) apply more aggressive sanding at spots on the surface, which is REALLY a problem when you get next to the round-overs.  Basically any edges or not completely flat surfaces just won't have as much clear on them because the clear will settle as it's drying, and it works its way to the nearest flat spot - so just by that very nature, the clear will always be thinner on edges and non-flat surfaces.  So...lesson learned.  I put the power sander down and went back to doing things by hand.  Really, I just continued on to finish the entire baffle so I could learn more by doing.  I mean, I already knew I was going to have to go back and paint and clear in some spots so I might as well gain as much knowledge as possible while there.

SOOOOOooooo.....here are the photos.  Like I said, I was/am very frustrated I tried to speed things along because I can PROMISE you it's going to set me back days now as I'll need to paint and clear again and I'll only be able to do those things in the evenings :-(

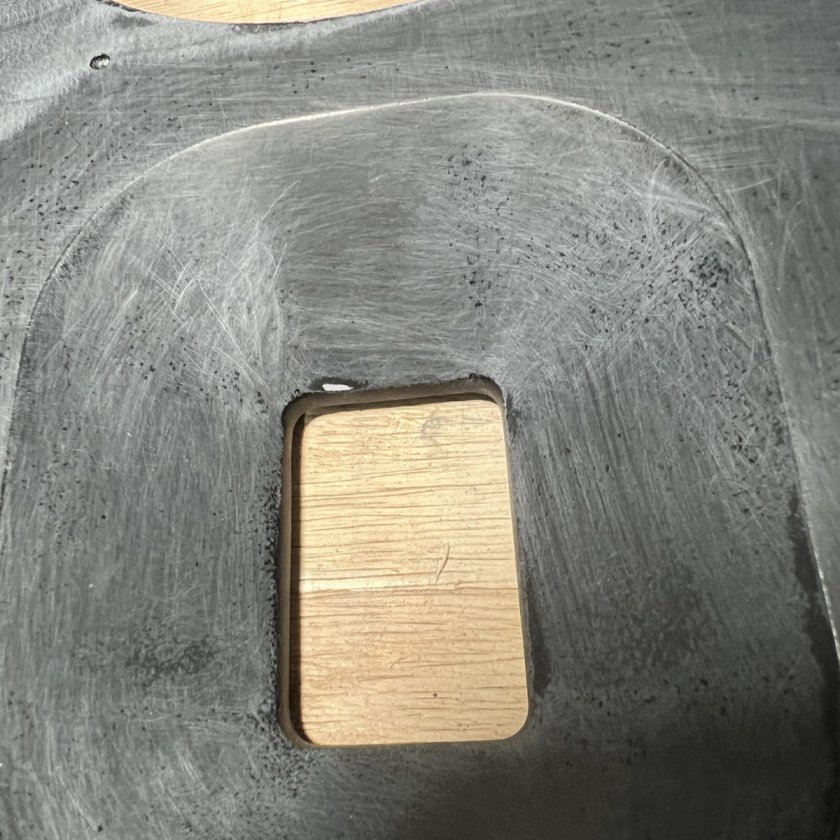
Here's the wave guide where I hand sanded mostly with 600 and then some 400 and had some burn through to the primer :-(


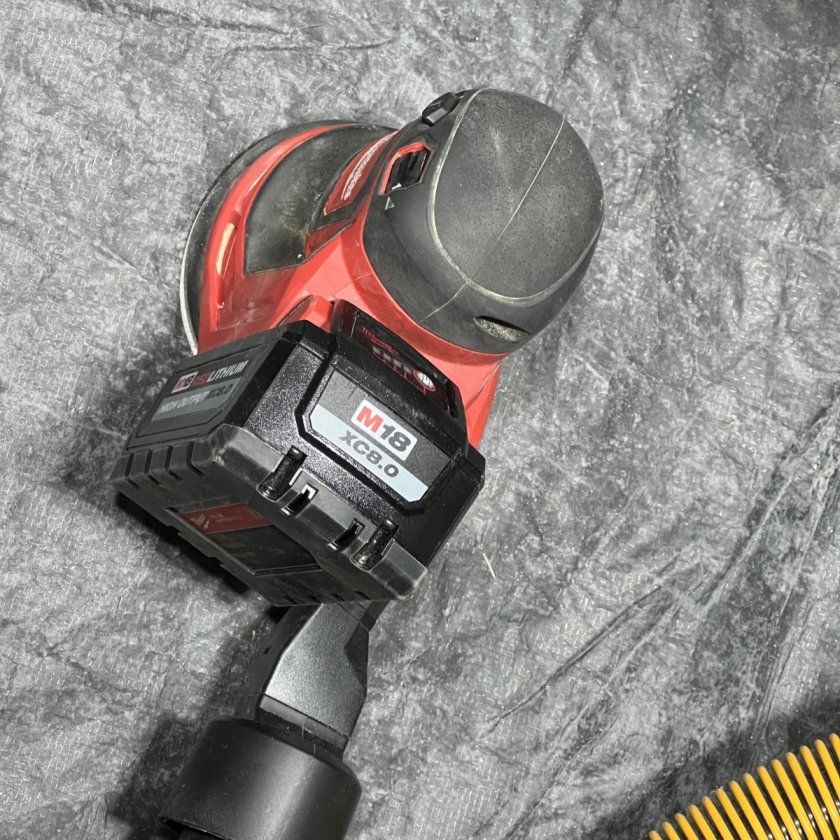
Here's the devil - the random orbit sander - I had put 320 grit on there - I screwed up:


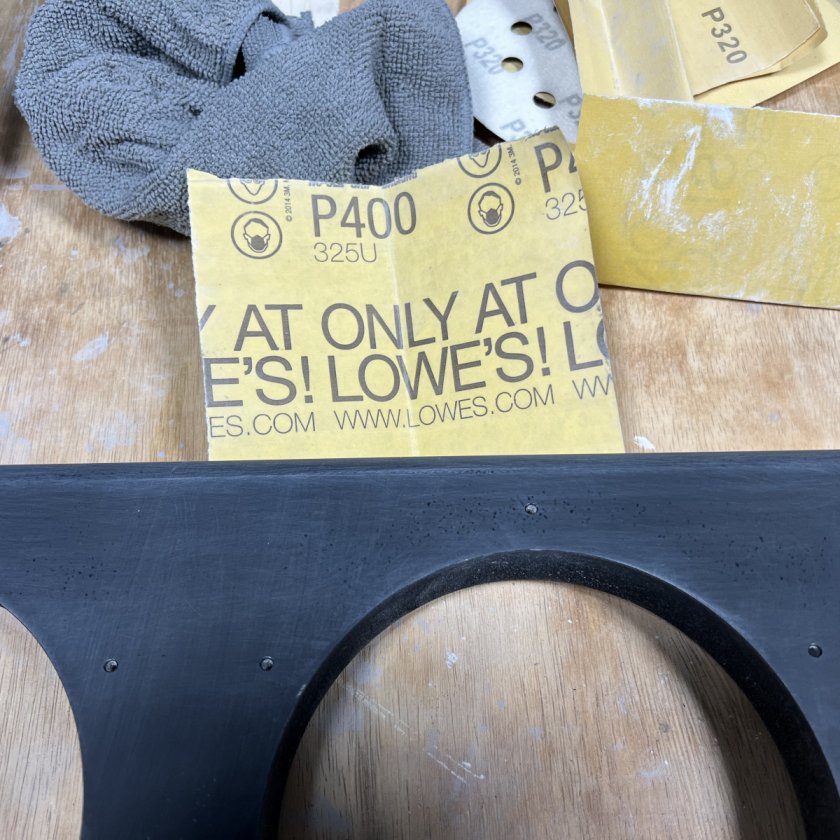
Here's where I showed I was hand sanding using 400 grit for the roundover just to be safe:


Here's where I show the part of the baffle where I used the random orbit sander and 320.  You might say - "Why didn't stop when you saw you burned through?!" - well, the random orbit throws out so much more dust that you can't really see that you burned through it until you take a break and wipe everything down - EVEN WITH the vacuum on for dust collection!
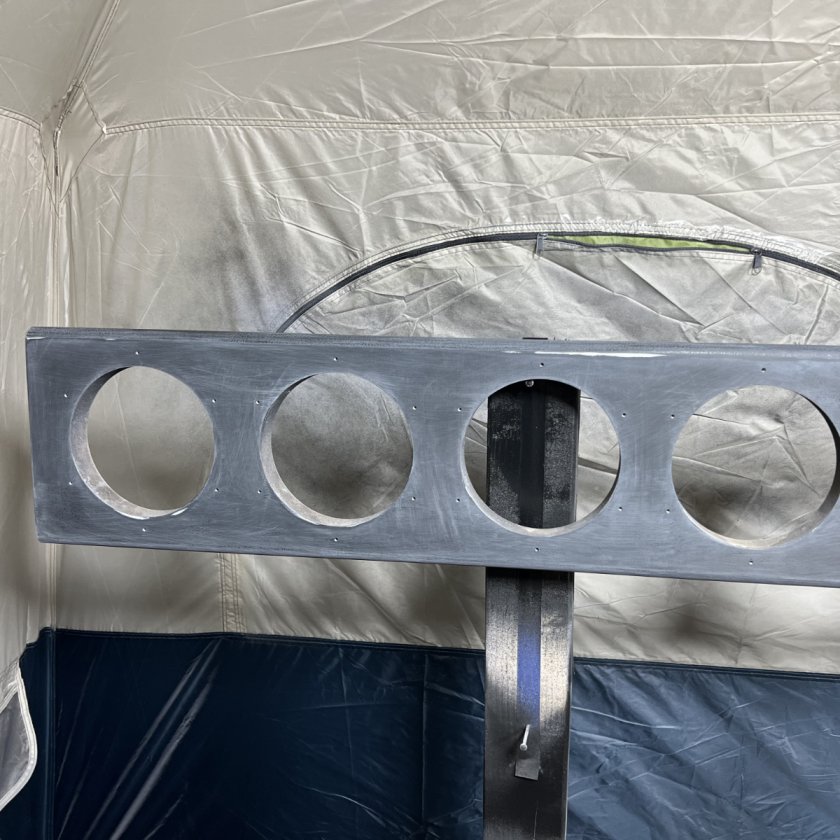


Here's the middle of the baffle that I hand sanded with 320 and mostly did just fine:
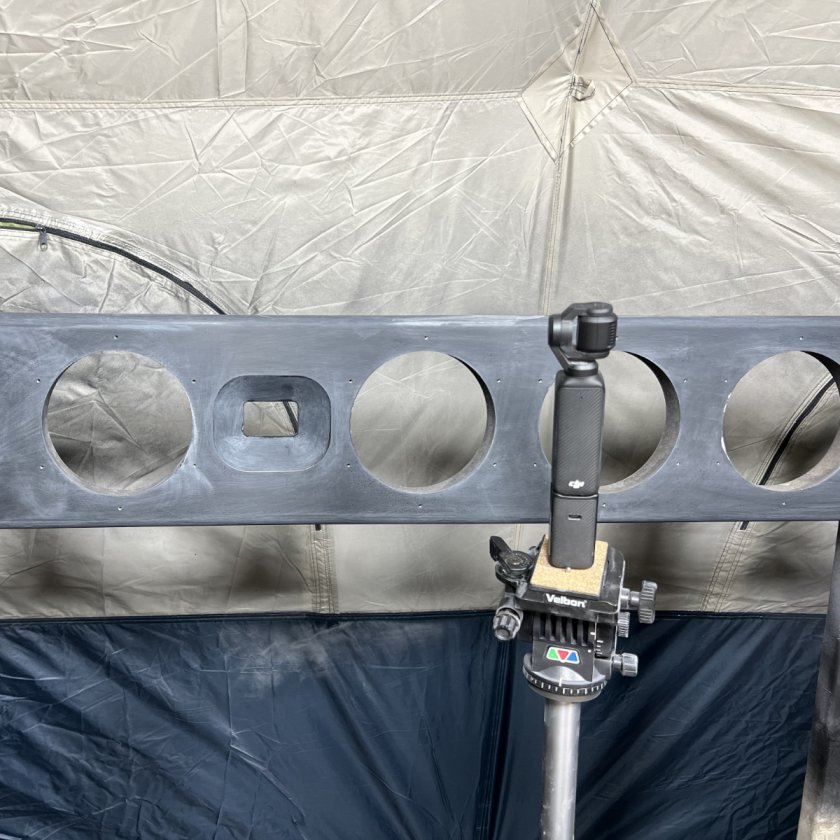


And the same for the other end of the baffle - mostly did just fine when hand sanding with 320:
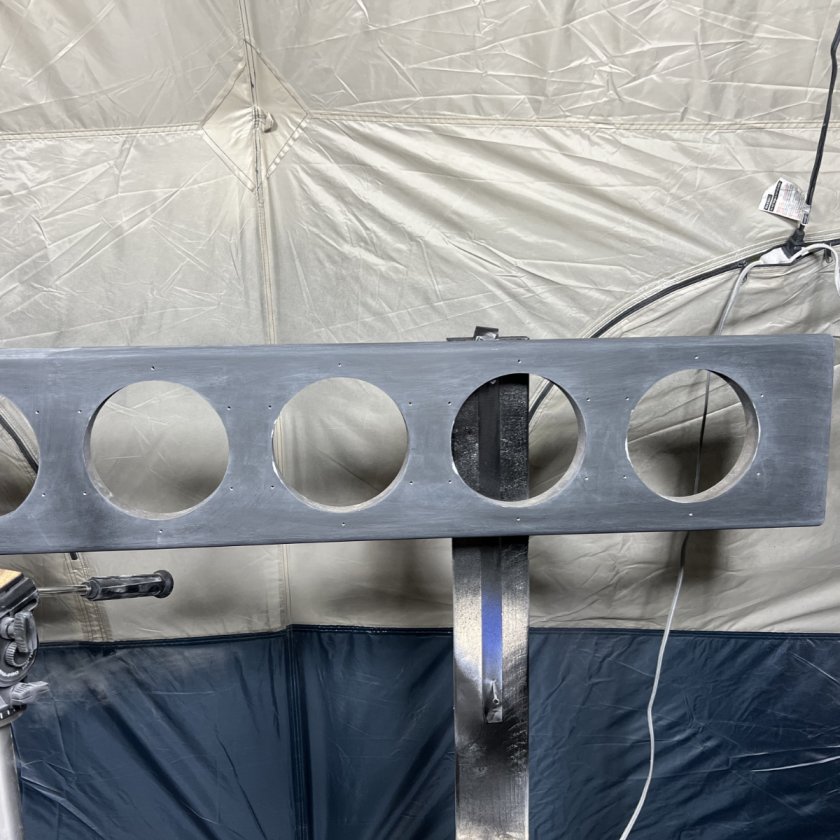


If you look closely at any of those three baffle pictures, you will notice that there are several spots right on the speaker openings where it looks like I got down to the primer, even in the hand-sanded sections.  That's a lesson learned for sure - I don't even need to get that close to those edges as they'll be covered up by the speaker drivers themselves.  So...I'll probably go ahead and touch these up because I have so much touch up to do anyways, but on the other baffle I'm going to steer clear of those areas - again, the edges will ALWAYS have less clear on them than the rest so any time you get close to it you run the risk of burning through the finishes.  Live n' learn I suppose

You're now caught up with where I am so the next updates will be a little slower coming.  I was so bummed after those sanding mistakes that I called it a day on this.  I'll likely try to do the other baffle tomorrow and probably both the bases as well.  Like I said, this has probably set me back many days to a week.  I'm going to wait to get everything sanded down before doing the touchups because I only have one more bottle of the spraymax and I'll need to do all those coatings roughly at the same time knowing they're only good for 48 hours. 

Oh, one other thing worth noting - it is SUPER annoying to burn through sand paper so quickly.  I saw this on a guitar finishing video on YouTube and I may buy some of this to give it a shot.  The reviews of these products are just amazing - apparently they don't clog up like regular sandpaper which saves time and money (maybe - they're not cheap).  BUT, I'll take saving time any day of the week so I may be purchasing some of this tonight.

Super Assilix sandpaper:
https://amzn.to/4b3SDkp

Like I said, there will be a pause in posts, so I'll be back after some more progress, positive or negative as it may be :-p

allensound

Re: Allen NX-Treme Build
« Reply #18 on: 20 Feb 2025, 01:34 am »
I forgot - Lighting

Ok, one last thing I wanted to share.  Lighting matters a lot when you're trying to paint, sand, finish, etc.

Originally I believe this is the one I purchased and had set up in my spray tent:
https://www.walmart.com/ip/Bell-and-Howell-Triburst-High-Garage-Light-with-288-Bright-LED-lights-Multi-Directional-Shoplight/5038633150?classType=REGULAR&athbdg=L1200&from=/search

Then, I was walking through Costco the other day and found these...
https://www.costco.com/5-panel-led-garage-light-2-pack.product.4000304135.html

Walmart light on left, Costco light on right:


Costco light on left, Walmart on right


Same photo just way under exposed to show the difference in how the light beams into the room.  The Walmart light has this beam type effect because the LEDs are exposed - so if you accidentally look at them you''ll see spots for a while - it was a much harsher light to have in that area.


Not only are the Costco ones cheaper (I know it shows $35 online, but I got this same two pack for $25 today in the store) BUT, the light they put out is not only stronger, but it's MUCH easier on the eyes because they have a soft cover over the LEDs.  Additionally, they were much easier to direct the light to what I was working on .  With the one I purchased from WalMart, because of how the lights are hinged, I could only really direct two of the lights in the direction I wanted.  And lastly, the Costco lights have a lumen output setting AS WELL AS a color setting!  They rock!

So I highly recommend those lights from Costco - just overall better.  Also, when I bought those today, I realized I could have set up the lighting better in the tent - originally I had the one light dead center of the tent.  When I got these new ones, I hung both of them further away from the area where I was doing the finishing and directed the light in that direction better.  So a win-win. 

oskar

  • Full Member
  • Posts: 422
Re: Allen NX-Treme Build
« Reply #19 on: 20 Feb 2025, 04:05 pm »
VERY comprehensive chronicle of your build.
I appreciate it. I hope you have them up and playing soon.