I have been plugging away. The No-Rez has been cutup and installed in the cabinets. The kit Danny sent me included 4 sheets of No-Rez and there was little left over, even with the added quarter round I included in the build and took up space the No-Rez would have filled. Not sure if I did things right, but it seems right.
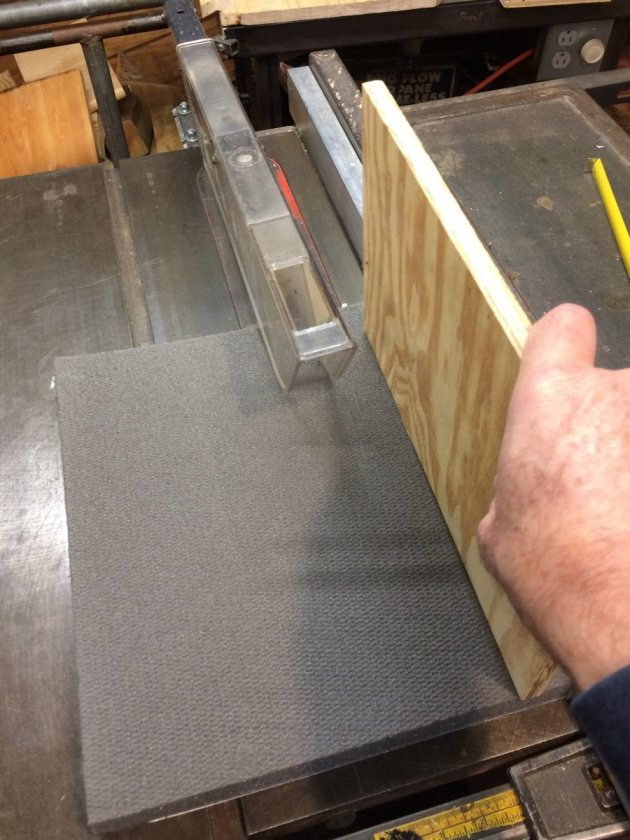
I went the route suggested by Danny, which was to cut it on a table saw. Easy, just like he said. I did read somewhere that someone saw sparks when cutting this stuff on a band saw. To me, that says part of it is pretty abrasive. I changed out the blade on my table saw to an older blade that I wasn’t worried about damaging. I also found that a pair of tin snips worked really well to trim a slightly oversize piece (not that I mis-measured or anything like that...

)
The No-Rez has a bit of a curl to it and I used a piece of plywood to hold it flat while pushing it through the saw.
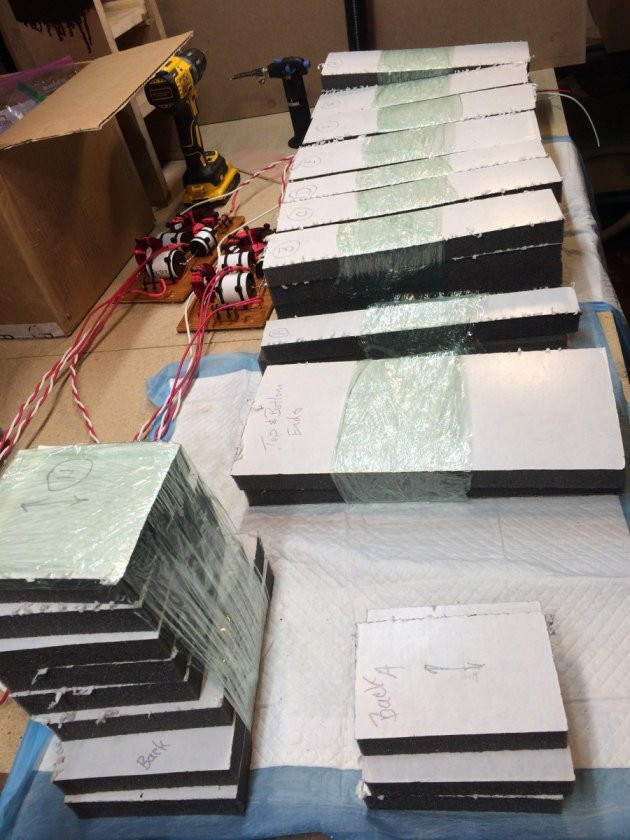
Given the symmetry of the cabinets, I cut all of the side pieces and bundled them together so they wouldn’t get mixed up.
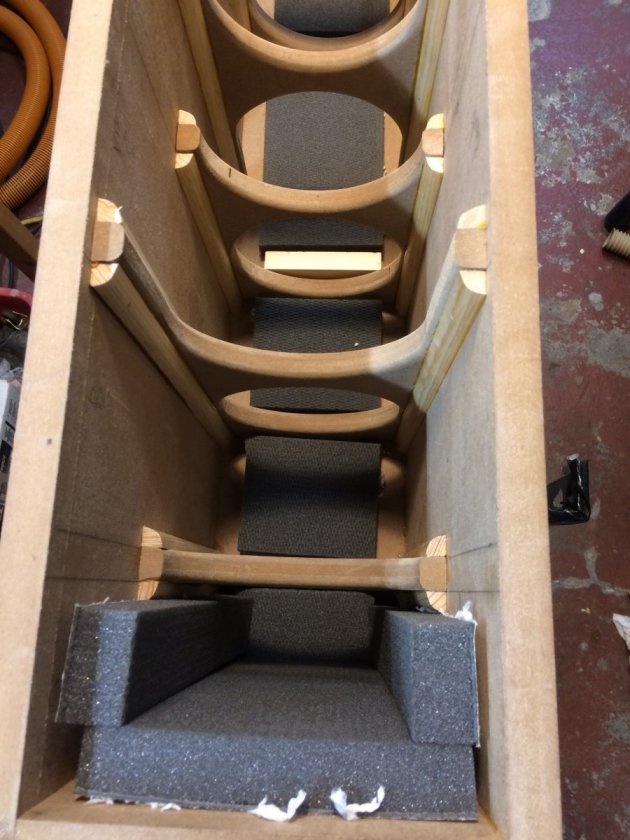
Because of the size of these speakers, the only way I could figure as to how to do any of the internal work was with the front baffle off. I started with the No-Rez for the back side first. As it turned out, I probably should have cut these pieces a bit larger (about 1/2” larger). But, there was little excess, so maybe this was the best. A little larger would have looked better, though, as it would have fully tucked under the side pieces.

Next came the top and bottom ends, followed by the sides of those chambers. I had a section of a shelving unit that I used to have the cabinet a lower height than my workbench, which made installing the No-Rez a little more comfortable to do.
The No-Rez sticks like crazy. I had seen suggestions to seal the insides with shellac, but in the builds Peter R showed in his videos, he just stuck them to the bare MDF, which is what I did. I did wipe the insides down with a little alcohol on a paper towel just to get any dust off. It dries fast and that seemed to work well. I also made sure that there were no glue drips that would cause the No-Rez to stand off the MDF and not stick fully.
Lining up the No-Rez before pressuring it in place is really important because, once it touches the MDF more than a just a little bit, it is stuck for good. Oh, I also followed Peter’s suggestion to cut the No-Rez with a gap to what ever it is adjacent to. I think he said 3/8”. I was about at this width, and in some cases less. To his point, close is good enough. This made it easy to fit the pieces in.
This all took a while to do, between the measuring, cutting, wiping and sticking it in place. To complete the job, I installed the crossover unit and got the wires all in place.
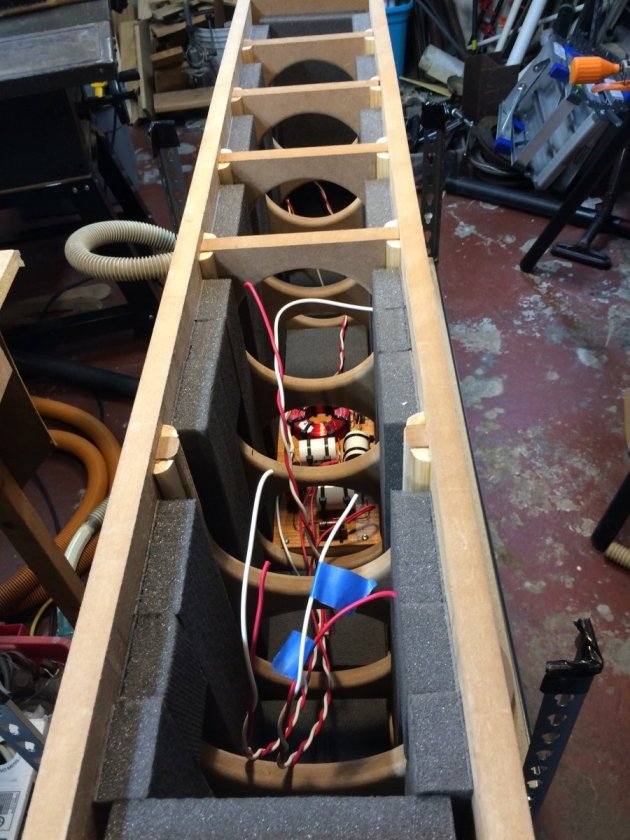
I cut the hole in the back baffle for the binding posts before putting the No-Rez in. The idea is to have the No-Rez cover the hole while I finish the cabinet. This way I don’t have to worry about dust or drips of some sort getting inside where it will be darn near impossible to get out. I did this on a practice piece I found that I could use a 1/8” drill bit in my Dremel to cut the hard part of the No-Rez and then a really sharp knife to cut the foam. I plan to do this on the front baffle for the ports. I will cover the driver holes in the front baffle with tape before I glue the front baffle into places.
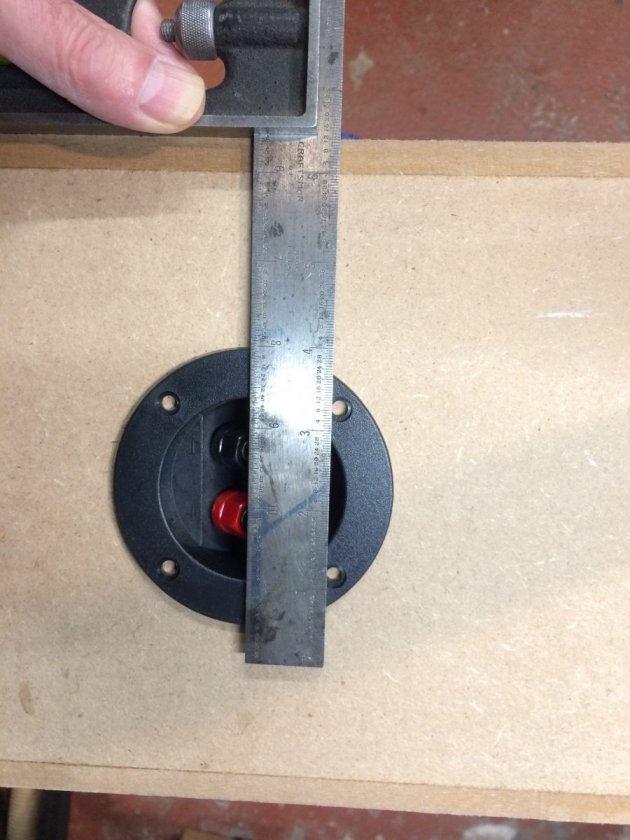
I lined up and marked the holes for the mounting screws, which is what I will do for the drivers also. Things need to look good, even if they are out of sight, most of the time. It shows you care.
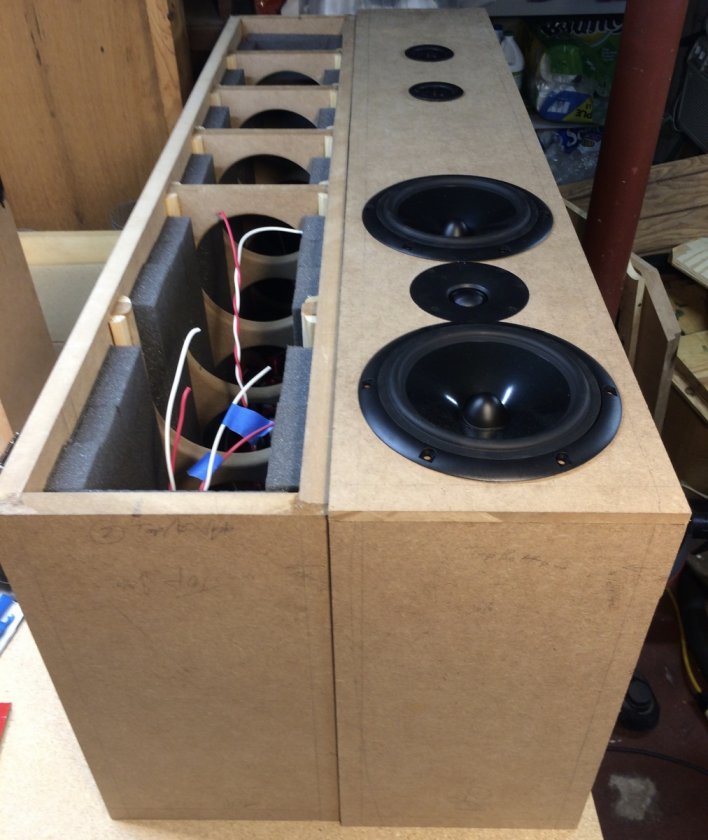
I am getting close to having these things done. I took my time cutting the holes in the front baffle for the drivers.
I did practice cuts for all of these holes on scrap pieces and made sure the drivers fit the resulting holes. I also recorded all of the pin hole locations for the hole jig for the router. For the actual cuts, I first drew out each hole on the front baffle before doing any cutting. This way I would know if I had selected the correct pin location on the hole cutting jig.
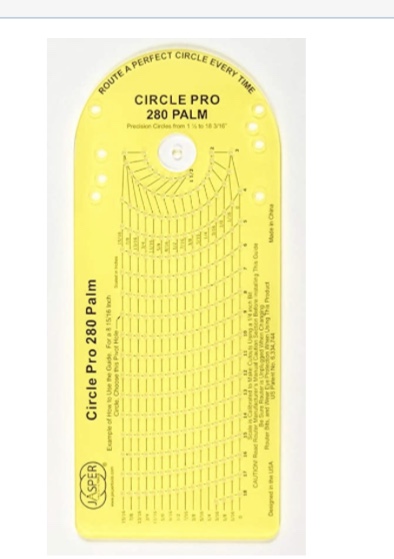
I am using a 1/8” cutting bit for the cutting and all of the pin hole locations on the hole cutting jig are marked for using a 1/4” cutter, so with using that jig all of pin locations had to be adjusted accordingly to get the proper hole diameter. For example, to cut a 5-1/8” dia hole, I had to use the 5-1/4” pin location.
I also found on my test piece that I had not cut the depth for the tweeter deep enough. I found this when I was doing a triple check of my setup before cutting the front baffle. I used the test piece to make adjustments to the blunge depth a little to get the tweeter flush with the baffle face, before actually cutting on the front baffle. It was good I did the checking as that would not have been an easy correction, if I have finished the hole cut before finding this out.
I first cut the recess for the tweeters, then I cut the hole, and then added the cutout for the wiring posts on the tweeters.
It is starting to look like a speaker.