LM3886 w/ tube front end DIY project

0 Members and 1 Guest are viewing this topic. Read 15964 times.

Niteshade

  • Full Member
  • Posts: 2423
  • Tubes: Audio's glow plug. Get turbocharged!
    • Niteshade Audio
Re: LM3886 w/ tube front end DIY project
« Reply #20 on: 12 Apr 2010, 12:46 am »
I'm going to start the capacitor upgrade this week. Then start assembly the week after. Nothing has been done so far & everything will be photographed. It's been sitting patiently on my desk waiting for a vacancy in the shop.

Mariusz

Re: LM3886 w/ tube front end DIY project
« Reply #21 on: 12 Apr 2010, 01:24 am »
Thanks for the update Blair.  :thumb:
Pictures would be really nice.  :drool:
Hope it doesn't interfere with your busy schedule ?
If it does, put it on hold for a bit.
No big deal ..... really.


Mariusz :) 

Niteshade

  • Full Member
  • Posts: 2423
  • Tubes: Audio's glow plug. Get turbocharged!
    • Niteshade Audio
Re: LM3886 w/ tube front end DIY project
« Reply #22 on: 21 Apr 2010, 04:23 pm »
Here are details for the capacitor upgrade:

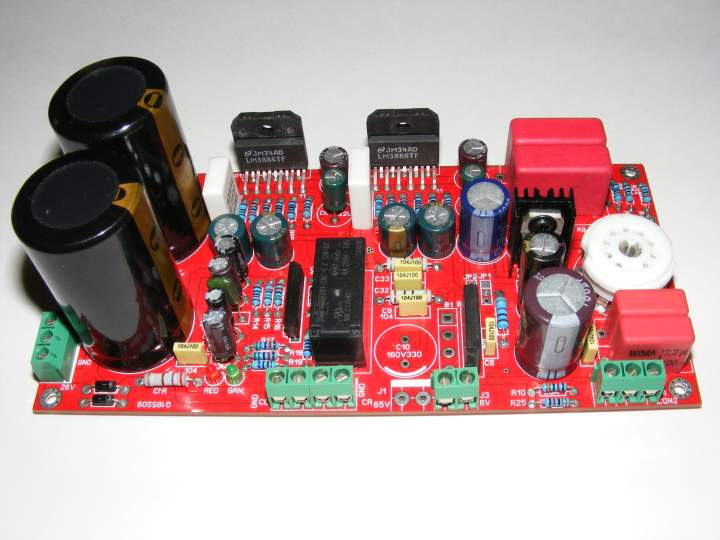
Stock board photos:

Top of board:

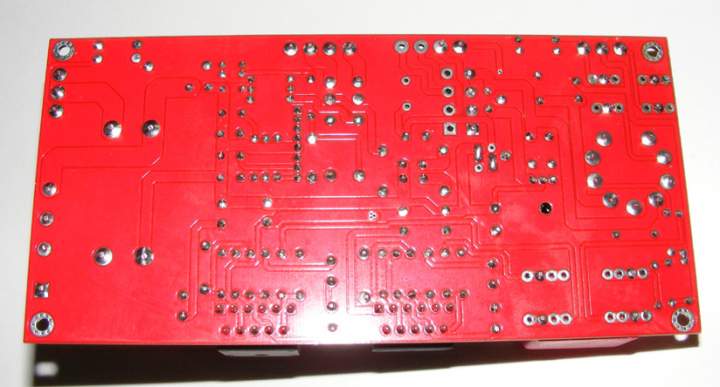
Bottom of board:

A lesson on removing components on plated-through hole boards:

Reduce the temperature of your iron from full to about 70-80%. Make sure the iron's tip is tinned and clean of debris.

Heat one solder pad at a time. Gently pull up, from the component side, the side of the capacitor corresponding to the pad you're heating up. The iron is to remain on the pad while you're pulling up. To be more clear, push on the side of the cap that corresponds to the pad you're heating:
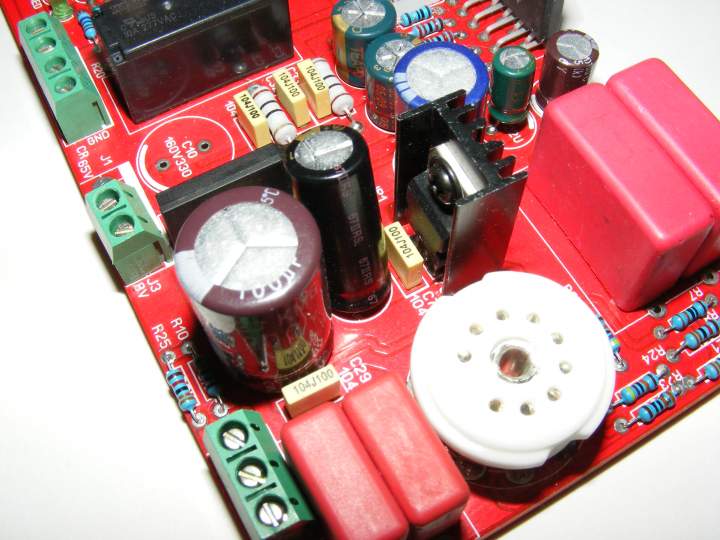


Notice how one side has been lifted. Do the same thing for the other side. You may have to repeat this step until the capacitor is clear of the board and can be freely removed.

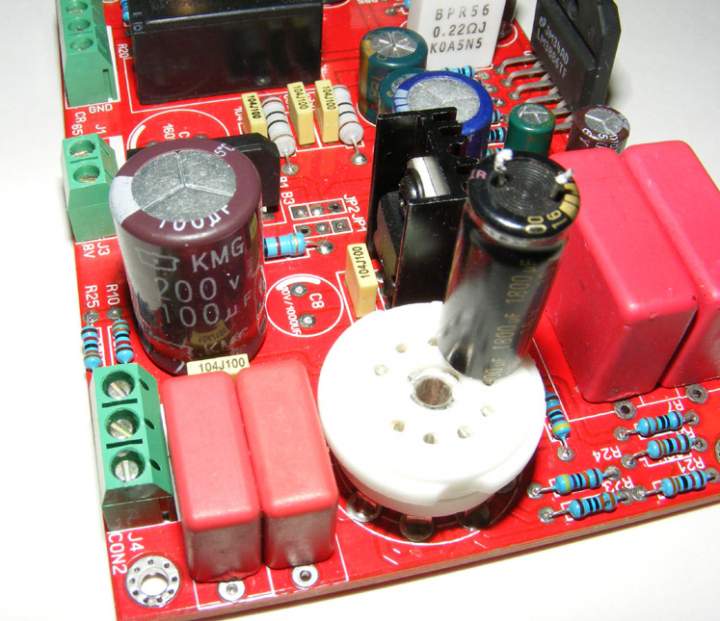
Removed capacitor:

Now you have to clean the holes with a solder sucker:
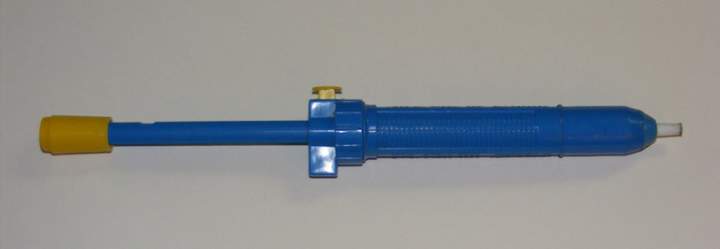
The iron might have to be turned up a little to make the residual solder liquid enough to be sucked out.

Clean holes w/ capacitor leads showing:
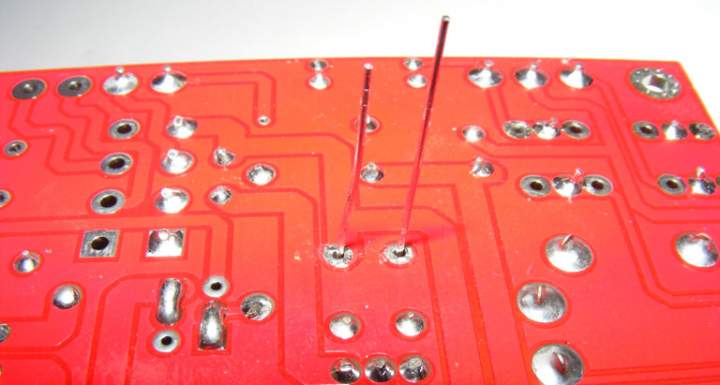

Soldering the capacitor in place:
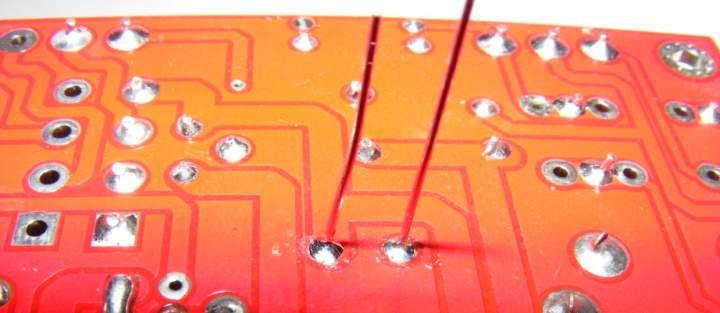
After soldering, clip the leads. Do not clip the leads before soldering.

These steps have to be repeated for every capacitor. Sometimes removing solder form the holes is difficult. Do not grind the tip of your iron on to the pad. Make sure the iron tip remains clean. You might have to apply some solder to the pad and then attemp to remove it all again. This takes practice! Good news: This board is rugged! I like it!

NOTE: Sometimes hole spacing is not perfect. I bent the capacitor leads to fit the holes with the small caps:
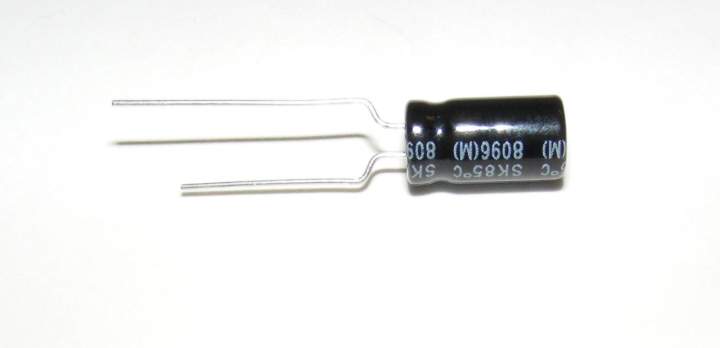


Completed upgrades, form the bottom:
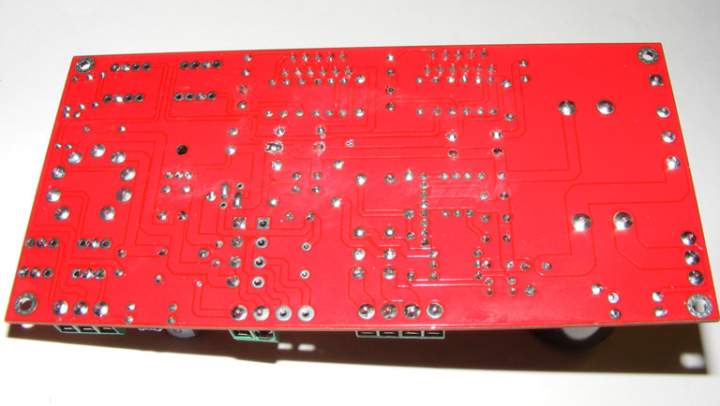
Clean the completed board with isopropyl alcohol, high alcohol content. I blew the access alcohol off with an air gun.

Completed board from the top:
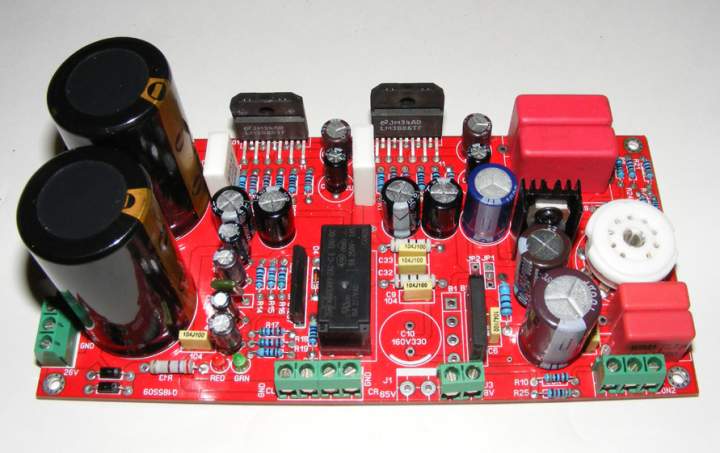


Niteshade

  • Full Member
  • Posts: 2423
  • Tubes: Audio's glow plug. Get turbocharged!
    • Niteshade Audio
Re: LM3886 w/ tube front end DIY project
« Reply #23 on: 21 Apr 2010, 08:21 pm »
Next Steps: Phase II

Heat sink choice:


I found several kinds:

The top & bottom ones were found on Ebay.Any of these would work fine.

The next step in putting this together will start in around 2-3 weeks.

Niteshade

  • Full Member
  • Posts: 2423
  • Tubes: Audio's glow plug. Get turbocharged!
    • Niteshade Audio
Re: LM3886 w/ tube front end DIY project
« Reply #24 on: 22 Apr 2010, 12:12 am »
How are the photos & level of instruction so far?

Mariusz

Re: LM3886 w/ tube front end DIY project
« Reply #25 on: 22 Apr 2010, 01:21 am »
Hi Blair
Pictures look sharp.
Instructions are pretty straight forward.

What is the choice for enclosure?
Maybe we could do something fancier?
I could supply the case but would need minimum required dimentions.

Cheers
Mariusz

etcarroll

  • Full Member
  • Posts: 3724
  • SE PA. by way of Boston, MA.
Re: LM3886 w/ tube front end DIY project
« Reply #26 on: 22 Apr 2010, 01:36 am »
How are the photos & level of instruction so far?

For the most part - fine.

But what did you order here - "The capacitor upgrades just arrived from Mouser"

Niteshade

  • Full Member
  • Posts: 2423
  • Tubes: Audio's glow plug. Get turbocharged!
    • Niteshade Audio
Re: LM3886 w/ tube front end DIY project
« Reply #27 on: 22 Apr 2010, 10:18 am »
The upgraded capacitors are all Mallory, except for the big one near the tube which is a Nichicon.

I'll get back to you regarding the enclosure. The Heat sink poses some issues- but I may have solved most of them.

Mariusz

Re: LM3886 w/ tube front end DIY project
« Reply #28 on: 19 May 2010, 12:57 pm »
Did you resolved heat sink issues Blair?

Hope all is well.

Mariusz

Niteshade

  • Full Member
  • Posts: 2423
  • Tubes: Audio's glow plug. Get turbocharged!
    • Niteshade Audio
Re: LM3886 w/ tube front end DIY project
« Reply #29 on: 19 May 2010, 01:29 pm »
I'll be getting back on this pretty soon. It's been busy around here for a while!  :D

etcarroll

  • Full Member
  • Posts: 3724
  • SE PA. by way of Boston, MA.
Re: LM3886 w/ tube front end DIY project
« Reply #30 on: 19 May 2010, 02:33 pm »
The upgraded capacitors ........, except for the big one near the tube which is a Nichicon.


Was that the VK series - Manufacturer Part #:  UVK2D101MHD  ?

Niteshade

  • Full Member
  • Posts: 2423
  • Tubes: Audio's glow plug. Get turbocharged!
    • Niteshade Audio
Re: LM3886 w/ tube front end DIY project
« Reply #31 on: 12 Jun 2010, 02:42 pm »
No, I didn't forget this project! Sorry for the delays. I can't wait to hear it myself. I will attempt to squeeze it between some orders again.

wushuliu

  • Full Member
  • Posts: 3729
  • Music a bubble, not looking for trouble.
Re: LM3886 w/ tube front end DIY project
« Reply #32 on: 12 Jun 2010, 10:27 pm »
promises, promises...  :lol:


Folsom

Re: LM3886 w/ tube front end DIY project
« Reply #33 on: 14 Jun 2010, 05:50 am »
Next time... http://www.parts-express.com/pe/showdetl.cfm?Partnumber=370-325

You may not need to work side to side action on a capacitor. There are places where you can not fit it, but if you can it often removes enough solder that the component is loose.

Niteshade

  • Full Member
  • Posts: 2423
  • Tubes: Audio's glow plug. Get turbocharged!
    • Niteshade Audio
Re: LM3886 w/ tube front end DIY project
« Reply #34 on: 14 Jun 2010, 08:58 am »
Radio Shack used to have a soldering iron w/ a desoldering apparatus built into it that worked pretty good. All you had to do was squeeze the bulb first to create a vacuum, then place the hollow tip over what was going to be desoldered and let the bulb go. Worked pretty good and it was fast.

The one you mentioned looks interesting. Plated through holes can be a PITA even with these tools.

Niteshade

  • Full Member
  • Posts: 2423
  • Tubes: Audio's glow plug. Get turbocharged!
    • Niteshade Audio
Re: LM3886 w/ tube front end DIY project
« Reply #35 on: 24 Jun 2010, 11:38 am »
I had an idea to make this thing inexpensive, yet interesting:

How about mounting this inside the chassis of an old stereo receiver? It could be made fancy or just keep the faceplate as-is. There are plenty of parts/repair units on Ebay that are acceptable.

Example: Ebay # 120579788730

The knobs, etc.. can be pulled off and a wood faceplate can be installed.

NOTE: The power transformer in these receivers, if good, is typically too high a voltage. : 30-0-30 volts. These amps like around 24-0-24 and the tube jobs like this one require filament voltage as well.

Mariusz

Re: LM3886 w/ tube front end DIY project
« Reply #36 on: 24 Jun 2010, 12:30 pm »
Hi Blair

What are the minimum size for enclosure (HxDxW).
Maybe, I could make s quicky out of some exotic wood and aluminum?????

Mariusz

Niteshade

  • Full Member
  • Posts: 2423
  • Tubes: Audio's glow plug. Get turbocharged!
    • Niteshade Audio
Re: LM3886 w/ tube front end DIY project
« Reply #37 on: 24 Jun 2010, 12:50 pm »
If you're going to internalize everything, which I believe is the best thing to do- then I'd say 12x8x7 inches (LxWxH) The top and bottom covers must be vented. Height should be no less than 6 inches and depends on the heat sink size. Big boxes are better than form fitting ones.

Niteshade

  • Full Member
  • Posts: 2423
  • Tubes: Audio's glow plug. Get turbocharged!
    • Niteshade Audio

Pemo

  • Newbie
  • Posts: 2
Re: LM3886 w/ tube front end DIY project
« Reply #39 on: 19 Sep 2010, 02:37 pm »
Did you replaced all of them (caps)?