With my skill set and tools I thought that I needed to do something different with mounting the braces within the cabinets. What I had seen was either butt joints or routed recesses. The butt joints looked to be something that I would need more hands and jigs than I have to assemble it. The routed version seemed to need a precision that I think I would struggle to meet and it would take time, even though I am sure it can be done. Also, I know that having a recess in the MDF will greatly weaken it before the cabinet is fully assembled. In my hands I would fear breaking a board before I got to the assembly stage.
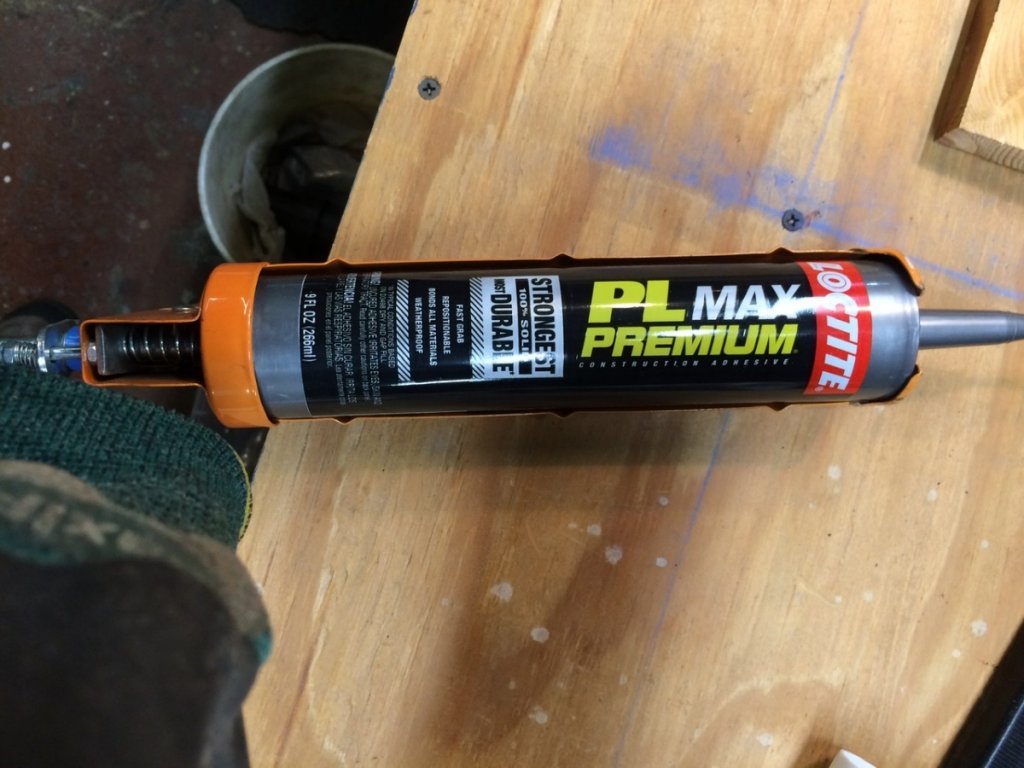
My plan is to locate the braces on the side walls using common 1/2” quarter round. The quarter round will preclude unwanted reflections and can be covered by a bevel on the no-Rez. The front and back ends will then just be glued as butt joints. Peter R introduced the PL construction adhesive in his video for installing the small diagonal braces in one of the smaller speaker cabinets. This glue will tolerate less that tight tolerances that are required of regular wood glue. By using this glue I can have the quarter round located to allow a little wider fit up gap that would be more than a routed gap. This will also allow the braces to be cut slightly undersized and I don’t have to be perfect with their fit up.
For ease of assembly, I plan on making it in 2 (3?) steps. First will be to glue the braces to the cabinet sides with the rest of the panels “dry fit” in place to make sure everything is square as the glue sets. The second step will be to glue the sides/braces to the back, top and bottom. The 3rd will be the assembly of the front after the crossover and other stuff are done. I guess that is 3 steps (at least...

)
I also considered the change in volume from the addition of the quarter round stock. It is not insignificant; about 75in^3 per speaker. To accommodate this, I found that opening up the holes in the braces by 3/8” on the diameter would about perfectly offset this difference. Other options I considered were making the cabinet taller or deeper, both of which I discounted for the possibility of changing the tonal quality of it.
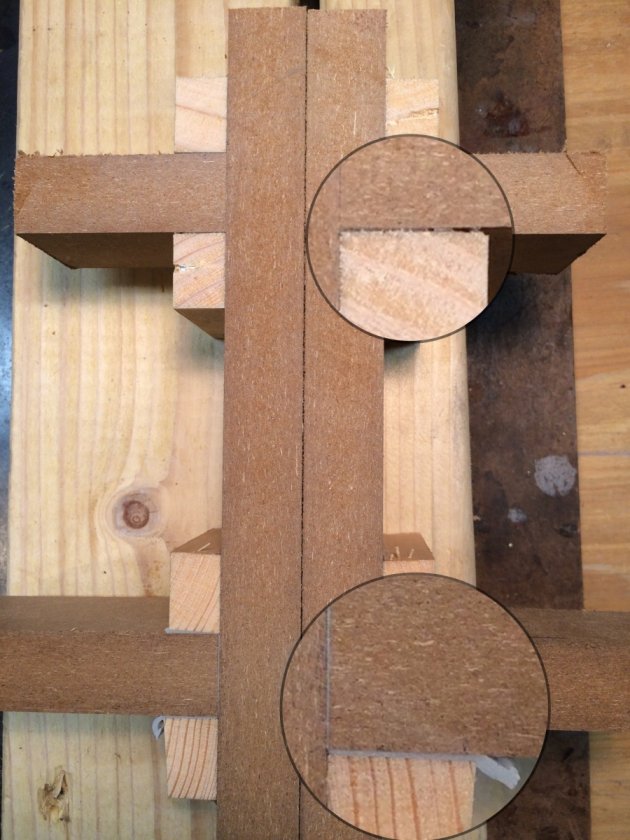
Here is the mockup I did with some 1/2”x3/4” wood I cut to approximate the 1/2” quarter round and some scrap MDF
Not too exciting... The adhesive:
I set a line on the MDF for the 1st wood strip and then it was glued (Tight Bond slow set) and tacked (brad nailer). The pneumatic brad nailer worked great for this. The second wood strip was then located with a 3/4” square steel tube with a piece of thick tape on it, which added about 1/32” to its thickness. In the actual assembly I will use a single spacer bar laid across both panels at the same time to have the quarter round pieces pretty well lined up.
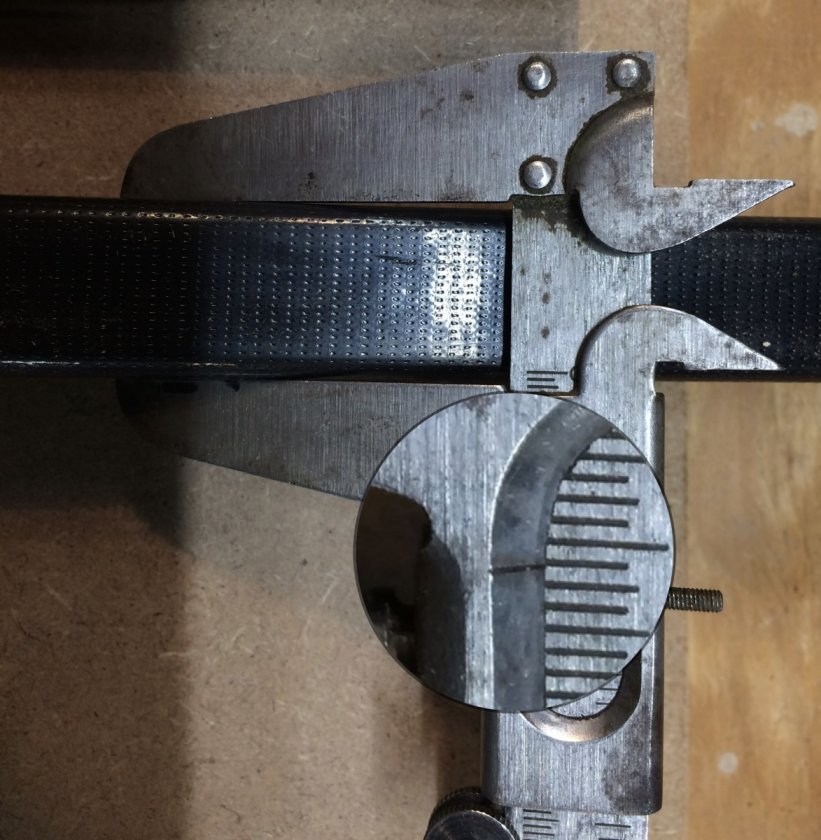
Spacer bar and thickness measurement with the tape. This added clearance will allow for a bit of tolerance mismatch between the two sides.

The PL adhesive on the pieces to show how it flowed. This shows what it looked like with just one bead between the 2 wood strips. Needed more to get up the edges...
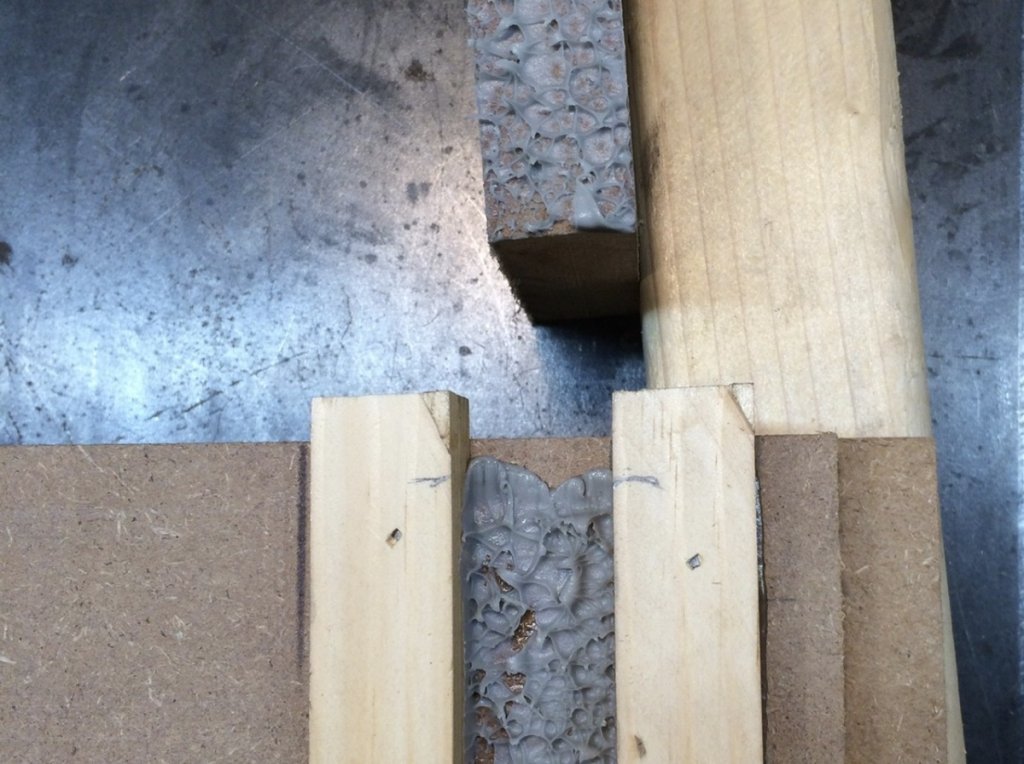
I did a second mockup using the Tight Bond. Both were clamped in place; the PL one was done a day before the other.
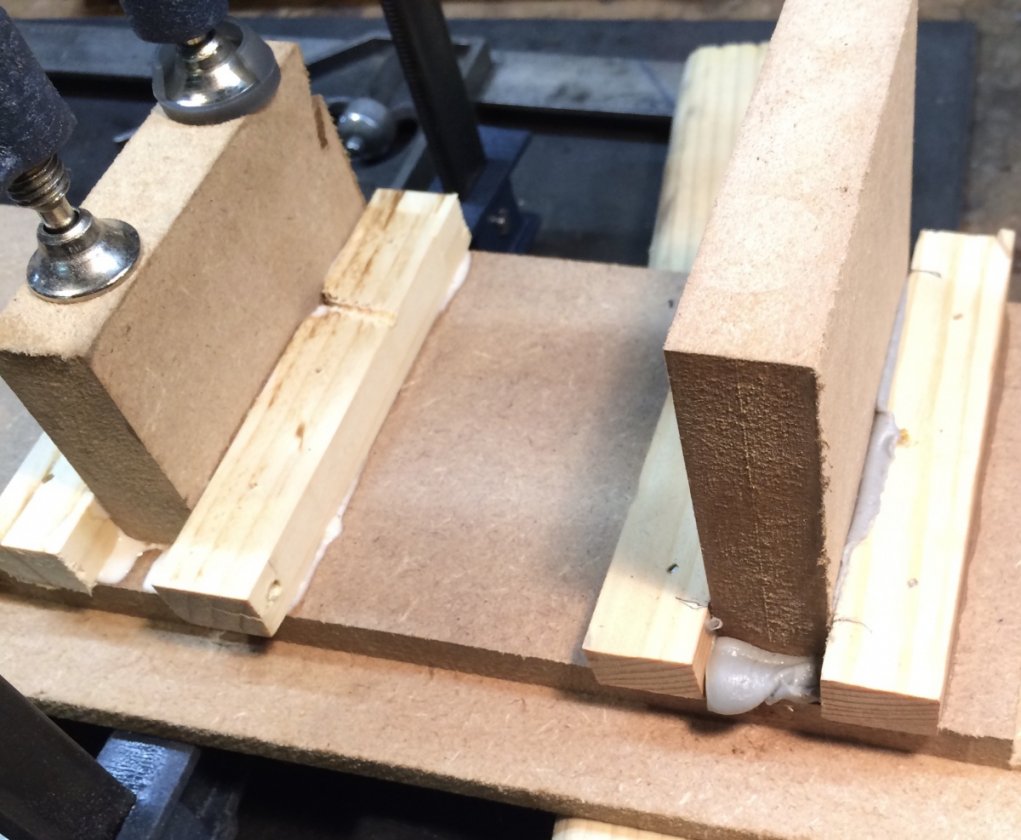
You can see that the PL moved nicely and filled the spaces.
I then sectioned the mockup to see what it looked like. You will notice that I did less than a stellar job making the strips fully rectangular; they are a bit trapezoidal

But as you can see, the PL flowed nicely and will take up imperfections in assembly.