I tried to think of a good lead-in for this post...
Mo’ glue. Mo’ better
Wingin’ it is a plan; not
There are not enough clamps in the world
Think you see where this is going? Glueing is a Fricken Fracken misery!
I got greedy and tried to do it all in one sitting. What was it that someone said? Patients; take your time. And what was my response? Sure, that is what I do and why I practice.
Well, even with practice one needs patients (take notes Jon, good notes

)
I tried glueing up the practice box I built. I had removed the quarter rounds from one set of pockets I had made to see how well Peter’s idea would work. And then set to work glueing this thing together.
I’ll start with the success parts...
- Peter’s idea was fantastic and worked really well.
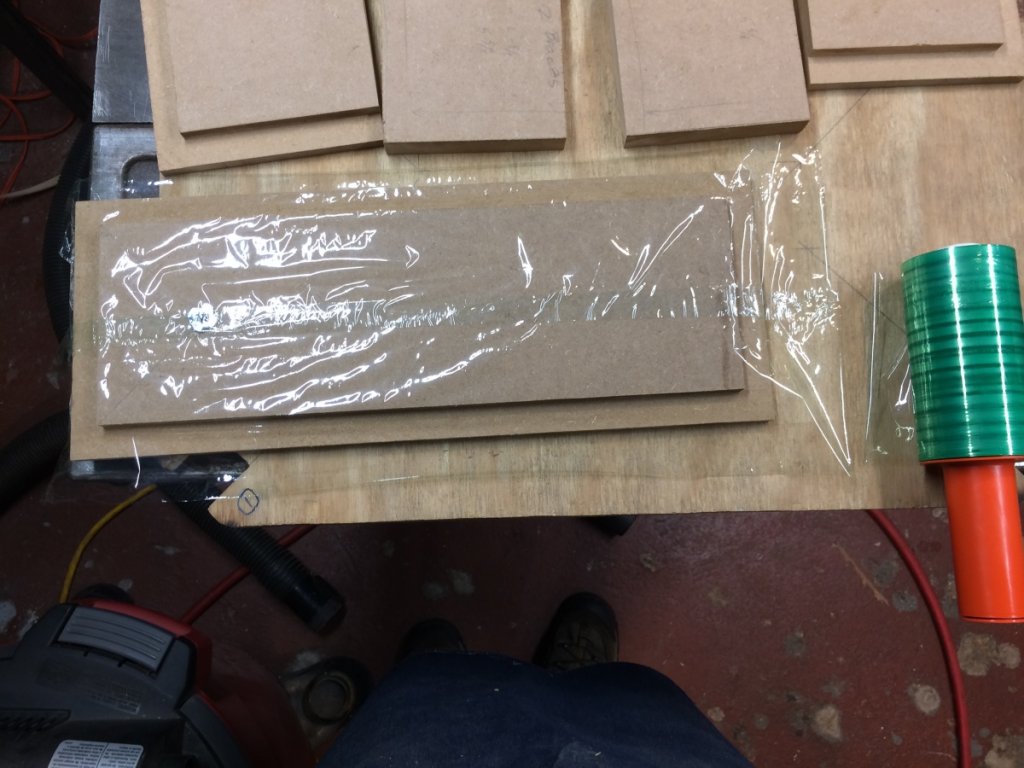
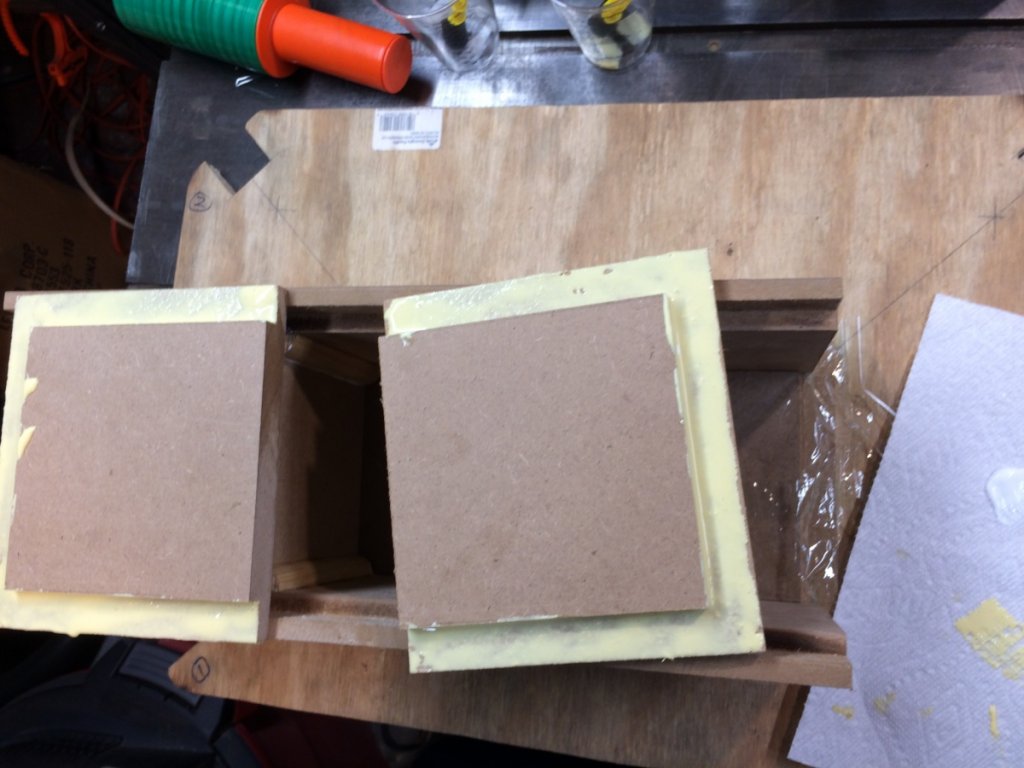
- I covered the inside face of the front panel with that stretchy, Saran Wrap like stuff that is used to bundle things together. This was to keep from gluing the front to the rest of the assembly as that needed to be last. It worked.
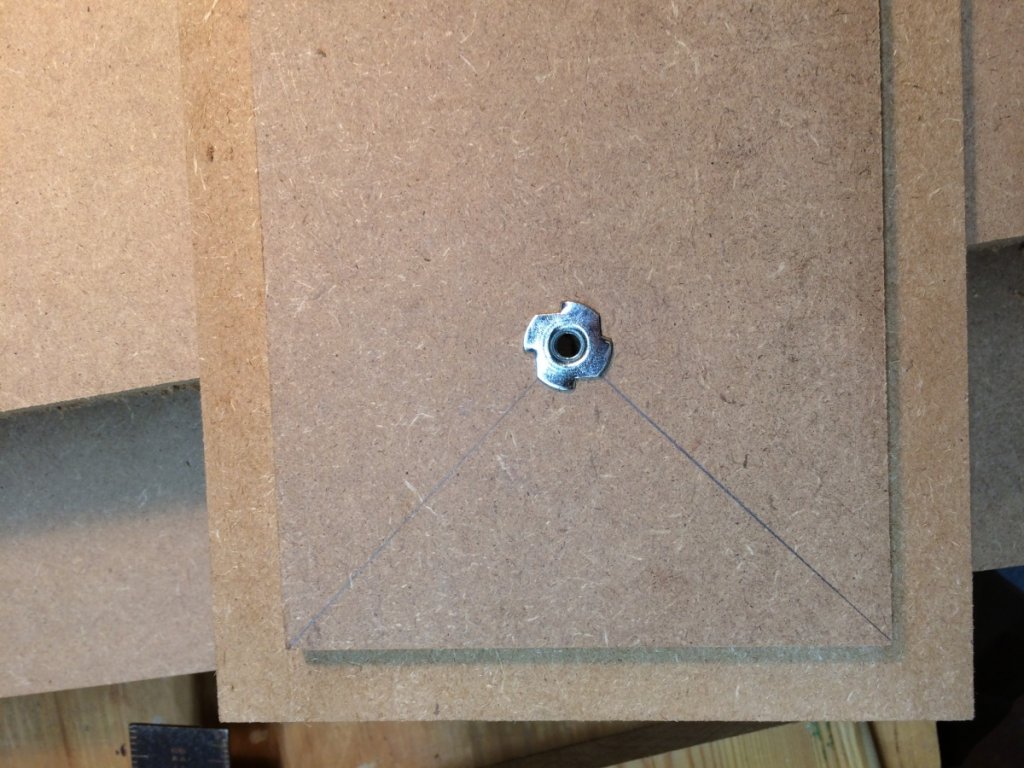
- I installed a Tee nut in the front panel where the pretend center for one of the speaker drivers would be, This was to give myself a way to remove the front panel after the glue set up. It worked
- The Titebond glue brushes worked well...
- The Quick and Thick glue is useful in the right areas.
What I learned:
Planning. Lay out the clamps so they are ready for use. Come up with a sequence to assemble the pieces. Plan small steps that can be done one at a time and the glue allowed to set. Peter’s idea will work nicely into this.
I need the corner clamps that were noted prior. These will help greatly with the “small step” part.
Make sure new clamps work they way they should before needing to use them and finding out they don’t...

Need a good glue brush holders... so they don’t fall over and get glue in/on places you don’t want it.
My basic plan is to:
- put on the one of the quarter round side of the brace locaters as Peter suggested.
- Assemble over the front panel (but not glued to) the top, bottom and 2 sides, glue the 4 corners and let it set up. These will need to be clamped quite well; something I need to figure out. This is where the corner clamps will be used.
- One at a time glue in the braces, lightly clamp and let setup. I think the second corner piece is a good idea and I found that it glues into place easily.
- Check the fit of the bottom piece, adjust as needed, then glue and clump.
- All of this will be done with front in place but not glued.
As for the good, bad and ugly...
A couple of good things...
I installed a Tee nut in the inside of the front panel so I could pull it out after all else is glued.
I used the front panel as a jig for the assembly of the sides. I knew gluing had the potential to be messy so I covered it with bundling film. I didn’t wrap it (I tried that) as it didn’t allow the sides/top/bottom pieces to fit into the recess. The nice things about this stuff are that it is stretchy but strong, and it clings to itself so it makes a complete cover.
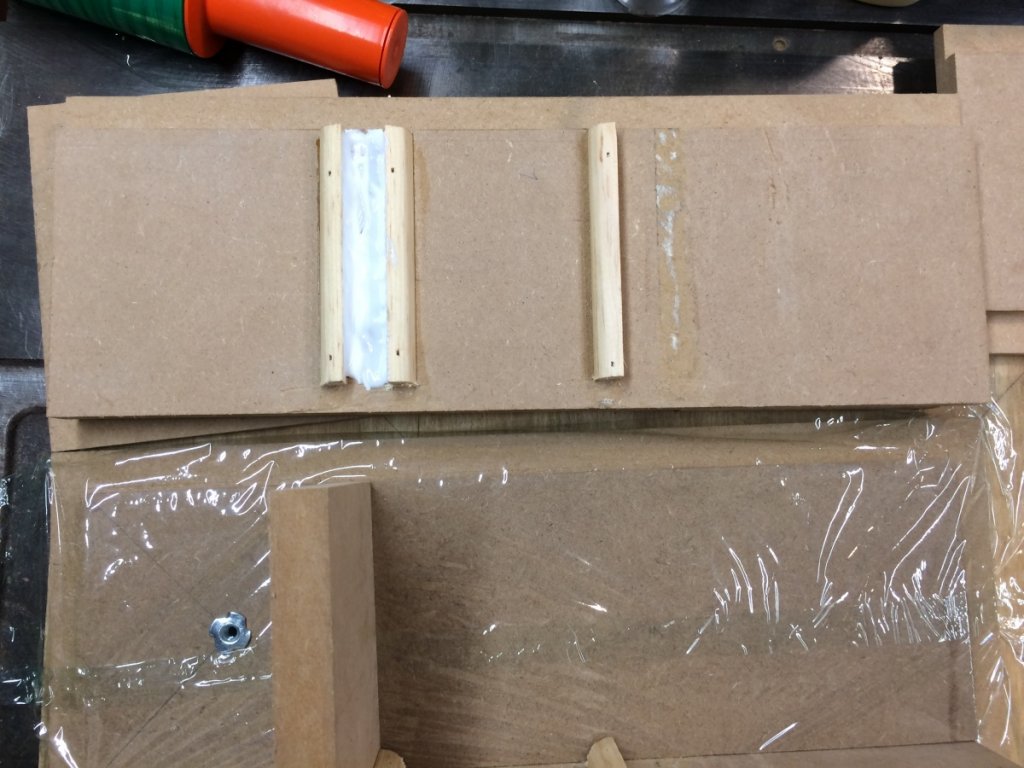
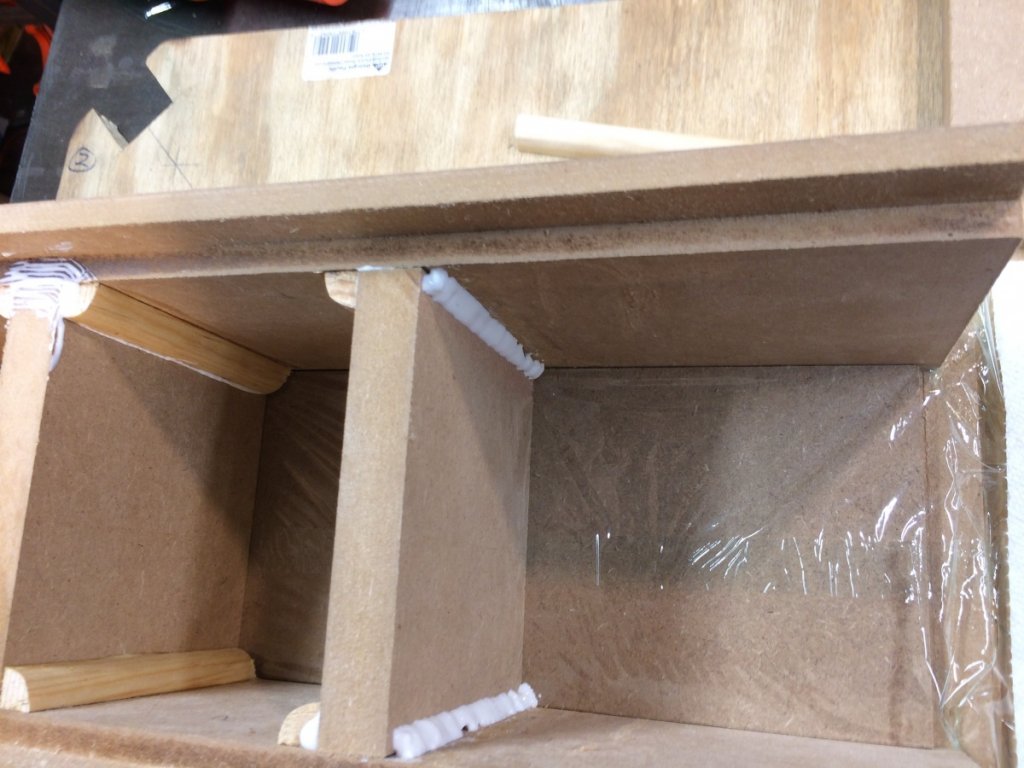
I removed one side of one of the pockets I had made in the side panels so I could try out Peter’s idea. I left the other pocket in place so I could see how the 2 ideas compared. The complete pocket idea turned out to be not a good one, nor would be a dado. This also show the glue I put into the pocket. The “white” glue is the “Quick and Thick”.
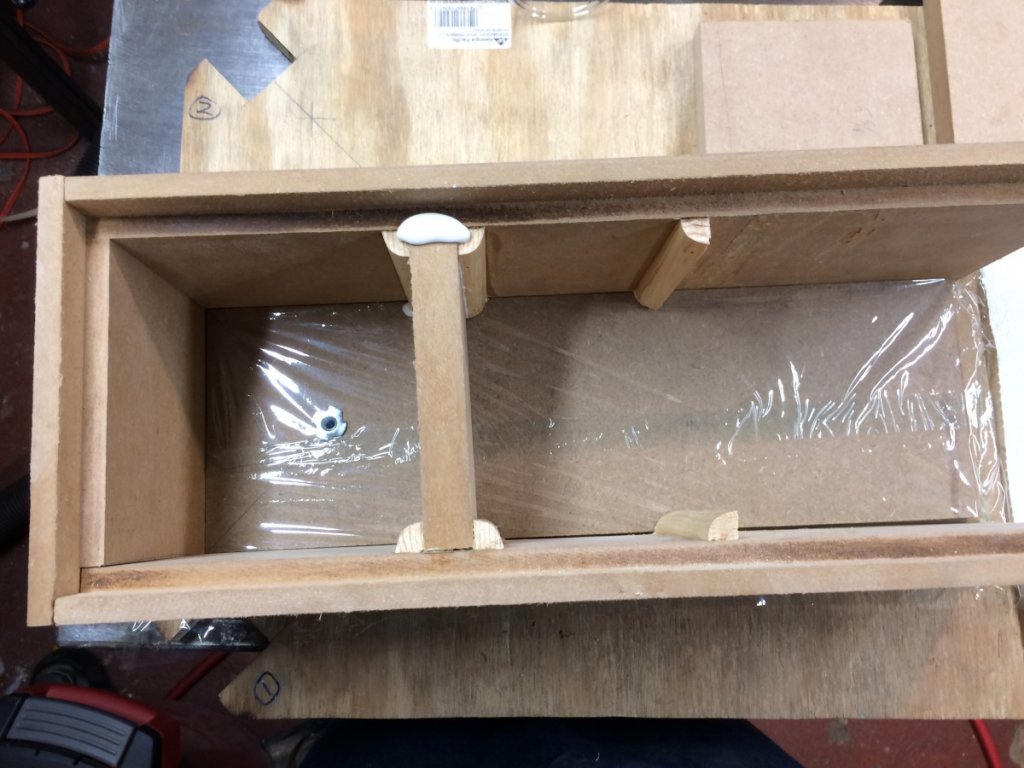
Here is the brace in place in the pockets of the 2 sides. The end cap there is just a place holder to keep things square.
Here is the “Peter” brace. Again I used the Thick glue which I spread on the side rail and the panel side. it would have been a good idea to have fully marked where the brace was to go so I would know how far to spread the glue. After pressing the brace in place I put a bead of glue (too much) in the corner for the second piece of quarter round. The glue is thick enough to hold everything in place.
And this is where I realized that I had the sequence wrong and got flustered. I didn’t have any way to keep this all square, without installing the top and bottom pieces. And it went downhill from there.
The problem at this point was that I put glue on the recess part of the top and bottom panel where the back panel would be going, but that wasn’t needed at this point and I was afraid that it would be beyond its set time before I got to the point of putting the bottom on. So I wiped it off. Another mess...
Then there was clamping this whole mess...
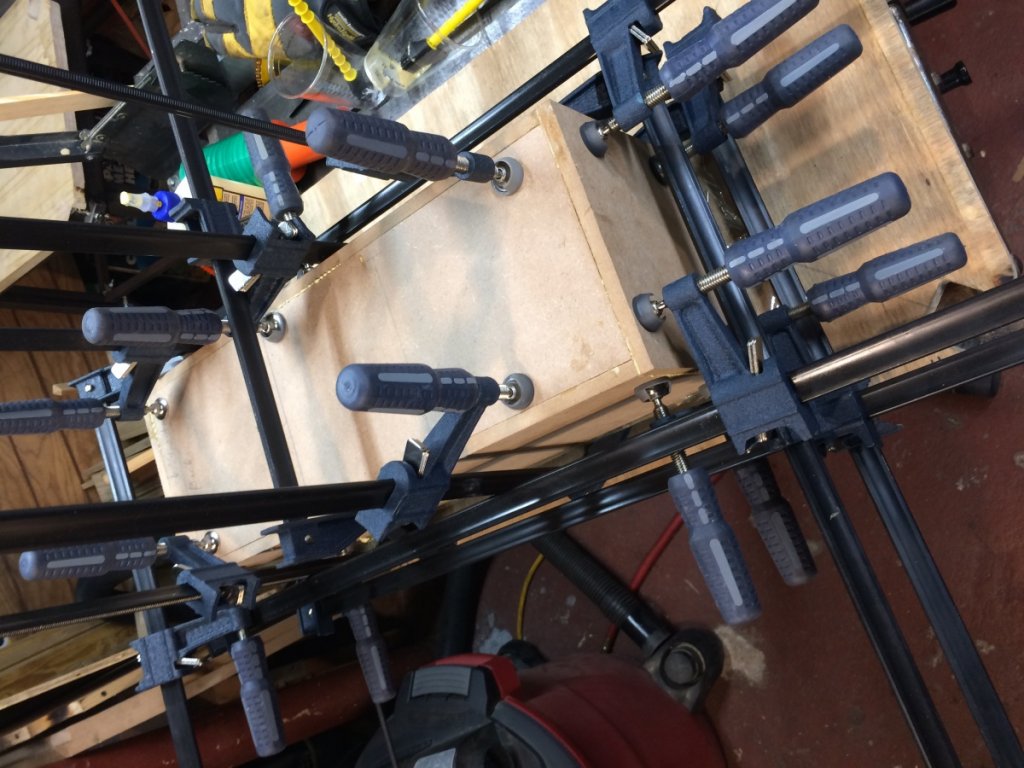
And a mess it was. I had clamp failures. I had too much glue. I had glue setting up. I couldn’t get things clamped evenly. The MDF is too flexible for this sort of thing...

After a day setup, I did get the front panel off with no problems... and this was what I was faced with....
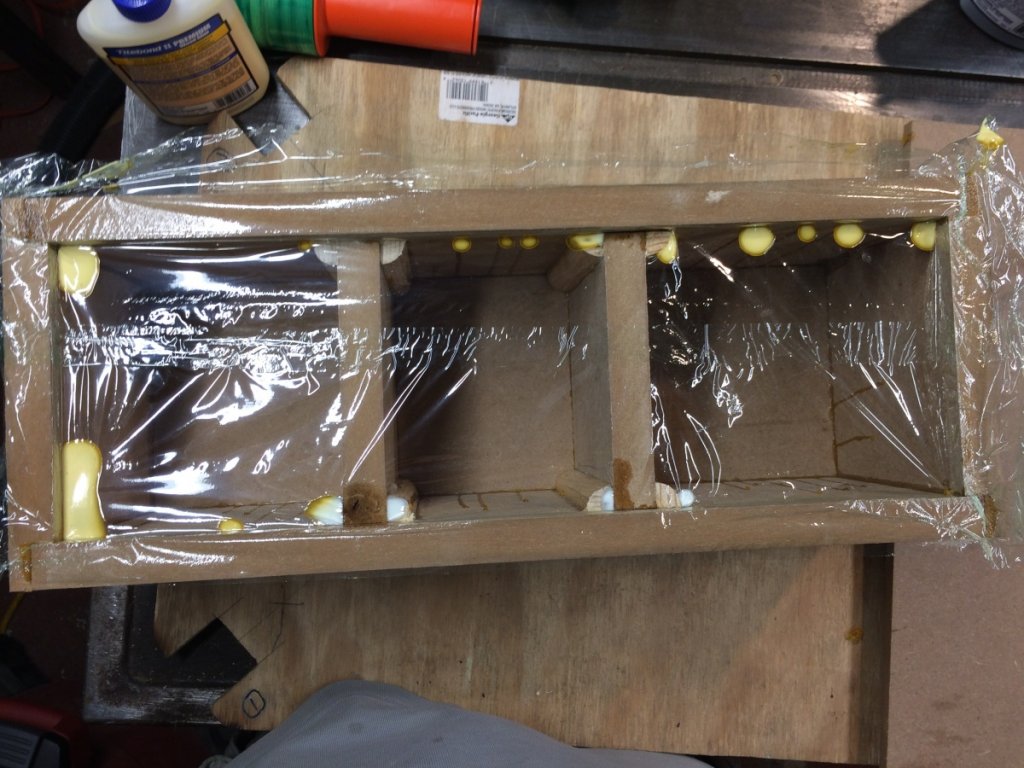
No drips, no runs, no errrors...
Yah, right! Time to rethink things.
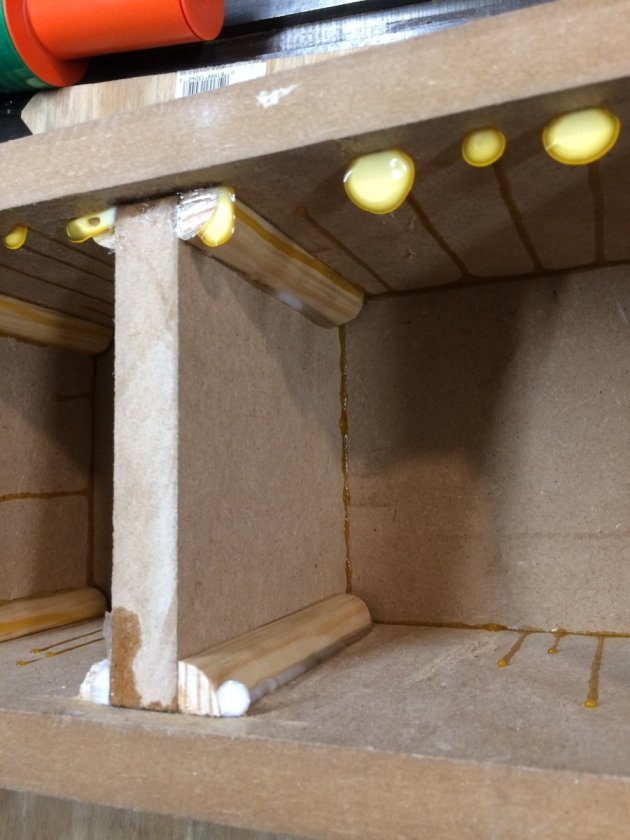
The brace in the forefront was done based on Peter’s suggestion and as you can see it is nicely located and held in place. This was a good use of the Quick and Thick glue.
For the rest of it, because I plan to break this down into smaller steps, I plan to use the Titebond II. It is a bit thicker than the III and I think will be easier for me to deal with. As for working time, my planned steps should be quick, so I expect to have plenty of time.
And I know some of you got a good chuckle from all of this. I was just glad I was able to get the front panel out after all that glue setup...


A win for me...
