Wedge Base Build

0 Members and 1 Guest are viewing this topic. Read 8372 times.

Keithh

  • Jr. Member
  • Posts: 101
Wedge Base Build
« on: 13 Oct 2015, 08:36 pm »
The Wedge is an incredible speaker and deserves a beautiful enclosure. But the Wedge flat pack supplied really only  can be painted and I am
a woodworker not a painter.  Thus the only solution is to scratch build a Wedge later in a way that uses veneer. Since the waveguide on the Wedge needs
to be painted, I thought something like these Chario speakers would look good and I think I can handle the painted sections.


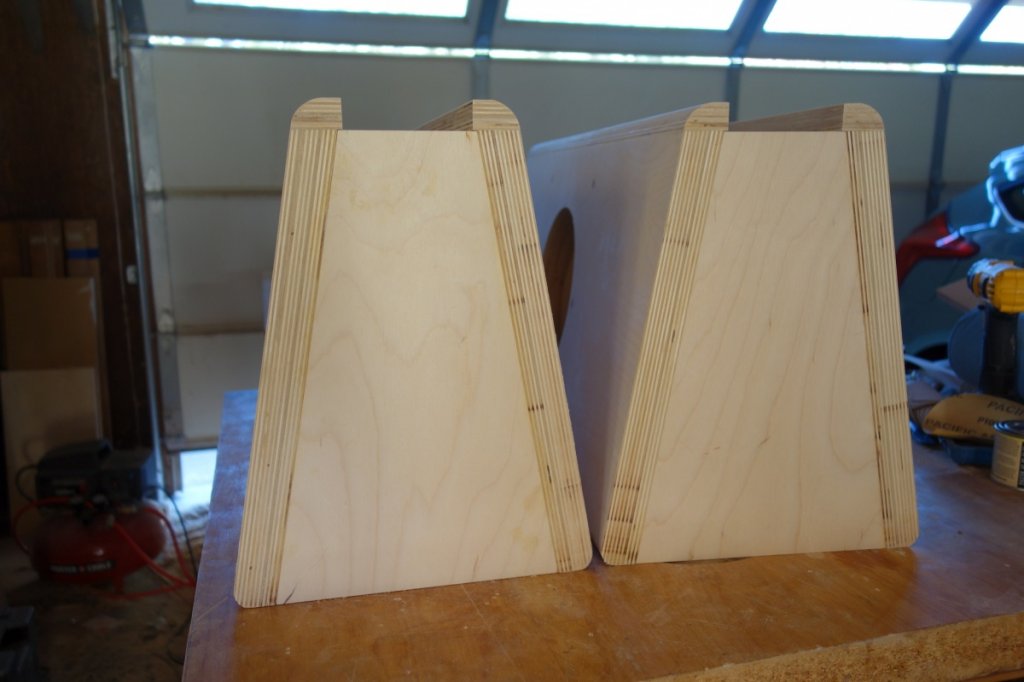
I am going to start the Wedge Base first. It is made from Baltic Birch, it was free thanks to the forklift operator who dropped a unit at work.


The sheets were laminated together using Kreg screws, then they were cut to size, dadoed and the hole cut. If you like rounders on your work, it is much
easier to put a roundover on one edge before you cut the bevel on the side. Then cut the bevel up to the low edge to the roundover and when you turn your
piece over to cut the other bevel, the roundover will rest against the fence instead of a sharp corner trying to go under the fence.


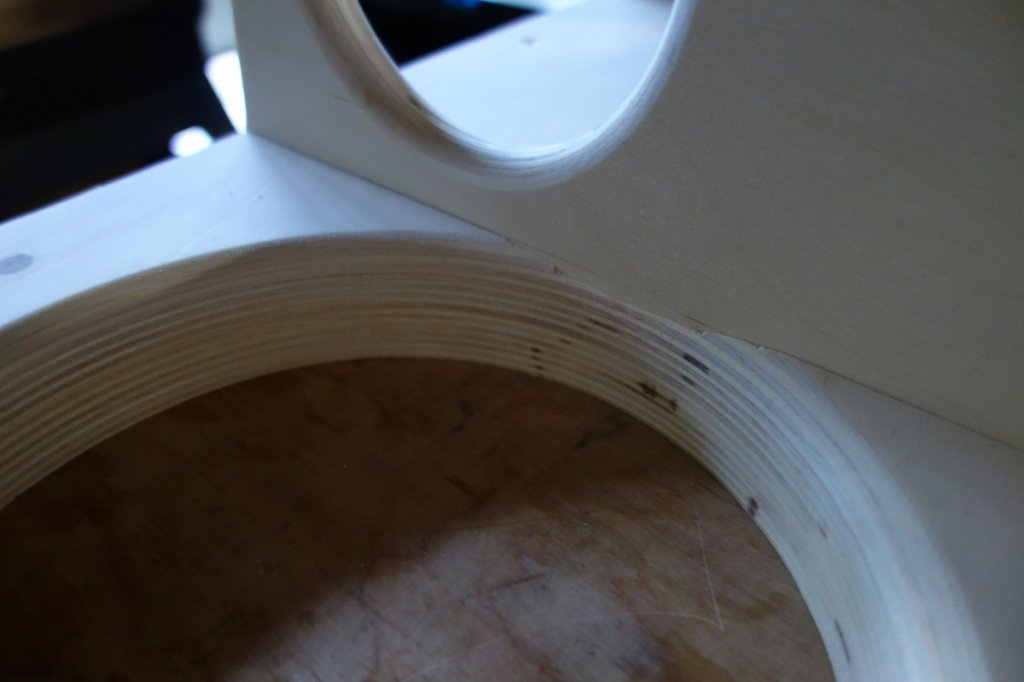
Mike was concerned that a dado would interfere with the roundover. This is what it looks like.


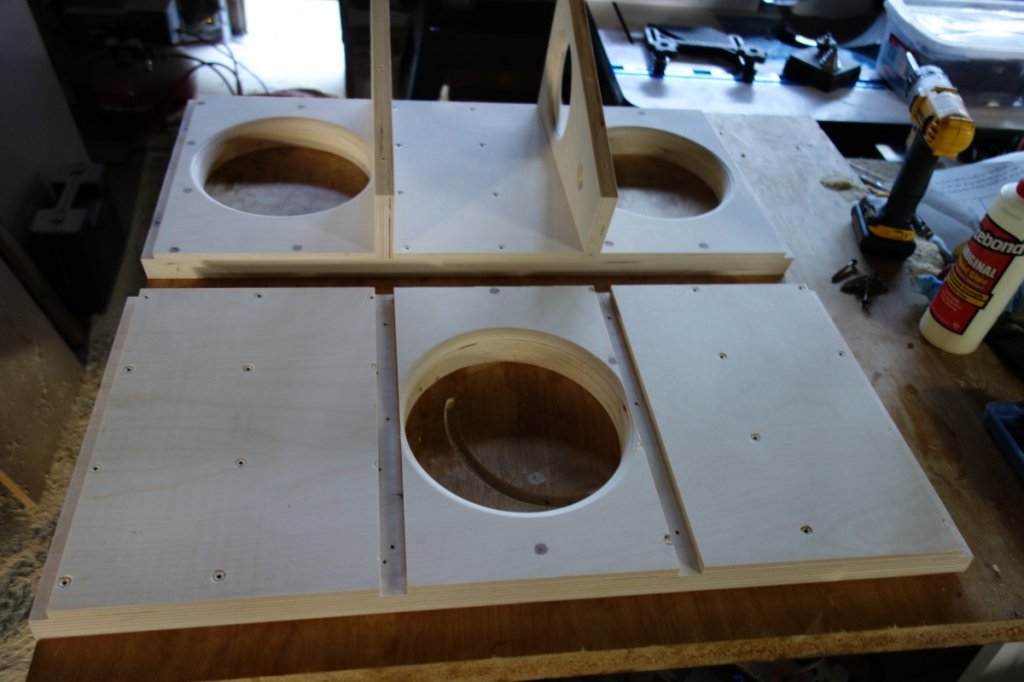
Sides were screwed together since I am using veneer. Much easier than clamps and anyone that has not built a box with dadoes
as opposed to butt joints needs to feel how much stronger a box built with dadoes is.


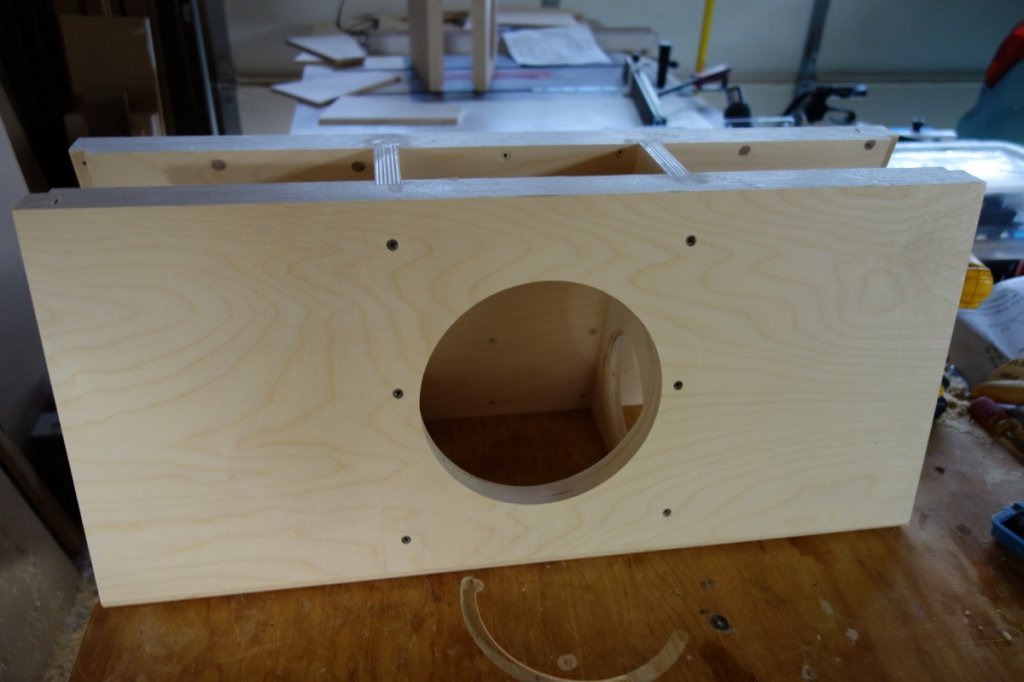
Only 3 clamps needed for this build. Used the cutoffs from the braces. I was going to use band clamps put they were all tangled up.


I will be using 17" x 30" sheets of raw veneer so I cut 1-1/4" strips and put a 1" roundover on them and the nailed them to the front.
That leaves a 1/4" lip on the front so that a 3-1/4" painted piece can be installed later, after the cabinet is veneered and finished.


persisting1

Re: Wedge Base Build
« Reply #1 on: 13 Oct 2015, 08:39 pm »
Keep those pictures coming  :drool:

Hugh

  • Industry Participant
  • Posts: 1329
    • Angel City Audio
Re: Wedge Base Build
« Reply #2 on: 13 Oct 2015, 08:50 pm »
Very nice.

aldcoll

  • Full Member
  • Posts: 761
  • Champagne Taste on a Water Budget
Re: Wedge Base Build
« Reply #3 on: 13 Oct 2015, 08:59 pm »
I agree this is a great start and I will follow this build.  With your background I hope to see a few more help full tips like using the scrap for glue blocks. 

I personally have been thinking of a birch build and using a matching plug for the screws of a contrasting material like walnut?  I just personally like the wood stained and I know my veneer work is lacking.

And yes Keep the pictures coming :thumb: :thumb: :thumb: :thumb:

mlundy57

  • Industry Participant
  • Posts: 3594
Re: Wedge Base Build
« Reply #4 on: 13 Oct 2015, 09:48 pm »
Interesting build. I agree about the scrap as clamping block tip. I'll have to remember that. Clamping angled joints can be a pain.

I stained the parts that could not be veneered black but you can veneer most of the Wedgie:


Mike

Peter J

  • Full Member
  • Posts: 1883
  • Hmmmm
Re: Wedge Base Build
« Reply #5 on: 13 Oct 2015, 11:21 pm »
Nice work, Keith.

 That center panel's a great idea and lends itself to many ways of finishing. Think of it, you could get some of that self-stick flowered shelf liner...

Or not.

You may want to consider wraps, there's all kinds of stuff available and it's fairly easy to apply. Metals, camo, patterns, the world's your oyster.


https://www.fellers.com/


Danny Richie

Re: Wedge Base Build
« Reply #6 on: 14 Oct 2015, 02:50 pm »
Wow, nice work.

mlundy57

  • Industry Participant
  • Posts: 3594
Re: Wedge Base Build
« Reply #7 on: 14 Oct 2015, 03:14 pm »
The Wedge is an incredible speaker and deserves a beautiful enclosure. But the Wedge flat pack supplied really only  can be painted and I am a woodworker not a painter.  Thus the only solution is to scratch build a Wedge later in a way that uses veneer. Since the waveguide on the Wedge needs to be painted, I thought something like these Chario speakers would look good and I think I can handle the painted sections.

The black areas on the Wedgies I posted above were not painted, they were stained. On these particular units I used a alcohol based black India ink for the stain. I am currently using a black gel stain for the insides of the 12" driver wedge base I'm building. Both work.   

Mike

Captainhemo

Re: Wedge Base Build
« Reply #8 on: 14 Oct 2015, 03:14 pm »
They look great Keith  :thumb:
I agree 100% about the dados, been using them in   the H frames and another  recent project. As you say,  they  wold seem to add a lot of strength as wellas aid in assembly

Looking forward to more pics 

jay

Keithh

  • Jr. Member
  • Posts: 101
Re: Wedge Base Build
« Reply #9 on: 21 Oct 2015, 10:21 pm »
Did a little more work on the Wedge bases. The top and bottom braces are 1/2" thick, not 3/4" like the middle 2 braces.
I did this because solid wood corners will be used and didn't want to have to cut out that much material.


A 1/2" piece was glued on top and solid strips will be glued in after it is veneered. One thing nice about Baltic Birch is that it
machines so nicely and  combined with dadoes, everything is so straight that I will be able to glue in the solid pieces without any
more work. I think if MDF was used I most likely would have to clean up the area with a router.


The inside was dyed with TransTint black dye. I know glue works fine over TransTint.


I was going to use Walnut burl raw veneer, but I had this sheet of Santos Rosewood paper-backed veneer so that was used.
Used the iron on method with Heatlock glue. Worked great and was extremely easy. I wanted to see what black gel stain looks like
over black TransTint on the front piece, on the right speaker, and now I know I will definitely be painting that section.


Originally planned to veneering just the back edge of the side pieces and leaving the braces black, but now I am going to fill in the braces with veneer.
Next step the tops.


mlundy57

  • Industry Participant
  • Posts: 3594
Re: Wedge Base Build
« Reply #10 on: 21 Oct 2015, 11:31 pm »
Now that is sharp!!! They're going to be beautiful  :thumb:

Mike

Captainhemo

Re: Wedge Base Build
« Reply #11 on: 22 Oct 2015, 04:38 am »
Wow, they really are going to be gorgeous Keith , nice  :bber:

jay

ebag4

Re: Wedge Base Build
« Reply #12 on: 23 Oct 2015, 12:58 am »
Really nice build Keith, can't wait to see the final product.

Best,
Ed

Keithh

  • Jr. Member
  • Posts: 101
Re: Wedge Base Build
« Reply #13 on: 12 Nov 2015, 12:05 am »
Originally thought the Wedge was a lost cause in the looks department, but since they sound so good who cares.
I am changing my opinion on that after Mike's painted build and my build, I think they can be made to look great.
Put in the solid Rosewood strips in the corners. I used 1/8" rabbets between the solid and veneer panels. Wasn't sure if I
should use them but I am glad I did now.


Filled in the back braces with veneer


For the base I cut out a bunch of small pieces and screwed them down into a piece of Baltic Birch to make a template.
Then I used a router with a flush trim bit to make a template. I used the template to cut out the 1" Baltic Birch base.


For the Speakon connectors, I was going to do the same design as everyone else. But I really never liked the look of it. It looks like
an afterthought, kinda like getting finished with the cabinet and realizing you completely forgot about the wiring.
The Speakon connectors I have are 1-1/2" sq. so I glued a 1" wide piece of 3/4" plywood to bottom back of the base. Then I drilled a
1" dia. hole. The wiring  will go through the base to the speaker.


Put a 3/8" roundover on top and attached the base. They are now ready for finishing. The veneer will be lacquered and the base
and front panel will be painted black.


ebag4

Re: Wedge Base Build
« Reply #14 on: 12 Nov 2015, 12:40 am »
Nice Keith, I really like your base layout as well.  Keep the pics coming! :thumb:

Is it an optical illusion or are you tilting the top downward to give a downward tilt to the wedge? I was considering tilting my upcoming build due to some additional height caused by one of my base designs.

Best,
Ed
« Last Edit: 12 Nov 2015, 03:37 am by ebag4 »

gregfisk

  • Restricted
  • Posts: 1349
  • Us alone in the universe? sure is a waste of SPACE
Re: Wedge Base Build
« Reply #15 on: 12 Nov 2015, 12:42 am »
Man, you really did turn these into swans, can't wait to see them finished, very nice look.

Greg

bladesmith

  • Full Member
  • Posts: 1378
  • water quenching steel since 2001....
    • palmer knives
Re: Wedge Base Build
« Reply #16 on: 12 Nov 2015, 02:16 am »
Sweet build....... 8)

Danny Richie

Re: Wedge Base Build
« Reply #17 on: 12 Nov 2015, 04:00 am »
Wow, those look nice.

mlundy57

  • Industry Participant
  • Posts: 3594
Re: Wedge Base Build
« Reply #18 on: 12 Nov 2015, 04:11 am »
Keithh,

Looking good. I especially like the way you did the feet. looks like outriggers.

Another option you might want to consider for the fronts would be some type of contrasting veneer. Since you would only need one long or two short pieces you might be able to find something you really like pretty inexpensive. One place I have found some striking veneer for bargain prices is veneersupplies.com, especially on their miscellaneous and bargain areas  http://www.veneersupplies.com/  .

Mike

Keithh

  • Jr. Member
  • Posts: 101
Re: Wedge Base Build
« Reply #19 on: 12 Nov 2015, 07:03 am »
Quote
Is it an optical illusion or are you tilting the top downward to give a downward tilt to the wedge?

It is an optical illusion. The top is flat. The top piece is the only thing I changed from Danny's plan. It is 1" thick instead of 3/4" so I could use solid corners.
This picture shows it better.


This is a better picture of the base.


Quote
Another option you might want to consider for the fronts would be some type of contrasting veneer.

That was one of ways I was thinking of. I was thinking of Rosewood sides/black front, Walnut burl sides/black front and Walnut sides/Curly Maple sides, all of which I have on hand.
But my wife said no more speakers made from Walnut, so I went with Rosewood.