X-MTM and X-CS build

0 Members and 1 Guest are viewing this topic. Read 6042 times.

JWCoffman

X-MTM and X-CS build
« on: 10 Feb 2021, 03:51 am »
I was going to start this thread after getting a little farther, but thought I'd get some first steps down along with the two photos I have so far.

Quick synopsis:
Building a pair of X-MTMs and a X-CS for our downstairs tv room.  Rather than doing the flat packs I'm building both cabinets from scratch for a few reasons:
- The MTM's need to be a little higher due to our listening height
- I want to use this as a means of getting better at woodworking
- It's an excuse to buy more tools
I ordered the parts from Danny a couple weeks ago and, like a lot of you, just waiting on some back-ordered parts.

My skills:
I'm not afraid of tools and using my hands.  I spent much of my life doing small boat repair (dinghys, racing shells and such), so I know my way around a sander, carbon, and epoxy.  I've also taken on a few amateur carpentry projects around the house for things that we're fine with being not quite professional.  Woodworking is a different animal, however, so I'll need to muddle through it.

My plan for the cabinets are to dado and rabbet most of the joints except the front baffle which will be a butt joint with dowels (I'll get into the reason for that later).    The dado's and rabbets will be a new challenge, but I think the increased cabinet strength and easier assembly (fingers crossed) will make it worthwhile.  Accuracy will be everything.  I've pored over the plans countless times and drawn it out in Sketchup to make sure I have a good understanding of how the pieces are going to fit together.  This may be old hat for the accomplished woodworkers in this forum, but it will be new territory for me and I'm a little nervous about it.

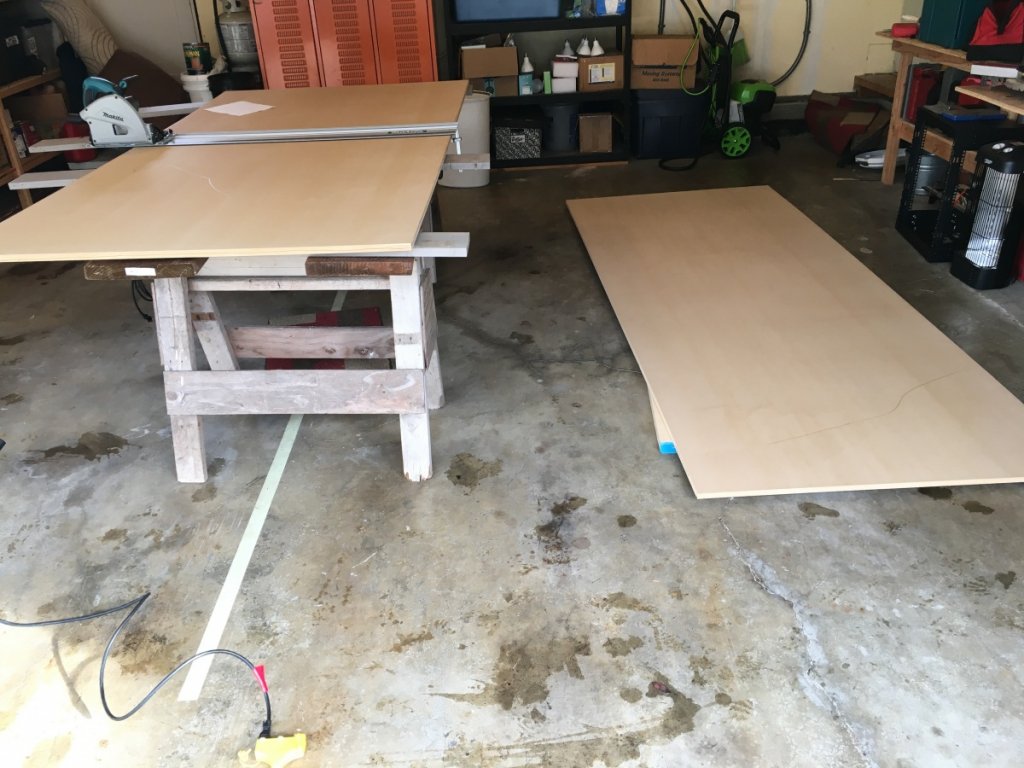
After watching some of Peter's videos, I was pretty selective with my choice of MDF and had to call around to multiple lumber yards to find high quality stuff to use.  They even had 4'x10' sheets which allowed me to use two sheets rather than three.  After spending even just a little time with it, I can see why MDF quality important and I can honestly vouch for it.  It's true 3/4" thick, cut 1" over on both axes (49"x97"), tough, and great to work with (clean cuts with minimal tear out).  Downsides, it's even heavier than box store MDF and I actually cut myself on one of the dado'd corners because it was so sharp.  At $45 for a 4x8 sheet, it's not really that much more expensive than the cheap stuff, and the 4x10 sheet was only $10 more at $55.


My steps so far:
- Cut down the panels to usable size
- Rout out the dados and rabbets before trimming out the parts.


Pic above shows one sheet that has the front, back, and sides of one MTM.  The sheet on the table is about to get the same treatment for the other speaker.  Top and bottoms will be rabbeted and cut out of the panel leaning in front of the first piece.  The braces and X-CS will be cut out of the sheets behind the dadoed sheet.

I didn't get nearly as far as I wanted over the first weekend, but a couple early mistakes made me slow down a lot to make sure that each and every cut and router pass was dead on.

Things I learned/opportunities for improvement/screw ups:
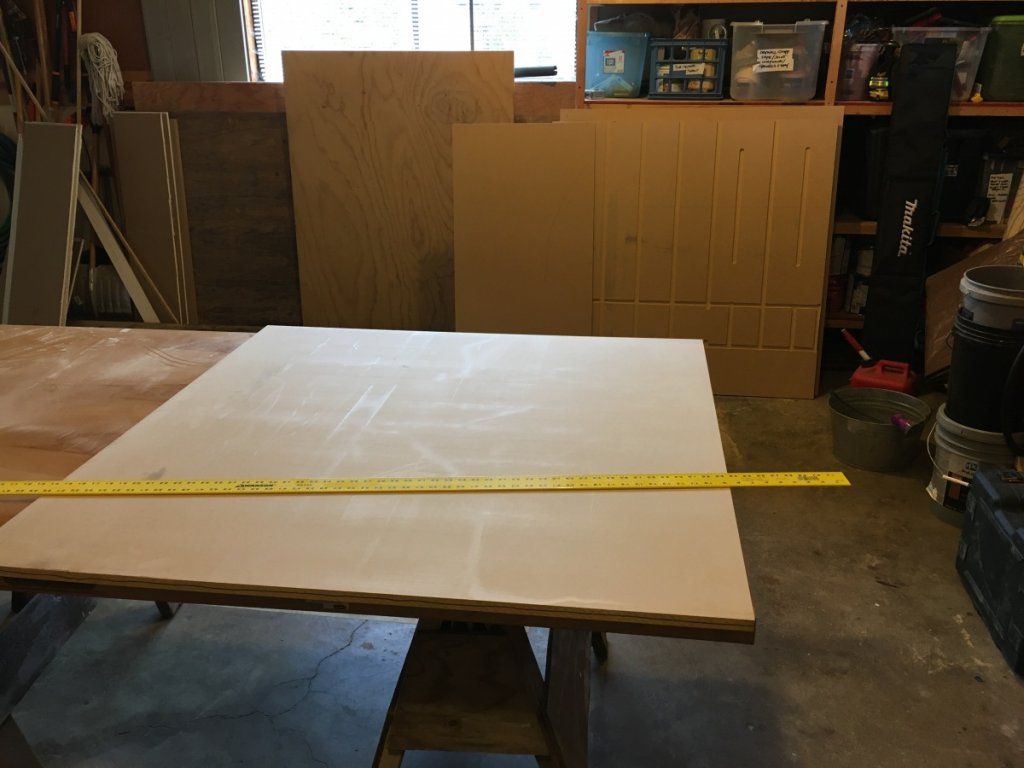
- When doing my initial breakdown of the sheets I wrote down one number wrong, it was a 1 instead of 11.  So...yeah, it was 10" off.  Not the end of the world but it forced me to revamp most of my cut list.
- Know and understand the difference between a standard cut and climb cut with a router.  Due to inexperience my first dado ran away from the fence.  Luckily it's in an innocuous spot and can be fixed.  After that I spent most of the morning making a more robust dado jig that ended up saving a lot of time and heartache in the long run.
- Almost forgot another.  Keep track of the factory edges.  I thought I was referencing a factory edge on my first round of dados only to find I was using a cut edge.  I even ran a sharpie around the entire perimeter of each sheet before cutting them down to minimize the likelihood of this.  Luckily my track saw cut was within 1/32, so I don't think it will have much effect.  Bullet dodged.

I'm sure I'll learn more as I go along and should have more progress after this coming 3 day weekend.

mflaming

Re: X-MTM and X-CS build
« Reply #1 on: 10 Feb 2021, 03:32 pm »
I'm also new here and just a few steps ahead of you having completed an X-LS and sealed sub build.

I've already posted this on this forum, but I'll repeat here: Cutting perfect circles is the first real technical challenge. I practiced a few times on scrap before committing to the real thing. The jig I built can be found on the "TimCan the Jig Man" YouTube channel. it works perfectly and doesn't cost anything if you have some bolts and scrap plywood around.

I'm about midway through an X-SLS build and have learned that you can't have too many clamps in cabinet building. I had to go purchase about 6 more - an expense I didn't really factor in the beginning.

There's lots of talent on this forum if you get in bind. Take your time and enjoy the build!

JWCoffman

Re: X-MTM and X-CS build
« Reply #2 on: 10 Feb 2021, 03:55 pm »
Clamps!
Yeah, I've got four 6' pipe clamps and six 3' F-clamps, but I know I'm going to need at least a couple more to feel confident during the MTM glue up.  So many braces!  These things are tanks.

Good note on the circles.  I've been fretting that part too.  The tough part is going to be the fronts of the baffles as my plan is to use clear acrylic as the front baffle surface which will be glued onto the MDF to create a seamless shape but with some illusion of depth behind the drivers.  I may end up having the acrylic sheets CNC'ed at a local shop then using the driver holes as a template for the MDF layer.  Pricy.  The whole thing could end up just being a terrible idea.

For now I'm keeping all my options open as I know I'd still be happy with a simple walnut veneer over the entire thing.

JWCoffman

Re: X-MTM and X-CS build
« Reply #3 on: 16 Feb 2021, 02:36 pm »
Build is coming along.  Lots of progress with a few dumb mistakes.  I should have a couple photos up tonight or tomorrow.
I'm considering making the front baffles a little thicker than planned for design reasons, most likely 1.25".  Are there any issues with the woofer drivers on a thicker baffle?  I'm planning on a 1/2" roundover inside the woofer holes, and it looks like I could go up to 5/8" before running into the side walls.  Should I try to go up to 5/8" (which involves buying a bigger router bit)?

Digi-G

Re: X-MTM and X-CS build
« Reply #4 on: 16 Feb 2021, 02:59 pm »
Someone just asked about the radius size in another thread.

https://www.audiocircle.com/index.php?topic=174965.msg1845938#new

Bottom line is that 1/2" or 5/8" is fine.  Maybe even preferred over 3/4".  I don't think you'll hear a difference between 1/2" and 5/8".

JWCoffman

Re: X-MTM and X-CS build
« Reply #5 on: 16 Feb 2021, 03:30 pm »
Someone just asked about the radius size in another thread.

https://www.audiocircle.com/index.php?topic=174965.msg1845938#new

Bottom line is that 1/2" or 5/8" is fine.  Maybe even preferred over 3/4".  I don't think you'll hear a difference between 1/2" and 5/8".
I think that question was for the exterior roundover along the outside edges of the cabinet as far as I could tell.  I'm asking about the interior roundover inside the woofer holes and whether adding 1/2" of material to the baffle affects the woofer dynamics.

mlundy57

  • Industry Participant
  • Posts: 3561
Re: X-MTM and X-CS build
« Reply #6 on: 16 Feb 2021, 06:12 pm »
Build is coming along.  Lots of progress with a few dumb mistakes.  I should have a couple photos up tonight or tomorrow.
I'm considering making the front baffles a little thicker than planned for design reasons, most likely 1.25".  Are there any issues with the woofer drivers on a thicker baffle?  I'm planning on a 1/2" roundover inside the woofer holes, and it looks like I could go up to 5/8" before running into the side walls.  Should I try to go up to 5/8" (which involves buying a bigger router bit)?

The normal roundover on the inside of the woofer hole is 3/8" so 1/2" should be fine. Also, trim the foam layer off the NoRez so there is 1-1/2" - 2" of space between the baffle and the foam. This is to allow the woofer to breathe.

JWCoffman

Re: X-MTM and X-CS build
« Reply #7 on: 16 Feb 2021, 06:40 pm »
The normal roundover on the inside of the woofer hole is 3/8" so 1/2" should be fine. Also, trim the foam layer off the NoRez so there is 1-1/2" - 2" of space between the baffle and the foam. This is to allow the woofer to breathe.
Thanks!  That no-rez tip was something I was thinking about anyway.  Thanks for clarifying that part.

JWCoffman

Re: X-MTM and X-CS build
« Reply #8 on: 17 Feb 2021, 02:45 am »
A good 3 day weekend allowed me to make some good progress.  First step was to finish the dados then cut the components for the outer cabinets. 


I spent some quality time with the old trusty miter saw getting it square and replacing the old blade which had seen a couple laminate flooring projects.  Anyone know how to keep these portrait photos from turning landscape in the forum?


Next came dry assembly for all three speakers.  This was a good way to see exactly how short I am on clamps.  I do have four 6' pipe clamps I didn't use for this purpose, but even then, I'm at least 4 clamps short I think.  I'm glad I picked up the strap clamp on a whim, it turned out to be really helpful for this part once you get it set up.


The dados line up!  I was actually kind of surprised by this.


After using the dry assembly to determine the exact dimensions of the braces, I started cutting circles.  I went the quick route and actually bought a circle jig.  Worked great and turned out to be much simpler than I thought.


Once I got one of the big braces done, I just used it with a flush trim bit on my router table to make the other ones after using a jig saw to cut out most of the circles.  This worked very well and I was able to make quick work of the big MTM braces.  I still have the small braces for the MTM's and all the braces for the X-CS to do next weekend.

Things I learned/opportunities for improvement/screwups:
- I made one measuring error that led to a cascade of other errors that I spent much of the first day trying to rectify. I had to redo the back panel of one of the MTM's, dado and all.  Frustrating.
- Not really a screw up, but the MDF dust has lost its quaint novelty and is now becoming a real source of tension in my marriage.
- Realized when I was ready to start using the trim bit on my router that I hadn't actually gotten around to buying one.  Ended up just having to go to the nearest box store and get what they had.  It was fine, but I would have preferred getting a higher quality bit for such an important task that I will be using a lot in the coming weeks.


mlundy57

  • Industry Participant
  • Posts: 3561
Re: X-MTM and X-CS build
« Reply #9 on: 17 Feb 2021, 03:43 am »
If you are going to be trimming veneer, do yourself a big favor and get a good quality 1/8" carbide spiral downcut flush trim bit. I use Whiteside bits but there are other good ones as well.

https://www.whitesiderouterbits.com/collections/flush-trim-spiral-bits/products/rftd2100


JWCoffman

Re: X-MTM and X-CS build
« Reply #10 on: 17 Feb 2021, 03:42 pm »
If you are going to be trimming veneer, do yourself a big favor and get a good quality 1/8" carbide spiral downcut flush trim bit. I use Whiteside bits but there are other good ones as well.

https://www.whitesiderouterbits.com/collections/flush-trim-spiral-bits/products/rftd2100

Good to know, I just ordered one.  Did you mean to say 1/4"?
The bit I got yesterday is fine, a Freud 1/2" straight cut which works well for my purposes right now, but I can see how the spiral downcut makes a cleaner edge on veneer.  After spending $200 on Walnut, I don't want to cheap out on a bit that will potentially mar the surface.  I specifically picked up a battery trim router for purposes like this, since I don't have the experience with routers to feel confident in manhandling the big Bosch around the edges (geez, that sounds like a euphemism).  This project was always just an excuse to buy more tools anyway.

jonsk2514

Re: X-MTM and X-CS build
« Reply #11 on: 19 Feb 2021, 02:14 pm »
I just finished a set of the X-MTMs and I am blown away by how good they sound in my home theater system.  This was my first build too and found the build to be a great learning experience.  I am looking forward to following your build.

Also, clamps, clamps and more clamps, especially for these...

https://www.audiocircle.com/index.php?topic=170542.msg1825031#msg1825031

 :thumb:

JWCoffman

Re: X-MTM and X-CS build
« Reply #12 on: 23 Feb 2021, 03:21 am »
More progress this past weekend.

First step was upgrading my garage lighting which meant converting the old light boxes to hold an outlet.  It also meant completely replacing the light boxes since the old ones were too small.  I didn't plant for a trip into the attic this weekend, but there I was trying to pry a couple old lightboxes off the trusses.


The result, however, was well worth it as I could really see how dirty every surface in our garage is.

Spent the rest of a long first day cutting out the rest of the braces for the two MTM's along with the X-CS.  Made a couple minor errors here and there, but nothing worth noting since nobody will see it.  Put a 3/8 roundover on all the braces except the diagonals in the X-CS which got 1/4".  This meant they were nearly a full semicircle which I liked.  Again, nobody else will see it, but whatever.


Dry fit with all the braces looked good.


I started with the glue up of the top, sides, back and braces on the X-CS before calling it a night.  I didn't want to put in the bottom on the CS since I'm not entirely sure how big the crossover will end up and I didn't know how tough it would be to squeeze into there just through the front.

Next came one MTM this morning.  I picked up some Titebond 3 to use on the towers mostly because of the longer working time, but according to them it's stronger too.  Is it just me or is Titebond 3 runnier than Titebond 2?  I had a bear of a time with it on the vertical surfaces.  I've never glued up anything that big so I spent quite a while juggling clamps all while trying to keep surfaces in contact.  Glue everywhere.  I had 16 clamps on that bad boy and I probably could have used a few more.


All in all, a successful weekend even if I'm going to be spending some quality time with a chisel getting bits of glue off some surfaces next weekend.

Next steps are to get the 2nd MTM glued up, trimming, filling and sanding next weekend.  I've got some critical decisions to make regarding final look of the speakers before I get much farther.  I know for sure they will be mostly walnut with a danish oil/shellac finish.  I should be getting the walnut this week some time, so at that point it's just waiting on getting the guts from Danny.

Things I learned/opportunities for improvement/screwups:
- You know, you can never have too many clamps.  I feel more people should say this. :lol:
- I did make every effort to cut the fronts, backs, tops and bottoms oversized so they would sit proud of the sides for trimming.  I was mostly successful but after glue up there are a couple spots where I'm going to need to fill in order to have a smooth surface for the veneer to bond to.  Perhaps next time I go to 1/8 over rather than 1/16.


Hobbsmeerkat

  • Industry Participant
  • Posts: 2529
Re: X-MTM and X-CS build
« Reply #13 on: 23 Feb 2021, 03:29 am »
Those are coming along really nicely! Excited to see more!

jonsk2514

Re: X-MTM and X-CS build
« Reply #14 on: 23 Feb 2021, 01:38 pm »
OK - I’ll bite...

“You can’t have too many clamps!”

 :lol: :lol: :lol:

And I feel your “pain” at having to rewire the garage to get rolling on this project.  I found I had to do major lighting upgrade in my basement to do mine.  It seem like there is alway something in the way of actually doing what I plan to do...   :roll:

More progress this past weekend.

......

Things I learned/opportunities for improvement/screwups:
- You know, you can never have too many clamps.  I feel more people should say this. :lol:
- I did make every effort to cut the fronts, backs, tops and bottoms oversized so they would sit proud of the sides for trimming.  I was mostly successful but after glue up there are a couple spots where I'm going to need to fill in order to have a smooth surface for the veneer to bond to.  Perhaps next time I go to 1/8 over rather than 1/16.

Sorry to read that the fitup after gluing wasn’t as good as you wanted.  This was something I worried about during my build and I did some practice pieces to try to figure it out.

While I wasn’t quite as worried about having everything oversized, I did want the fitup to “sit proud” as you say.  I cut everything between 1/32” and 1/16” over and it came out that way after glueing.  I am going to offer a guess that the glue was starting to setup while you were in the middle of clamping and you didn’t have enough clamps (seriously) to draw the pieces together.

A check you can make is to clamp it together reasonably tight when you do the dry fitup.  If everything sits proud dry, then it should sit proud when you get done glueing.  Remember, the MDF is really flexible and I found that I need a clamp every 8 - 10” inches to get everything to pull in nicely when glueing.  I found I had bowing if I had clamps too far apart.

I had several discussion with others about glues during my build of the MTMs (https://www.audiocircle.com/index.php?topic=170542.msg1813005#msg1813005) and did some practice runs with the different glues.  I finally settled on the Titebond I for a lot of my glue.  Yes it is runny but it has a pretty long work time which I found helpful.  I also watched Peter’s video which provides great hints about glueing (https://youtu.be/5n3ZYGnEjgE, need to get to about half way in to see the glueing).  Brushing it out after putting a bead in a joint was a big help.

Not sure if any of this helps with these, but maybe something to think about for the next time....

JWCoffman

Re: X-MTM and X-CS build
« Reply #15 on: 23 Feb 2021, 03:17 pm »

Sorry to read that the fitup after gluing wasn’t as good as you wanted.  This was something I worried about during my build and I did some practice pieces to try to figure it out.

While I wasn’t quite as worried about having everything oversized, I did want the fitup to “sit proud” as you say.  I cut everything between 1/32” and 1/16” over and it came out that way after glueing.  I am going to offer a guess that the glue was starting to setup while you were in the middle of clamping and you didn’t have enough clamps (seriously) to draw the pieces together.

I think that's definitely part of it.  The other part was my clamp juggling as I noticed that the pieces weren't coming together like they had previously.  I felt I had enough on my dry fit as everything was sitting proper, but I think adding the glue made it tougher to draw the pieces together and during some of that struggle a couple of the joints had already started to set.
As I said yesterday, this is by far the biggest glue up I've ever done, and I feel the number of complications are the square of the number of joints ( C=J^2), but that's probably just inexperience, and needing more clamps.  If we throw clamps into the formula, then we get this:
Co=J^2-Cl^(1/2)
Complications equal the number of joints squared minus the square root of the number of clamps.  So, as the number of joints increases, the number of clamps needed approaches infinity.  Ergo, you can never have too many clamps.  That's just science.
I'm picking up a few more before clamping up my last MTM.

Tyson

  • Full Member
  • Posts: 11082
  • Audio - It's all a big fake.
Re: X-MTM and X-CS build
« Reply #16 on: 23 Feb 2021, 04:35 pm »
I found during clamping that if I use a bead of glue at the joints, then the pieces tend to float during the clamping process.  That caused some pieces end up not flush. 

Only solution I found was to run my finger along any beads of glue and flatten it out before assembling the pieces. 

JWCoffman

Re: X-MTM and X-CS build
« Reply #17 on: 23 Feb 2021, 04:59 pm »
I found during clamping that if I use a bead of glue at the joints, then the pieces tend to float during the clamping process.  That caused some pieces end up not flush. 

Only solution I found was to run my finger along any beads of glue and flatten it out before assembling the pieces.
I did use a brush to flatten out the beads of glue and ensure every surface had coverage, but that's where I think the runniness of the TB3 worked against me as it was pooling at the bottoms of the braces between the backs and sides, which is exactly where I had the problems :duh:.  Definitely a few more clamps on that seam in particular would have been effective.  It's not so bad that I have to consider redoing it, but certainly wasn't perfect and I know how to do it better with the second one.

jonsk2514

Re: X-MTM and X-CS build
« Reply #18 on: 23 Feb 2021, 06:46 pm »
...
As I said yesterday, this is by far the biggest glue up I've ever done, and I feel the number of complications are the square of the number of joints ( C=J^2), but that's probably just inexperience, and needing more clamps.  If we throw clamps into the formula, then we get this:
Co=J^2-Cl^(1/2)
....

 :rotflmao:

I ran into this problem with the test piece I did.  I concluded that I had to limit the number of pieces I was gluing together at one time.  For example I glued the top and bottom to the 2 sides at one point.  In order to ensure everything else would fit up, I wrapped the ends of the front and back pieces with binding film (that stuff that looks like plastic wrap for food, but is used to bind stuff to pallets and what not).  This kept the run-off glue from gluing those pieces. I put glue on the joints to be glued and then assemble all of the cabinet outsides panels, and clamped it up.  Once the glue setup, I could then remove the front and back, knowing that they would fit later.  I know you have datto in slots for the braces, so your sequence would be different.  Maybe glue the top and bottom pieces to the back panel and then, once that sets up, glue one side to those other three pieces.  Then glue in the braces, using the other side as a locator, but not actually gluing it at this point...  Just thinking out loud here, as an example to limit the amount of gluing at any one time... 

JWCoffman

Re: X-MTM and X-CS build
« Reply #19 on: 24 Feb 2021, 02:47 am »
:rotflmao:

I ran into this problem with the test piece I did.  I concluded that I had to limit the number of pieces I was gluing together at one time.  For example I glued the top and bottom to the 2 sides at one point.  In order to ensure everything else would fit up, I wrapped the ends of the front and back pieces with binding film (that stuff that looks like plastic wrap for food, but is used to bind stuff to pallets and what not).  This kept the run-off glue from gluing those pieces. I put glue on the joints to be glued and then assemble all of the cabinet outsides panels, and clamped it up.  Once the glue setup, I could then remove the front and back, knowing that they would fit later.  I know you have datto in slots for the braces, so your sequence would be different.  Maybe glue the top and bottom pieces to the back panel and then, once that sets up, glue one side to those other three pieces.  Then glue in the braces, using the other side as a locator, but not actually gluing it at this point...  Just thinking out loud here, as an example to limit the amount of gluing at any one time...
Interesting.  I thought of limiting the number of pieces, but ruled that out thinking that I needed enough pieces to be in place to ensure everything fit on final assembly.  There are just sooo many braces (plus, I've added one more as a false floor since I'm building mine a few inches taller).  The plastic wrap is an idea I hadn't considered.  I'll game out something like that on Saturday when I get back to it.  I know I don't want to slide the braces into the dados as I'm afraid I'll lose too much glue along the sides, so I'll look at doing the back, top, bottom and one side first, then the other side and the braces.  I'm pretty sure we have some of that plastic wrap around here somewhere...