Amateur Build of the X-MTM Encore

0 Members and 1 Guest are viewing this topic. Read 28592 times.

jonsk2514

Amateur Build of the X-MTM Encore
« on: 31 May 2020, 06:24 pm »
Hi everyone - 2nd post on Audio Circle.  My first post was my introduction.

I have been lurking a while, reading about speaker builds and watching Danny’s videos, and have decided that I would take on the build of a pair of X-MTM Encore (I hope that is the proper name for these) speakers. The idea for doing these came from some email correspondence I had with Danny, which, along with his videos, convinced me that upgrading a set of old and butchered up ESS speakers wasn’t worth the effort.  Danny sent me the plans for the cabinets and a price for the components.

I am definitely an amateur with doing this sort of thing, but I have done this once before a long time ago.  I built a pair of ported 12”, 3 way speakers.  Back then there wasn’t the information that there is today, so the crossover I designed was “cookbook”.  I wound my own air coils.

If the X-MTM build goes well, then I plan to build 2 other designs - a X-CS Encore (center channel) and a pair of X-SLS Encores (rear channel).  Hopefully, these 3 designs play well together.  In the end I expect to have a nice set of speakers for my home theater.

I have never worked with MDF before, so I thought I would play around with some of that before I committed the money for Danny’s hardware.  Practice and some actual cutting.  I have taken some ideas from other people’s builds (thanks for posting) and watched some build videos (thanks Peter R.). So far I have cut up about 2/3s of a sheet of MDF and I am finding it to be pretty reasonable to work with.

I have gotten far enough along, I think (ya think?) I am committed to doing this build and thought that I would join this forum for help and support, and to show others my ideas and, maybe, get some feedback.

I hope this thread also helps other amateurs to take on one of these speaker builds.  I plan to show how I do the build with the limited hardware I have.

Thanks everyone in advance for any post you have made and for any help you provide.  I already have a few questions in mind... to be posted later.

~~~~~~~~~~~~~~~~~~~~~~~~~~~~~~~~~
Post script:
I have finished these speakers and can say - OMG, they sound awesome!
Very much worth building...

If you are looking for a speaker to build and have never done this before, I would say that Danny has easier speaker designs to build and more difficult ones to build, than these (the X-MTMs) are.  Overall, though, with a little skill and a few tools you can do this.  Watch the build videos that Danny and others have posted.  Read threads that others have posted about their builds, even if they are not exactly the same design.  There are a lot of shared techniques for building any of Danny’s speaker designs.  And remember, there is no one right set of details to follow to build Danny’s designs, as long in the end they meet the internal and external dimensions of his sketches.  You may tailor your build details from what others have done to accommodate your skill, the tools you have and the room that you have to work in.  Most of all, enjoy the build...  :thumb:

Now that I am done, is there anything different I would try if I were to build another set of speakers?  Yes.  If you read through this thread, you will see that I used a somewhat unique way to install the internal braces.  While it worked well and the way I intended, I think I would try the simple butt joints that others used.  This would change the build sequence slightly, but is very doable.  When you get to that point in this thread, I posted a link to another thread where this was done.  It may give you ideas of how to do yours.

Also, you may note that this build took me a long time to complete.  I will assure you this is not a reflection of difficulty.  It is a result of personal circumstances and I did the build as time allowed.  Even so, reading through this thread I hope you see how much I enjoyed doing the build.  Clearly I am enjoying the end product
.
« Last Edit: 31 Jan 2021, 01:24 pm by jonsk2514 »

corndog71

  • Full Member
  • Posts: 1670
  • Some people call me Rob.
Re: Amateur Build of the X-MTM Encore
« Reply #1 on: 31 May 2020, 09:27 pm »
Danny designed rear surround speakers.  http://gr-research.com/av-1rs.aspx

PMAT

Re: Amateur Build of the X-MTM Encore
« Reply #2 on: 31 May 2020, 11:01 pm »
Good luck with your build. Remember that your material is pretty toxic. Always wear a mask and use fans to remove sawdust from the air. There are plenty of people here to help you along the way. I’m sure you will be fine so go for it!

jonsk2514

Re: Amateur Build of the X-MTM Encore
« Reply #3 on: 1 Jun 2020, 12:00 am »
Danny designed rear surround speakers.  http://gr-research.com/av-1rs.aspx

Yes, I saw those, and strongly considered them.  I am sure they are a good suggestion.  However, I am probably putting every thing in the worst audiophile room.  It has a partial stone wall, windows on 2 walls and no wall space.  Oh, and a tile ceiling and seating is bad.  So I am kinda stuck putting something on the floor.. .  :roll:  I am also thinking that the X-SLS would be a good match to the other speakers.  I do have time to reconsider, though, as those will be the last ones I do.

Quote from: PMAT link=topic=170542.msg1805882#msg1805882 date= 1590966099
Good luck with your build. Remember that your material is pretty toxic. Always wear a mask and use fans to remove sawdust from the air. There are plenty of people here to help you along the way. I’m sure you will be fine so go for it!

Thanks!
One reason I am posting here is I have seen the spirit in which people here pitch in on questions and suggestions.  This is a big part of the reason I am here posting.   :thumb:

I read about the hazards of the MDF in the comments to one of the videos I watched.  With that in mind I  have experimented with the shop vacs I have.  For the long cuts I am doing on larger section of board, that are too large to handle on the table saw, I am using a 1/8” down spiral cutter on a router.  The cuttings then go into a channel which is evacuated with the vacuum.  Works well.  My table saw and miter saw are both hooked to the vacuum.   That said, your reminder about wearing a mask is a good one, which I need to better with.  I have a good industrial one with dual filters that I should be using.  I have a lot of cutting ahead of me, not to mention sanding and whatnot.  I expect making the recess for the tweeter is going to make a real mess... :P

jonsk2514

Re: Amateur Build of the X-MTM Encore
« Reply #4 on: 1 Jun 2020, 12:20 am »
Did I mention that these speakers are going into the worst audiophile room?

Yes, and that includes having little room to place the X-MTM speakers at any real distance from the wall that will be behind them.  I might be able to get them a foot away from the wall.  With these being rear ported, will that be enough?  I guess not ideal, but enough?

My other option is to put the ports into the font of the speakers.  I had read in another thread that this was acceptable, as long as the location was maintained.  When I was considering this build, I asked Danny about this, he responded that I might get some port noise.  Can anyone expand on audio impact with relocating the ports?  And what would be “port noise”?

Jon L

Re: Amateur Build of the X-MTM Encore
« Reply #5 on: 1 Jun 2020, 02:11 am »
a pair of X-SLS Encores (rear channel).  Hopefully, these 3 designs play well together. 

Welcome to AC  :D

If it were me, X-SLS would be way overkill as rear channels.  In fact, I prefer the sound quality of X-SLS over X-MTM, especially in terms of bass definition, therefore upper range clarity.  X-SLS also has a chamber on bottom that can be filled with sand for even more solidity of sound (X-MTM does not).  I used to own X-Statiks also, but that's another story..

Thus, I would tend to go with X-SLS Encores as mains and build 3 X-LS Encores as center and rears.  Add sub(s) of your choice  :thumb:

mlundy57

  • Industry Participant
  • Posts: 3561
Re: Amateur Build of the X-MTM Encore
« Reply #6 on: 1 Jun 2020, 04:43 am »
Did I mention that these speakers are going into the worst audiophile room?

Yes, and that includes having little room to place the X-MTM speakers at any real distance from the wall that will be behind them.  I might be able to get them a foot away from the wall.  With these being rear ported, will that be enough?  I guess not ideal, but enough?

My other option is to put the ports into the font of the speakers.  I had read in another thread that this was acceptable, as long as the location was maintained.  When I was considering this build, I asked Danny about this, he responded that I might get some port noise.  Can anyone expand on audio impact with relocating the ports?  And what would be “port noise”?

If the bass sounds bloated because they are too close to the wall, you can partially or fully plug the ports. I know Jay built his N3s with the transmission line opening to the front instead of the rear but I haven't heard of anybody doing that with the X-MTMs. Port noise is usually described as a chuffing sound coming from the ports. The higher the volume, the more prominent the sound can be.

I have the opening of my N3s on the rear and they are only 18" from the wall. If I let them play full range the bass gets a little boomy so I cross them to the sub at 40Hz. This works very well and I don't have to plug the port. You could do the same with the X-MTMs and leave the ports on the rear.

Mike

jonsk2514

Re: Amateur Build of the X-MTM Encore
« Reply #7 on: 2 Jun 2020, 01:32 pm »
Welcome to AC  :D

If it were me, X-SLS would be way overkill as rear channels.  In fact, I prefer the sound quality of X-SLS over X-MTM, especially in terms of bass definition, therefore upper range clarity.  X-SLS also has a chamber on bottom that can be filled with sand for even more solidity of sound (X-MTM does not).  I used to own X-Statiks also, but that's another story..

Thus, I would tend to go with X-SLS Encores as mains and build 3 X-LS Encores as center and rears.  Add sub(s) of your choice  :thumb:

Thanks for the input and interesting comment.  I would have thought that the X-SLS Encore and the X-MTM Encore (an X-MTM with upgraded hardware, which Danny says he has) would have been similar in sound quality, but that the X-MTM would have “more” of what the X-SLS has.  Actually that way of thinking, as feeble as it is, was the basis for my choices.  I have read threads on the X-LS and know they are really good, but couldn’t find much about the X-MTMS.  I have also watched a number of Ron’s (new record day) reviews, but didn’t see anything on any of these (sorry if I missed some), in particular without subs.  Right now a sub is way out in the future, if I even do one.  So my choices were a bit of a gamble, fingering that anything I do of Danny’s designs will be more than “adequate” :thumb:

That said, I am well on my to having the MDF all cut up for a set of the X-MTM and I think I will go ahead of with the X-SLS.  You have me curious about the two and I am willing to “risk” a bit of “overkill” :lol:

If the bass sounds bloated because they are too close to the wall, you can partially or fully plug the ports. I know Jay built his N3s with the transmission line opening to the front instead of the rear but I haven't heard of anybody doing that with the X-MTMs. Port noise is usually described as a chuffing sound coming from the ports. The higher the volume, the more prominent the sound can be.

I have the opening of my N3s on the rear and they are only 18" from the wall. If I let them play full range the bass gets a little boomy so I cross them to the sub at 40Hz. This works very well and I don't have to plug the port. You could do the same with the X-MTMs and leave the ports on the rear.

Mike

Mike,  great info and, at some point in the near future I will need to make that decision.  I have front and side panels cut and can take those to the room to see how they will will fit as a “mockup”.  Given that these will have a depths of 16.5” and to add another foot to 18” may put the front of the speaker too far into the room.  The room can’t tolerate much like that.  Overall, I am guess that if I need to be close to the wall, then front mounting the port might be the way I need to go.

As for “huffing”, I saw just a bit of that (actually a lot) when one of my college buddies showed up at the dorms with a set of JBL L100 speakers.  It was interesting to see their movement at the end of Lucky Man... :icon_lol:  If that is the sort of thing you are referring to, that will be ok with me.

jonsk2514

My workshop
« Reply #8 on: 3 Jun 2020, 12:51 am »
A little about what I am working with.... For a shop, clearly amateur. I used this project as an excuse to first clean out some of the crap in my basement and to rebuild my workbench.   :roll:  I now have a reasonably flat and level 3/4”x4’x8’ plywood workbench to work on.  I have collected a variety of tools over the years which I will be using to make this project happen.  These include: a 12” Craftsman table saw, a couple of Craftsman routers and a small cast aluminum Craftsman router table for one of those routers, a vintage cast iron floor stand drill press and an Evolution 10” sliding miter saw (designed for cutting metal, but doing great at cutting MDF) and a variety of 20v Dewalt tools, including their smallish 20v router (which I am really liking, so far - more on that later).  Also a variation of hand tools including an old carpenter square, which is actually square and thick steel (needed to make square corners), a vintage cast iron machinist’s square, and high quality measuring tapes.  Believe it or not, I have bought measuring tapes that were off :nono:  I am a fan of the older quality stuff for some of this stuff.  These tend to be more durable and have a bit of “heft” to them than the stuff you get today at your local stores (yes, there are some high end tool stores and you should go for it if you can)  For a straight edge I am generally using 1/8”x1”x2” rectangular aluminum tube (get at most any hardware store but the best place is Metal Supermarkets, if you have one nearby). C-clamps and adjustable welding clamps; these are for holding pieces for cutting not particularly for assemble.  I need to get assembly clamps.  There are likely other tools I will use, but again nothing special.

For glue, I am following Peter R’s suggestion in one of his videos - Tight Bond (slow set) and Loctite’s PL Max (construction adhesive).  At least that is my plan for now.

I think for any amateurs thinking of building a set of these speakers, do it; I am not using anything special.  The 12” table saw is overkill for this project.  I picked it up used as something of a castaway and was able to get it working.  A more typical 10” would be fine.  The routers are also nothing special.  The miter saw is nice, but not necessary as the slide is short for some cuts.  I also have a hand circular saw, but don’t have plans to use it.  I find it makes less accurate costs than I would like.  I think there is nothing particularly wrong with it. I just think it is the wrong tool to use for this work.

I plan to document what I am doing, pictures if I can.  More to come.

jcsperson

  • Jr. Member
  • Posts: 211
Re: Amateur Build of the X-MTM Encore
« Reply #9 on: 3 Jun 2020, 01:46 am »
The two power tools I'd recommend for anyone who wants to build speakers are a router and a track saw. If you're just making box speakers those will give you all the accuracy you could want. Once you have them you'll find a million uses for them around the house too.


jonsk2514

Re: Amateur Build of the X-MTM Encore
« Reply #10 on: 3 Jun 2020, 02:42 pm »
Thanks for the suggestion.  I had not thought about a track saw.  This could be an ideal option, especially if you don’t already have a table saw.  I can see the benefit of one of these for doing the cuts that I am doing which are across the width of a full sheet of MDF, where trying to do those cuts on a small table saw would be next to impossible.  :thumb:

There are a lot of option for an amateur to use for dong these builds.  It is interesting to hear and read about these.

My only caution would be that if someone is going out to buy one of these, spend the money for a good one.  You don’t want anything that has any flex in the straight edge or clamp parts.  I bought an inexpensive clamp-on edge guide for this project.  While the straight edge part of it was really stiff, it had a lot of plastic in the clamp mechanism and that allowed it to flex a lot with just a little side loading.  It was a waste of money.

I have gotten further along in my build than I have had in getting a chance to document much of it.  I hope to do this a chronologically so people my progression.  It is far to say, at this point, that I have made my long cuts with a router, a 1/8” down spiral cutter and a simple straight edge.  More to come.

jcsperson

  • Jr. Member
  • Posts: 211
Re: Amateur Build of the X-MTM Encore
« Reply #11 on: 3 Jun 2020, 06:50 pm »
My only caution would be that if someone is going out to buy one of these, spend the money for a good one.

Exactly.

You don't need a shop full of Festool stuff. I just have a corded Makita SP6000. I think I paid $350 new for it. I bought two PowerTec 55” Guide Rails for $130. They are compatible with Makita and Festool saws and come with connectors to give you 110" capacity. I've since bought a single PowerTec 55" track because I got tired of taking the two I had apart and putting them back together.

You can use one 55" track to crosscut a sheet of plywood and use two with the connectors to rip long sections. I've even ripped boards too heavy to safely cut on my TS. Just put another board of the same thickness next to it to support the track. I never cut large items on my table saw anymore.

jonsk2514

Re: Amateur Build of the X-MTM Encore
« Reply #12 on: 3 Jun 2020, 08:36 pm »
That makes sense.  I too have bought multiples of things for that same reason.  Let’s see - 5 drills are part of my weakness.  4 are battery powered as I hate cords.   :lol:

jonsk2514

Re: Amateur Build of the X-MTM Encore
« Reply #13 on: 4 Jun 2020, 12:01 am »
The thought of building these speakers was enough to have me thinking of the plans for making them.  Danny had sent me the basic plans for the cabinets, but I needed build plans.  Having watched a few videos I found a few ideas I like.  One was to built the cabinets with recesses in the edges of some panels, into which the other panels would be bonded.  In my mind this did two things.  One being it makes each panel the square for the panels attached to it.  The other, I feel it adds strength to the design.  The design can take advantage of the recess lip for strength as well as the glue.

So here are the build plans I came up with.  They have the correct interior dimensions of Danny’s plans but it eliminates the butt joints.  There is nothing fancy here.  No CAD drawings to auto correct my errors.  Just pencil and paper; not even a straight edge (save that for the build...  :roll:)


Ok, this is not perfect.  For example the leader line for the top/bottom panel comes to the wrong spot, but the dimensions are right (they better be, other wise I am cutting new pieces...  :?)

So, as you see the front will be cut with a 3/8” deep x 3/4” on all 4 sides, the top/bottom is cut on 3 sides, the sides are only cut on the back edge and the back panel is cut to fit into the recess of the top/bottom and side pieces.  As long as I cut each panel square, I can do the fit up of this without needing a square.

When all is said and done, this is a pretty simple box...   :thumb:

corndog71

  • Full Member
  • Posts: 1670
  • Some people call me Rob.
Re: Amateur Build of the X-MTM Encore
« Reply #14 on: 4 Jun 2020, 12:15 am »
If you’re stuck with floor standing surround speakers then I recommend the AV-O. 

http://gr-research.com/av-o.aspx

I used the larger X-Omni as rear surrounds and they worked really well.  Should be an easy build too.

Here’s an old pic showing X-Omni and X-SLS.


jonsk2514

Re: Amateur Build of the X-MTM Encore
« Reply #15 on: 4 Jun 2020, 12:40 am »
The next part of this was to make a MDF cut plan.  You will notice that it is based on a 48”x96” (4x8 foot) sheet of wood.  No one told me that each sheet of MDF is 49”x97”...   :duh:  Well didn't this little oops come in handy When I made an opps cutting (more later on that).


The 60-ish piece is a leftover from a previous project and that is what I started with.  I figured if I struggle to cut that up, then I might have to rethink my plans and nothing lost.  As it was, cutting went well and it was a bit more than 60” so I got more out of it than I thought.  None the less, for anyone building these, with these 2 sheets of MDF you can build a set of these speakers.

A side note.  I thought I could just go back to my big box wood store and get another sheet of the MDF I had and materials would match up.  But no.  Around here we are thankfully starting to “open up” after being shut down for months (good thing as we wouldn’t be opening up now).  One of the first business to be let to restart was construction.  Ugh for me; good for them.  So off to another big box store.  Different brand of MDF, but it seems to look, smell and taste  :roll: the same, so hopefully it performs the same.  I figure that it will make up opposing panels.  That is, the tops, bottoms and fronts came from the one sheet and the sides and back are coming from the other.  The bonus was that when we pulled the sheet of MDF from the pile, one corner was split.  Could I use it, ask the store employee asked...  30% off if you take it... A quick check of my cut plans, which I had a copy of on my phone (love today’s tech...  :thumb:)... Yes.  Not expensive to begin with, and bought cheaper yet...  Yes, a win for the build....

jonsk2514

Re: Amateur Build of the X-MTM Encore
« Reply #16 on: 4 Jun 2020, 01:31 am »
If you’re stuck with floor standing surround speakers then I recommend the AV-O. 

http://gr-research.com/av-o.aspx

I used the larger X-Omni as rear surrounds and they worked really well.  Should be an easy build too.

Here’s an old pic showing X-Omni and X-SLS.


Thanks!  And I like the black.  The X-SLS are sure popular.

 I looked at a lot of designs that Danny has up and saw a few in build thread of ones that he doesn’t have up, one of which is the X-MTMs.  I also noted that the Encore versions of the designs were particularly impressive in people’s minds.  This is why I asked Danny if that existed for the X-MTMs.  Part of the reason I gravitated to the X-SLS to go with the X-MTMs is they are both Encore versions and, right or wrong, I thought they might be the best match together versus matching the X-MTMs to some other speaker.  I also wanted to do something that was a step up from the AV line Danny has as this will likely be a dual purpose system.

I can’t say exactly what drew me to the MTMs, but something did.  Maybe it is my old school way of thinking - Bigger is better.  The best stereo system I ever heard was the sound system for a Deep Purple concert in Cornell University’s football field.  It was a 3 way system comprised of 14 base driver cabinets, with 2 drivers per cabinet and each stood between 5 and 6 feet high.  7 of these on a side.  On top of each set of those was a cabinet with an array of mid range speakers and on top of that was a big horn tweeter.  From the center of the football field to where I was sitting, the start of Pink Floyd’s Dark Side of the Moon (pre-concert canned music) was moving my pant’s leg.  This is the sort of BIG I grew up with...   :o. Maybe that was the attraction of the X-MTMs.  But, I do know now that big isn’t aways better... I should know that, I drive a MINI Cooper (a quicker version).  :duh:

For now I am committed to the X-MTMs for the fronts.  But for the rears, there is still time to change my mind.  There is a lot to be said for the X-SLS for the rears.  But, you having pointed me to the AV-Os or the X-Omnis, has me thinking about the spacial aspect they might provide.  Tis to think about...  But, then there is the acoustic tile ceiling they will be playing up to.  As I said before, I have a tough room to fill.

But there is another consideration to my madness.  That is, there is a second room in my house that might be able to use a set of X-MTMs or X-SLS.  So I might be in for a long speaker build adventure.

 :thumb:

mlundy57

  • Industry Participant
  • Posts: 3561
Re: Amateur Build of the X-MTM Encore
« Reply #17 on: 4 Jun 2020, 03:09 am »
I've built, and listened to, the X-LS Encore, X-CS Encore, X-SLS Encore, X-MTM Encore, and the X-Omni. The X-LS and X-SLS Encore are the same speaker in different cabinents. The X-CS and X-MTM Encore are the same speaker in different cabinets. When compared to the X-SLS Encore, the X-MTM Encore plays deeper and has more weight and body in the midrange. The advantage of the X-SLS Encore is that it is shorter so not as imposing in the room. For front main speakers I prefer the X-MTM Encore.

Mike

jonsk2514

Re: Amateur Build of the X-MTM Encore
« Reply #18 on: 4 Jun 2020, 01:45 pm »
Mike - Wow - I knew that some here on AC were prolific builders...  :thumb:
I appreciate the review.  I also figured that I couldn’t go wrong with any of Danny’s speaker designs. 

I am sure, like a lot of people here, that the draw to building Danny’s designs is that the designs are really well thought out and have a strong technical background.  And he has done will with his videos to showcase his knowledge.  As I said, my original thoughts were to somehow upgrade the ESS speakers I have.  The $18 woofer I put in years ago needed to go.  So I started to look for what might be better.  While looking for replacements I got some “recommendations” for some of Danny’s videos.  I watched a few with him explaining what he liked and disliked about base drivers.  For me, his explanations passed my common sense test and filled some holes in my knowledge (not that it is much beyond basics).  So, my next thought was to take that new knowledge and pick drivers.  Well, then my concern was whether the crossovers would work or would I need to change it.  Then there was a discussion about multiple small drivers being better than one large driver and one Cap design being better than another.  And then, and then...  You know were this is going.  The more I learned and thought about it, I realized “I can’t get there from here” and he has done all the work I was trying to, and has the knowledge to do it, which I really don’t.  A few emails with him convinced me that building a kit or 2 or 3 was the way to go.  I like the building part, so here I am.

And, I have read enough posts here to see that there are a lot of people here who have “been there, done that” and are helpful to one and another to make me feel comfortable in what I have set off to do...

jonsk2514

Re: Amateur Build of the X-MTM Encore
« Reply #19 on: 4 Jun 2020, 06:43 pm »
With my skill set and tools I thought that I needed to do something different with mounting the braces within the cabinets.  What I had seen was either butt joints or routed recesses.  The butt joints looked to be something that I would need more hands and jigs than I have to assemble it.  The routed version seemed to need a precision that I think I would struggle to meet and it would take time, even though I am sure it can be done.  Also, I know that having a recess in the MDF will greatly weaken it before the cabinet is fully assembled.  In my hands I would fear breaking a board before I got to the assembly stage.

My plan is to locate the braces on the side walls using common 1/2” quarter round.  The quarter round will preclude unwanted reflections and can be covered by a bevel on the no-Rez.  The front and back ends will then just be glued as butt joints.  Peter R introduced the PL construction adhesive in his video for installing the small diagonal braces in one of the smaller speaker cabinets.  This glue will tolerate less that tight tolerances that are required of regular wood glue.  By using this glue I can have the quarter round located to allow a little wider fit up gap that would be more than a routed gap.  This will also allow the braces to be cut slightly undersized and I don’t have to be perfect with their fit up.

For ease of assembly, I plan on making it in 2 (3?) steps.  First will be to glue the braces to the cabinet sides with the rest of the panels “dry fit” in place to make sure everything is square as the glue sets.  The second step will be to glue the sides/braces to the back, top and bottom. The 3rd will be the assembly of the front after the crossover and other stuff are done.  I guess that is 3 steps (at least...  :duh:)

I also considered the change in volume from the addition of the quarter round stock.  It is not insignificant; about 75in^3 per speaker.  To accommodate this, I found that opening up the holes in the braces by 3/8” on the diameter would about perfectly offset this difference.  Other options I considered were making the cabinet taller or deeper, both of which I discounted for the possibility of changing the tonal quality of it.

Here is the mockup I did with some 1/2”x3/4” wood I cut to approximate the 1/2” quarter round and some scrap MDF

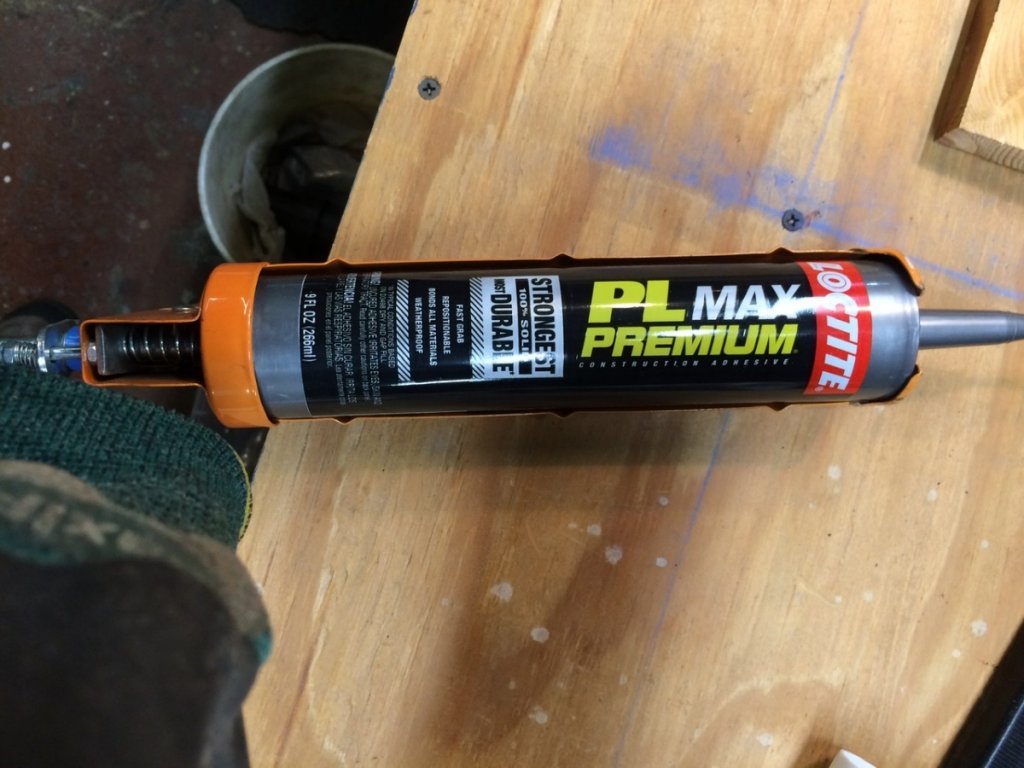
Not too exciting... The adhesive:

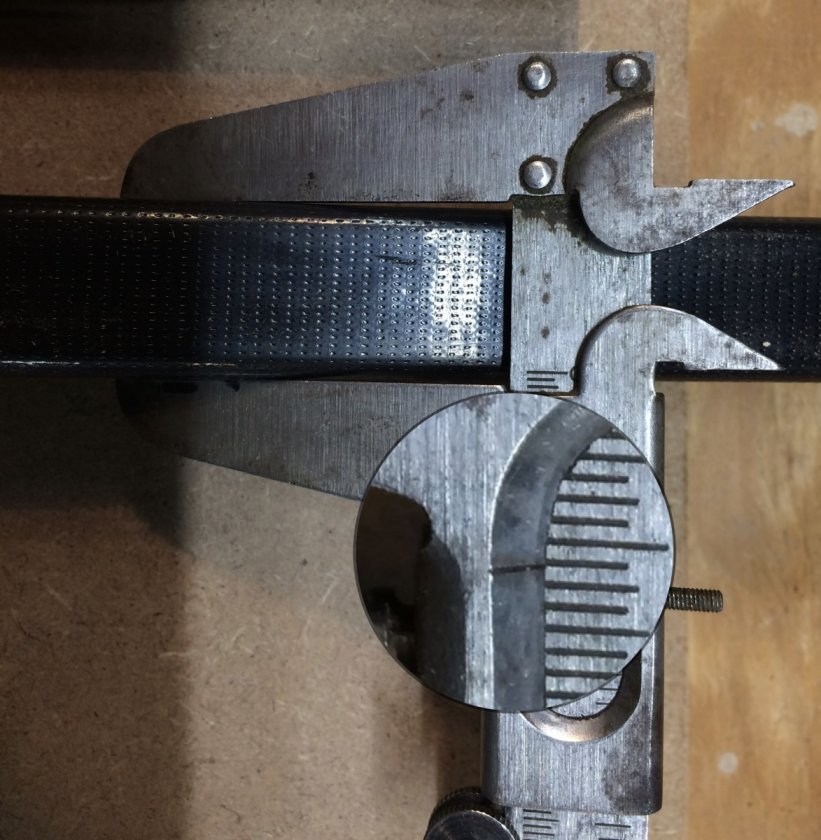
I set a line on the MDF for the 1st wood strip and then it was glued (Tight Bond slow set) and  tacked (brad nailer).  The pneumatic brad nailer worked great for this.  The second wood strip was then located with a 3/4” square steel tube with a piece of thick tape on it, which added about 1/32” to its thickness.  In the actual assembly I will use a single spacer bar laid across both panels at the same time to have the quarter round pieces pretty well lined up.

Spacer bar and thickness measurement with the tape.  This added clearance will allow for a bit of tolerance mismatch between the two sides.
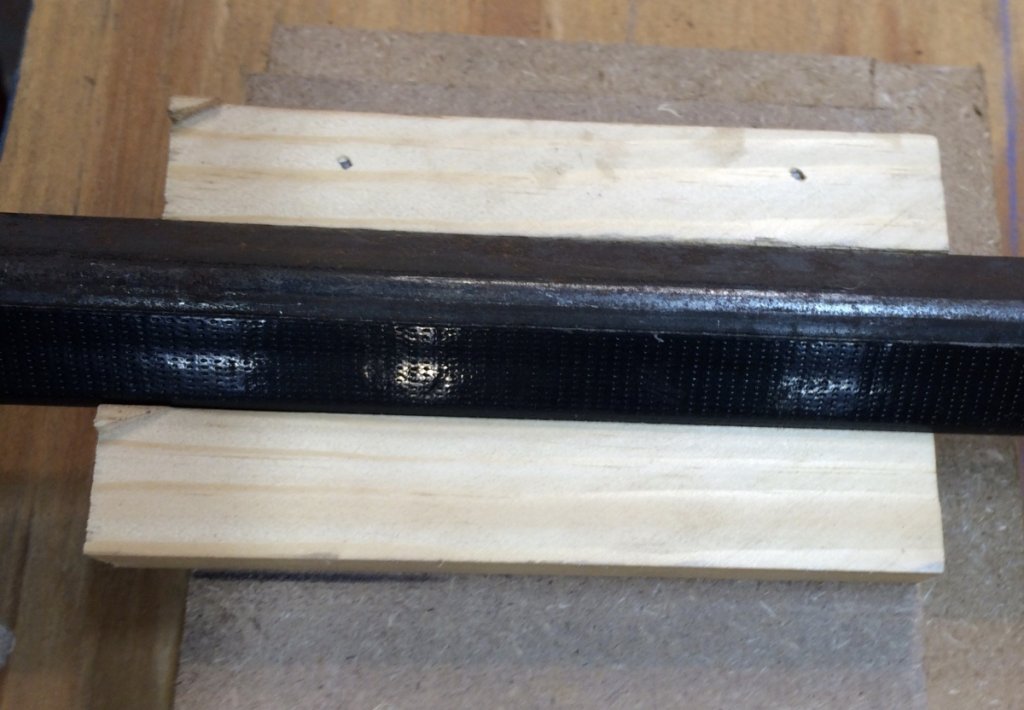


The PL adhesive on the pieces to show how it flowed.  This shows what it looked like with just one bead between the 2 wood strips.  Needed more to get up the edges...
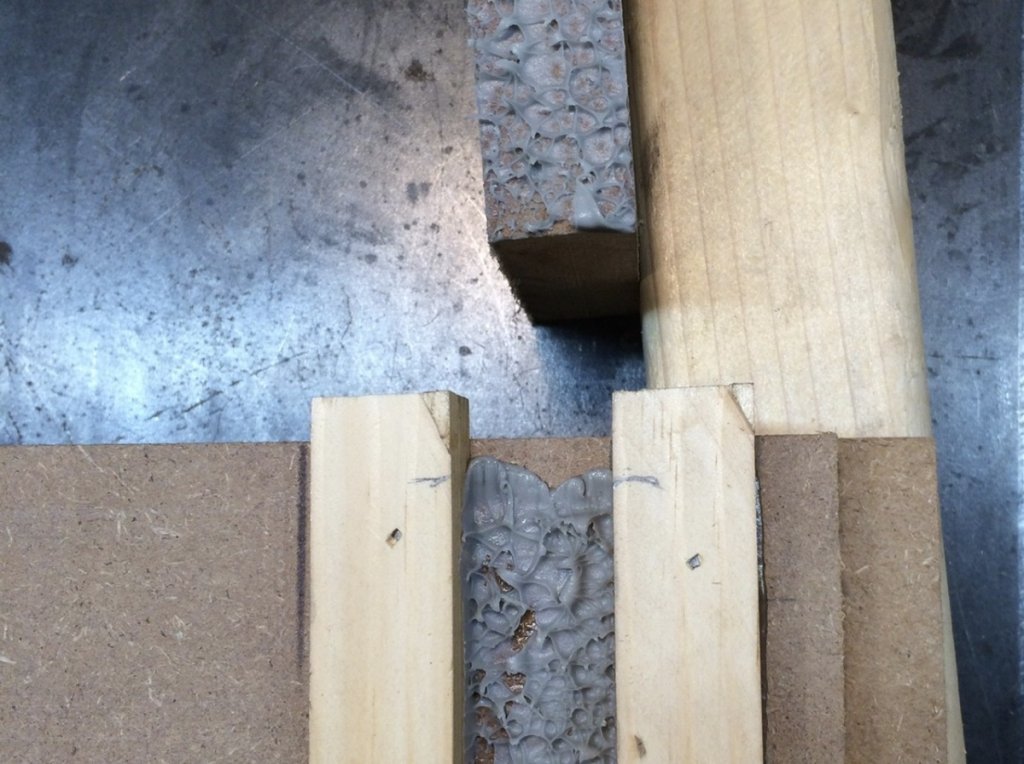


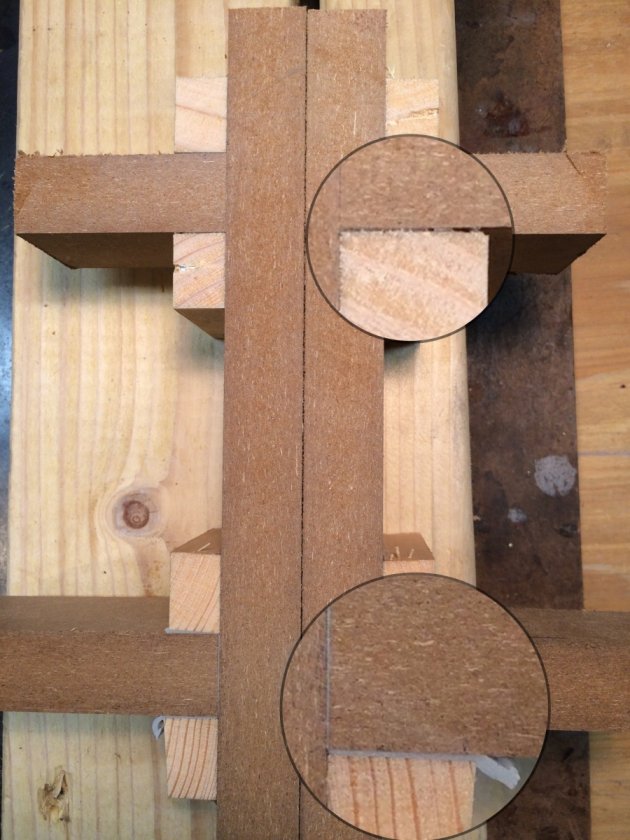
I did a second mockup using the Tight Bond.  Both were clamped in place; the PL one was done a day before the other.
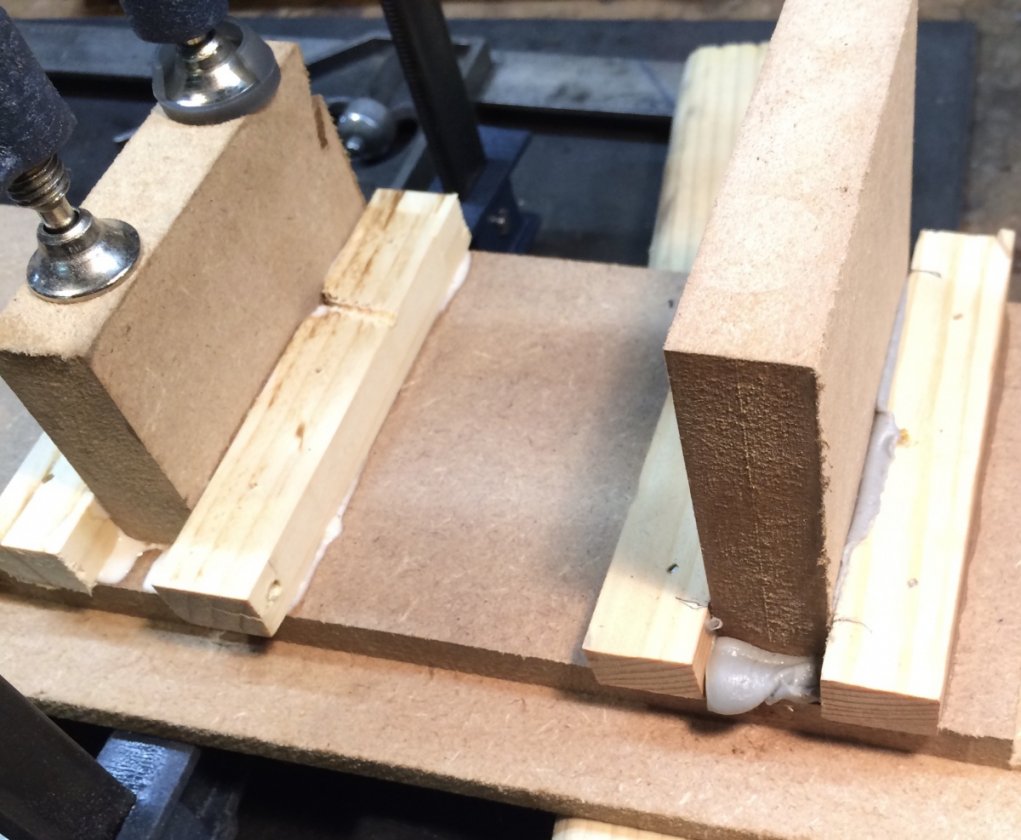


You can see that the PL moved nicely and filled the spaces.

I then sectioned the mockup to see what it looked like.  You will notice that I did less than a stellar job making the strips fully rectangular; they are a bit trapezoidal   :roll:   But as you can see, the PL flowed nicely and will take up imperfections in assembly.