Here are the original posts / images that Danny started this thread with...
============
I am going to use this tread to document a crossover assembly. I'll cover some do's and don'ts and try to make it as easy as possible to follow.
In this example I am going to be assembling the crossovers for Guys V-2's. This pair, along with a bunch of other stuff is going to Vietnam.
I will update this as time permits and as work progresses on the build.
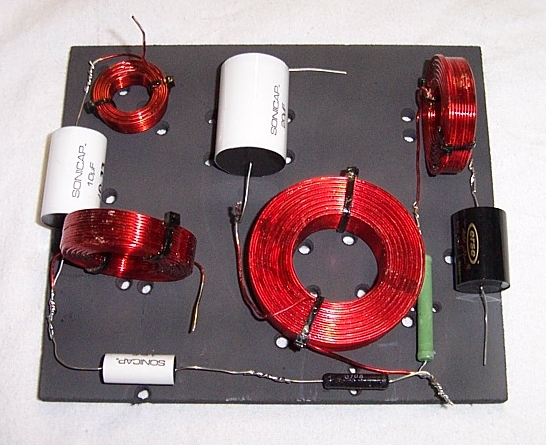
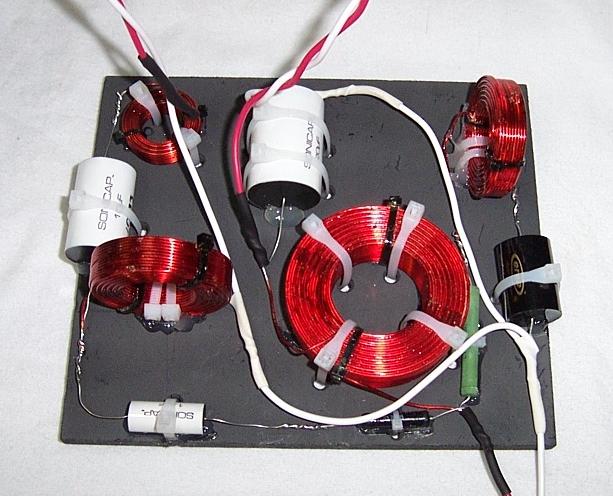
The first thing is to figure out the space available for the crossover. In this case the crossover is mounted on the back side of the speaker, in plain view, right below the open baffle coaxial driver.
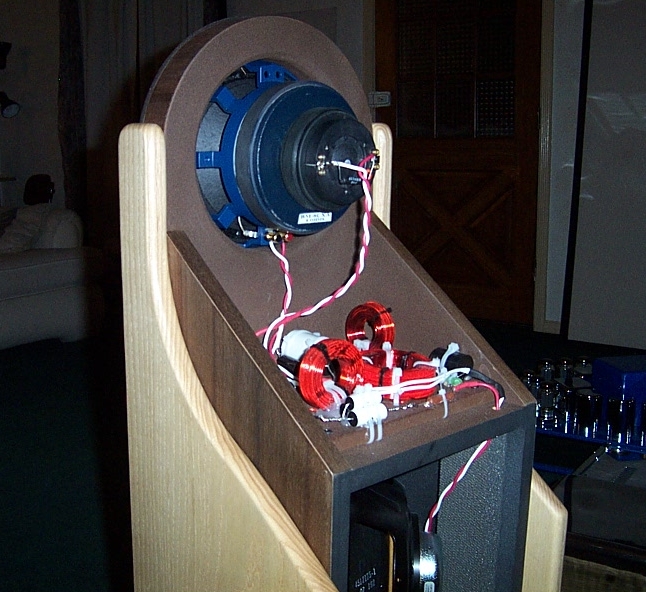
The space for the crossover leaves plenty of room for a crossover board that is 7.5" by 8.75". This gives plenty of room for layout without crowding.
More coming....
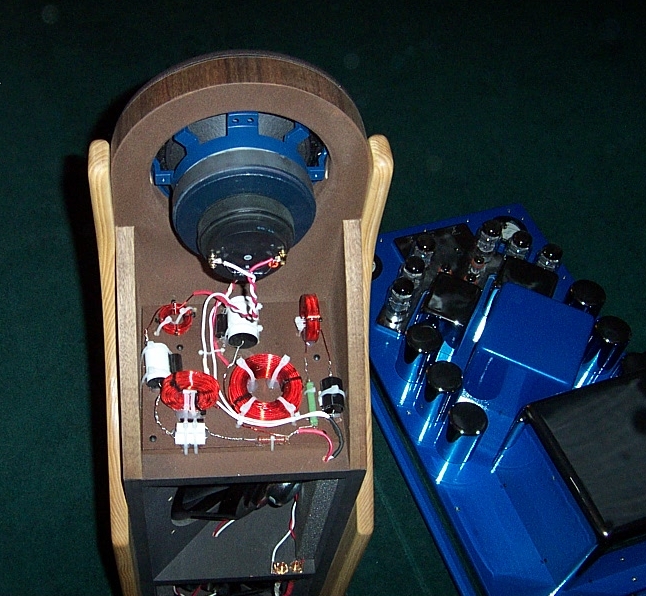
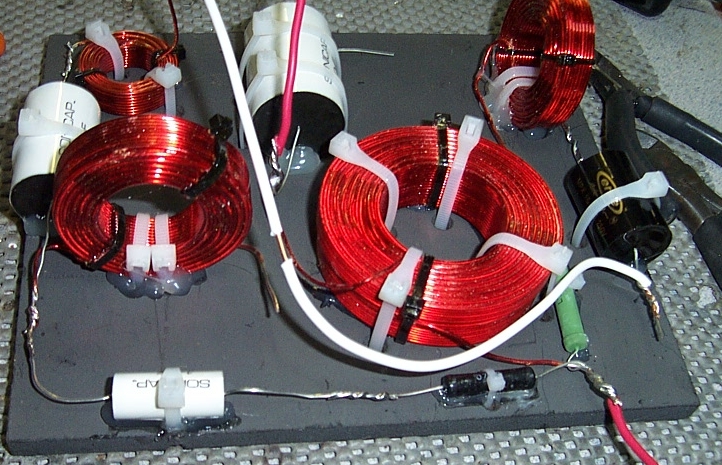
kay, once you have the space laid out, the next thing is to fit all the parts into that space.
Layout needs to be to where inductors are not facing the same direction. Ideally, if the smaller inductor that is up on its end were to roll, then it would not roll back and forth across one of the larger inductors. It would roll into or away from it. Then the further it is away the more it can be turned a different direction. 4 inches or so away and there is little interaction even if they are turned the same way. So different directions are good and distance is good.
It is also good to run all the caps in the same direction even though they are non-polar and work either way. The input and output terminations and such can differ and in some cases it can have some effect on the sound. So run them all in the same direction. Using the print direction works fine.
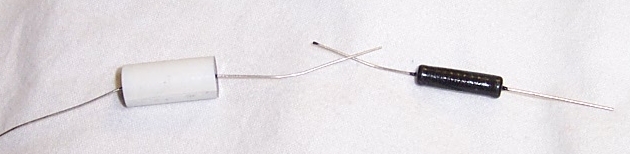
Twist each piece together so as to make one continuous wire. Don't loop one across the other to make the solder make the connection. Solder is not for making connections. It is for holding connections. So twist each together well, then run a line of solder across it to keep that connection from becoming loose or from not making good contact.
Where there is going to be a wire attached then you can let those connection stick up so that you have something to twist the wire to. You will also seal those connections with heat shrink so you will want to be able to slide heat shrink over the connection.
If just twisting two components together then there is no need to leave a connection sticking up that might short something out. Make one line out of it as if they shared the same wire.
Also, don't use connectors, screws, connection plates, or anything like that in the signal path. We want to keep it as pure and as uninterrupted as possible. No sense in using great wire then inserting a piece of tin or various alloy's into the path to create an insertion loss of some kind.
More coming...
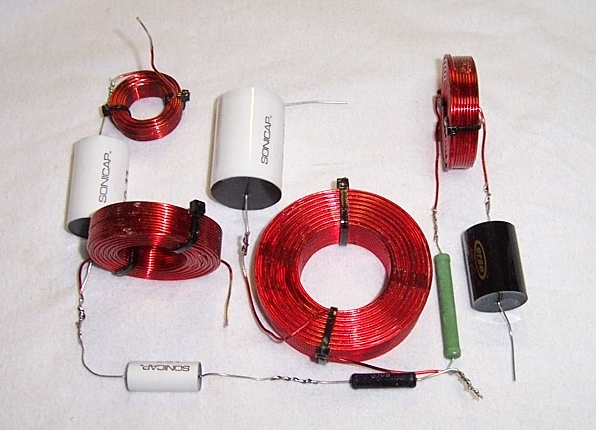
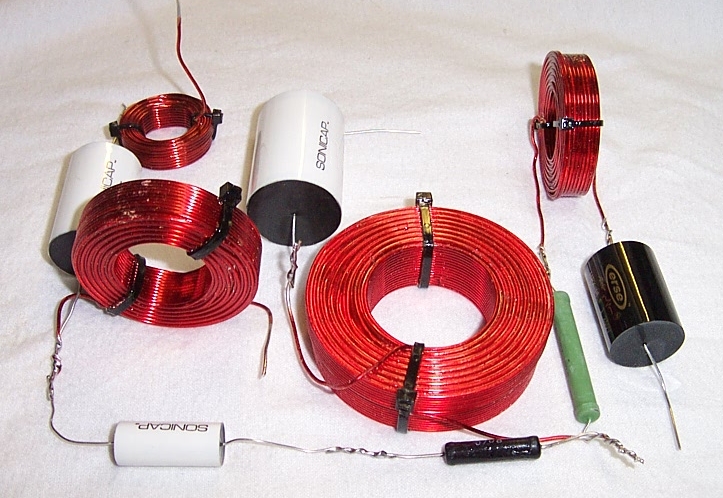
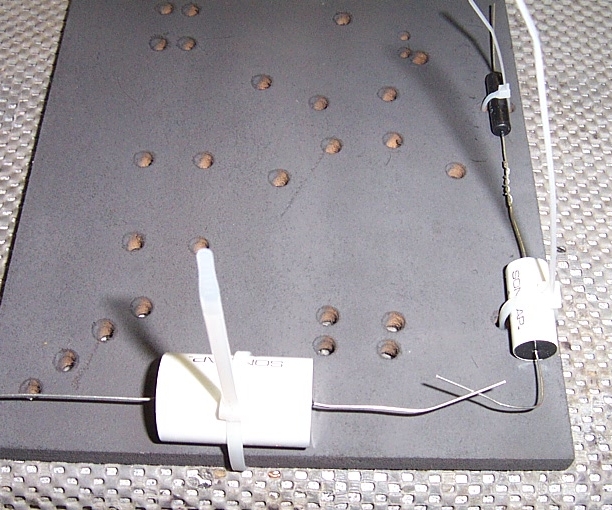
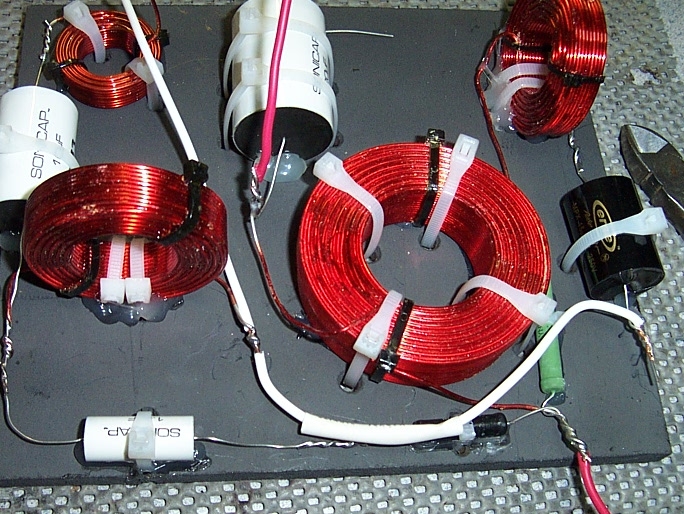
Okay, with the components laid out and connected, I then slide the pre-cut board under it.
Then I mark with a Sharpy all the spots for holes that I want to drill for zip ties.
When drilling the crossover boards I drill through both of them at the same time so that they are identical. So I drill the holes and clean up any rough edges.
You can then start attaching all the crossover parts. This one however is going to be exposed (seen) so the board is painted Black.
Now it is ready for the next step...
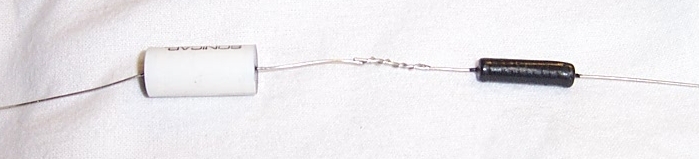
Here is more on connecting the components.
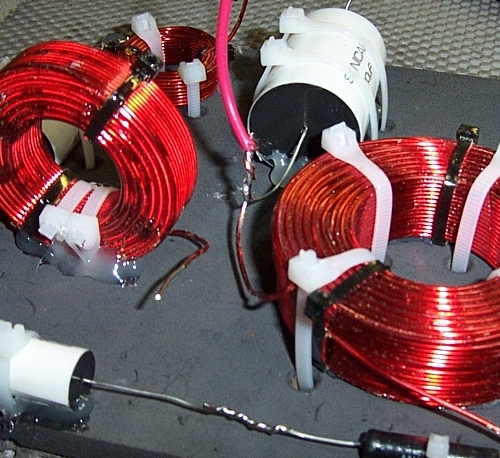
Let the leads overlap each other and twist from both ends. I often use a couple of small pairs of needle noise pliers to made twisting easier.
Twisting another crossover together like the first one and having it match the pre-drilled holes is not easy. So I zip tie each component to the board so that they are in the right position then twist the ends together.
Pretty soon you have one that looks like this. All joints have now been soldered too.
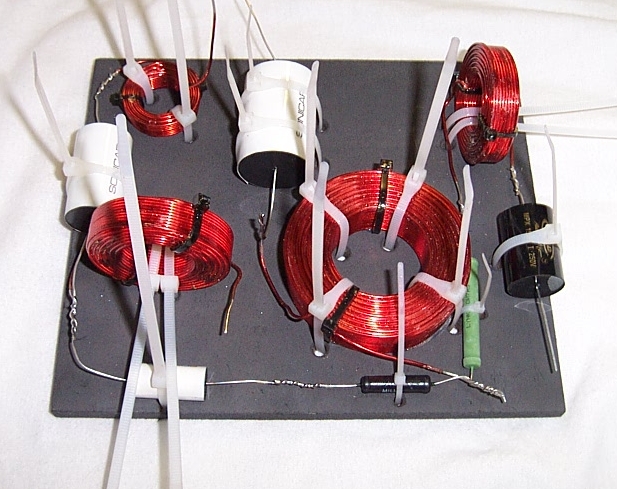
I also use clear Silicone under the heavy inductors to further hold their weight.
Then I zip tie the first cross to its board and trim the excess zip tie leads.
Next I go around each component and hit it with a little hot glue to make sure nothing moves or vibrates around.
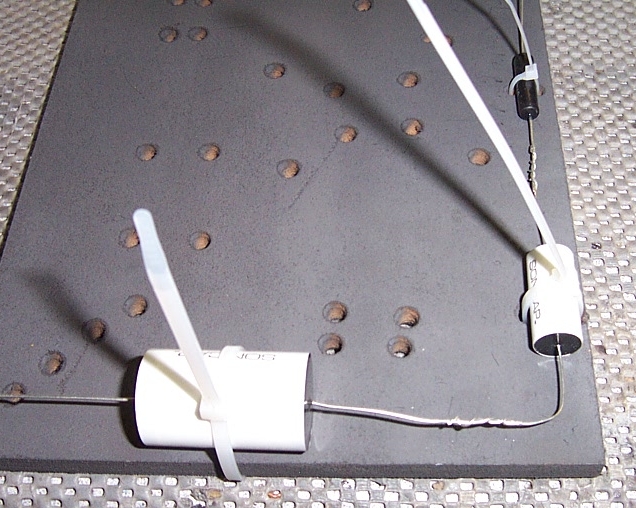
Then I start the wiring...
Positive to the woofer twisted on but not soldered yet.
Another important aspect of the solder is to seal the exposed Copper wire.
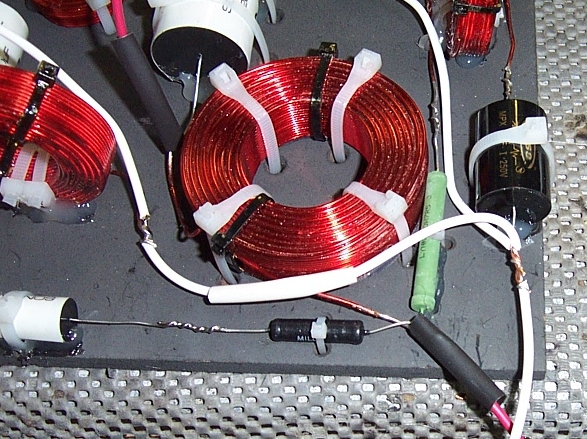
When we get to the negative wire we often need to catch the shunt leg of a component returning to ground. There is no real reason to cut little pieces of wire to make those jumpers. We can go from the driver straight back to the source with one piece of wire and just catch that inductor on the way with a little splice in between.
So I cut out a little piece where it will be twisted to the inductor. Just chop into it with the right sized stripper and pull a little in each direction to open up the area in the middle. If you need to open it up a little bigger then you can make two cuts with the stripper and use a sharp knife to slice out the piece in between. Just try not to scratch the Copper.
Don't forget to slide some heat shrink on before attaching the next end or you won't be able to get it on.
Now it is soldered on. Note the white heat shrink waiting for cooling so it can be slide down over it.
The continuous wire keeps a nice clean signal path. I like that much better than cut and paste of little pieces. It is faster and easier too.
The negative for the woofer is one continuos piece also. It catches that same point before heading on the source.
Now I can heat up all the heat shrink to seal everything up.
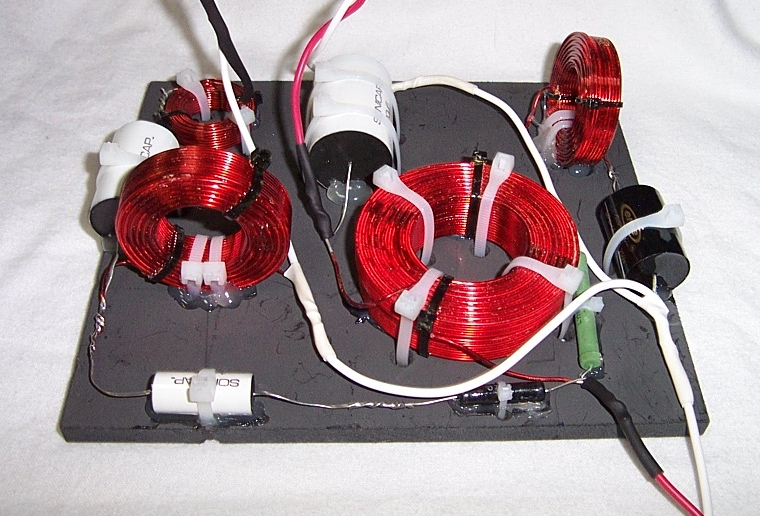
That looks nice and clean now.
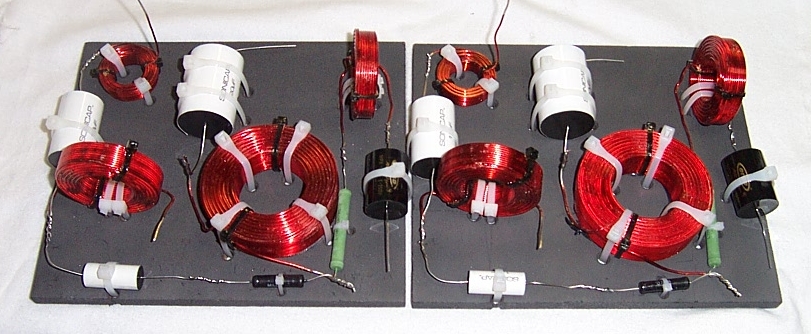
And this network, as easy as it was to assemble, has more parts, and takes slightly longer to build than most of the other kits that I offer. Only the Super-V, and three way kits like the O-3, OB-5, OB-7, and OB-7 Plus are more complex.
So if you are looking at any of my A/V series kits, N1's, N1X, N2X, N3, N3S, or the V-1, then all of them are even easier than this one.
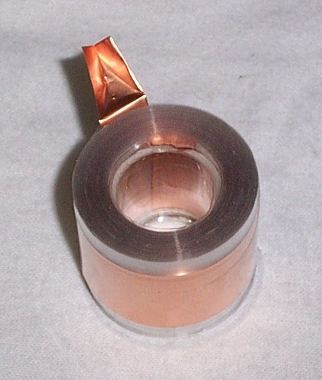
***Question asked about how to do foil inductor connection***
Okay, I pulled an old inductor that had an inner lead torn off of it to use as an example.
First cut the lead down so that it is not very long and fold a V or U shape into it so that it will easily hold solder and so that it will allow a little folding that can be done while soldering the wire to it.
Then put the soldering gun into it and heat it up will feeding solder into it.
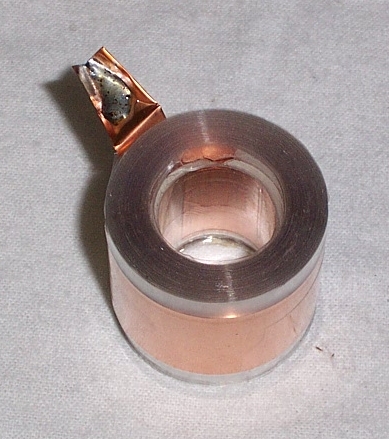
You'll also have to tin the wire.
Then put the soldering gun onto the inductor and heat that solder up until it starts to flow then insert the wire so that it is making good contact with the foil.
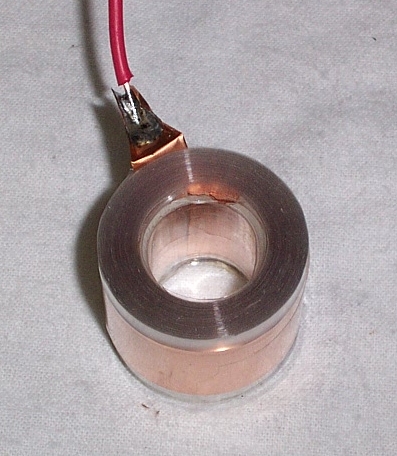
If you are real good then you can squeeze it with needle noise pliers while it is still hot and fold the foil over the wire to make a nice crimped connection too.
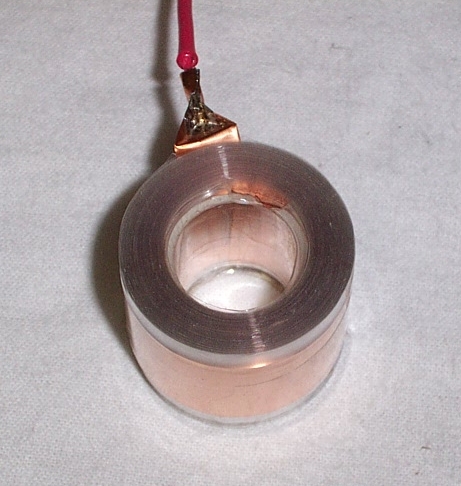
Then just slide your heat shrink down over it to seal it.
See, that was easy too.