On another forum I frequent, a project doesn't exist until you shown pictures to prove it. So here I thought I'd create a bit of a project blog/diary with some pictures of project progress. I was hoping to get the ball rolling and then maybe I'll turn it into a bit of a construction thread later with more pictures of the steps.
For now, it will just be proof that the projects exist and are under way. Excuse my lame pictures as I am not much of a photographer. An expensive camera does not a photographer make.
First up, some pictures of my Karna amp project. I just started it this weekend. I drilled out one PSU chassis and started putting it together before I ran out of fasteners.
I might put the chokes underneath as they are kinda ugly, but they are a little taller than the pan is deep. However, I was planning to make a wood base that was taller than the pan with kerfs for the lips to sit into. So I still may put the chokes underneath, or make covers for them.
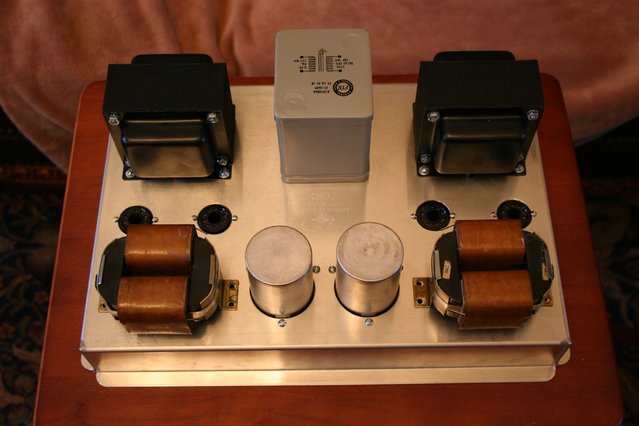
The two black transformers are B+ transformers one for the input/driver and one for the output, these are from Bud Purvine at Onetics. There are no filament windings on these, all filaments are seperate transformers. The grey transformer in the middle is a 6.3V 7amp filament transformer for the diode dampers. I got this from surplussales. Its old stock, completely potted and sealed. The chokes, from diyaudio, are 10H 250mA low dcr C-core chokes. One for output B+, one for input/driver B+.
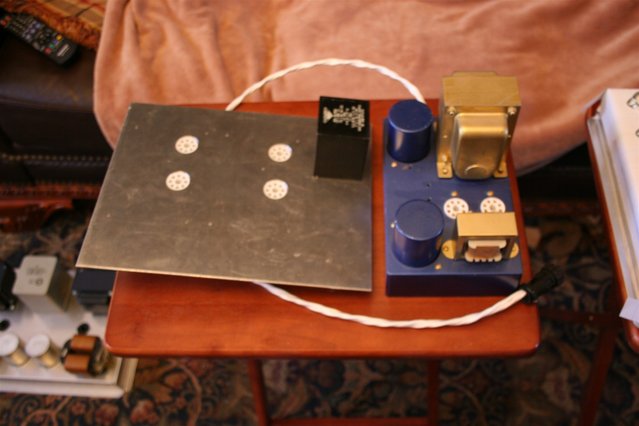
Next up is the main signal chassis for one channel...
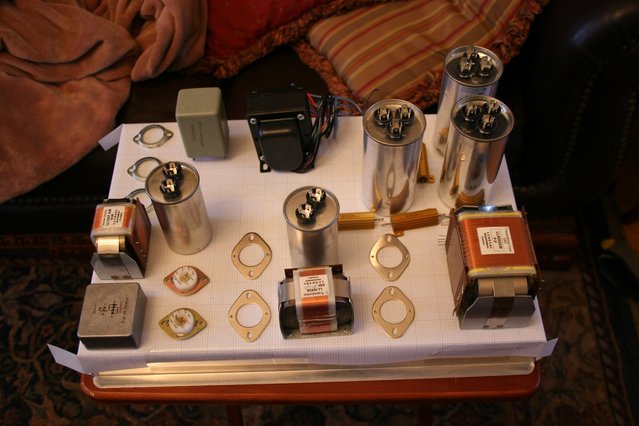
This shows how I did the layout. I tape graph paper to the top of the chassis, then layout everything as I like. Trace the holes and size with a pencil, then I drill out with my drill press. It isn't laser/cnc quality, but it works. I did the PSU chassis this way, but didn't take pictures of that step.
The input splitter is Tribute, the anode choke, interstage tx and OPTs are Lundahl amorphous. Right there you have a crap load of money. I am really going on faith that this will turn out well. I have certainly invested enough.
The black transformer is the filament transformer for the DHTs, both the 45's and the 300B's. The little grey one is a 6.3V/1.2a filament transformer for the input tube(s) also obtained from surplussales.
Right now I am contemplating using the front end from K&K's PP300B amp proposed a long while back. It is topologically the same as the PP Input section up on his site now but with 2a3/45's instead of the 6bx7s. It was taken down some time ago but I still have a copy. This means that I need to edit some things in order to fit the K&K input section into the Karna amp using the Karna's input/driver PSU circuit.
The key differences are in the original Karna circuit the input tube is a 5687 loaded into an interstage transformer into the 45's into another interstage. With K&K's, the input tube is a 6SN7, although you could also use a 5687, DC coupled to the 45's with a PP anode choke load on the 6SN7's. Kevin stated that he liked this front end better in his own amps. It takes one interstage out of the signal path and DC couples the two stages together while still giving the input tube a choke loading. I like it. Izzy-wizzy's site has shown a few variations of these ideas with his 813 PP amp based on the same topology as the Karna.
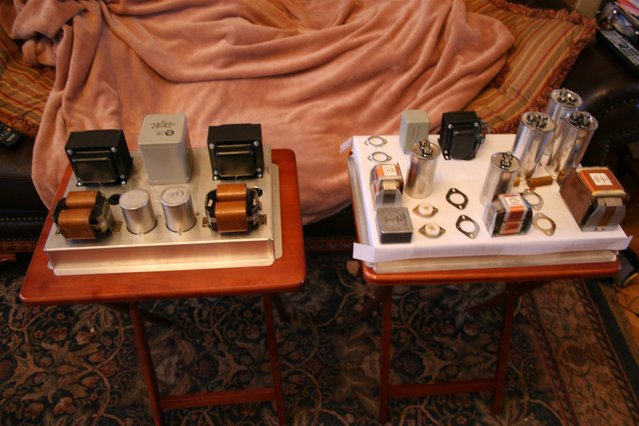
Here is the side by side, one PSU chassis and one Signal chassis. Mind you this is for one channel only.
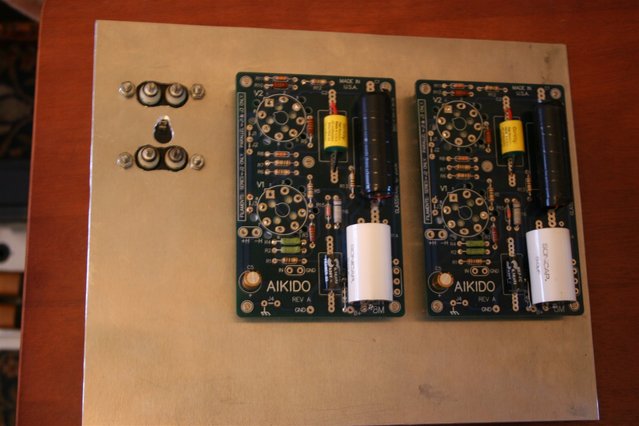
Next up is the state of my Aikido preamp...
I was planning to go into the basement and try to start on the base today. We'll see if that happens.
I have a main signal chassis and seperate PSU chassis. I was experimenting with painting and color on the PSU chassis. I don't think it will stay this color though, especially since I scratched the hell out of it when futzing around on the inside. It has a Felix built in, btw.
Underside of the top plate...