Hello, I've just joined the forum after finding it via some searches on BeoLab 1s.
I recently picked up a pair of these speakers, and a sub, as part of my first B&O system. I'm really looking forward to using them.
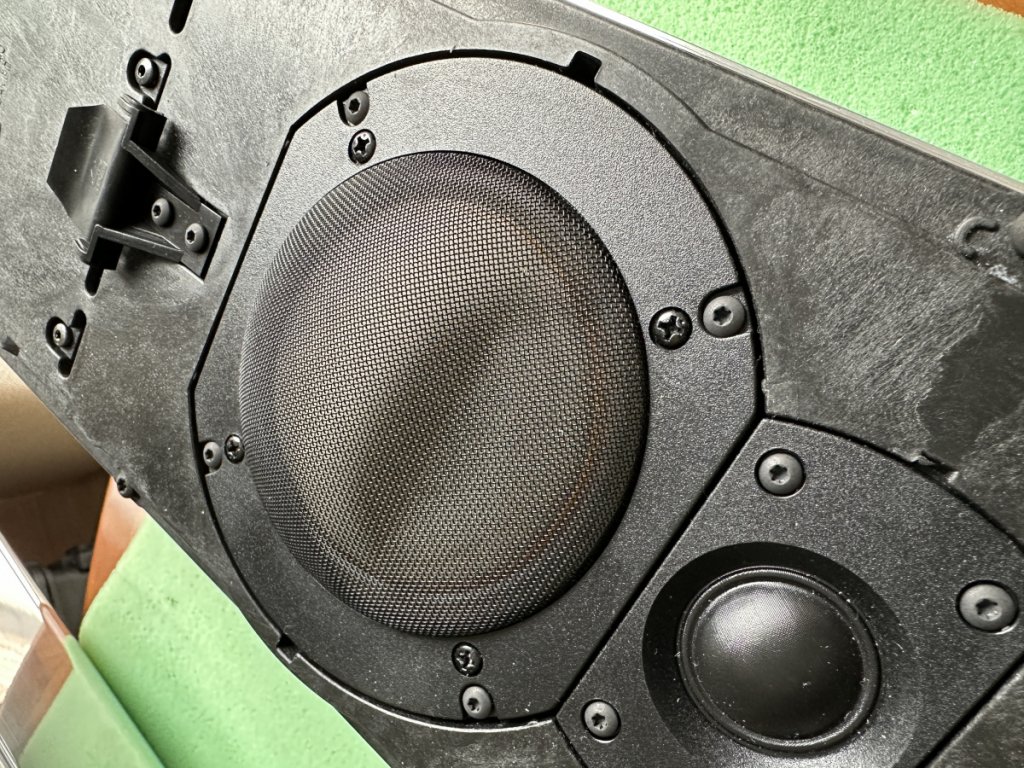
As part of my setup I have been cleaning them. All though they are in very good condition the fasteners are all mild steel and there was an amount of dissimilar metal corrosion and rust. I have swapped every fastener out for stainless steel versions and some of the old ones were so badly corroded they snapped while being removed.
I'd recommend making the swap to anyone picking up a used pair. You can see the state of some of mine below and these speakers weren't abused or kept outside (I picked them up from an older gentleman with plenty of money who had them in his living room).
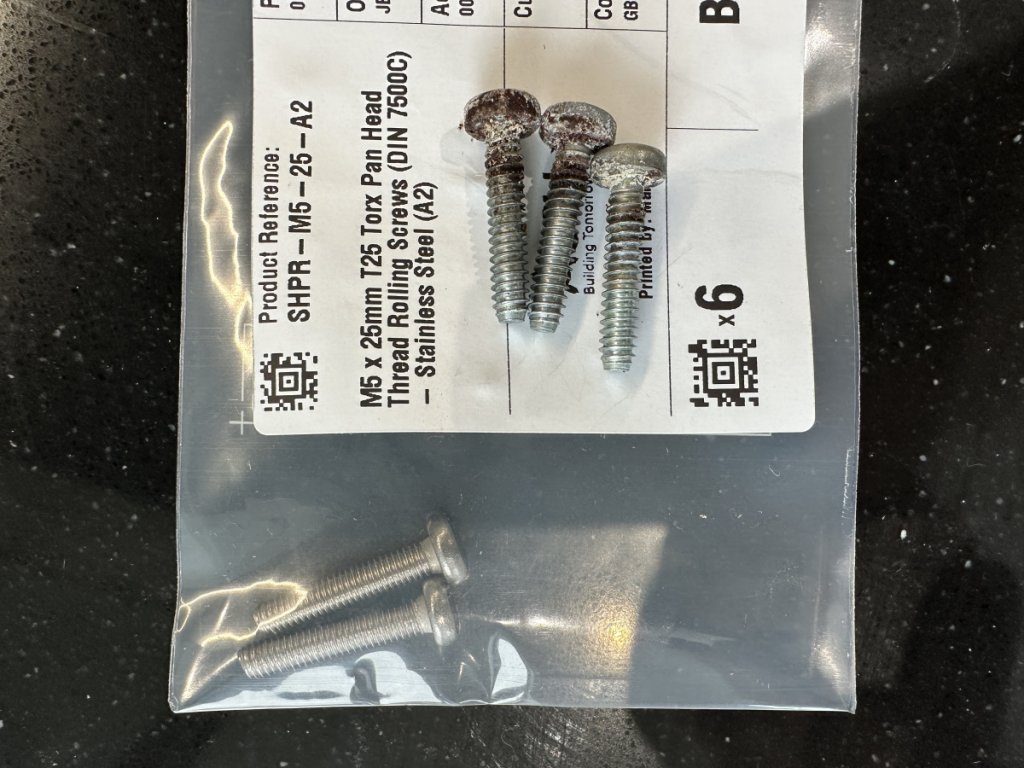
The screws in the speaker are all thread rollers which threw me a little.
If you try to measure the threads, or use a "thread detective" (a set of labelled bolts and nuts in known sizes you can use to test unknown fasteners to determine their size) these won't be identified. All M5 connectors you can by have .7mm threads with extremely rare exception. When you measure the threads on these connectors though they are 1mm. A size I can only find used in a single place (a Mercedes Benz door lock) and is basically impossible to buy.
They are in fact 0.7mm thread rollers (also known as thread forming screws). Designed to have a tight fit into plastic or thin metal because they cut their own threads as they go. These are much more common and a perfect fit.
Some of the M3 connector replacements for these speakers I found are labelled as 30º or "Polyfix" for similar reasons - another label for thread rollers. I got identical parts for every replacement with the exception of one connector. The speakers use M4 x 18mm T20 Torx Pan Head Thread Rolling Screws in black which is a really odd size. I got 16mm versions of that in black Stainless Steel after careful measuring. They are a perfect fit and the 2mm difference makes no difference to the connection (as the screws are very close to hitting the cabinet walls). I think in fact that contacting the walls might have lead to some of the corrosion thanks to unintended electrolysis.
Just don't make the mistake I made and try to measure the threads directly. They will read as weird and you'll never find matching parts. Given B&O's pricing and these being the top on the line when released I'm surprised they don't use stainless fasteners by default but it's a cheap and easy fix. I reccomend you remove the old fasters in sections, with the speakers on their backs, so nothing moves and there's no chance for anything to fall out.
I also have a question.
One of the domes over one of my midrange drivers has a small dent (shown below). I would like to pop it out but to do so I need to remove it. I removed the driver but none of the screws I can see appear to release the dome. I know another user here who did extensive Beolab 1 tweaking removed their domes entirely. How is this done? I'm assuming they weren't cut off. I just don't want to open them up more than I need to exploring a solution someone else has already found.