Built this pair of X LS Encores with kind of a dual purpose, 1 they are to be a gift for my nephew and his GF who both just graduated from university and are both music lovers, and 2, we recently heard a pair of pretty pricey mini monitors in a local audio shop that I felt compelled to shame with a pair of these so that's what they'll do before heading to their new home

Started out as your typical build, this time I lined them with no rez before gluing onthe front baffles just to make things a bit easier. I also used a single biscuit on each panel to just aid in alignment while clamping them up. As you can see in the pic, instead of using the .75" square cross brace, I always use a piece of .75" round stock as I've got a bunch lying around, probably no difference but I like to eliminate the sharp edges if possible

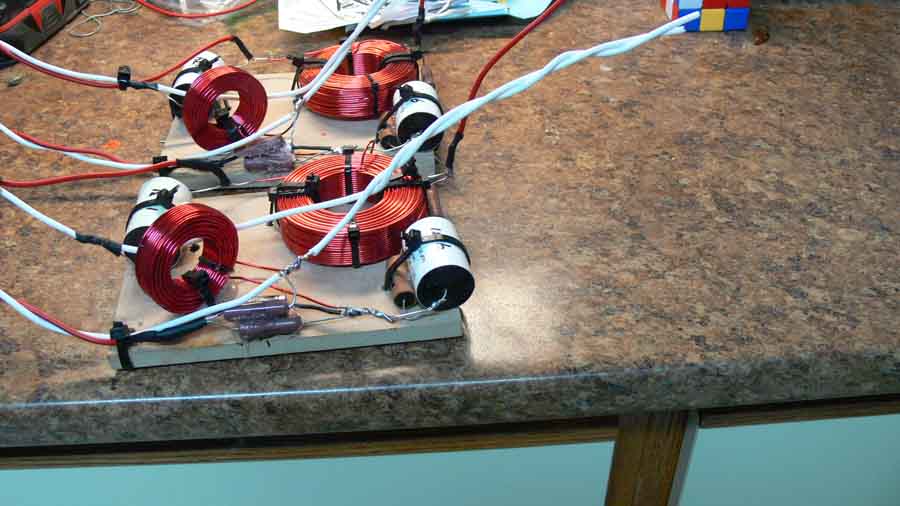
We decided to go ahead and upgrade the networks. P2P wired, Sonicaps bypssed with a Jupiter Copper on the high pass, bypassed with a .22uF Sonicap on the low pass. A Clarity ESA cap was also used on the high pass circut as well. Mils resistors and XO inductors completed the networks. I used a board slightly longer than the PCB , it let me space out the inductors a bit more
I had some rotary cut Red Oak leftover from a previous build and decided to use that up , sorry, I didn't take any pics during the actual process of veneering, only my 2nd veneer project and pics were the last thing on my mind .
Anyway, after wrapping them in the veneer, I wanted to do something a bit different. After talking to my nephew and determining that he and the Mrs both liked red, I decided to make these REALLY RED.
Picked up some dark red Aniline water based dye, mixed it up and gave the cabinets a sponge bath. Somewhat tricky to try and keep the color uniform on both cabinets and in all areas, kind of a messy process too as the dye tends to get EVERYWHERE.
After the dye, the cabinets were kind of dull and had no "pop" so, out came the Dark Walnut Danish oil, I used 600 grit paper and did 4, 1/2 hr soaks lightly sanding with the oil soaked paper and keeping the veneer wet for the duration of each session. Along the way, some problems arose, in a couple places around the woofer cutouts, the light sanding seemed to remove the dye and after it was removed, nothing would take, seemd the more I tried , the wore the issue got, I think I was actually into glue coming through from the back side, both speakers were having the same issue right around the woofer cutouts

Mouinted the drivers to see how bad things actually were


Talked to a woodworker buddy and he suggested I try using some lacquer based toner to blend the troubled areas into the grain...my artsy niece was the perfect person to tackle this, you'll see the results in a sec.
After she did her thing, I proceeded to apply numerous coats of wipe on satin poly. After the 4 th coat I started lightly sanding with 800 grit ontinuously doing so after each 2 coats. As the poly leveled out, I kept moving to finer paper before finally finishing with 2000 grit.

So, in the end, they did come out pretty cool looking imho. If I were doing the same finish again, I'd use more dye and have them end up a bit darker Got lucky with the repairs around the woofer cutouts, my niece did a great job of dealing with those.
Set these up last night to start getting some hours on them and man, they really sound great

Here a few more pics of the end results


jay