TL;DR: Never sand edges of painted surfaces. Keep practicing with a spray gun until you get a nearly perfect finish right off the gun. Use mistakes as an opportunity to improve setup, tools, and technique.
After an excellent brunch and a visit to the local, open-air Weihnachtsmarkt, I had the afternoon free to work on speakers.
I had sprayed on 3 coats of enamel a few days ago and other than a few small drips, they looked pretty good. Sanding and polishing test strips had gone reasonably well, so I started with 320 grit and worked my way up. At 400 grit on the first cabinet, I burned through on a sharp corner. Crap. It looked repairable so I kept on working and got up to 1000 grit. The surfaces were starting to be reflective but I had burned through a few more sharp corners. Using a triangle of thin plastic sheeting, I lightly covered the exposed sections. I figured I'd let them dry overnight and sand them lightly with 800 grit in the morning.
On to the next cabinet. Burned through 2 sharp corners with 320 grit. Now, I had been trying to learn from my earlier mistakes so this was rather annoying. I was carefully sanding outward from the center so I wouldn't cut hard into the edges. When I free-handed the roundovers, I ran over the sharp corner where two roundovers meet and instantly burned through. *sigh*
Moving on to 400 grit, I burned through next to one of the driver holes. Touching up the exposed sections wasn't going to work near the driver hole. It would need to be sanded flat and then worked up to 2000 grit. A thin layer would never hold up. Time for a new plan.
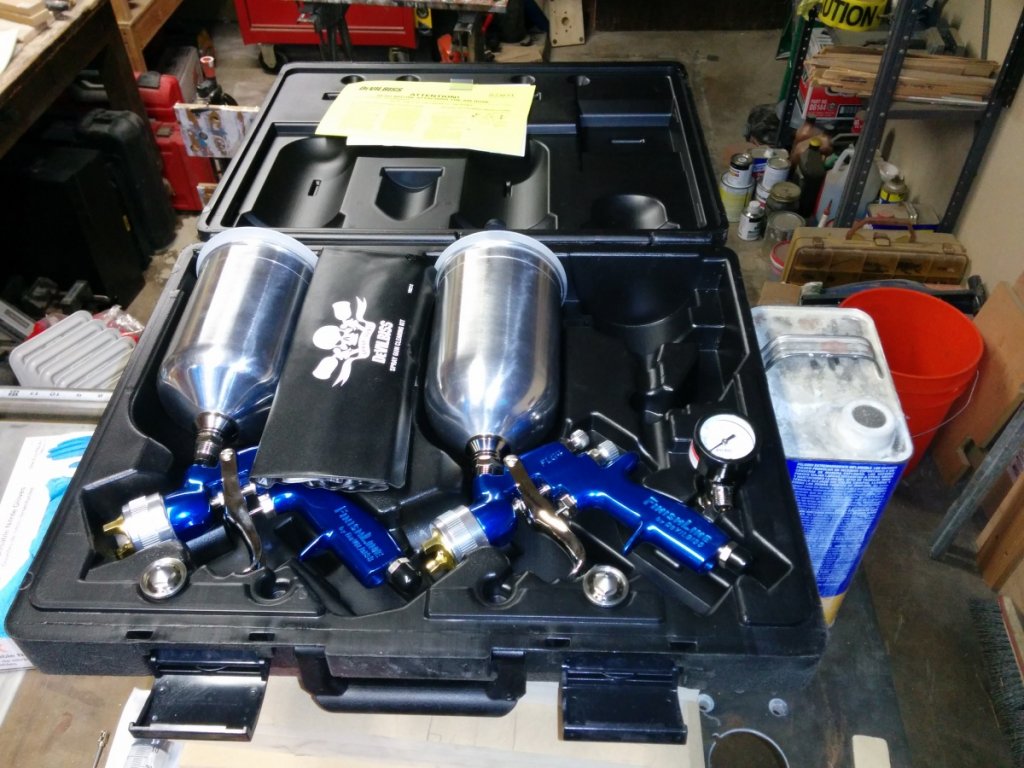
Spraying a new coat seemed the most reasonable plan. If I could get it nearly perfect right off the gun, I could skip the whole sanding madness. Part of the problem had been the Rockler HVLP gun I'd been using. It works OK but throws globs occasionally and wasn't very consistent. I'd already purchased a pair of DeVilbiss FinishLine 4s so that part was easy.
The spraying setup using struts to suspend the cabinets had worked out reasonably well but there had been a few areas that could be improved. For starters, I used the extra sections of strut (it only comes in 10' lengths) to create a lower tier to mount from. This gives a little more flexibility in positioning as well as stiffens up the whole support structure.
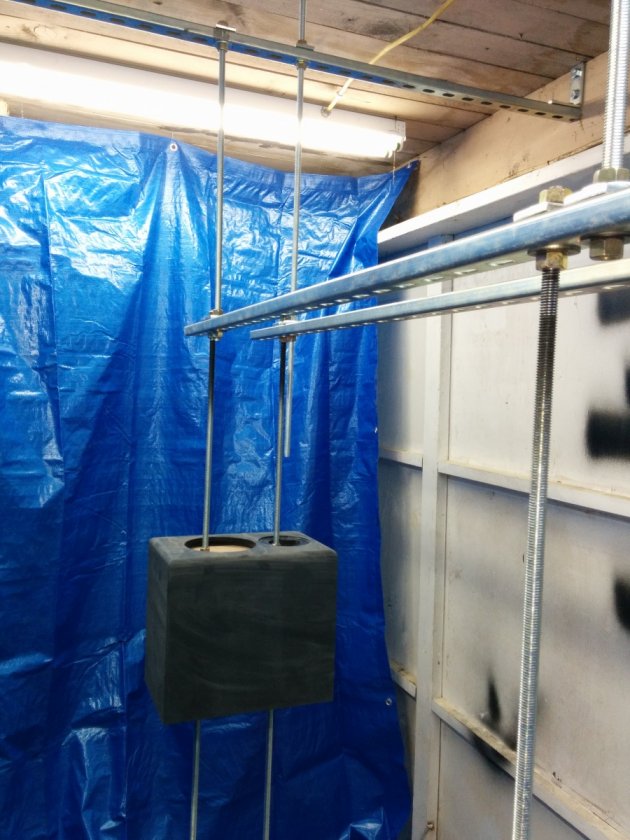
Last time, I had suspended the cabinets such that the front baffle was facing the ground. Attempting to spray all 6 sides in one pass turned out to be do-able but only barely. Gravity-fed HVLP guns don't work very well when aimed upward. This is probably part of the reason I burned through in so many places. On the other hand, the back of the cabinet (which was facing upward) was considerably smoother and had no issues with burning through. Ideally, I want to paint the top and sides, then flip the cabinet and paint the top again. Additionally, attaching the cabinets to the support structure was nearly impossible. Holding up the cabinet from inside while attaching a washer and nuts through a driver hole ends up being challenging.
This time, I solved both problems (I hope) by mounting the plywood in the middle of a 4' section of threaded rod. That way, I can flip the cabinet over and remount it without having to mess with nuts and washers inside the cabinet. It also means that mounting the cabinet is now just a matter of holding it by the threaded rod and attaching a nut and washer on the top side of the struts. _Much_ easier.
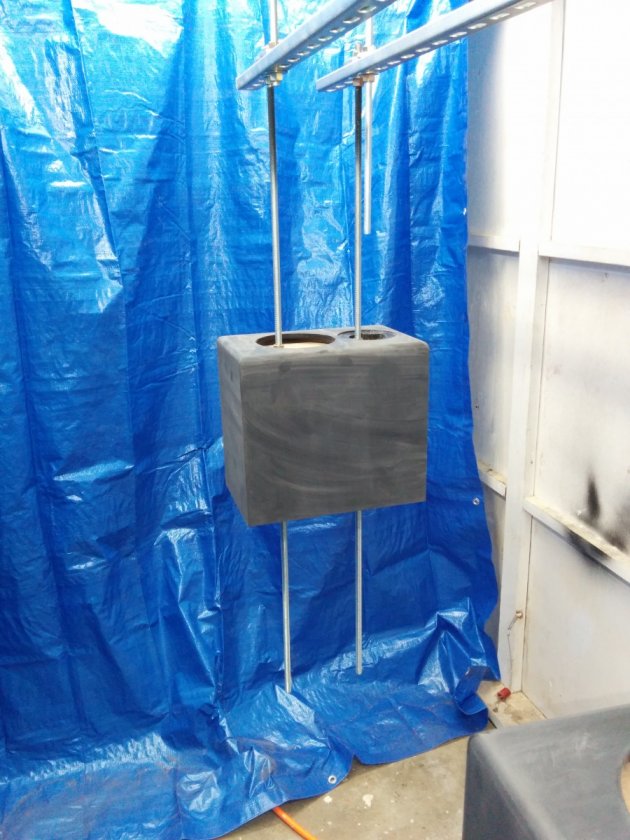
Finally, there was only a single light mounted in the center of the spray area. That means that it was pretty hard to see the pattern when working on the far sides of the cabinets. I added two additional lights on each end of the spray area. Now I have nearly 200W of fluorescent lighting covering most angles.
Of course, all of this took the entire evening to do. Painting will need to wait until the morning.