X-LS Classic build

0 Members and 1 Guest are viewing this topic. Read 7106 times.

kc8apf

  • Jr. Member
  • Posts: 181
  • Are you sure what side of the glass you're on?
X-LS Classic build
« on: 5 Sep 2013, 06:01 am »
I've been meaning to build a GR kit for quite a while.  My sister's birthday was coming up so I asked if she'd like some speakers for her new apartment.  The X-LS Classic kit is on its way.  Time to pick up some MDF and build the cabinets.

kc8apf

  • Jr. Member
  • Posts: 181
  • Are you sure what side of the glass you're on?
Re: X-LS Classic build
« Reply #1 on: 23 Sep 2013, 05:52 am »
Spent the past few days getting all the pieces cut out, holes cut, trimming the coutersinks, etc.  After a last-minute run to find more biscuits, both cabinets got assembled.  Didn't grab a picture of them with the clamps on but here's one of all the pieces laid out for assembly:


cody69

Re: X-LS Classic build
« Reply #2 on: 23 Sep 2013, 10:44 am »
Looking great. Very generous making these for your sister, she is definitely going to enjoy them.

What are your plans on finishing the cabinets?

bdp24

  • Full Member
  • Posts: 884
Re: X-LS Classic build
« Reply #3 on: 24 Sep 2013, 12:09 am »
Spent the past few days getting all the pieces cut out, holes cut, trimming the coutersinks, etc.  After a last-minute run to find more biscuits, both cabinets got assembled.  Didn't grab a picture of them with the clamps on but here's one of all the pieces laid out for assembly:


What size biscuits do you use on boxes this size?

Danny Richie

Re: X-LS Classic build
« Reply #4 on: 24 Sep 2013, 03:55 am »
What a nice brother... :thumb:

kc8apf

  • Jr. Member
  • Posts: 181
  • Are you sure what side of the glass you're on?
Re: X-LS Classic build
« Reply #5 on: 24 Sep 2013, 04:10 am »
Looking great. Very generous making these for your sister, she is definitely going to enjoy them.

What are your plans on finishing the cabinets?

I've been practicing w/ 2K urethane for my own projects but she wants matte black :duh:.  My plan is to start with marine epoxy as a base/primer, do a few coats of spar urethane, and then top it with a satin black alkyd enamel.  It won't be matte but I think she'll like it.

kc8apf

  • Jr. Member
  • Posts: 181
  • Are you sure what side of the glass you're on?
Re: X-LS Classic build
« Reply #6 on: 24 Sep 2013, 04:13 am »
What size biscuits do you use on boxes this size?

I'm using #0.  That lets me fit 2 across on the 8.5" edges fairly easily.  Honestly, I only use the biscuits to help with alignment when clamping.  I've built boxes with plain butt joints before and never had a problem.  I just got lazy.

bdp24

  • Full Member
  • Posts: 884
Re: X-LS Classic build
« Reply #7 on: 24 Sep 2013, 01:00 pm »
Thanks. Alignment is the very reason I picked up a joiner. I'm also going to try some dual 45 degree corners.

kc8apf

  • Jr. Member
  • Posts: 181
  • Are you sure what side of the glass you're on?
Re: X-LS Classic build
« Reply #8 on: 4 Oct 2013, 04:30 am »
I took some time to try out the finish method on another project where the appearance doesn't matter much.  Marine epoxy (Raka) went on fairly well and 2 coats was enough to get a solid, smooth surface.  Spar urethane was trickier to apply (bubbles appear if you look at it wrong) but, again, 2 coats was sufficient to get an even coating.  Lastly, I did a single coat of Rustoleum satin black enamel with a small amount of japan drier.  Application was easy but I'm worried about the durability.

I'm working in an enclosed porch so temperature varies quite a bit with mid-day being ~80F and nights getting down to ~60F.    The epoxy and urethane were completely dry within 24h.  The enamel had a dry appearance after 24h and it is not tacky.  The problem is that it seems to be _very_ easy to scratch.  Even lightly running my fingernail over the surface will cause a fairly noticeable scratch.  I've heard enamel can be slow to dry completely especially in colder conditions so I gave it another 48h (72h total) but it still scratches way too easily.

Do I need to wait longer?  Would moving to the garage and leaving a heater on help?  Am I doing something wrong in application?  Should I be looking at something other than enamel?


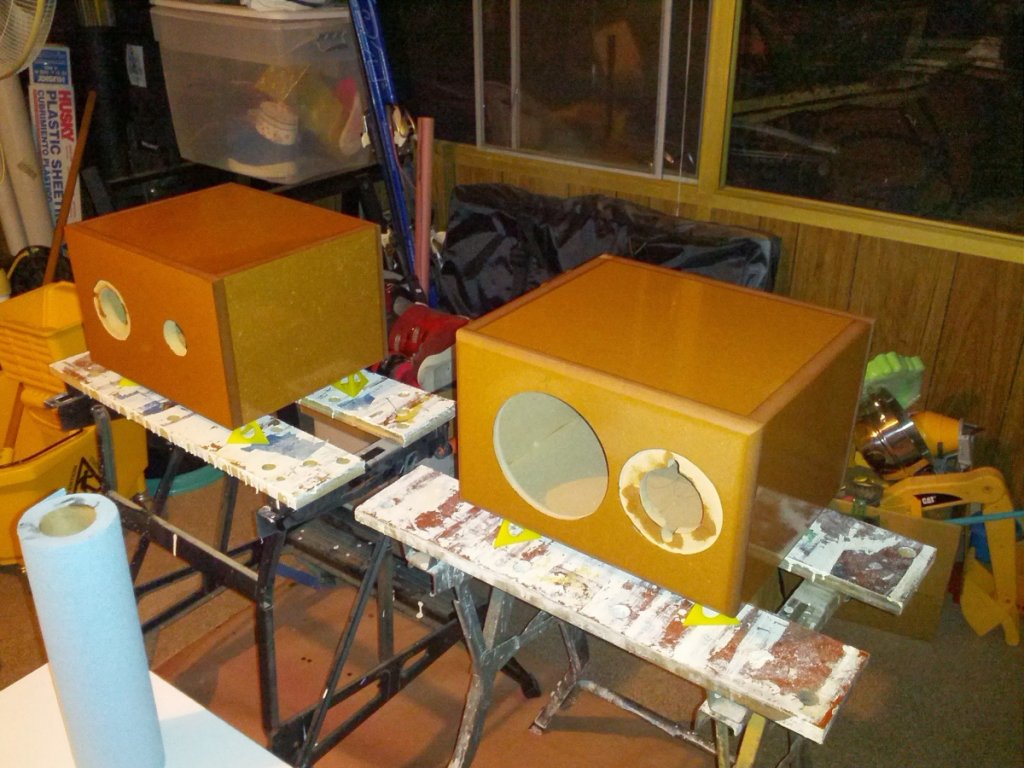
While I get the enamel figured out, I got started with epoxy on the X-LS cabinets.  Here's shortly after the 1st coat went on:


mlundy57

  • Industry Participant
  • Posts: 3587
Re: X-LS Classic build
« Reply #9 on: 4 Oct 2013, 02:58 pm »
Wouldn't the urethane work better over the black enamel rather than under it? It seems the urethane is what would provide the protection. Not sure about this but I have always seen urethane used as a clear top coat.

Mike

kc8apf

  • Jr. Member
  • Posts: 181
  • Are you sure what side of the glass you're on?
Re: X-LS Classic build
« Reply #10 on: 5 Oct 2013, 05:06 am »
I don't have much experience w/ enamel but everything I've read says that once it is dry, it should be very durable.  It _shouldn't_ need urethane on top.  I did the urethane before enamel based on http://www.epoxyproducts.com/enamel.html#2.1.  I have no idea if the epoxy I'm using has that issue but it seemed simple enough to do.  While finishing the 1st coat of epoxy on the cabinets tonight, I put a coat on a piece of scrap as well.  I'll get a few coats on it and try enamel w/o the urethane and see what happens.  I also moved everything into the garage and turned on a heater.  Seems to keep things in the 75-80F range which should hopefully shorten the drying times a bit.

lacro

  • Full Member
  • Posts: 602
Re: X-LS Classic build
« Reply #11 on: 5 Oct 2013, 03:23 pm »
I don't have much experience w/ enamel but everything I've read says that once it is dry, it should be very durable.  It _shouldn't_ need urethane on top.  I did the urethane before enamel based on http://www.epoxyproducts.com/enamel.html#2.1.  I have no idea if the epoxy I'm using has that issue but it seemed simple enough to do.  While finishing the 1st coat of epoxy on the cabinets tonight, I put a coat on a piece of scrap as well.  I'll get a few coats on it and try enamel w/o the urethane and see what happens.  I also moved everything into the garage and turned on a heater.  Seems to keep things in the 75-80F range which should hopefully shorten the drying times a bit.

Epoxy should cure at least a week, longer is better. ANY finish you apply over epoxy should be tested for compatibility. Some finishes will never dry! Get some Zinsers Seal Coat (shellac) use it as a transition primer over the CURED epoxy.
 I did pretty much what you did, applying epoxy to MDF, but when I do it again, I am putting India ink on the MDF first as I did with my stands. This will help prevent you from sanding through the finish between coats. Of course this is if your painting the speakers a dark color (black).
 I applied multiple coats of polyurethane after several coats of brushed shellac with sanding between each coat. I wanted the smoothest possible surface before applying the final finish. I had the best luck finishing the boxes with black enamel rattle can/wet sanding/polishing. However, my surface was super smooth from applying multiple coats of Shellac & Poly before hand.


mlundy57

  • Industry Participant
  • Posts: 3587
Re: X-LS Classic build
« Reply #12 on: 5 Oct 2013, 04:27 pm »
How did you get the gloss shine after the enamel?

Mike

kc8apf

  • Jr. Member
  • Posts: 181
  • Are you sure what side of the glass you're on?
Re: X-LS Classic build
« Reply #13 on: 5 Oct 2013, 05:46 pm »
Good to hear that my approach isn't wildly off.  If I add shellac to the process, it ends up being:

- 3 coats epoxy
- 3 coats shellac as transition primer
- enough coats of urethane to get a smooth surface
- 1-2 coats satin enamel

Sanding in between each coat.  I do remember the spar urethane being a bit tacky feeling after 2 days of drying.  I couldn't easily drag my finger over the surface.  It wasn't rough, just....tacky.  I'll pick up some shellac and see if that helps let the urethane dry better.

mlundy57

  • Industry Participant
  • Posts: 3587
Re: X-LS Classic build
« Reply #14 on: 5 Oct 2013, 06:52 pm »
I did pretty much what you did, applying epoxy to MDF, but when I do it again, I am putting India ink on the MDF first as I did with my stands. This will help prevent you from sanding through the finish between coats. Of course this is if your painting the speakers a dark color (black).

Where did you get your india ink?

lacro

  • Full Member
  • Posts: 602
Re: X-LS Classic build
« Reply #15 on: 5 Oct 2013, 10:12 pm »
How did you get the gloss shine after the enamel?

Mike

Mike,
 Look at my build thread to see how I did it.

This page covers most of it: http://www.audiocircle.com/index.php?topic=108371.40

lacro

  • Full Member
  • Posts: 602
Re: X-LS Classic build
« Reply #16 on: 5 Oct 2013, 10:23 pm »
Where did you get your india ink?

Any art supply or craft store should have it. I got mine at A.C. Moore. I am not sure if they are everywhere?  The Alcohol base is the one you want. $5-6 bottle. Apply with a 1" foam brush right from the bottle. One bottle is all you need for speakers and stands.

lacro

  • Full Member
  • Posts: 602
Re: X-LS Classic build
« Reply #17 on: 5 Oct 2013, 10:43 pm »
Good to hear that my approach isn't wildly off.  If I add shellac to the process, it ends up being:

- 3 coats epoxy
- 3 coats shellac as transition primer
- enough coats of urethane to get a smooth surface
- 1-2 coats satin enamel

Sanding in between each coat.  I do remember the spar urethane being a bit tacky feeling after 2 days of drying.  I couldn't easily drag my finger over the surface.  It wasn't rough, just....tacky.  I'll pick up some shellac and see if that helps let the urethane dry better.

 I only used the urethane because I already had it. You could just build several coats of rattle can black over the shellac, and add a clear on top of that to protect the black. it could be the urethane or clear rattle can. The biggest pain in the butt is all the coats of finish, and the sanding required to get a TRULY smooth finish.

 If you could spray all these finishes, it would go much faster and require less sanding. The shellac brushed on drys really fast, and will drive you batty! I had temporary feet on my cabinets so I could do all sides at one time.

 You will probably need more than 1-2 coats of satin enamel. The problem with satin is the you probably won't be able to polish it, as it will get glossier if you do. So your stuck with your rattle can finish which may or may not come out good. For us amateurs it's a long slow process to get a really good finish.

kc8apf

  • Jr. Member
  • Posts: 181
  • Are you sure what side of the glass you're on?
Re: X-LS Classic build
« Reply #18 on: 6 Oct 2013, 04:49 am »
Not using rattle can.  Did roll and tip for the trial project.  Reading a bunch more, I think I know where I went wrong.  I was worried about the cold nights slowing the enamel drying so I added a little japan drier.  Apparently, if you add too much (easily possibly with the small amount of enamel I was using), it causes the enamel to dry quickly but remain soft.

I've built up two test strips w/ epoxy.  I'm going to do two experiments: shellac -> enamel, shellac -> enamel w/ valspar hardener.  The hardener is supposed to speed drying time _and_ make the enamel harder.  If so, I shouldn't need to top w/ urethane.

kc8apf

  • Jr. Member
  • Posts: 181
  • Are you sure what side of the glass you're on?
Re: X-LS Classic build
« Reply #19 on: 17 Nov 2013, 06:57 am »
Long over due for an update.  Between a vacation and various house projects, I haven't made much progress.  I finished 3 coats of shellac on the cabinets and on two test strips.

I sanded both test strips starting with 220 grit and moving up to 320.  I painted one strip with 3 coats of plain Rustoleum satin black enamel letting each coat dry for 24h.  The other got 3 coats of the same enamel mixed 16:1 with Valspar enamel hardener.  I then sanded both strips starting with 320 grit and moving up to 1000.

Even when sanding the surface and doing some light polishing, the satin appearance is preserved.  The surface is very smooth but the paint has little depth and doesn't reflect.  It may turn glossy when going up to 3000 grit but I'm convinced enough to proceed with painting the cabinets.

Both strips were reasonably scratch-resistant but the hardener version seemed to mar less when dragging a fingernail over the surface.  Both were scratched with a pointed fingernail and significant pressure.  While the differences are small, I'll be using the hardener for the cabinets.