Well jeffh, I'm not an expert but maybe the following will explain a bit of my process. Any suggestions on better ways to do things are always appreciated.
I don't have any photos as I built the enclosure but I used 3/4" MDF for the sides, top, back, and brace (approximately mid way front to back) and 1" MDF for the front baffle. 1/4" deep rabbets or dados were cut for all these pieces to ease assembly with yellow glue and a 18 ga brad nailer. Care was taken to not put brads where I was going to cut edge rabbets. The majority of the Sonic Barrier cabinet liner was added during this part of the build too. The front and back were then added and edged trimmed with a router so they matched. The veneer was then added before cutting 3/8" rabbets on the corners and doing the circular cut outs.
All this routing of MDF produces a tremendous amount of fine and really nasty dust. I'm quite sensitive to the dust (formaldehyde) so I have to wear a respirator and get any dust off my skin quickly or I itch and almost burn from it. A tight fitting dust mask would seem to me to be the minimum protection. I have a vacuum attached to my table saw and I also rigged a vacuum attachment to my router that greatly minimize airborne dust.
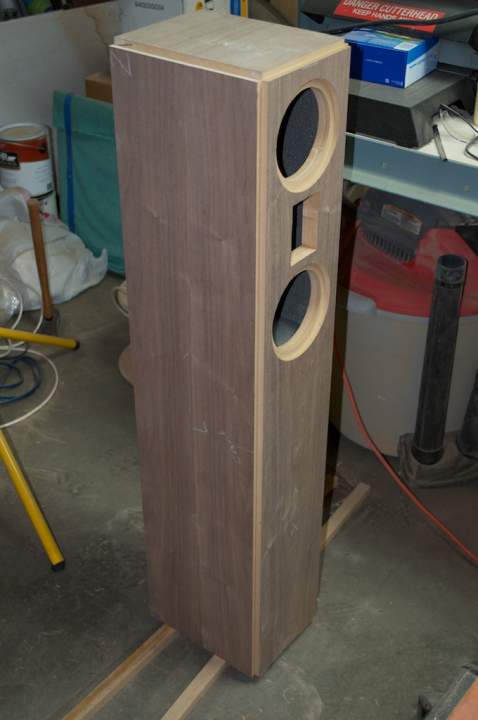
This picture shows the enclosure at that stage.

And a little closer look as I was test fitting drivers:

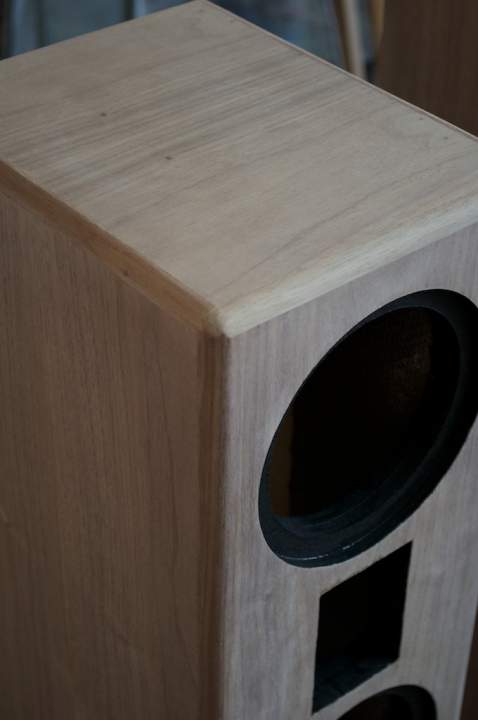
Then I carefully planed solid stock to fit the depth of the edge rabbets and glued them in place after mitering the corners. The edge strips were trimmed to width and rounded (3/8") over with a router as can be seen in this picture. You'll note I painted the exposed MDF black in case the drivers were a little loose in the cutouts.

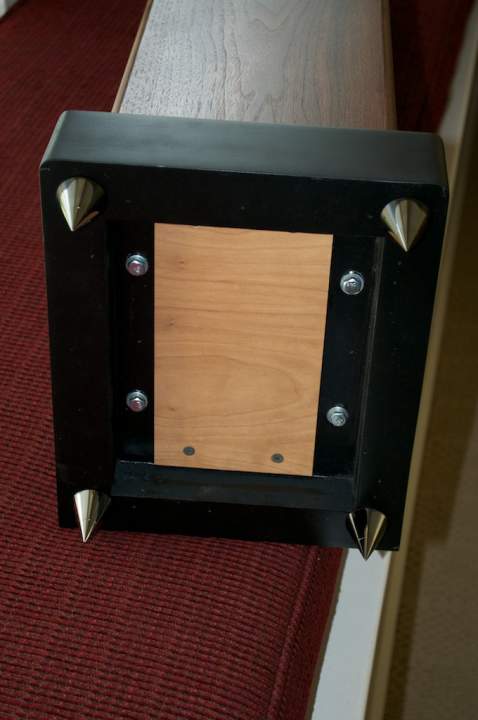
The bases on my MTMs were made with stacked 3/4" MDF. The exposed edges were sealed with a thinned glue solution, painted with spray primer and finished with a spray satin. Between each step there is considerable sanding and resealing/priming to get a smooth finish. I would use hard maple for any new bases versus MDF. The MDF was just too hard to seal up and get a smooth finish. Here is a picture of the underside of base showing the access to the crossover. The bases are bolted to the enclosure with threaded inserts in a frame piece at the bottom of the enclosure.

It was fun to build these enclosures and even more fun to listen to them!