Neo1X Build complete

0 Members and 1 Guest are viewing this topic. Read 2019 times.

dkordonowy

Neo1X Build complete
« on: 11 Nov 2009, 07:01 pm »
Finally finished my Neo 1X's!  You would have to search quite far down the list archive to see when I started them.  Needless to say, I bit off more than I could chew with my design. 

These speaker cabinets were made by John at diyspeakercabinets.com.  I added the aluminum front baffles, which I waterjet at my local machine shop and had anodized nearby.  I used a random orbit sander to get a nice shine on the aluminum, although it's not obvious from the picture attached.

The crossovers are in the wooden boxes below, which I made using a salvaged piece of heart pine (?) flooring from an old mill in the area.  The only thing I did to finish them was use a couple coats of poly.  They don't match the speakers, and I'm considering adding an aluminum front to the boxes as well to at least go with the theme.

So how do they sound?  So far, awesome!  I switched out my old speakers (Thiel 1.6) for them and running off of Parasound Halo gear I think they resolve detail extremely well.  They're not optimally placed yet and I don't have a stand for them to do critical listening yet.  Eventually they'll be a second system in another room.  I would welcome suggestions on an integrated amp to run them that isn't too large.  I have been looking at something like the Peachtree Decco for that purpose.  Plus I'd like to do whole-house audio and I know that the Sonos players can help with that.

In conclusion, I'd like to thank Danny and John for their help.  I'm very happy with these and I'll update as I do some A/B-ing in the future.  I can also upload more information or pictures for those interested.


poseidonsvoice

  • Full Member
  • Posts: 4027
  • Science is not a democracy - Earl Geddes
    • 2 channel/7 channel setup
Re: Neo1X Build complete
« Reply #1 on: 11 Nov 2009, 08:05 pm »
Wow! Beautiful job.

More pics, more, more, more, even show how your external crossover is built up.

Excellent work  :thumb:.

Anand.

Ron

Re: Neo1X Build complete
« Reply #2 on: 20 Nov 2009, 11:18 am »
  Your newly built Neo 1X's look absolutely great! A first class job. I especially like the added aluminum front baffle.

sl_1800

  • Full Member
  • Posts: 406
Re: Neo1X Build complete
« Reply #3 on: 20 Nov 2009, 09:42 pm »
Those look fantastic.

dkordonowy

Re: Neo1X Build complete
« Reply #4 on: 24 Nov 2009, 03:39 am »
Thanks for the compliments!  I'm really digging the sound from these.  I'm waiting on some stands to place them right now, but even so, they sound superb.  Very low reaching for such small bookshelf speakers.

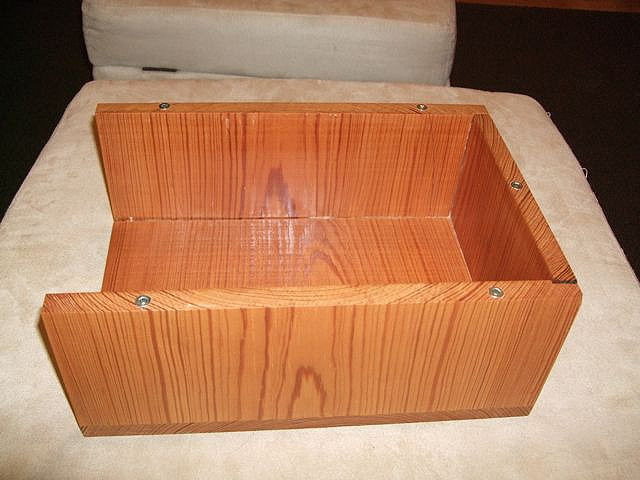
I had some time to disassemble the crossovers to take some pictures on how they are built.  Luckily I built them to be taken apart because the boxes are not exact and I had accidently installed the incorrect network into the boxes (which didn't quite fit).

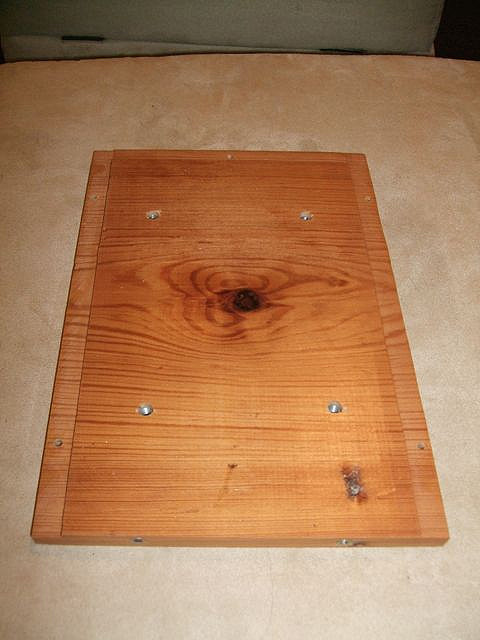
Here's the base of the crossover.  You can see the five holes drilled around the edges as well as four holes with inserts for the crossover networks to fasten into.  Three of the sides have an offset to fit the top of the box.


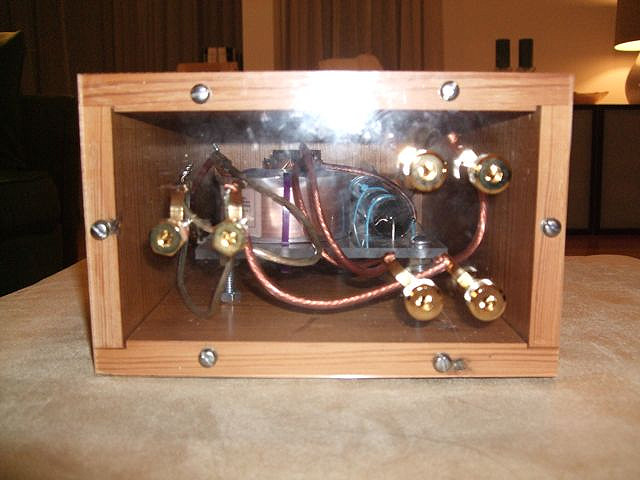
Next, the crossover network attaches to the base as shown.  The back is made of lexan sheet from home depot, with the terminals taken from the GR Research included cups as well as some additional cups I bought from parts express.


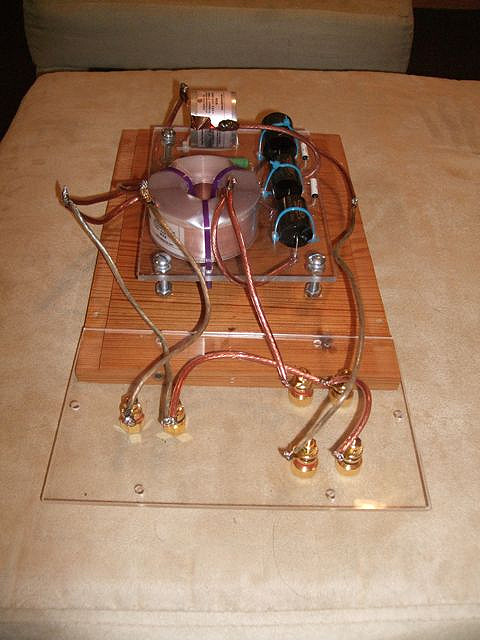
The network stands off the base using some 2" 1/4" machine screws with nuts to keep it from falling.  The back uses smaller #6 fasteners that attach to these really small wood inserts that are drilled into the side of the base and top.


The inserts for the network also double as the feet inserts on the base.  It seems kind of silly to have spikes on the crossovers but it keeps the base off the ground, which has some button head fasteners that protrude (from the five holes seen in the first pic).


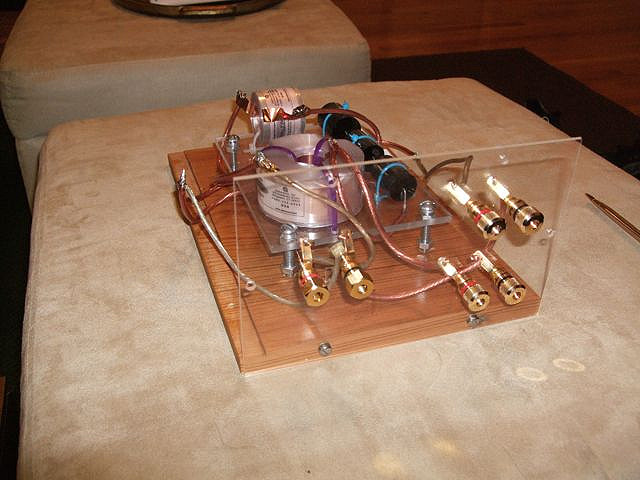
Here's a shot of the top of the crossover.  You can see all the inserts that are drilled around the bottom to close out the crossover.


The crossovers are coming together.  Here's a shot from the back now that the top is screwed into place.


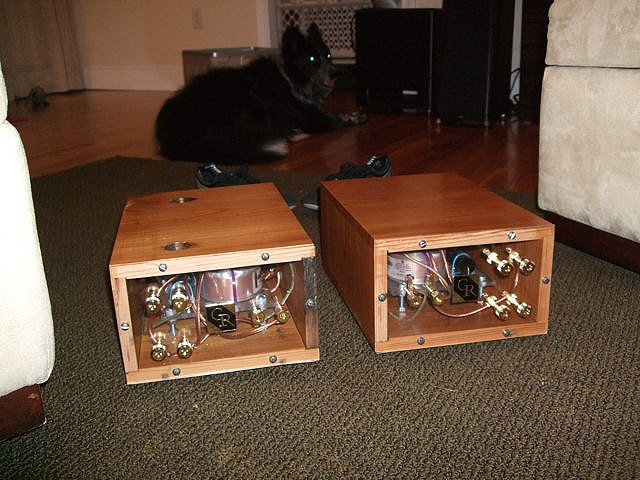
And I almost forgot to give credit where credit is due...I added the GR Research logos to the back as well.  Here's both crossovers together from the back (and the dog is happy to be helping in the assembly as well).


Finally, here's the pic from the front.


Hope you all found this interesting!

TRADERXFAN

  • Full Member
  • Posts: 1093
  • Trillions will vanish... it's a debt blackhole.
    • GALLERY
Re: Neo1X Build complete
« Reply #5 on: 24 Nov 2009, 03:44 am »
Yes, very interesting. Thanks for sharing. I like the use of the lexan.  :thumb:

-Tony

**edit

Wow, EXCELLENT job on the speakers. Didn't see that part  :oops:

Really like what you did with the aluminum!