Ron started this thread with his post on achieving a simple yet elegant wood finish using paper backed veneers and Minwax wipe on polyurethane. Excellent post Ron I fully concur with your method of wiping on multiple coats with fine grit sanding between coats. In hindsight with greater experience of other methods I was lucky to use this method for an early project with excellent results which have now stood up to years of use.
My interest was further peaked when texneus added his comment that he uses oil finish as a starter to color and pop the grain then builds on a protective top coat using Tung Oil Finish. I have been testing a couple of different Tung oil finishes for the cherry veneer on my present project and texneus' experience confirms the direction I am headed. I would also reemphasize his advice to try on a test sample BEFORE applying to the actual items being finished.
When stevenkelby asked:
"Can the poly be given enough coats to build up a thick, hard layer which is glass smooth, like the surface of a piano, but with the stained grain showing through?"
Ron replied "I normally apply about six (6) costs of the wipe on poly. The more coats you apply, the deeper the finish appears. You have to lightly sand between coats with 600 or 800 grit sandpaper and wipe well with a tack cloth to remove any dust. By using this method it will give you a very smooth and deep looking finish." Then droht and others expanded the discussion on achieving "piano gloss" results.
Here I believe I can add some useful experience. The photographs are of one of my projects finished in many coats of Minwax wipe on polyurethane. The speaker enclosure is a translam style made of stacked layers of Baltic Birch plywood the top veneered with birds eye maple. Driver is the Fostex F120A alnico magnet full range and yes its that good and worthy of an over the top box.
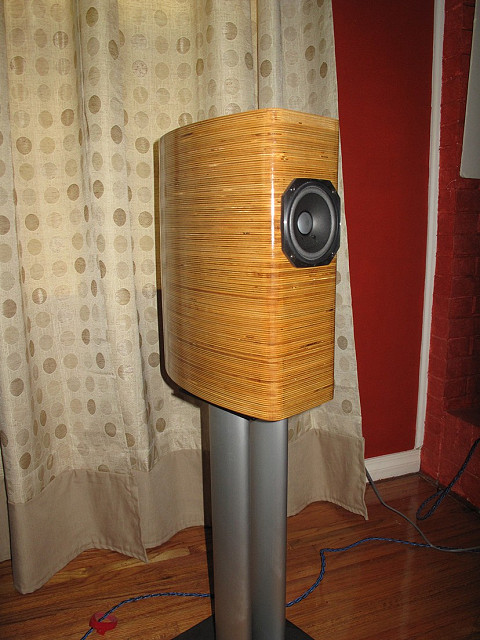
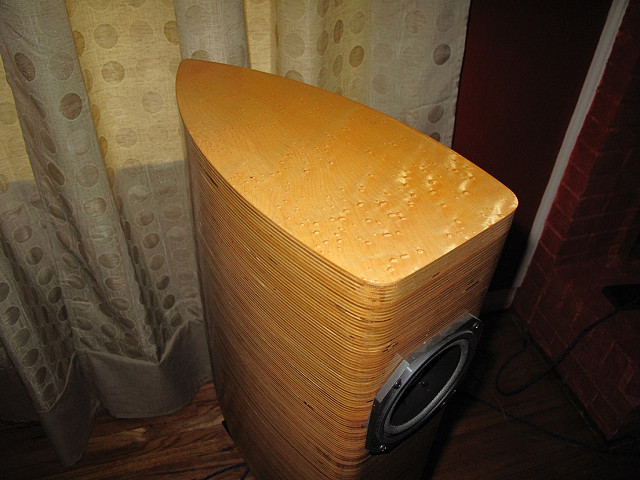
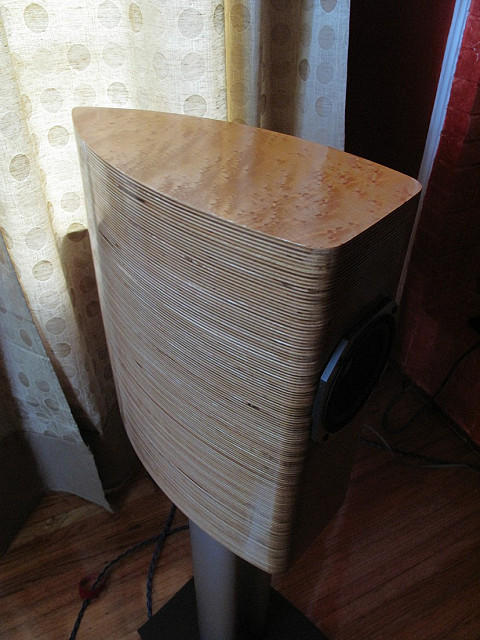
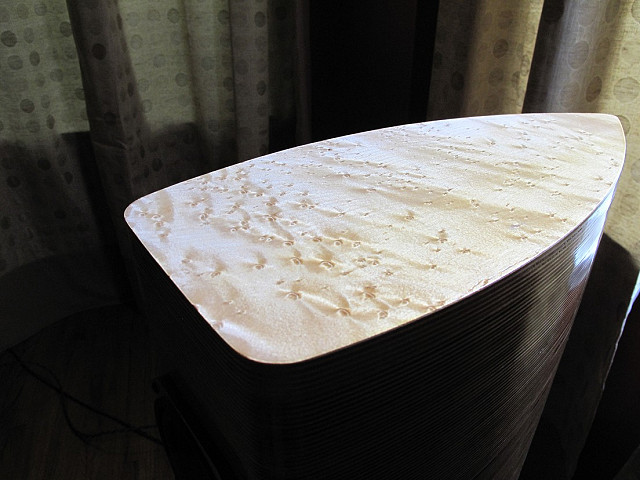
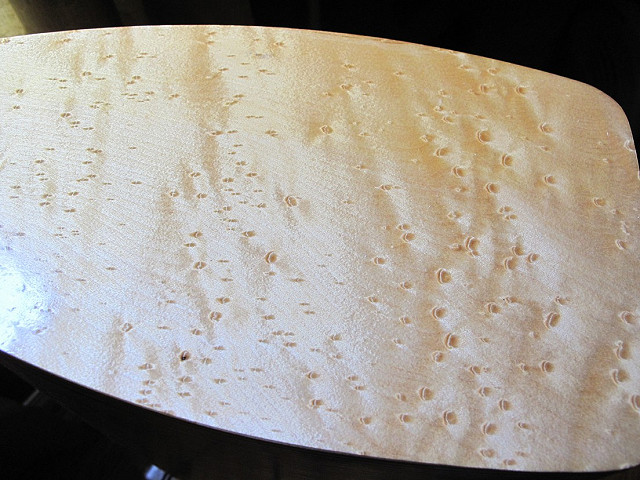
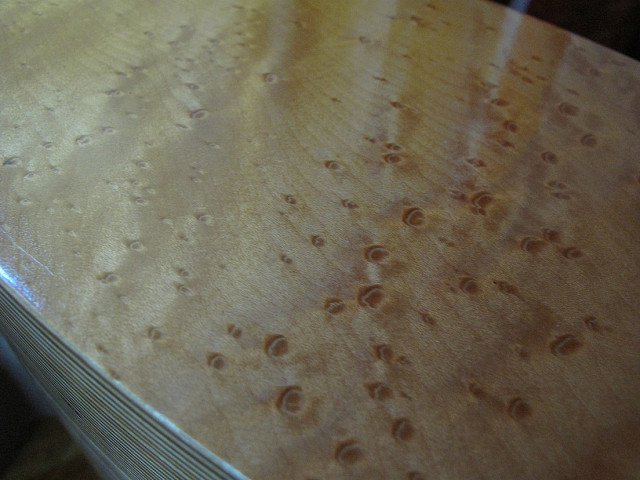
I am pleased with the result but it is not exactly what I intended. Note the finish has a golden or amber tone; in typical room lighting they look more amber than in these pictures. I had actually wanted a clear finish with the lightly colored Birch and Maple wood's blond color intact. When selecting a finish with the intent to go for a thick build be aware if the "clear" is really clear or ever so slightly tinted. Traditional products like shellacs are by nature slightly amber as are polys like Minwax wipe on. If using polyurethane look for a "water clear" product or factor in the amber tint which gets darker as the surface builds. This has little effect when using a technique like Ron's where the sanding to flatten after every coat keeps the buildup thin. This also tends to result in a semi-gloss finish which I find elegant. What I learned in the pictured project is when one attempts to extend the technique to a deep high gloss French polish style challenges arise.
First be aware of recoat time for the product. Shellacs and lacquers have the advantage here in that subsequent coats chemically melt the previous layer and the layers flow together. With polyurethane unless a subsequent coat is applied before the plastics in the previous coat harden and the polymers undergo chemical changes we are actually building up discreet layers of clear coats one on top of the last. Where this has bit me is during the flattening and polishing stages. There is always that one bubble, dust spot, or deep brush mark that needs 'just a little more' sanding and perfection will be mine. Working that spot or a corner or edge the top layer or layers of poly is sanded or polished through. The discreet layers of finish are revealed looking similar to layers of mica or shale. This starts what I find to be a downward spiral of more coats of poly followed by wet sanding 400-600-800 grits and then polishing compounds. Trying to get every square inch a perfect high gloss without visible imperfections when you can only work that last layer is not a happy place to be. I also found Minwax wipe on polyurethane does not buff out well using polishing compounds. I believe it is actually too hard once cured for buffing.
My personal conclusions is DIY polyurethane finishes like we can buy at the home improvement center work great for matt and semi gloss but are difficult to bring to a perfect high gloss finish in a home workshop. The value of a technique like Ron's is an excellent finish easily and quickly achieved. Attempts to extend this to an optically perfect high gloss finish are problematic.
My research shows professional high gloss finishes are usually sprayed on using products specifically formulated for the task. Newer systems with an eye towards the ever tightening environmental restrictions use water based polyurethane or polyester products. The base coat may be sanded for flattening and dust removal but the final coats are carefully sprayed in a professional filtered air spray booth so no further polishing is required. A little orange peel texture in the finish may be accepted to save hours of finish polishing. Or with careful process control and a skilled production staff very high glosses can be obtained. For an example look at a $200 beginner Yamaha electric guitars.
Another technique uses materials borrowed from the automotive industry. These clear coats can be wet sanded with results basically a function of how many hours one wants to invest in polishing how many coats. This is very unfriendly to DIYers as a spray booth is needed and many auto paints are very bad to breathe or otherwise ingest.
Speaking of not so good to breathe that brings us to shellacs and lacquers. Forget modern chemistry here we go old school furniture builder. These centuries old materials are not as hard and protective as polyurethane but if high gloss is the primary criteria for a DIY friendly process this is where I go. As mentioned above layer depth can be built up into a homogeneous thickness that can be worked and reworked to the desired level of perfection. The current issue of Fine Woodworking magazine has an article on using brushed on lacquers for high gloss. There are many articles all over the web on French polishing shellacs. The shellacs are typically cut with alcohol so they are safer to work with but do bring along that amber tint. Serious shellac users like the tint mixing their own flakes available featuring lighter or darker tints to be factored into the final finish color. Lacquers are cut with lacquer thinner which it is better not to breathe but hold out the advantage of water clear and workability. I am currently about to start using brush on lacquer over maple and will report the results if anyone is interested.
As a final bit of advice for anyone looking to this thread for guidance is experiment, practice, and build your skills before tackling the big project. Do not try and learn to veneer, stain, and piano gloss finish on a six foot tall speaker project unless you enjoy stress. If you are just getting started go ahead with the floor standers but in parallel build a pair of little mini-monitor boxes using the scraps from your big project. Try your materials and polish (pun intended) your skills on the little boxes first then scale up.
Happy Listening