Alright, finally getting around to posting some information on making the RC-5G kit. I really appreciate all the positive feedback about the construction. Yes, this was actually my first speaker project though I did build a large built-in bookshelf last summer that gave me some skills and confidence to pull off the RC-5G speakers. Here is a picture of the bookshelf I built over the summer:
http://www.audiocircle.com/gallery/albums/userpics/48240/Completed_With_TV.JPGhttp://www.audiocircle.com/gallery/albums/userpics/48240/with_doors_open.JPGThe link to my gallery with construction photos for the RC-5G speakers are here:
http://www.audiocircle.com/index.php?action=gallery;area=browse;album=1737.. I'm linking to this gallery with pictures I'm using to illustrate my description below. Man, as much as I meant to I really didn't take as many photos as I wanted.
I started by borrowing as many tools as I could including my dad's shop smith (which was less useful than I thought it would be), his circular saw with aluminum guides (this was incredibly useful and I'm buying my own), my neighbors router, and then used a bunch of my own equipment. I don't really have room for a woodshop and so my garage or unfinished basement become the shop and eventually the cars need to be put back in. So I figured borrowing tools would save money and space. I ended up buying my own porter cable router and plunger which I consider nearly mandatory for speaker building.
Making precision cuts with large pieces of MDF is extremely difficult and the RC-5 pieces were really too big for me to slide through the circular saw of the shopsmith easily. Therefore, after many many hours of trying things I ended up cutting nearly every side of the wood using a circular saw with guides and then routing the edge for a nearly "jointed" type fit. This took a very long time, but in the end everything fit together pretty nice. Ecramer recommended I miter joint the top of the speaker to avoid edge grain showing through veneer with time, but I couldn't figure out how to do this and get a super precise edge so I butt jointed the top of the speakers. Maybe next time I'll do better.
Still, for angles edges that are necessary for the RC-5Gs side ends I used a digital angle meters, wedged the router at the right angle with a strait board, flushed the board on the edge of the wood I had to cut, then used the router to make nearly perfect angled cuts. This is all because I didn't have a good table saw setup to make highly precise angled edge cuts or a radial saw with enough span. the RC-5G's are 15" across the front at the bottom and 16" deep by around 45" tall. Big board to work with. Hours and hours were spent cutting the wood and fixing my screwups. I think a momentary lapse of focus caused me to catch the router and run it across perfectly cut panels at least twice not including my measurement screwups. It took so dang long to cut the speaker panels!
To make the roundover look similar to a solid piece of wood I cut 1" x 1" strips of moradillo hardwood and glued them to the outside edges of the baffle (one link and one image):
http://www.audiocircle.com/image.php?id=18074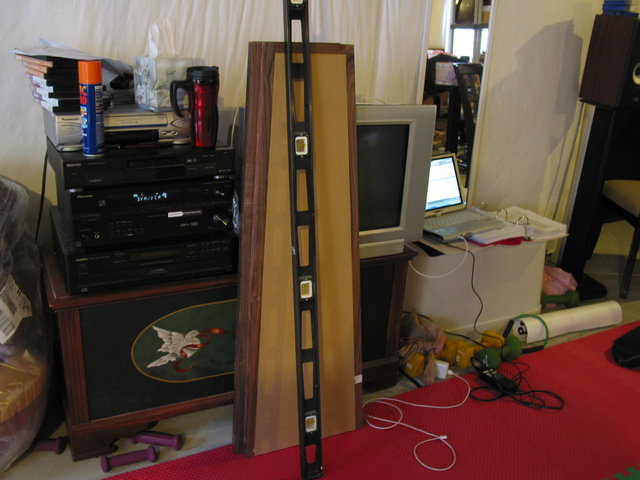
For glue up I used clamps, glue, and a Bradley nail gun. I was going to use biscut joints, but the Bradley gun worked just as good because my cuts were pretty good. Saved at least a day of glue up that way.
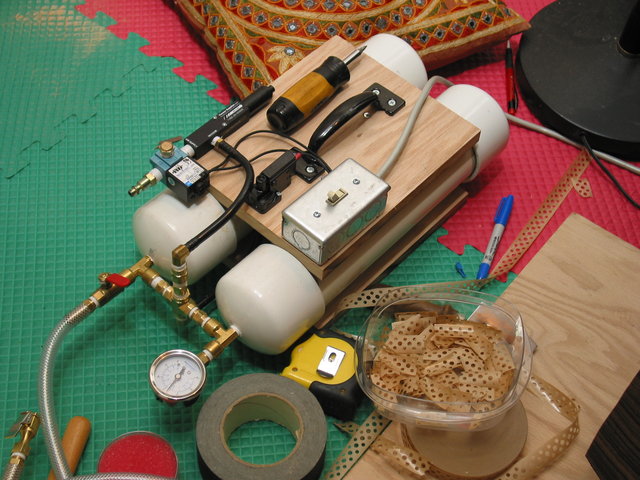
http://www.audiocircle.com/image.php?id=18081For veneer, I bought all of my tools at
www.joewoodworker.com. Took a weekend just to build my venturi veneer press:
I bought my veneer at
www.certainlywood.com. Here is a shot of it unrolled in the basement:
http://www.audiocircle.com/image.php?id=18084After learning how to book match my veneer and tape it plus building custom cauls for the sides of the RC-5 it was ready to press:

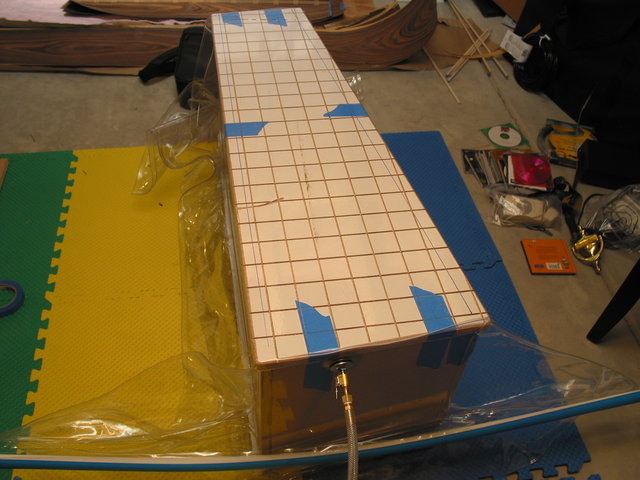
A few tips on veneer pressing a big speaker like this. I recommend buying cheap veneer and practicing first on a box if you can. I practised on a board twice, then the back of the RC-5G's first. I went all in and started veneering the speakers with my expensive Pau Ferro. Everyting was perfect at first, but for some reason I lost the ability to maintain vacuum (no leaks, just a problem pulling all the air in the system I think - still not sure) and I could only keep about 16" of mercury tops whereas joe woodworker recommends 21". Also, any slight imperfection in the flatness of the speaker (say near the edges of a butt joint) by even 1 degree concave or convex depression can become a problem for pressing. Veneer presses are supposed to overcome wood curvature like this if your bag can flex over the piece of wood and you can maintain high pressure. However, I used 3/4" cauls which do not flex easily to form along the speaker and since I didn't achieve the high vacuums and nearly 1,800 pounds per square foot possible to force the 3/4 inch cauls at all locations and, therefore, my veneer did not press totally level at all locations (only a problem a few inches from edges). In the future I'll make sure I do a better job getting super flat surfaces, or at least using a more flexible caul. For those readers following me I will probably invest in a breather mesh on the next project to ensure that all air is evacuated from the project. I think my veneer pressing will work much better on the next project.
Here is the final veneered speaker before topcoating, or application of the protective finish:
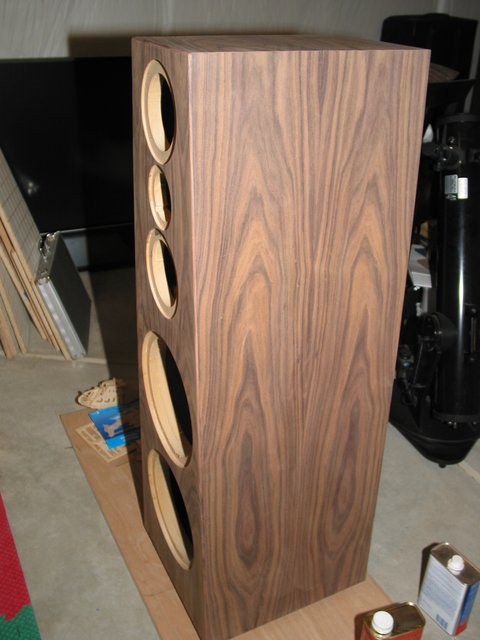
. Despite my mistakes they were looking sweeeet!
Wood finishing is an art and although I spent hours and hours reading Bob Flexner's and Terri Masachi's books on wood finishing I was still confused. I wanted the sprayed on look like a true production quality finished speaker, but didn't have the spray equipment and was not wanting to invest all the extra time to practice and figure it out on this project. I knew if I picked the right brush or wiping varnish I would still get good results - but what to use? Poly? Varnish? Lacquer? Shellac? 2-part systems? Hard polys are harder to repair while on the other end of the spectrum tung oils are easy to touch up, but stain easily. After perusing the forums and asking some questions WGH who had posted in another forum recommended I use waterlox. Normally used for floors, but is a wiping varnish with tung oil and resins that drys faster than normal tung oil and if applied thinly self levels for a nice finish. So that is what I did. Here is a shot after the first coat or two of waterlox:
http://www.audiocircle.com/image.php?id=18095I found that I was able to keep the speakers standing and do a coat every 24 hours on all sides and top. Since my speaker wasn't pressed perfectly flat at all locations (as mentioned earlier) I realized it was suicide to try and sand/buff these down. That is because I could sand through high spots, yet leave low spots untouched and this would be very noticeable. Actually, I tried a high-end rubdown using water and about 10 grits of sandpaper from 600 grit to I think 12,000 grit on the back of an RC-5 and then applied wax. It looked very nice and close to an antique look, but alas I couldn't achieve that everywhere on the speaker.
So in the end I chose to use very carefully applied thin layers of water lox gloss finish and sanded in between layers with 600 to 1000 grit sandpaper or sanding materials. Then I would apply again. All hand or brush applied topcoats leave nibs of dust or bubbles that need to be buffed out. For my last coat I water sanded with 8000 and 12000 grit sandpaper which smoothed the nibs without removing them all the way while maintaining the high gloss look. Something that a master would not be proud of, but the final product still feels and looks fantastic!
The other reason I chose waterlox is that my speakers are in the main living room and this product is touted as being easily touched up with the repair being invisible. I've already scratched my speakers and I need to touch them up in the next couple of weekends to get the gloss perfect again. This is a BIG plus and I don't have to worry so much about the durability of these babies. Also, waterlox is great against water, alcohol, and other products so actually is very durable.
Well, that is enough for now. This weekend I hope to finish the grills. Thank you for reading this if you did. I hope it helps somebody in the hobby. Oh yeah, and for the record after building this amazing speaker I believe that Rick's prices are well worth it. Yes, I save a good chunk of money but with my own labor, the extra tools and research, I invested a looooot of my own resources. If you go to the website his kit is $2,700 (not including the upgrade for the accutons) and I figure I put in another $1,300 or more in veneer, MDF, router bits, finishes, sandpaper, granite plinths, and the plethora of other stuff you realize you need (including a new plunge router kit).
Best Regards,
Todd


