Rather than have my speakers down for however long it takes a noob like me to finish a speaker upgrade I have been doing it in sprits. Today I cut the boards, twisted the parts up, marked out the holes and drilled them, secured the parts to the boards with zip ties soldered and tinned the wires. With a little bit of heats shrink thrown in there for good measure.
I hope and pray I got this right but I had a lot of help from some of the guys here so I'm fairly confident
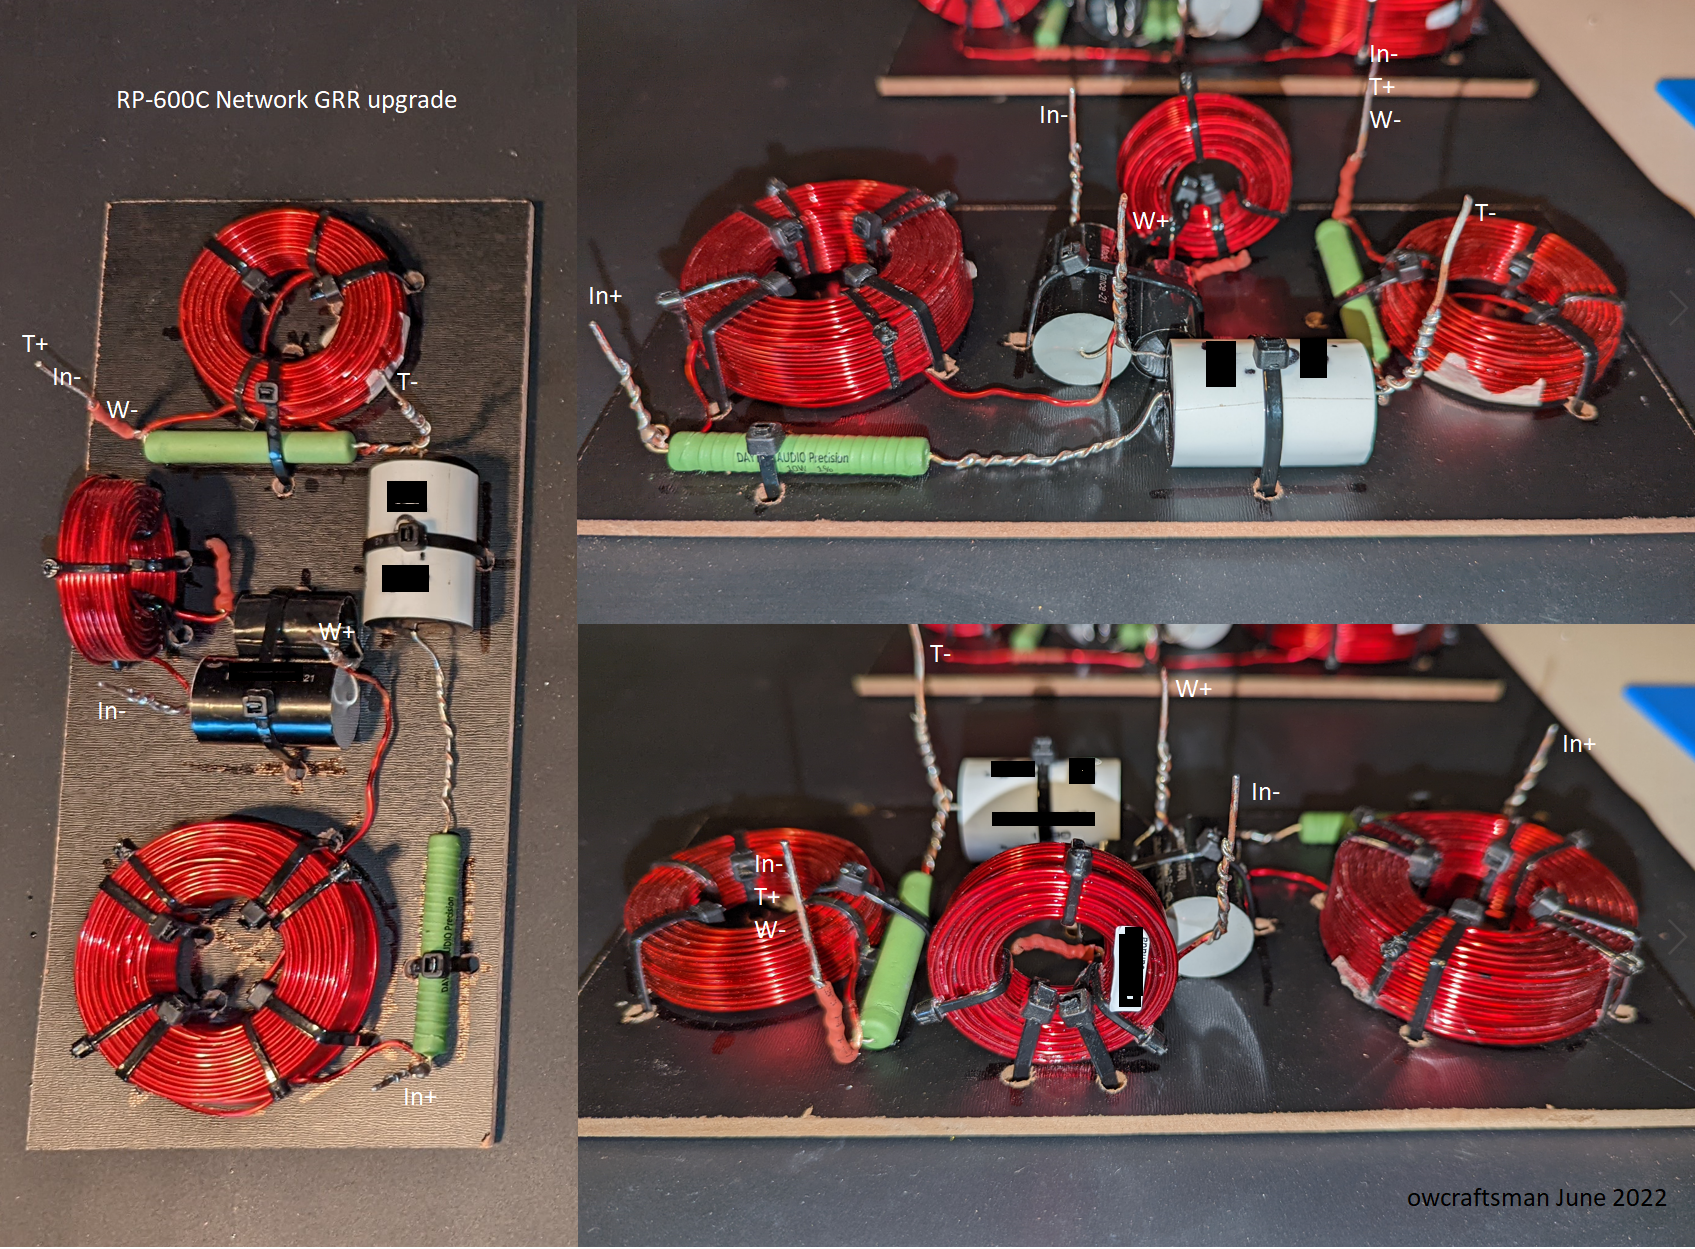
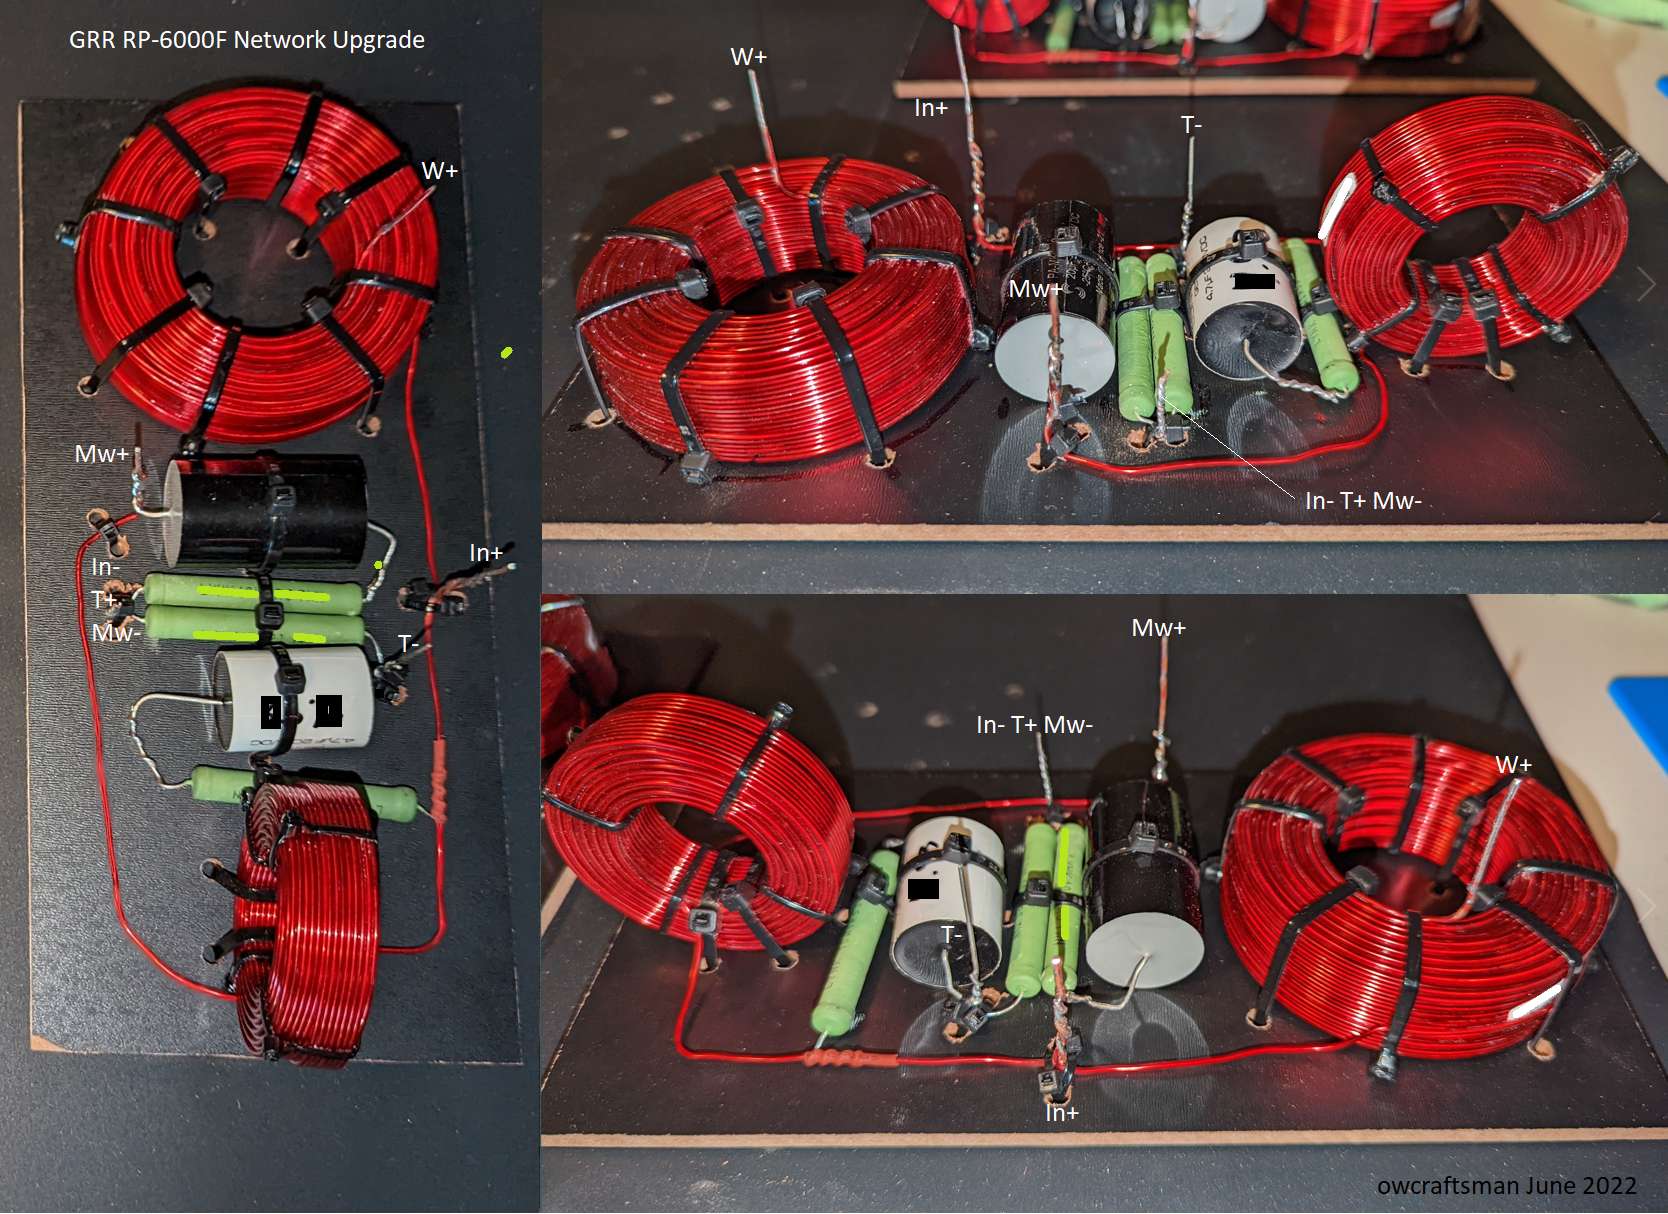
I post these to help anyone who might need it. Note there is a top/left and right view of both upgrades.
The only thing I had trouble with was identifying the resistors which EZee & Danny were very helpful with. Of course the identifying marks are redacted here to protect the intellectual property of GR Research. If you have any questions ask them or reply here and I will do what I can for these Klipsch upgrades only.
For the board I used
24 in. x 36 in H Dry Erase Board from Lowes. It saved me a step of painting and cost under 10 bucks.
All networks boards were cut with my trusty portable table saw to 4.5" x 9.5"
What took the most time was sanding the red off the coil leads as needed pre twist and solder. I used Emory cloth from my plumbing kit.
Other tools:
I had in house a
Wagner Spraytech 0503008 I used to use with monokote building scale model airplanes and a
Weller D550 solder gun both are overkill but get the job done nicely.
I also picked up some extra solder so not to run out of it
63-37 High Purity Tin Lead Rosin Core Solder Wire for Electrical Soldering, Content 1.8% Solder flux cost under 8 bucks at the big A.
Something I noticed before I started today was that the heat shrink included with the kit is quit large at 1/4" even at 3to1 shrink a bit large for what I was doing today. Fortunately I had picked up a combo kit from the big A which came in quit handy. Couldn't find a reasonable priced red white kit so I settled for
KOOWIN 300 PCS 3:1 Ratio Heat Shrink Tubing Kit, 5 Sizes (Diameter): 1/8, 1/4, 3/16, 3/8, 1/2 Inch, Electric Wire Cable Wrap Assortment Electric Insulation Heat Shrink Tube Kit with Box (Black & Red) My next free weekend I will finally complete the DIY experience. Removing the speakers posts ports and cheezee

crossover. Followed by cleaning up the interior and applying the No Rez. Then measuring, drilling, cutting and soldering in the tube connectors, and speaker wires. So, stay tuned.