Hey ya’ll,
So SVS subs are one of the more popular mass marketed subwoofer brands. Unlike a lot of other speaker mfr’s who have large lines of full range speakers and subs, SVS is mainly known for their subwoofers. SVS has something like 11 different models.
The 2000 line is their most popular model. (Now in the Pro series)
I hope this walkthrough of a dampening treatment can help SVS or whichever sub owners get a little more enjoyment out of your products.
This subwoofer was actually a replacement for the SB-3000 woofer I first purchased. I found that that model had a really bad design flaw in which the sub would emit a hum/buzz that was audible from across the room, and would on occasion sound like a dial up modem. So svs says “ the 2000 pro amp is solid and is dead silent. I agree, but with a definite loss in cabinet sturdiness.
So while smaller and less powerful, I thought the driver on the 2000 pro was quite nice. The app is just a real joy to use for tweaks and volume. No more looking behind you sub or getting up to turn it down when a home theater scene just rumbles your whole house when its late.
Anyways, what i did notice is that the 2000 Sealed and lower models, do not have internal bracing. This leads to a serious cabinet coloration of the bass. Once you’ve heard tight detailed bass in a sealed enclosure anything else just doesn’t cut it.
So I started on a mission to upgrade this thing. It started with sound isolation feet. This helped a little, more detail but did nothing for cabinet resonances. Then I got a better power cord, then an interconnect. Better quality and shorter cables made more improvements in the bass punch and clarity.
But what most annoyed me was the light cabinet that rings when you strike it.
So I tried a quick and simple solution, dynamating the outside of the bottom panel. (Not visible from any angle unless you turn it over.) This helped remove some of that resonance; this improvement was really addictive, it proved that the driver and amp pair was really capable of good bass, if the cabinet would get out of the way.
I decided to do the treatment I first did to my klipsch rp-600m’s. NO-REZ the cabinet.
That first treatment was the birth of my DIY hobby. It was such a major improvement and made me realize how you can extract a lot more performance out of your gear with modifications for far less money than upgrading.
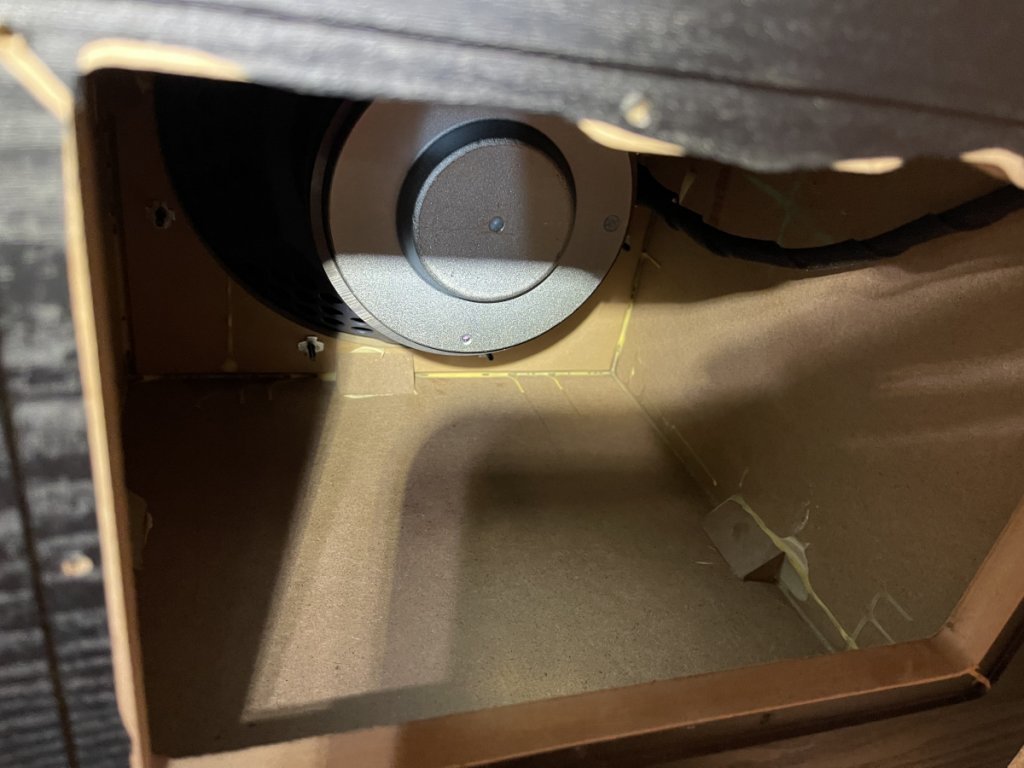
So, the back amp plate is very easy to remove just a snap on connector for speaker wires and the amp is removed from the cabinet.
Then there is a thick treatment of poly fill on all 4 sides. This is stapled to the box and requires some force to pry out. With the poly fill removed. The cabinet had excess glue drips on the sides which needed scraped off. Afterwards, I vacuumed out the debris, and wiped the cabinet walls with a damp paper towel to wipe clean the surfaces. Cleaning the walls, allows the best possible adhesion of the No rez.
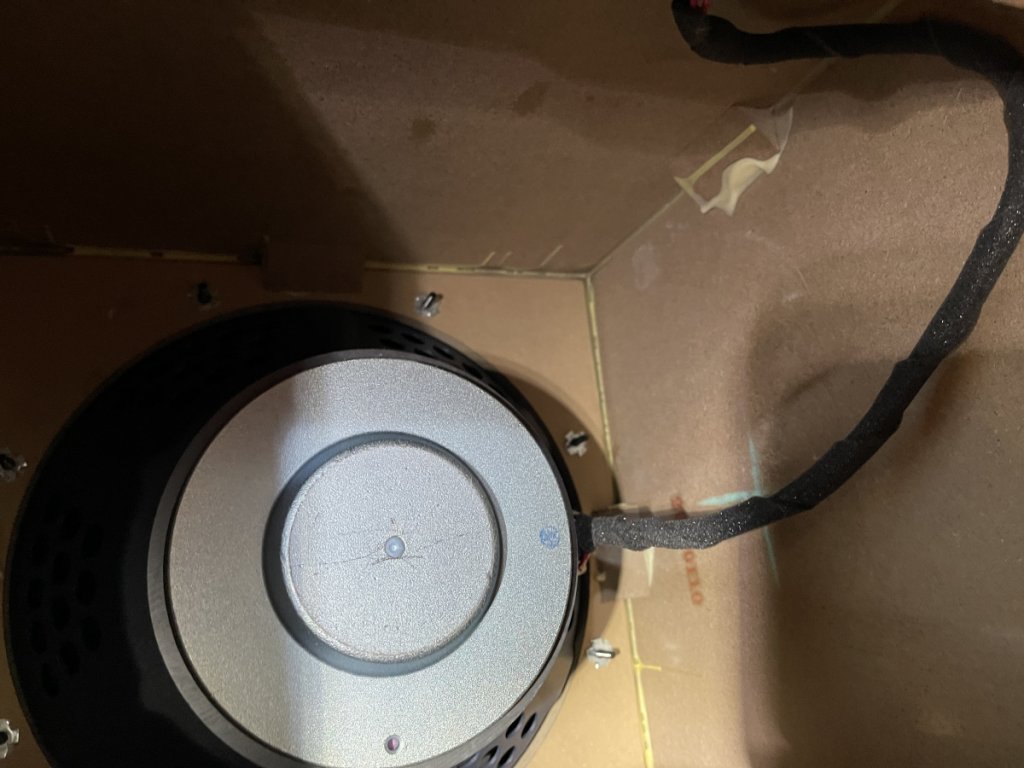
Next. The braces on the edges needed to be marked so measurements could be taken.
I made these measurements with a pencil and then measured all the sides and wrote down the dimensions that needed to be cut.
Armed with the sizes i needed. I used a razor knife and box cutter to carefully cut the pieces after tracing lines along my markings.
With the no rez cut, its ready to be placed inside the cabinet and pressed firmly seating it against the walls. I treated the 4 sides plus the two edges to the left and right of the amplifier.
My pieces were approximately 10 1/4” X 10 1/4” for the 4 sides. (This is not exact!). 1 1/2” X 9 1/4” on the sides of the amp.
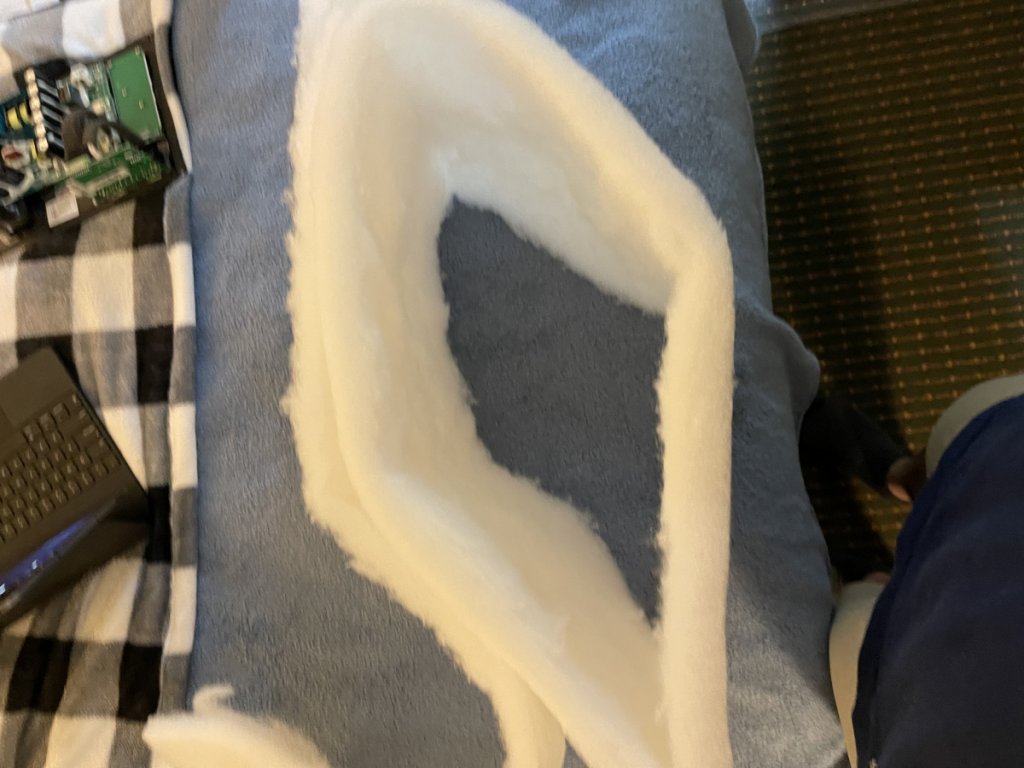
With the no rez applied and firmly seated, its time to put poly fill back in.
The polyfill is very thick from SVS maybe 2 1/2” to start. So with the foam from the no rez replacing the poly fill as the first layer, putting it back in as was would be too thick really cramping the subwoofer basket, and amplifier. Scaling down the polyfill can be addressed by basically ripping the poly fill in half, I carefully tore it down the middle so that the no rez and poly fill approximately covered the same thickness as it did inside the cabinet before the NO-REZ went in. When cut to size and installed, the polyfill really sticks to the no rez foam quite well. Using a hot glue, i removed any doubt of the polyfill moving around in the cabinet.
With the polyfill back in I pressed everything down firmly and the install was ready for the amp to go back in.
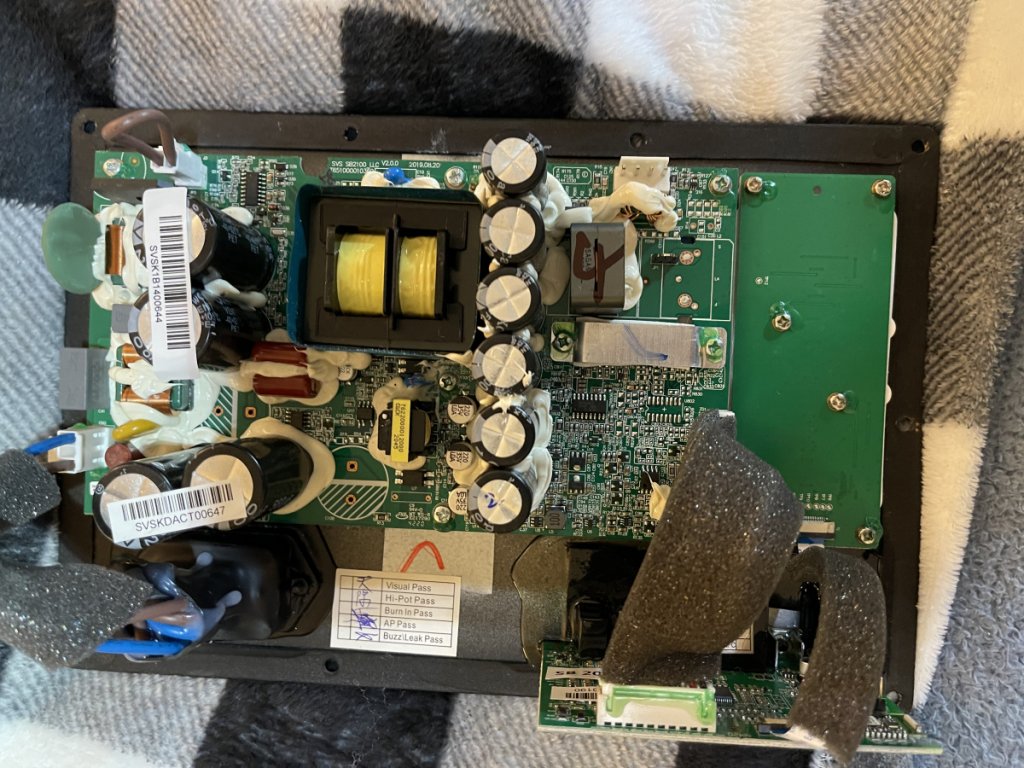
I carefully checked the clearance for the amp board when inserting the amp back into position. With the amp back in place and the cabinet slightly tilted forward to let gravity keep it there you, the screws can be driven back into the box.
Once the install was done I was both surprised and and delighted. The dampening job seemed to kill most all of the higher pitched resonances but there is still a small amount of deeper resonances present. Now this light deep ringing can only really be brought on be knocking in the very middle of the panels, but it is much reduced.
I think with a sub playing at for the most part under 120 HZ ( with a typical crossover of around 80Hz) you wont have too much ringing at all going on after the no rez treatment. I do fear though however, the lack of a brace in this model, makes it possible for the walls to ever so slightly flex.
If you wanted to take this fix a step further you could insert a cross brace, and treat the cabinet with no rez around it. But i got about 90 percent of the way to where i was hoping for when installing this. This installation also adds about 3 1/2 pounds to the overall weight of the cabinet, which was nice.
The svs sb2000 pro now passes the knock test, but admittedly just barely. Its not great or bad just normal now. Which is sad to say is a big improvement on the way these cabinets are direct from SVS. It would cost hardly anything to brace these. If SVS did the treatments I have to my sub, it would greatly shrink the gap in performance between this and the higher lines SVS offers.
I dont need crazy bass SPL but I do need accuracy, detail, and punch, all of which in a nice quality cabinet. Id call this upgrade a success, as it met my goals and really reduced that ringing.
On a side note about svs products.
I would caution anyone using the SVS soundpath rca to get rid of it immediately it was the worst sounding rca I’ve ever used, When i replaced it to a mid upper tier audioquest offering it was an entirely different sub, and to a lesser extent again when i used a nice power cord.
The svs speaker cables also couldn’t hold a candle to my current cables the 24 variable strand which looks a lot like the Kimber 12TC.
I digress,
The SVS SB2000 PRO has a lot of potential, with a few small tweaks it really removed the weakest link in this subwoofer’s performance and overall quality. I encourage you to lend your hand to really making your svs’ sing!!!! Happy listening, and I hope you enjoyed this tutorial.
I was in such a rush to button up my sub box, that I forget to snap pics with the NO-REZ installed. You’ll have to use your imagination lol.