Well this all started with me needing some DIY absorption panels for my front wall,
so I started with Owens Corning 703 1 1/2" rigid fiberglass and poly-fil as the base of the panel, I built this a little different than what I've seen on other audio websites.
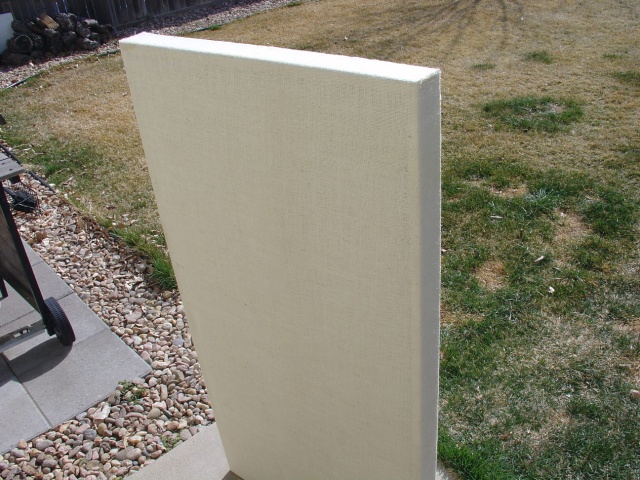
First the fame, I routered the front of the frame with a round-over bit so no sharp edges
for the burlap, and the back, I rabbet the edge so the backing board will be flush.
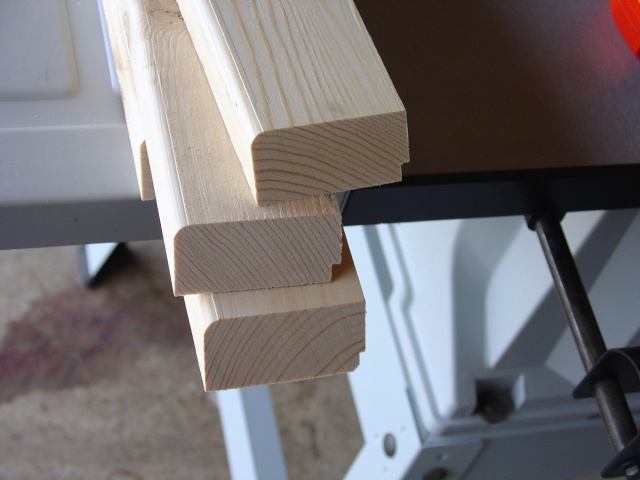
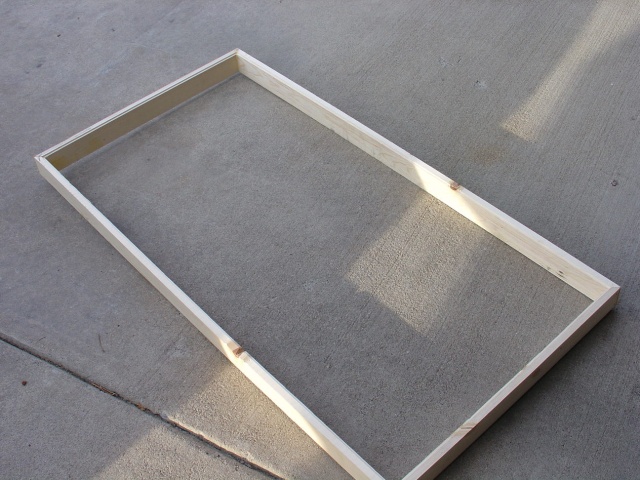
I used wood glue and a staple gun to put the frame together, in my opinion a hand or air staple gun makes this so much easier.

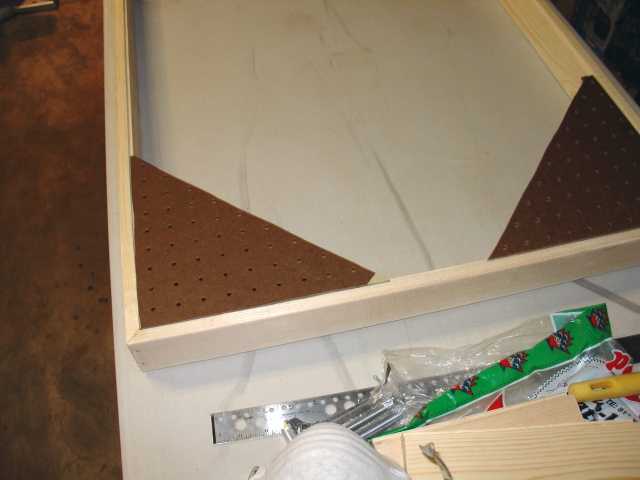
I cut out triangles from the backing board, if I used the whole 2"x 4" sheet it would have been to heavy to me. I glue and stapled them in and it worked fine to hold the fiberglass in place in the back.

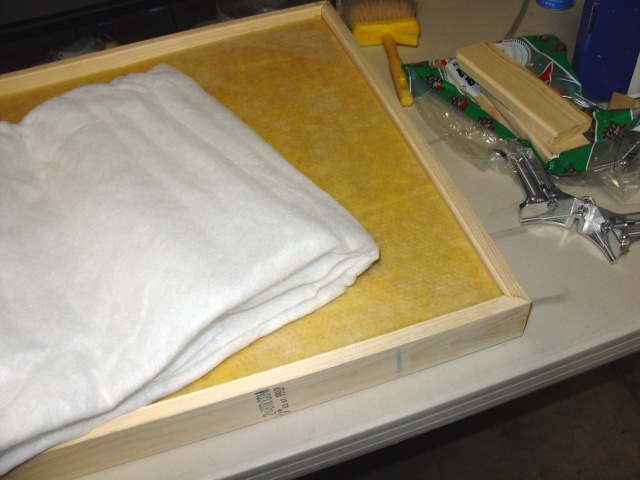
So I put a 1/2" layer of poly-fil down than the 1 1/2"? of 703 and 3/4" of poly-fil on top (the face). I had some white spray paint so I sprayed the frame so the wood would not show thru the burlap.
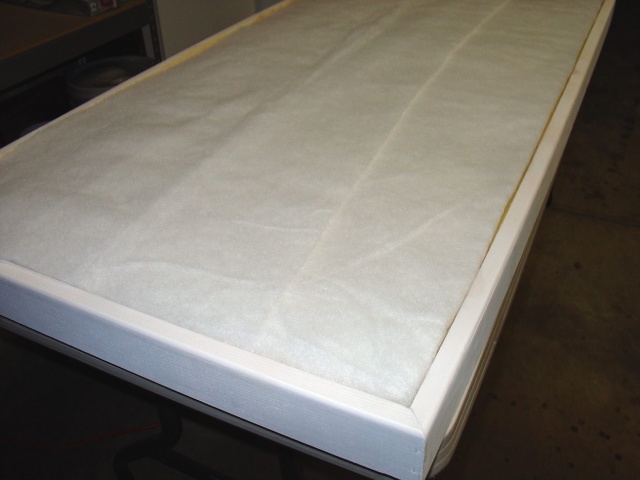
I than used spray adhesive and staples for the white burlap cover and a wire across the back of it to hang it up.
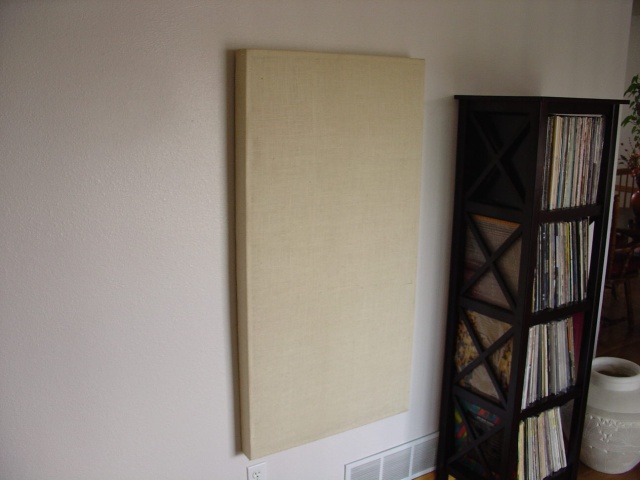
Everything turned out good, a little more time and work than I thought it would.
The only problem now, is I only made one, so I could see how it would turn out.
So I have 4 more to go, this will take some time.
The DIY panel is 3 1/2"W x 5 1/2"T x 2 1/2"?D and cost was around $27.
UPDATE:
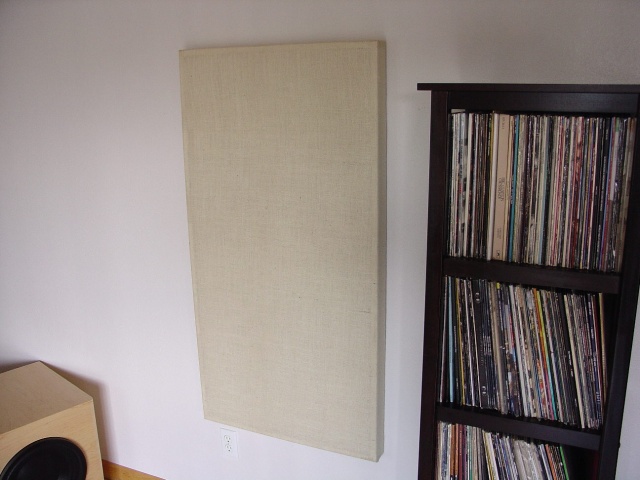
I finally finished the rest of my absorption panels, two on the side walls and three on the front wall. I already had four bass traps and EighthNerve controllers.
The differences in before and after are huge, taming the reflections in my room helped in several ways, first the mids are cleaner, I had a little blurring in the mids, which I didn’t know was that bad till I put up the panels and I also heard more depth and detail in the mids the funny thing is the extra detail was always there just covered up by to many reflections.
When I turn up the volume now it doesn’t get to busy sounding, the panels eliminated image confusion on loud passages.
And one of the biggest benefits I got is the back of my listening room opens up, to two
more rooms and I had severe echoes from these rooms but now the echoes are just about gone.
The treble was affected the least, I believe do to EighthNerve's controllers already being there.
The panels did take a very little air out and some ambience in back of me, at first I thought
the room was a little to damped but the more I listened, the more I believe now it just closer to the Recording.
I didn't do any before & after measurements of the room (don't have the means right now) but I would Highly Recommend getting some kind of acoustical room treatment
If you can.

Pete


