Having put together a few flat packs and assembled X-CS's over the last few weeks, I thought I'd share my method and tips.
[If you want me to send you a flat pack ($180), assembled ($250) or finished (price varies) CS... Email me at [email protected] ]
The X-CS is a single center channel that is designed to fit with a pair of X-LS Encores. I've built a handful of Encores as well, and ironically, the single center channel takes much more time than the pair of encores, but is quite satisfying to build. There is a significant increase in the total amount of routing in comparing the Encore to the CS, as well as a series of dado cuts that increase 'shop time'.
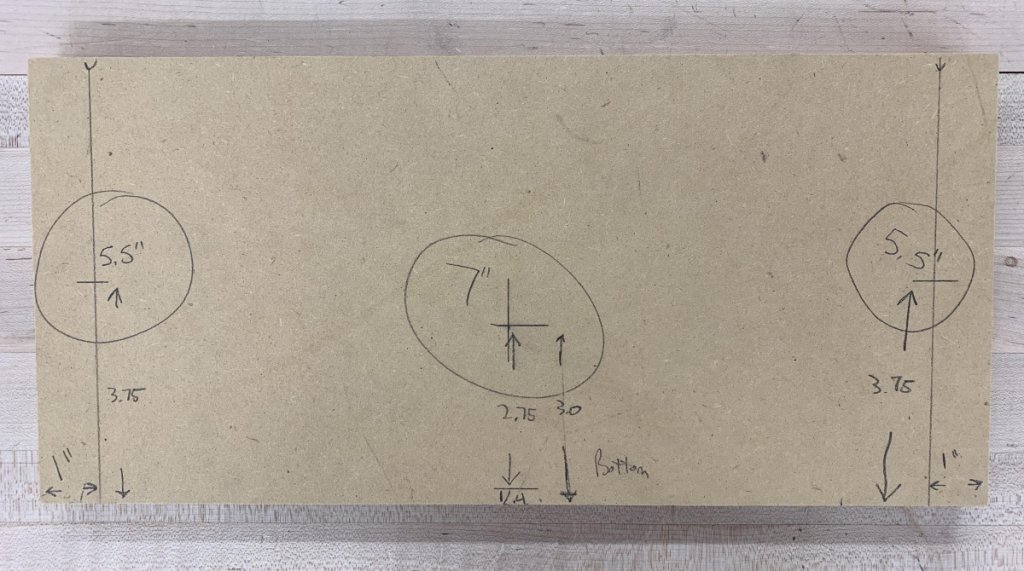
I built the CS with the intention of doing so in a way that makes a flat pack possible, and assembly as sure fire as possible. To do this, rabbets were used on the outside of the top and bottom as well as rabbets on the 'short' (7.5") side of the 'side' pieces. This changes the dimensions as follows:
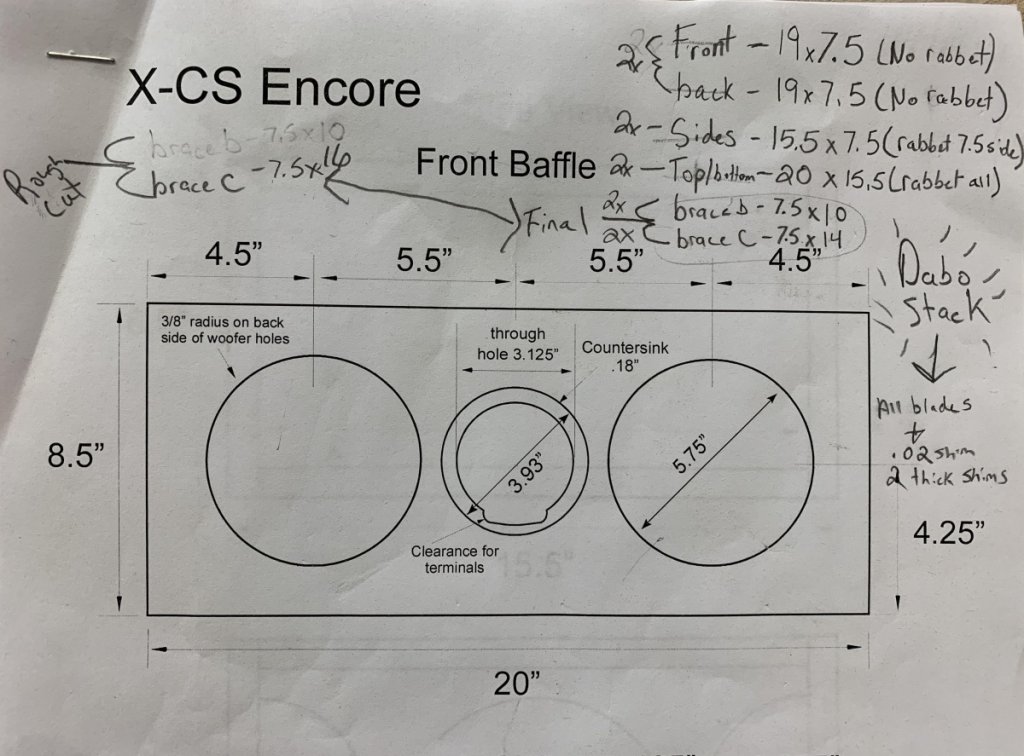
Front/back 19x7.5 (no rabbet)
Sides 15.5x7.5 (rabbet 7.5 side)
top/bottom 20x15.5 (rabbet all)
There was a change to the cut for the braces 'C' and 'B'. I'll get to it below.
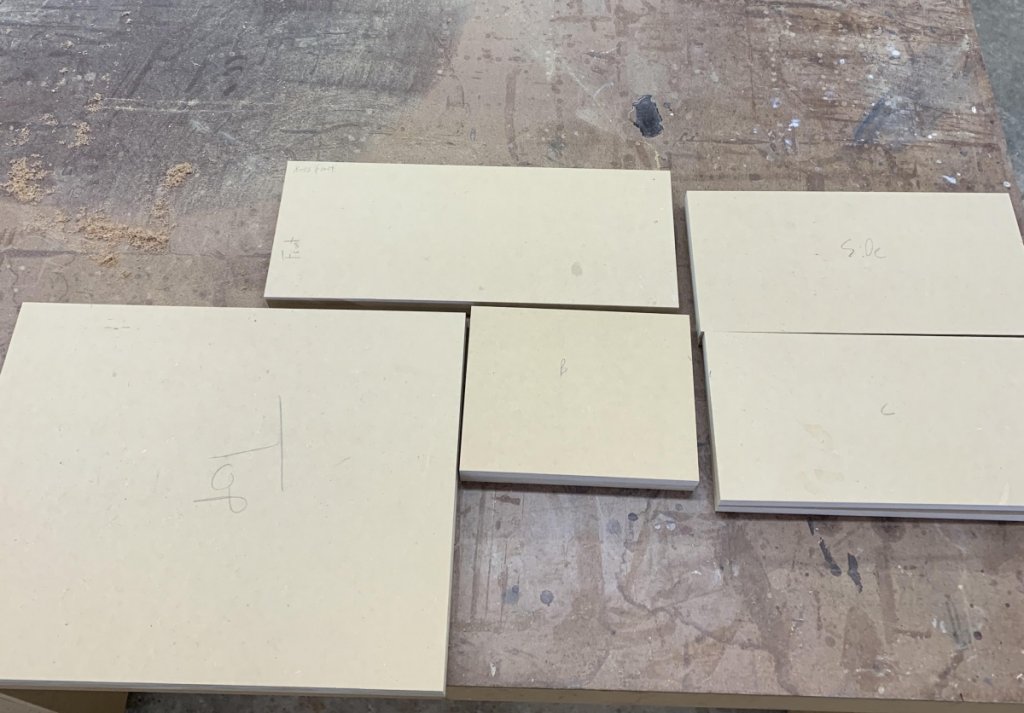
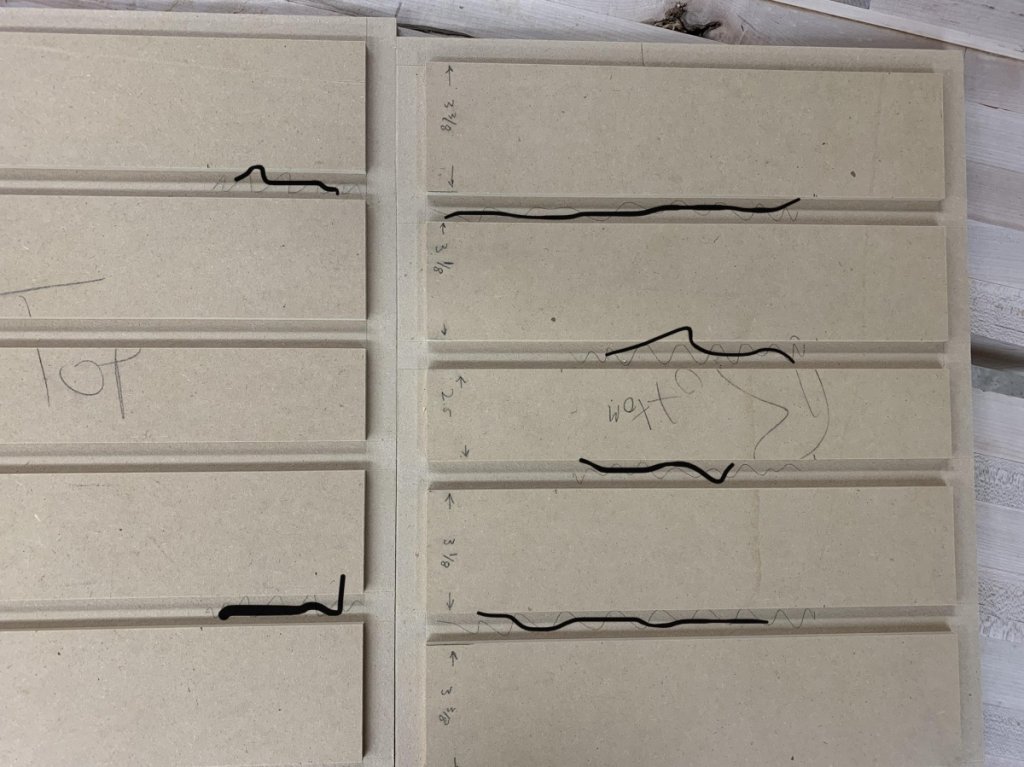
A small tip that is a bit of a beginner note, but may help some folks, is that I cut the pieces that have perfect mates a bit longer than the intended final dimensions on the chop saw first. Then finished the pairs on the table saw so that they were relative to each other perfect. Tiny discrepancies in the 'absolute' dimensions are not a problem that way. The 'mates' are: Top/bottom, both 'C's, both B's, side's, front back.
Next tip: make your rabbets slightly wider than the thickness of your mdf so that there is a slight overhang(we're talking a couple thousandths), then you can sand/flush trim it flat, instead of the other way around of trying to bring the face of our panels to the edges. Bring edges to the face panel. This also gives some wiggle room in the glue up.
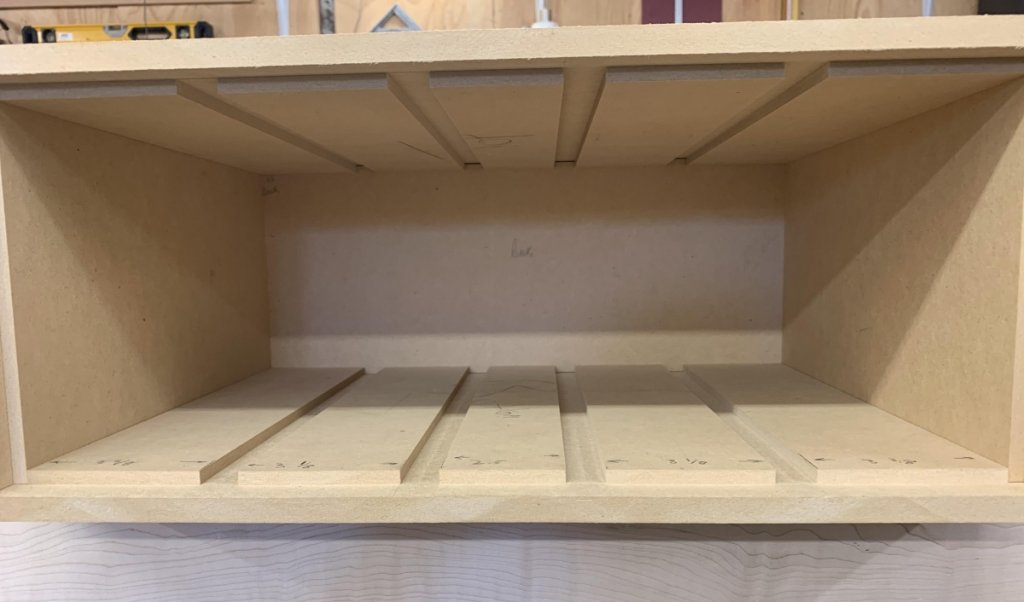
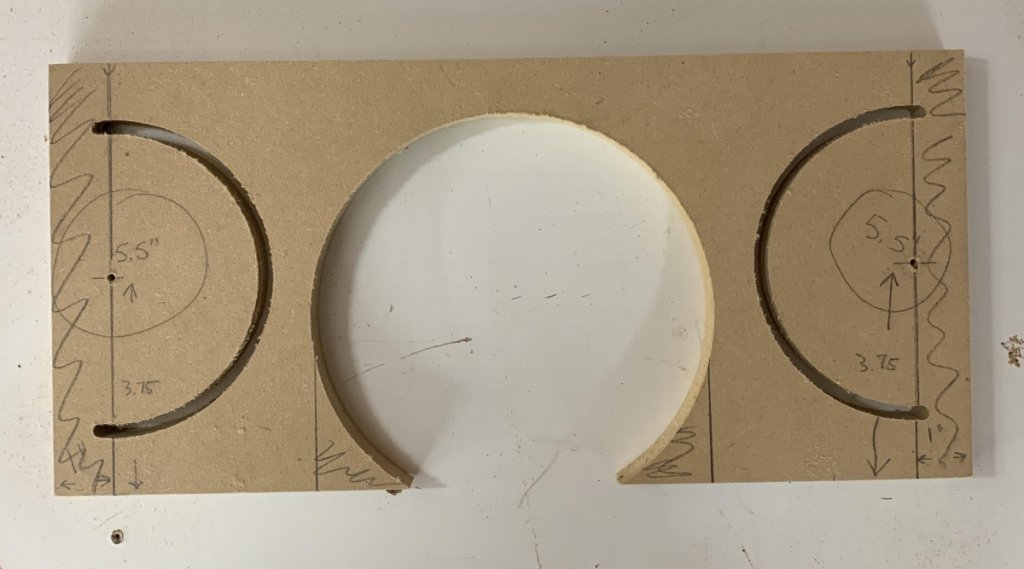
Next step is to cut your 'Dado's'. These long, shallow cuts, give you the ability to just slide your braces into place. It assures an easy and precise glue up. Again the intention to have your cuts relative to each other comes into play, as I measured the placement of the dado's on the bottom panel. Exact layout isn't critical because of the next steps explained here. As I cut them I would pass the top thru the table saw in the exact same position. Also flipping the piece end for end to get an exact mirror copy on the opposite side of the panel. So cut all 4 dados for brace B with the same fence setting before moving the fence to cut dados for brace C. I have to highly recommend this, because if the dado's aren't perfect relative to each other...you wont get the braces to slide in...even if off only by a 1/16th.
The dado's are cut relative to the changed dimensions due to the perimeter rabbet! Below image shows where the cuts line up now. Don't just follow the cabinet plans!
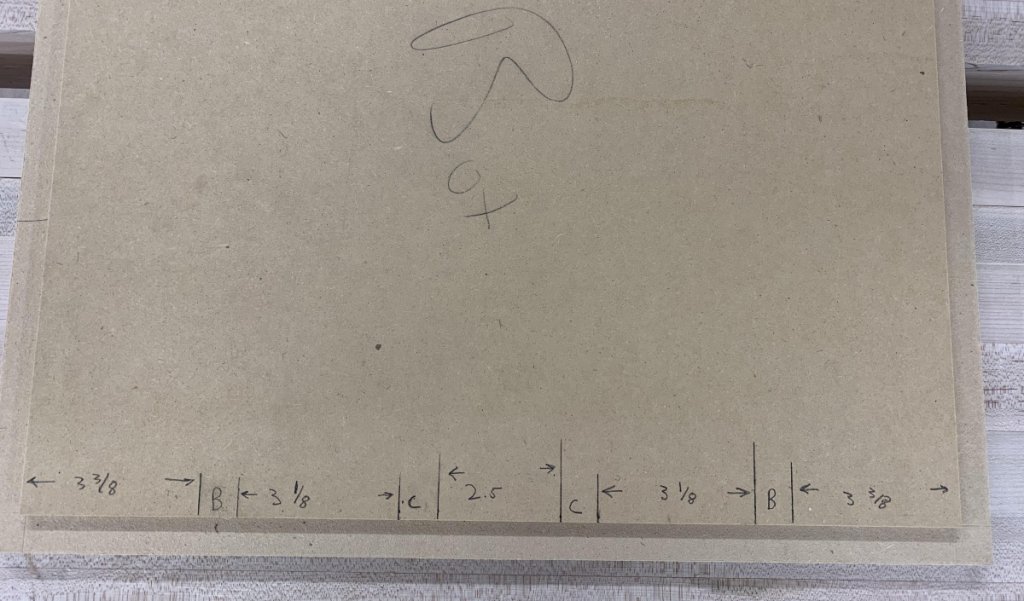
A picture that displays the 'relative' nature of the dado's top to bottom. Here you can see the layout lines aren't even put on the top panel because once you find the fence setting you like on the bottom the top is ran through the saw at the same setting.

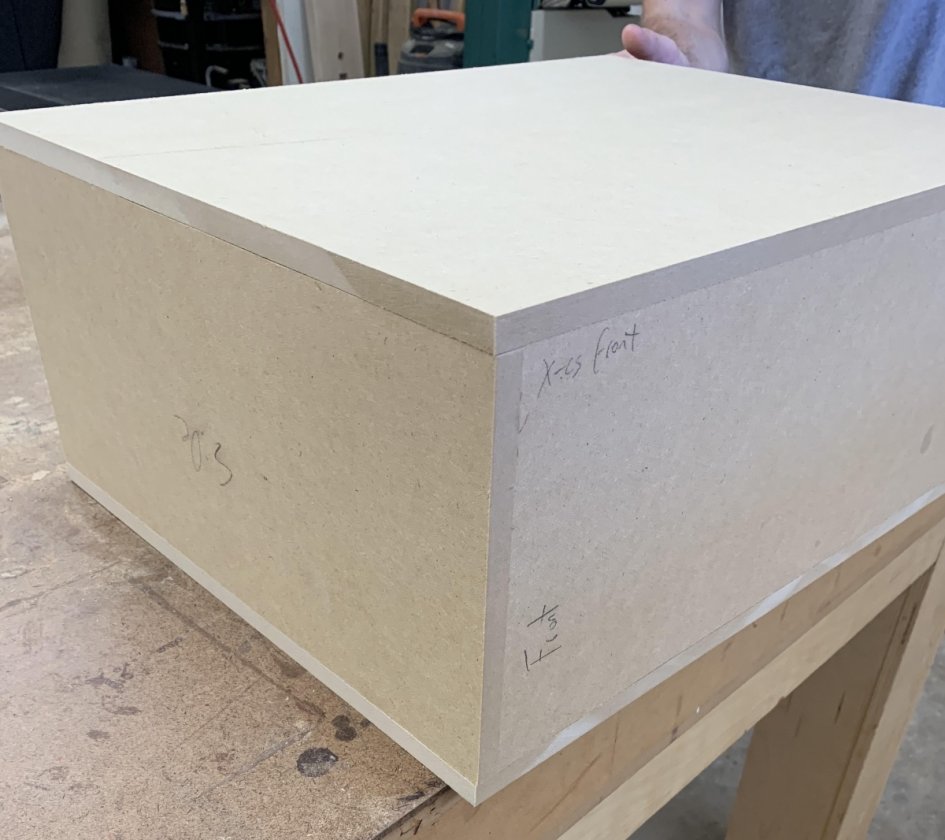
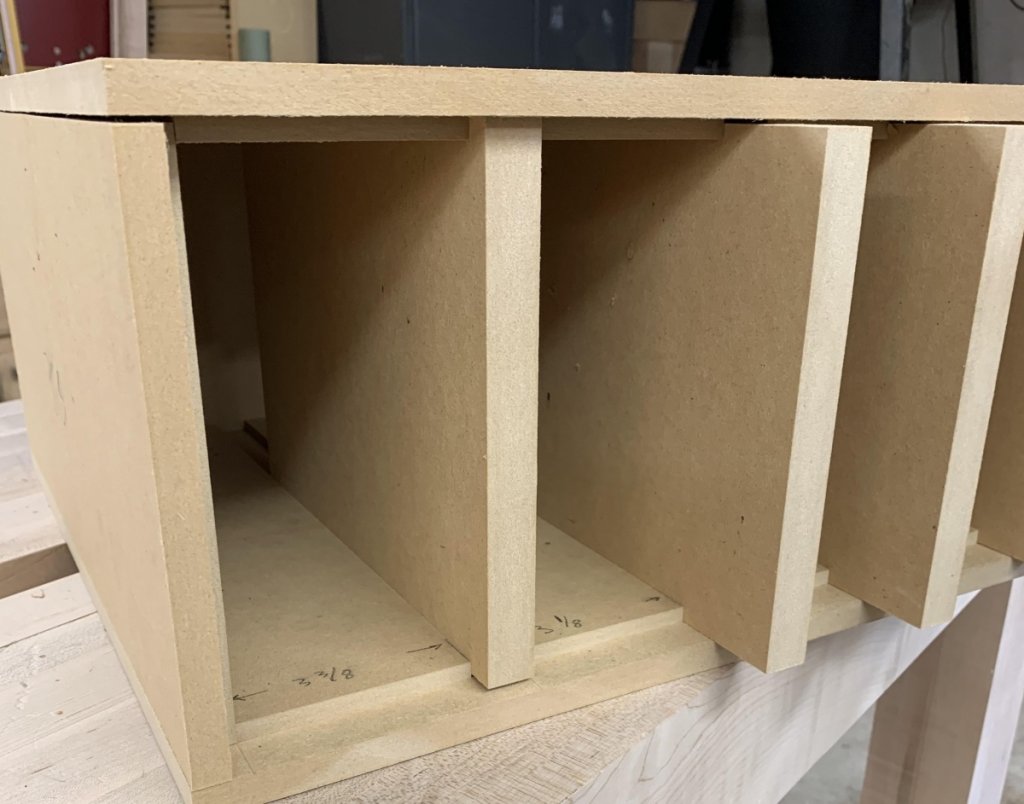
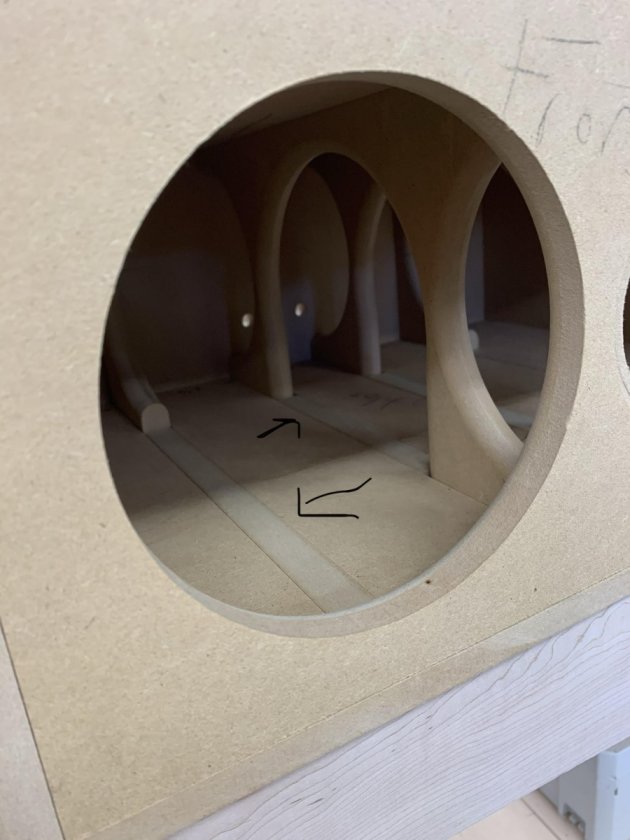
A dry fit starts showing why the build is so satisfying.
Next a dry fit of the braces to see if they slide in the dado's easily with no binding before they are cut.
Now onto the braces! This is where a huge time sink occurs as there is a ton of routing to be done.
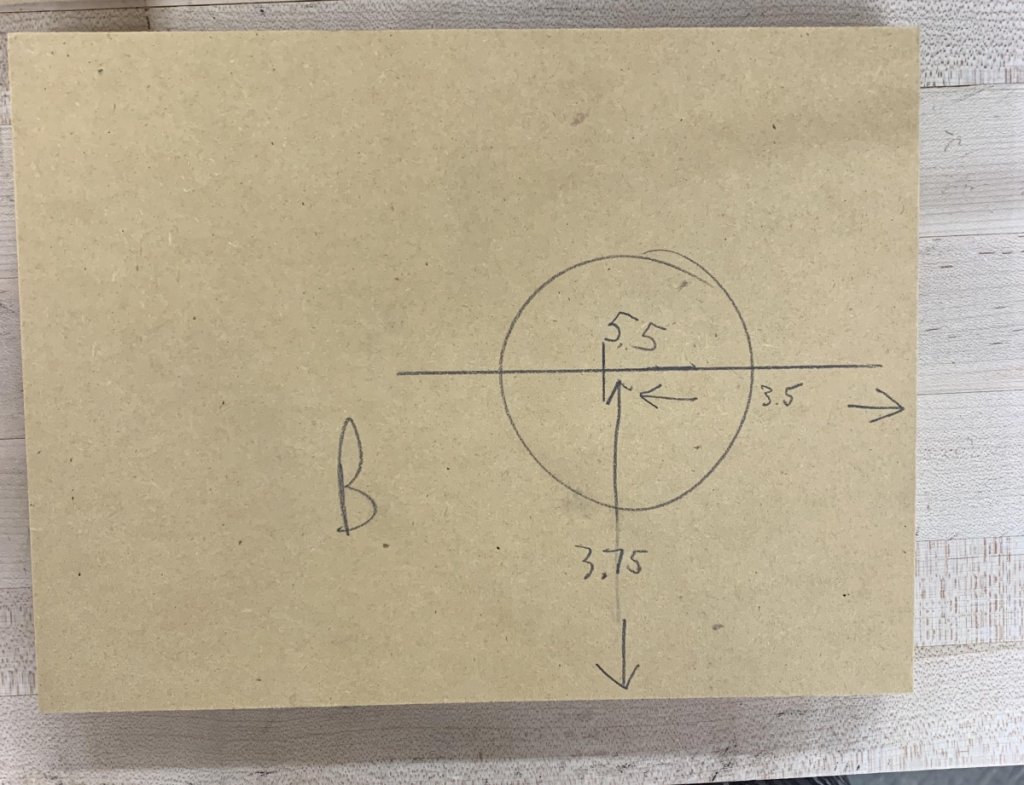
The dimensions of the initial board for the brace are slightly altered from the cabinet plans. Which also alters the placement of the routing. (but not the radius of the circle)
B Brace: 7.5x10
C Brace: 7.5x14
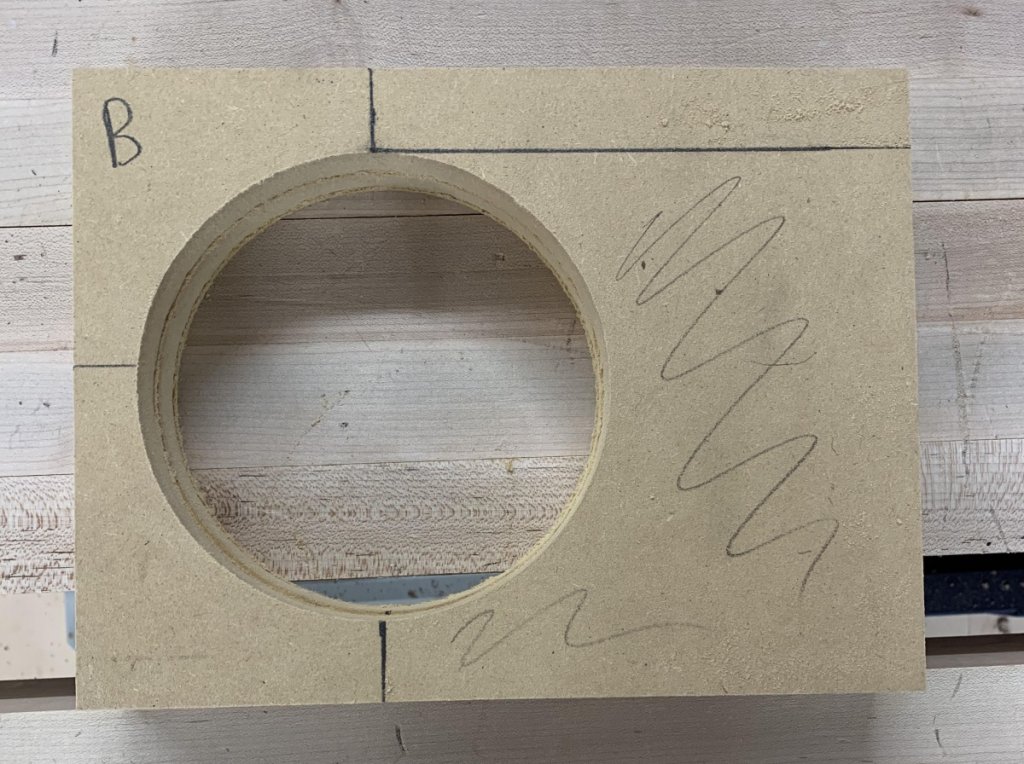
B Brace outline
B Brace showing what to cut off after routing.
C Brace also has an inch added to either side. This give you somewhere to anchor your router to cut out the half circle.
C Brace outline
C Brace showing half circle routed and then what excess is cut off
I also did a 3/8 round over on all the sides of the braces that don't slide into the braces. This isn't explicitly noted in the cabinet plans, but I have it on good authority that this is best practice (source: Danny)
Now the best part. Dry fitting the braces. This is where doing the dado's pay off big time, as the braces just slide right in.
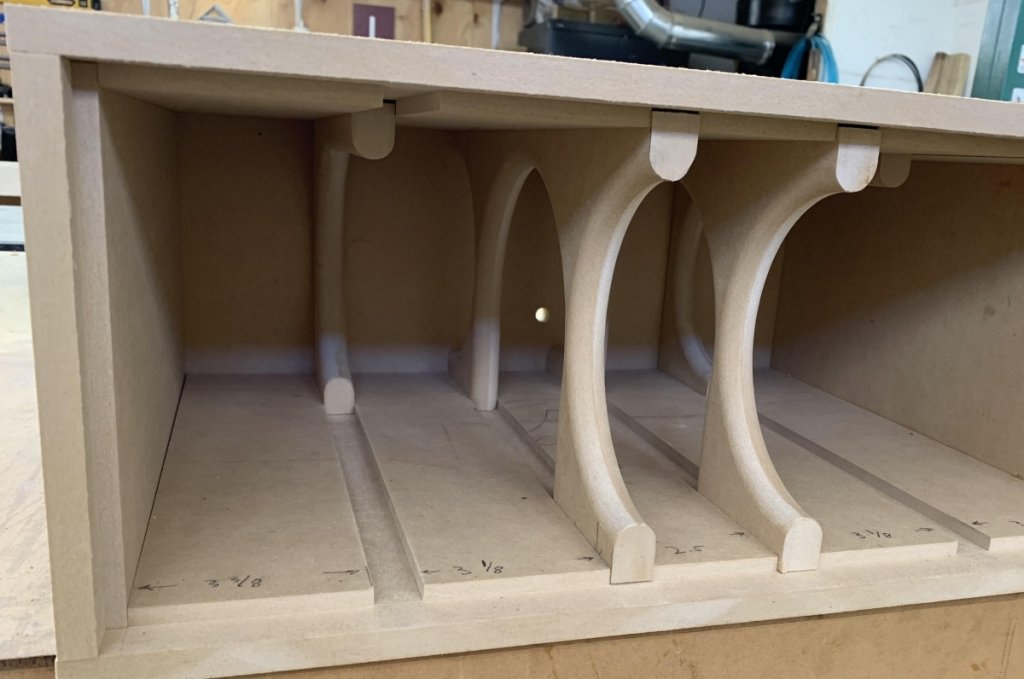
I can feel a few of you about to blow a gasket...... 'WHAT ABOUT THE GAP IN THE CABINET DUE TO THE DADO'!!!! MA CABINET RESONANCES!!!!!!!' or something along those lines...
The solution is super simple. Cut some 1/4x 3/4 strips to fill the gaps. The ease of glue up with the dado's is easily worth this simple final step. It also assures perfect brace placement. If you don't agree, by all means skip the dado and glue them up some other way.
Roughly where the strips will be placed after glue up.
A recommended 'glue up order' would be to first to start gluing the box together with no braces and leave the front baffle off. Then slide in braces with minimal glue here(there's really no need for glue on these as they are a "piston fit" and the little strips will keep them from sliding) but I would recommend a small bead of glue in the top and bottom dado before sliding them in, then glue in the front baffle. Then lastly a couple drops of preferred glue for the filler strips.
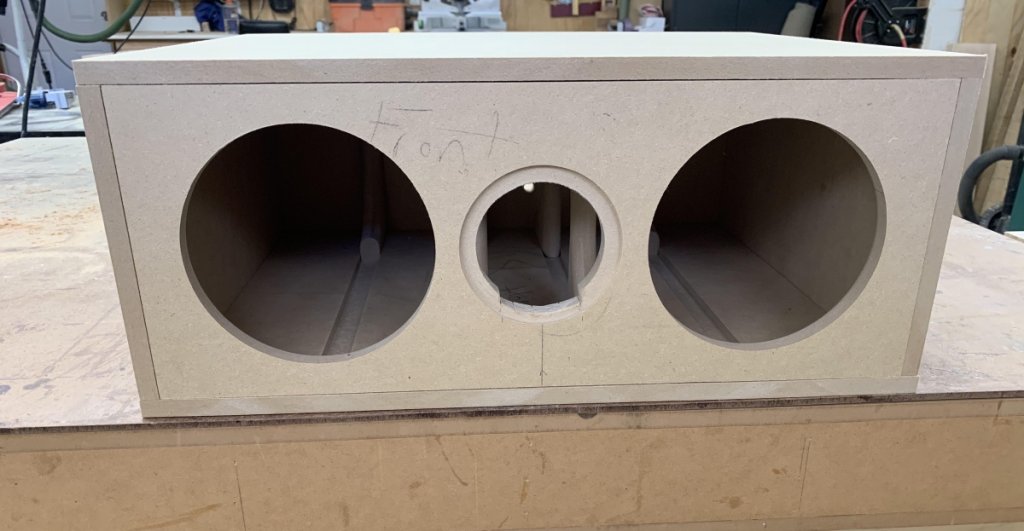
preemptive: the 'a' braces are included. The woofer holes are also have their 3/8 round over. The front baffle should be rounded after glue up. The rabbets are easy enough to hide with duratex or a veneer. If you'd like to make the front baffle a singular piece, that would leave nothing to worry about with the rabbets.
Now go park your truck on these!!!
