My goal was to build a silent media server to wirelessly play high resolution (up to 24-bit/192kHz) FLAC files stored on my desktop PC direct to my DAC via WASAPI or ASIO and S/PDIF, not USB. I took on building this server for the plain fun of it. I’m a geek and I know it.

This is a step by step guide on how I built the server for anyone interested…
First off, a BIG thanks to Chris Connaker for his work on
Computer Audiophile without which this would not have been possible.
I am building this real time as I post and will split the build into three separate posts:
1. Hardware
2. Configuration & Software Install
3. Use and Listening Impressions
Here we go…
Part I – HardwareParts list (Newegg, Amazon & eBay):
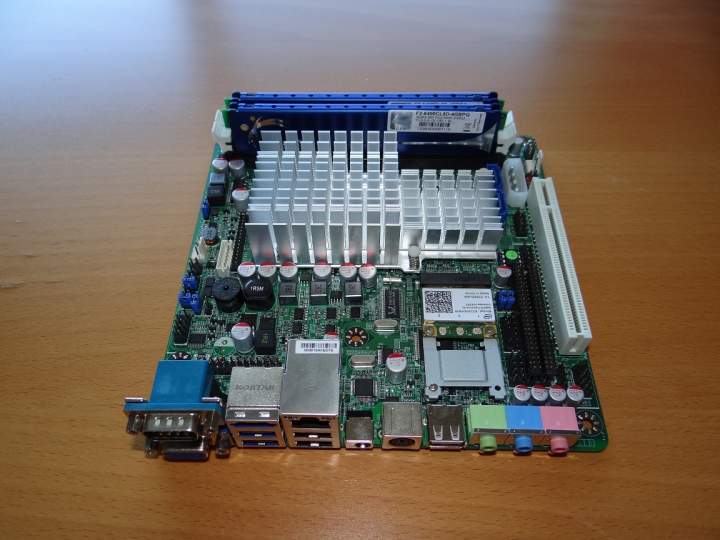
• $150 - JetWay JNF96FL-525-LF Mobo Intel Atom CPU Combo
• $110 - OCZ Petrol 128GB SSD
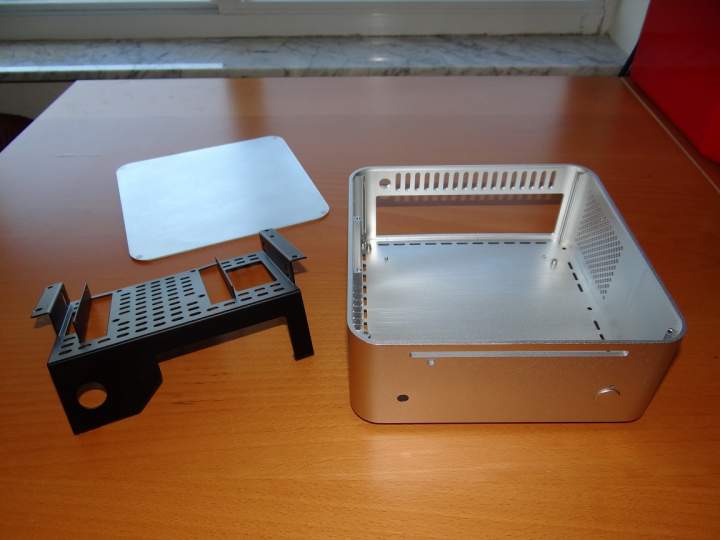
• $68 - Wesena ITX2-S Case
• $55 - G.Skill 2x2GB DDR2-800 Memory
• $51 - Sony BC-5600S Slimline Optical Disc Player & Bezel
• $42 - Intel Ultimate N Mini PCI-E Card, Extension Bracket, Pigtail & Antenna
• $24 - 2x8” SATA Cable & Slimline SATA Adapter
• $20 - Habey PW-12V402 60W (12V/5A) Power Supply
• $7 - 2-pin Digital Cable & Chassis Mount RCA (for S/PDIF)
• $527 total
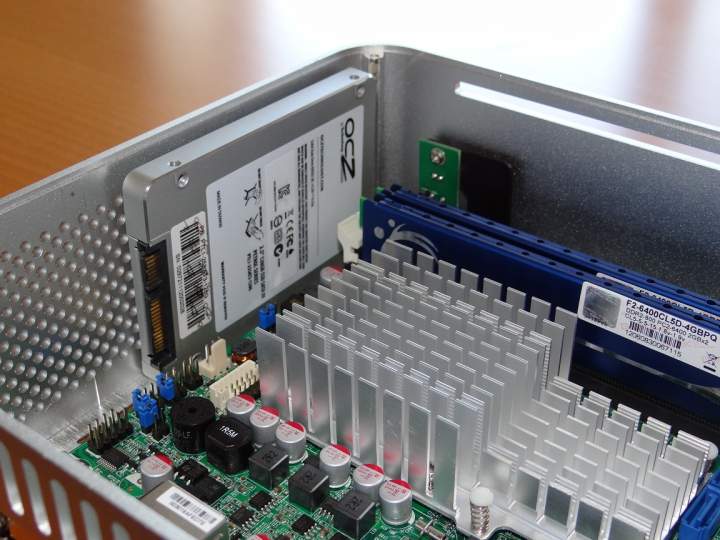
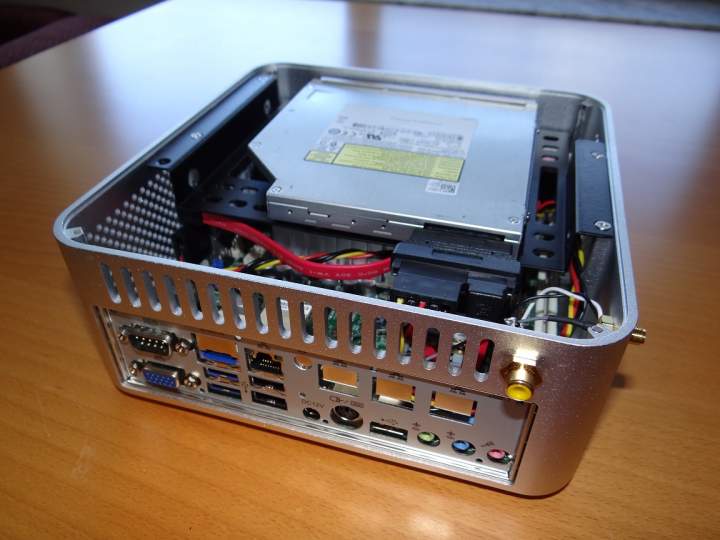
First off the Wesena ITX2 case is absolutely tiny (7.75” x 7.75” x 3”) and built like the proverbial tank, and I think it looks fantastic. The supplied bracket has mounting holes to mount two 2.5” drives and one slimline optical disk drive. It has convenient screw access holes to make assembly easy.
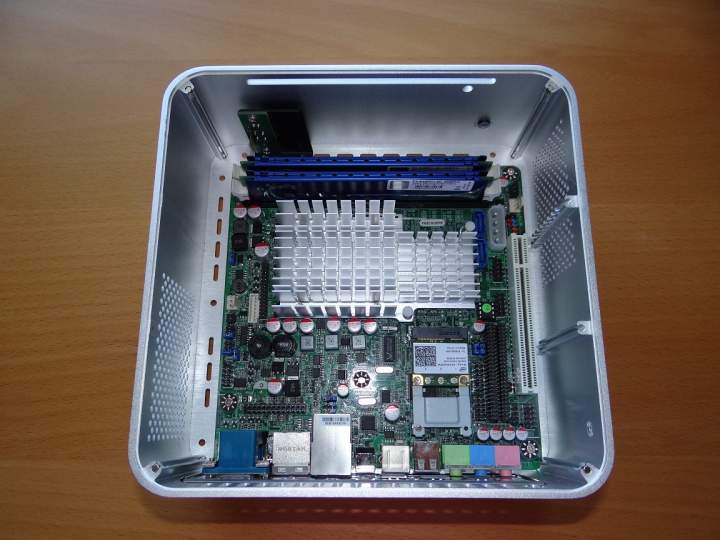
I installed the memory and the half-height mini-PCI-E wifi card with extension bracket on the mobo.
Then I snapped the I/O shield in the case...
and loaded the mobo in the case with 4 screws.
Did I mention I love how small this thing is?
The case has two mounting positions for 2.5” drives, one under the optical drive bracket/directly over the processor heat sink and one vertically on the side of the case. I mounted the SSD vertically on the side of the case with 2 screws so that the heat rising off the Atom processor’s heat sink would not cook the drive.
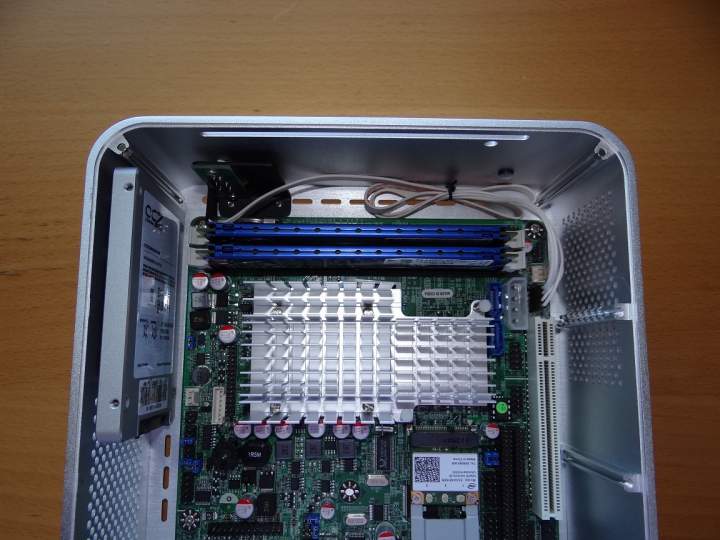
Next I connected the front panel connector (power/LED) to the front panel and mobo.
I installed the optical disk drive on the mounting bracket with 4 screws. I don’t have the drive bezel yet and it is required to use the case’s eject button so I’ll just use software eject until I get the bezel. (It is the only part I had to source directly from China.)

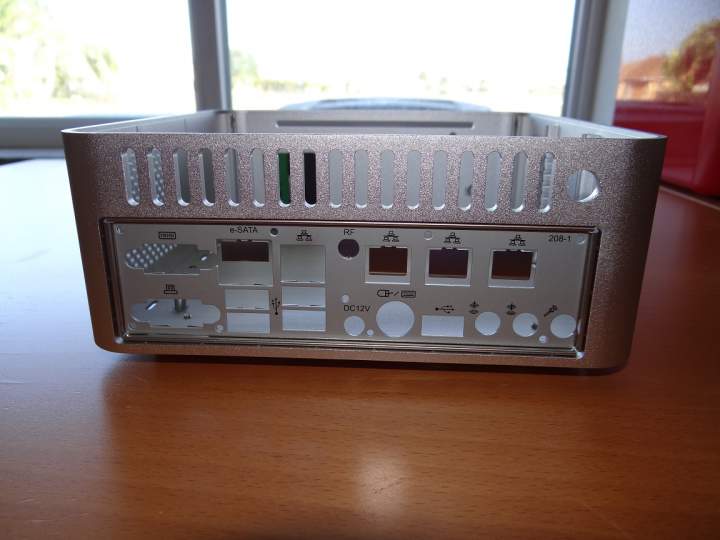
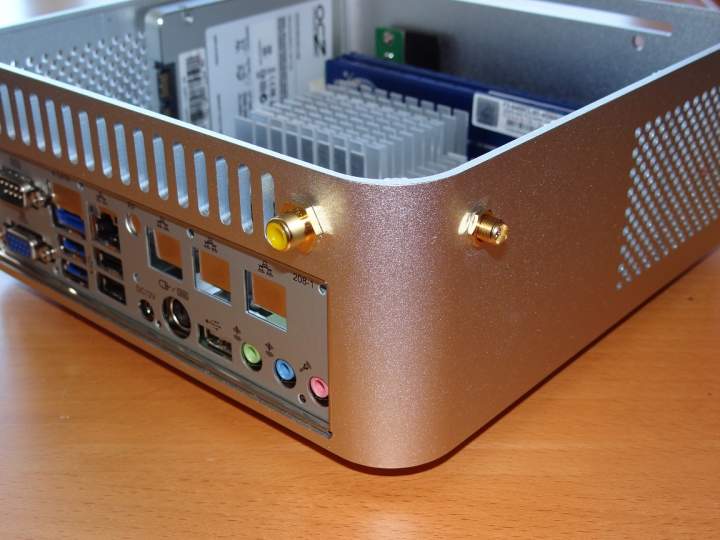
I then added the RCA S/PDIF jack and the antenna mount to the case. The case had a hole for a wireless antenna which I enlarged to ⅜” accept the RCA S/PDIF jack. I drilled a new ¼” hole for the wifi antenna. I am only using one but can add two more later if I find I don’t have enough wifi bandwidth for higher bit rate files. I plan to use mgalusha’s FLAC -> Wav loader tool so that should not be an issue. The aluminum case was easy to drill through and it looks like it came with the jack installed. I plugged the antenna pigtail onto the wifi card and the 2-pin cable onto the mobo S/PDIF header. The only soldering required on this build was soldering lead wires from a 2-pin digital cable onto the S/PDIF jack.

Next I plugged the SATA data and power cables into the mobo and SSD.
Then I installed the optical disk drive and mounting bracket into the case with 6 screws (2 into the top side of the vertical SSD, 2 into the bottom of the case and 2 into the internal side mounts), the SATA data and power cables onto the slimline adapter and the adapter onto the drive.
Have I mentioned I love how small this thing is?
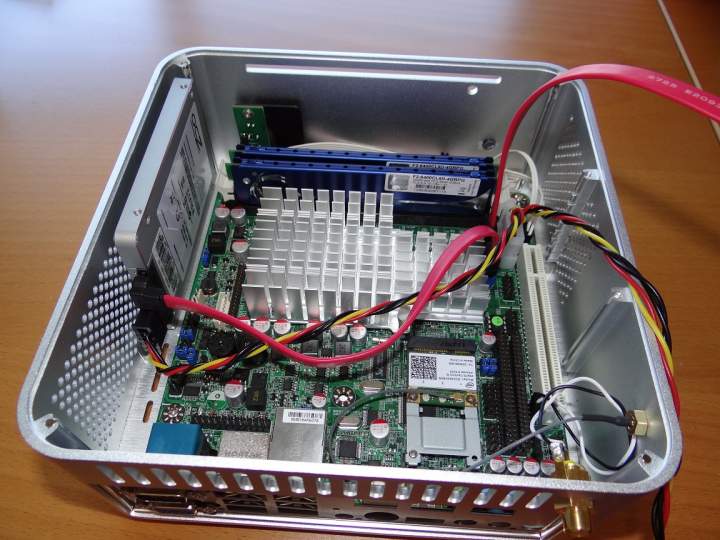
Lastly on goes the top cover which is attached at the corners with embedded magnets. (pretty neat) Next post will be booting the system and installing software.


Martin


