First Time Build X-LS Encore

0 Members and 1 Guest are viewing this topic. Read 7375 times.

grimace

First Time Build X-LS Encore
« on: 28 Feb 2011, 12:16 am »
Am new here to AC and the DIY audio space.  I ran across GR when I started doing research for a new bookshelf speaker system.  After a lot of reading and many emails back and forth with Danny, I thought it would be good to start with something simple as a gift, so I'm building a pair of XL-S Encores for a friend.  Have already pinged a few of you for help and you guys have been great.  Ron suggested I start a topic to show the build, so here goes.

I am building the basic plans with no port in the back out of 3/4" MDF and have the basic boxes built and braced:


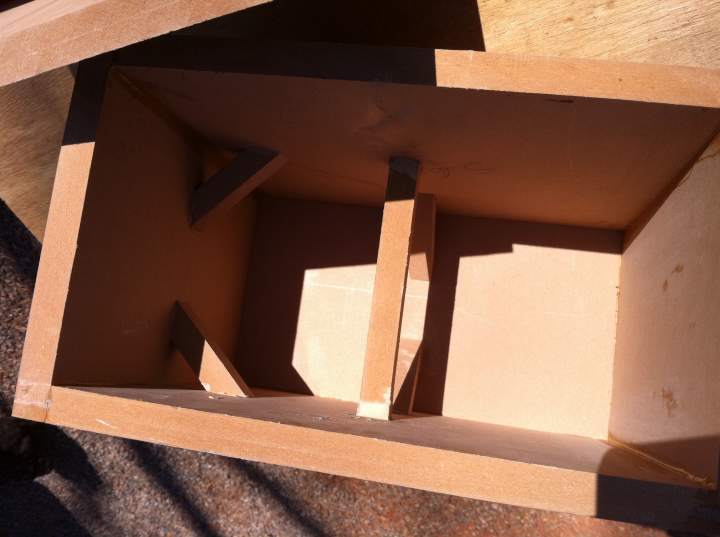
It was a nice day yesterday, so I glued up the braces outside.


I used regular Titebond II to glue up.  When I do it again, I will either use biscuits or shoot some brads to keep the sides aligned better, they slipped around some so I will have some extra sanding to do.

The plan is to veneer these, which will be a first for me.  And my veneer arrived yesterday, and it looks great.  Tomorrow, I will cut out the circles on the front baffle and on the back panel for the posts.

P.S. couldn't figure out how to rotate the picture so it would be portrait, so if anyone knows how, please let me know.

jeffh

Re: First Time Build X-LS Encore
« Reply #1 on: 28 Feb 2011, 12:43 am »
Looks good so far.  Your going to like those when you finish.  Great value for the money. 
I recently built my first speakers (X-LS) and did my first veneer job.  Just take your time,
measure twice and it will turn out fine.

grimace

Re: First Time Build X-LS Encore
« Reply #2 on: 28 Feb 2011, 01:32 am »
Looks good so far.  Your going to like those when you finish.  Great value for the money. 
I recently built my first speakers (X-LS) and did my first veneer job.  Just take your time,
measure twice and it will turn out fine.

Thanks, I remember your post on the mini's you did with the satin black oak veneer.  They looked fantastic.  Appreciate the encouragement and the tip, I always forget to measure twice...

grimace

Re: First Time Build X-LS Encore
« Reply #3 on: 28 Feb 2011, 01:41 am »
Ok, just found out I'm going to have make a design change.  The really nice sapele veneer that I ordered off of ebay (http://stores.ebay.com/rjfritz123-veneer?_trksid=p4340.l2563) is a little too narrow at about 11.5" usable to allow me to reach the front baffle. 


So, I guess I'm now going to have to do something different with the front baffle.  Maybe do a 3/8" roundover on all four sides and just paint the MDF?  Very open to ideas and any pictures of suggestions would be great.

Thanks

chip

  • Full Member
  • Posts: 868
Re: First Time Build X-LS Encore
« Reply #4 on: 28 Feb 2011, 02:25 am »
What about something like this -found on diy over at avs


ChrisM

Re: First Time Build X-LS Encore
« Reply #5 on: 28 Feb 2011, 03:31 am »
Man chip, you had to post that picture( i sold him the RBR kit for those speakers) :duh:

sl_1800

  • Full Member
  • Posts: 406
Re: First Time Build X-LS Encore
« Reply #6 on: 28 Feb 2011, 02:04 pm »
What about something like this -found on diy over at avs


Now that is a nice DIY job.  Grimace I'm looking forward to seeing how yours turnout.

grimace

Re: First Time Build X-LS Encore
« Reply #7 on: 28 Feb 2011, 03:39 pm »
Thanks Chip. That is a great idea.  I like the edge work they did on the baffle. Very nice.

Outofthewoods

  • Industry Participant
  • Posts: 980
  • Fallen Enclosures, Inc. Crafted with Passion
Re: First Time Build X-LS Encore
« Reply #8 on: 28 Feb 2011, 11:01 pm »
Hey Grim,

Nice veneer choice. :thumb:

FWIW, You can duplicate that baffle detail by setting your round-over approx. 1/16" deeper than usual.

Good luck!

Ruben

S Clark

  • Full Member
  • Posts: 7372
  • a riot is the language of the unheard- Dr. King
Re: First Time Build X-LS Encore
« Reply #9 on: 1 Mar 2011, 03:44 am »


Although it looks nice, leaving that little 90 degree drop off the surface of the front baffle is, to some degree, defeating the purpose of having the roundover.  You might want to let the roundover be smooth for the smoothest FR. 

grimace

Re: First Time Build X-LS Encore
« Reply #10 on: 3 Mar 2011, 12:34 am »
Ran into a problem. The plans I have call for a 4.125" outer ring and a 3" thru hole for the binding post cup. But the actual cup is much smaller. Wish I would have pulled the cup out before I started the hole. Sigh...

S Clark

  • Full Member
  • Posts: 7372
  • a riot is the language of the unheard- Dr. King
Re: First Time Build X-LS Encore
« Reply #11 on: 3 Mar 2011, 01:32 am »
If the through hole is a bit big, it doesn't matter.  As long as you have a tight fit between the tweeter face plate and the tweeter recess in the front baffle, and have enough material for you screw to hold, you should be OK.  You can even slant the screws if you have to in order to get them to bite. 

grimace

Re: First Time Build X-LS Encore
« Reply #12 on: 3 Mar 2011, 01:59 am »
Thanks sclark. This is on the back and is the hole for the speaker wire posts assembly. Appreciate the tip though.

grimace

Re: First Time Build X-LS Encore
« Reply #13 on: 6 Mar 2011, 12:46 am »
Made some progress this week, but not too much.  The boxes are complete and sanded.  I also found out why I had an issue with the hole size earlier.  The plans that Danny originally emailed me had a larger hole on them than the ones that actually came in the box with the X-LS Encore kit.

Here are the boxes (I wish I could figure out how to rotate the pictures):


I also installed the No-rez.  I ended up just cutting it on the table saw.  It was kind of tedious getting it to fit around the braces.  Not sure I did that great of a job, so am very open to feedback.


Onto the veneer next.  Am having fun so far...

jn316

  • Full Member
  • Posts: 422
Re: First Time Build X-LS Encore
« Reply #14 on: 6 Mar 2011, 04:13 am »
Nice job so far.

Where are you going to mount the crossover? Most mount it in the bottom of the cabinet.

grimace

Re: First Time Build X-LS Encore
« Reply #15 on: 6 Mar 2011, 11:05 am »
Nice job so far.

Where are you going to mount the crossover? Most mount it in the bottom of the cabinet.

 :duh:  - Good question, I guess I'll pull out the bottom piece of No-rez and mount it there.  Unless someone has a better suggestion.

Step 2: Thanks jn316, I went out to the shed and pulled up the bottom layer of No-rez, so I should be good to put the crossover on the bottom now.
« Last Edit: 6 Mar 2011, 12:46 pm by grimace »

jn316

  • Full Member
  • Posts: 422
Re: First Time Build X-LS Encore
« Reply #16 on: 6 Mar 2011, 05:30 pm »
Cool!

I thought that maybe you had overlooked that, but wasn't sure. There's a whole lot worse mistakes we can make in life!  :thumb:

grimace

Re: First Time Build X-LS Encore
« Reply #17 on: 11 Mar 2011, 10:36 pm »
Didn't get a whole lot of time to work on stuff this week, but here are the next few steps.  I have raw veneer and saw that it helps to "soften" it up so I started that process.


It takes about 12 hours to dry so hopefully I can start the heat & glue method to apply it tomorrow.  I also broke out the soldering iron and soldered the wires to the circuit board.  Seemed to go just fine.  Boy, it has been a long time since I soldered anything.

I did have one question, which prong is positive & negative on the drivers?


Here is a picture of the wired boards.  Still having a lot of fun with this.  Gotta admit, am very tempted by the V2 sale or the scratch-n-dent N3 enclosures that Ruben has for sale!!!


grimace

Re: First Time Build X-LS Encore
« Reply #18 on: 19 Mar 2011, 01:24 pm »
Am ready to assemble them, but am not sure which wire goes where on the drivers?  See post above.  Can someone help me please...yes I'm a newbie :)

HAL

  • Industry Contributor
  • Posts: 5255
Re: First Time Build X-LS Encore
« Reply #19 on: 19 Mar 2011, 02:24 pm »
Is there a + symbol embossed or red mark near one of the terminals?  If so that is positive.  Sometimes it is hard to see on the white terminal strip on the woofer.