Let me start by saying that I am a newbie at building speaker cabinets, I have never made one, but I always wanted to do one and when I saw that Danny was offering good deals on the Encore series, I decided to take a plunge. I must say that I am not an estranger when it comes to carpentry as I have done a good number of projects.
I also want to thank Danny for making available these speakers to all members and for sharing generously his knowledge, without some clarifications, I may have not tackled this project; thank you Danny.
I never had a center channel and I was considering many options; even buying one ready-made. I am aware and read that timbre matching is important and that MTM center channels have lobbing problems, etc. So the only viable solution will be to have all three main speakers the same and vertically oriented; if this is the ideal situation, many of us do not have the space to make that accommodation. On the other hand, my ears are aging and I am not too concern about timbre issues; I leave this worry to those with finer ears than mine.
The Encore series enjoyed good reviews and when the sale announcement showed up I could not wait. I initially wanted the X-SL Encore, but decide to go for the X-CS Encore kit instead with the updated caps and No-Rez; I decided to keep the same resistors.
There was some hope that cabinets will be available later on, but after waiting and then finally knowing that within the list Danny posted of boxes available, the X-CS was not there, that is when I decided to jump on, get my tools and get going before cold sets in.
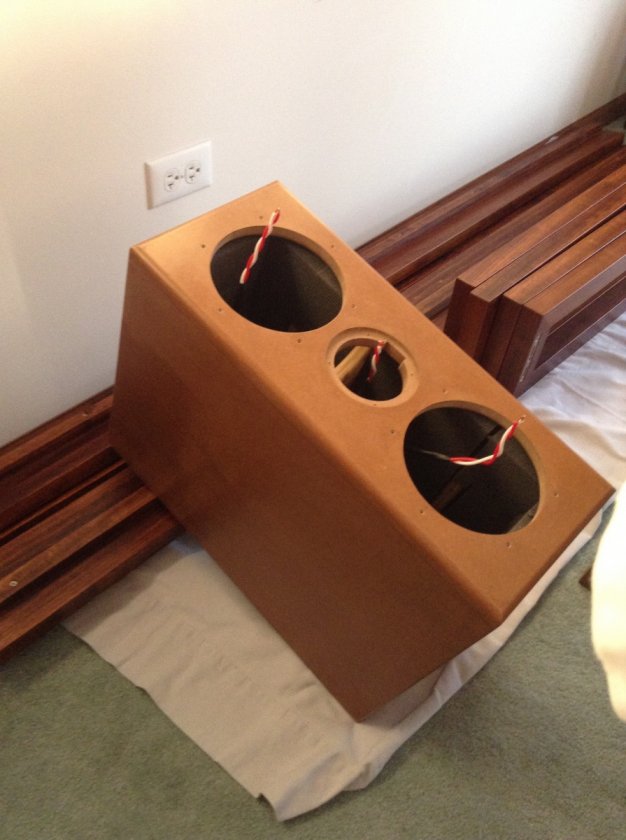
I followed the plan Danny sent with the goodies, MDF all the way, but for braces I used ¾” Baltic birch with 3/8” radius all over, sanded smooth and a coat of shellac as a final touch. The box is held together with cookies and there are also cookies holding the large braces; I did not use nails or screws anywhere, the only screws are those holding the drivers. When the glue dried, I sealed all the internal joins with a bead of silicone, then I lightly coat the interior walls with shellac, this is to have a better surface for No Rez.
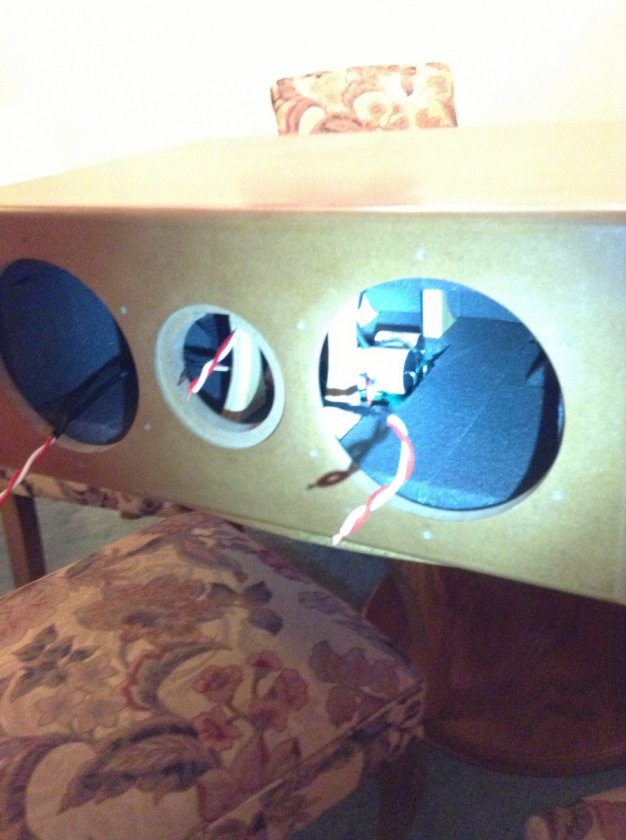
One sheet of No Rez covers everything but the back of the front baffle….I know Danny said that there should be no empty spaces. I did not want to order another sheet just for the little bit I need it to fully cover the back of the front baffle, so I left it like that. I did put a handful of polyfill in the back wall facing each driver as recommended.
I did not want to put yet another “how to do it” kind of tread since there already are a handful and well detailed construction guides that other members have graciously shared. The guidelines are basically all the same; however, the techniques for each build are different because not everyone has every tool; therefore, creativity will come to play and that is what happened in my case, so I will share what I did different.
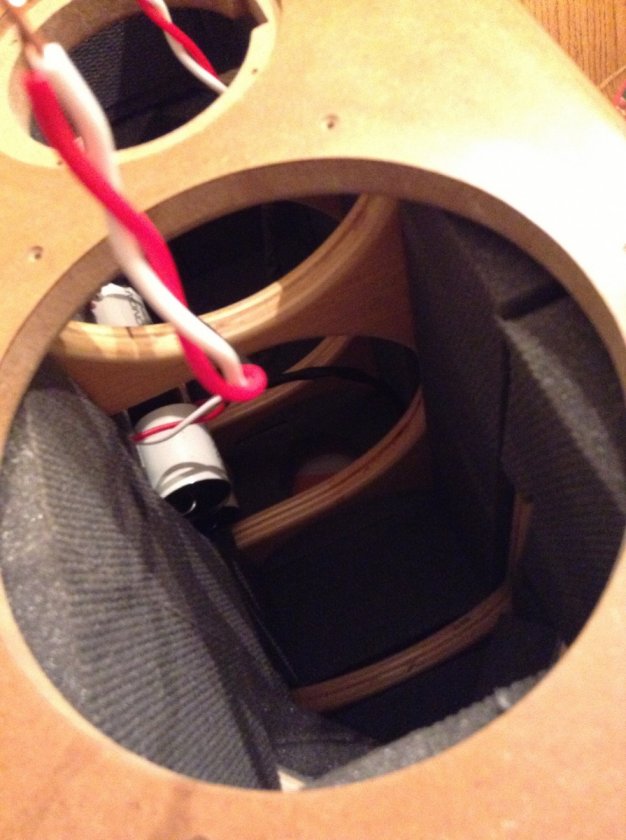
The biggest challenge for me was the round openings for the drivers and connector, particularly the rabbets for the tweeter and the back connector. I knew that a circle jig will make this task easier, but it requires a plunge router and I do not have it; I do not have a circle jig like Jasper either and did not want to buy one just yet because particularly with this jig you cannot infinitely adjust to the radius you want, it is fix to 1/16” increments. So what I ended up doing is making templates out of ¼” hardboard; that is, I cut two templates for each, tweeter and the connector in the back, one to cut the inside opening and another to cut the rabbet and outside diameter. I made another template to cut the woofer openings and two more templates to cut the braces B and C. Make sure you put some sort of registration marks on the templates so that they will match. I decided to scribe a center vertical line as a reference to locate all circle templates and it worked out alright.
The other reason to make the templates is because I do not have a plunge router and there have been very few times I have wished to have one, but have managed to come up with some other ways to accomplished what I wanted to do. This case was not the exception and the way to do it was to make rough cuts close to the final dimension with my jigsaw and with the help of a drum sander and lot of patience, bring the OD to the final dimension. I then cut everything with the templates, 3/8” bushing and a ¼” bit on my router. Yes, it is a lot of work and requires patience, but this is the only way to have a guaranteed final dimension. Of course, I did some trial cuts and fine tune the templates before making the final cuts.
To make sure MDF screws won’t strip once installing components, I put a few drops of diluted shellac in each previously drilled screw pilot holes, MDF sucks diluted shellac like water in a desert and dries fast. This way, MDF holds without crumpling when driving the screws, the shellac gives strength, the screw cuts its threads, there is no deformation and you can actually tighten the screw a bit without much fear, just put a bit of beeswax in each screw before driving them home.
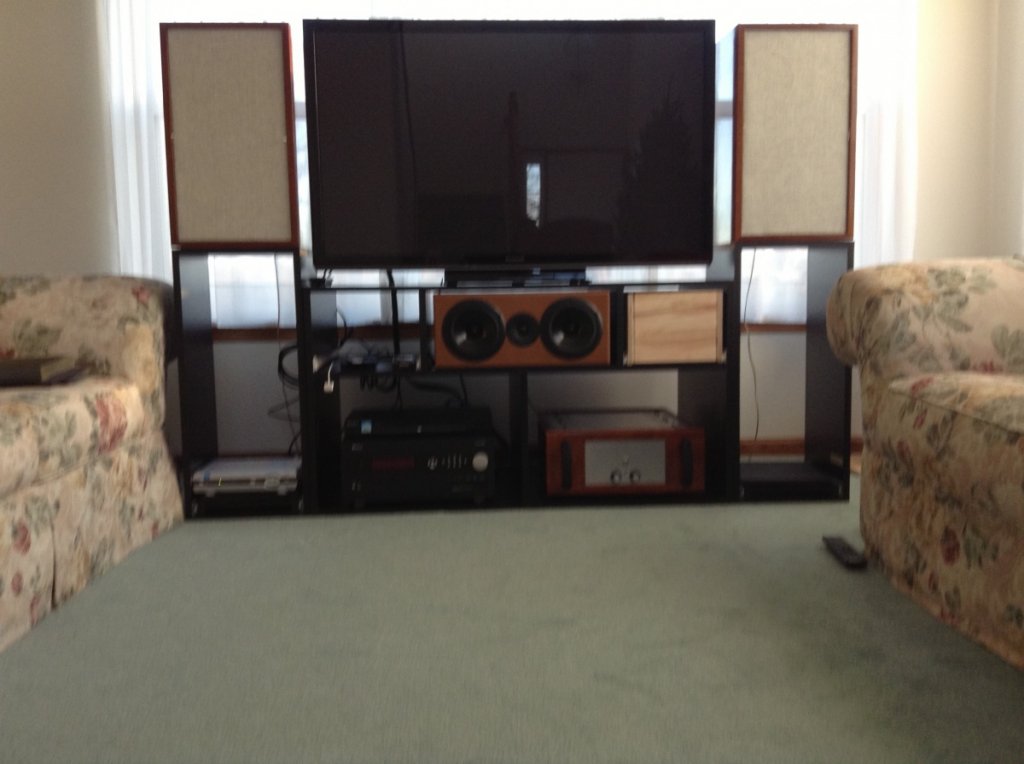
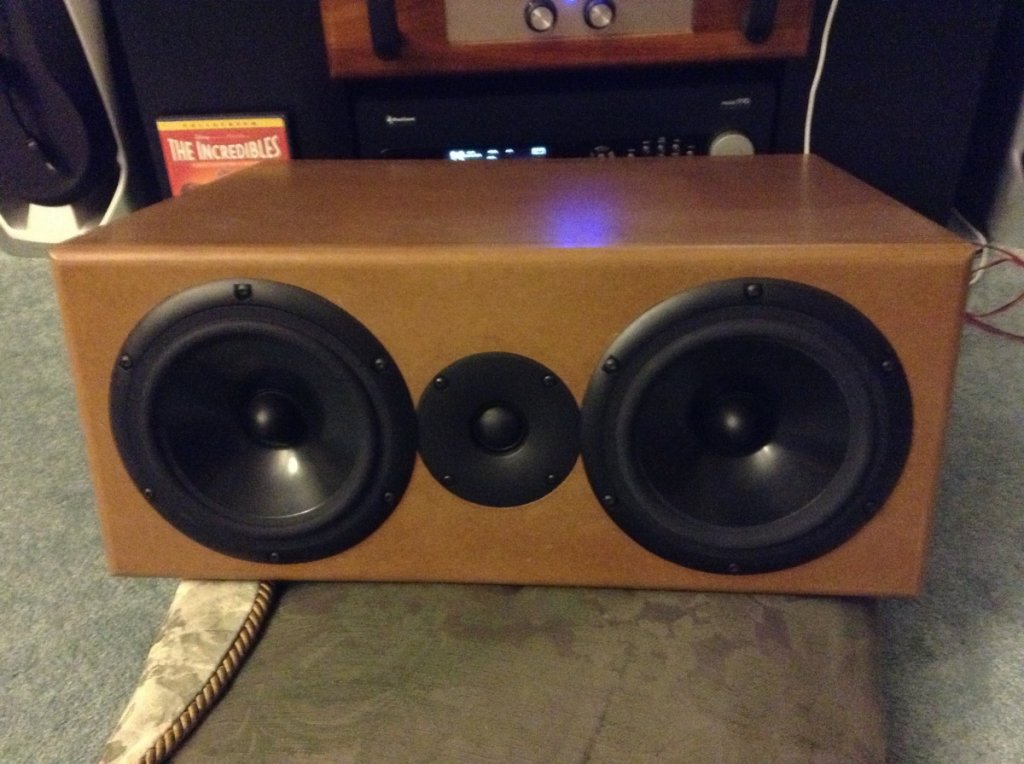
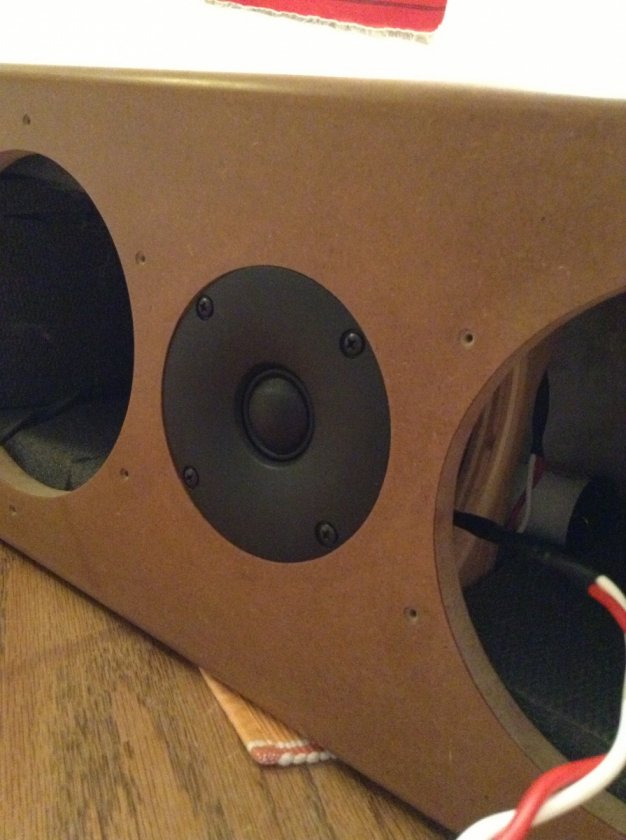
I am putting this center channel inside an opening in a credenza and I did not see the need to put a fancy finish on this speaker, no veneer or piano finish for this guy. Instead, I sanded the whole thing to 240-grit and put 3 coats of wipe-on varnish, waiting for each to dry, sand again with finer grade and then topped it up with a coat of garnet shellac. When dried, I did not like the shine and decided to wet-sand the whole thing and left it with a nice mate finish; I then rubbed a bit of car wax with no silicone – yes, you read correctly – car wax – I did not have furniture grade wax at the time. The results are fine, wife is happy and here are some pictures of the finished X-CS Encore Center Channel. Thanks Danny ☺
As far as comments on how it sounds, I am not an expert nor do I have golden ears, but those who had the chance to hear them and myself, think that there is a huge improvement in the vocal section compared to the standard wide screen TV speakers and the little Sony center channel I been using. All I can say is that there is clarity, definition; I can better understand the dialog and the speaker appears to have a good wide dispersion.
I was concerned about timbre matching with my old, refurbished AR-2ax speakers, but having a chance to see and hear the movie Thor the other night, my family or I did not notice any audible differences or errors and it appears that they all get along pretty well. The lows are solid with this combination and I think I may not need a sub. I been listening to the X-CS for more than a month and this speaker alone with my AR-2ax brings new definition and clarity when playing music as well. I think the brake-in period is refining the character of this speaker for the better. I still need to tweak my processor once I move everything to its final place, but so far, I am very please with the results. Leaving the technical aspects and details on the side, I just want to end by saying that I am very much happy with how this speakers turned out; there may be better sounding speakers out there, but these are keepers for me and there are no plans to go out and audition so more…..I got better things to do with my time….like enjoying music and watch more movies.