I've been building a set of right, left and center channel baffles for a fellow. Thought ya'all might be interested in seeing some pretty pictures. aa
The baffles are three layers of
7/
8" Cherry that have been laminated together. The center layer of each baffle has been hollowed out and filled with sand to help dissipate the energy caused by three 15" cones slamming back and forth. On top of the right and left baffles are Hawthorne coaxials, as is the center channel. The lower two drivers on each side of the main channels are Hawthorne Audio Augies.
The fellow already has a pair of "Duets", which means he has a pair of coaxes, and a pair of Augies. That means that I've got a pair of Augies and a single coax to "play with" as far as driver measurements (to drill the holes) and the occasional photoshoot "eye candy" to show off.
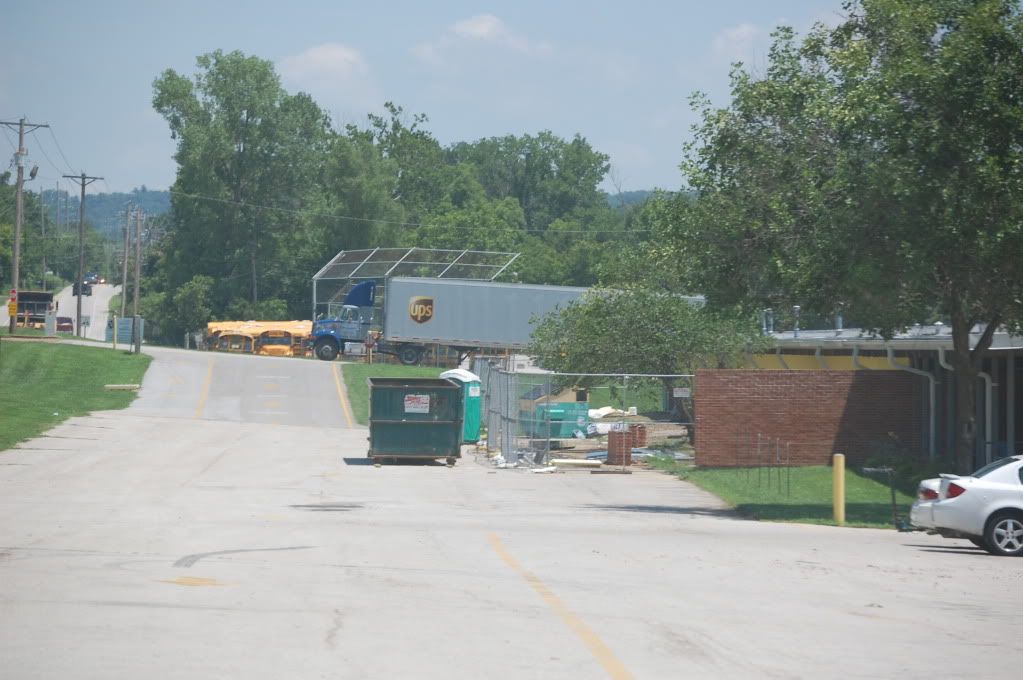
The pictorial starts when I met the UPS driver (the tractor trailer won't come down my street) and ends where I'm at, as of today, which is 99% finished. His plan is to drive 4.5 hours to personally pick up the baffles, as he doesn't trust a shipping company. If things go as planned, he'll be bringing his other four drivers so I can install them and I'll get a chance to photograph them "in their natural environment", so to speak.
Here we go...........
Meeting the UPS truck as the local school (which happens to be under construction):
The pallet of Cherry wood in my truck:
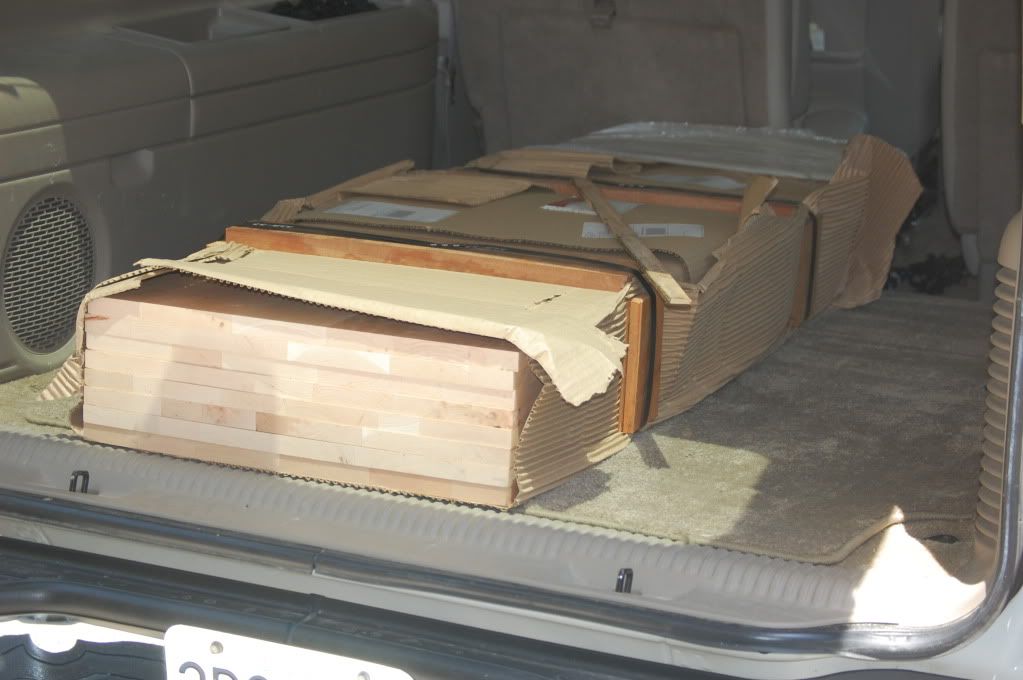
As soon as I get home, I unpackage the wood:
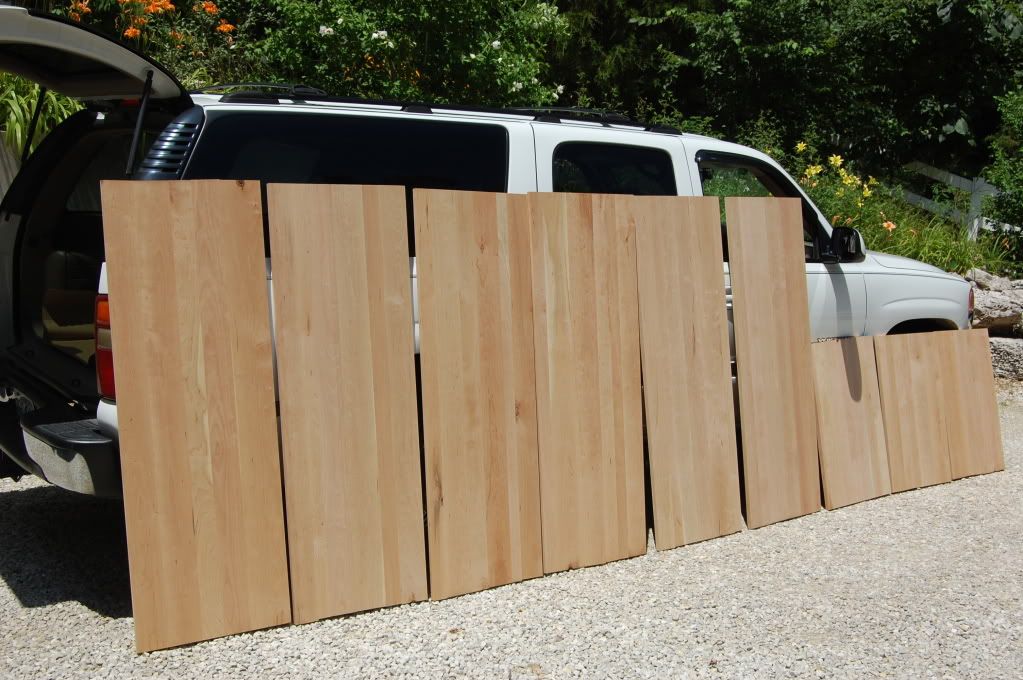
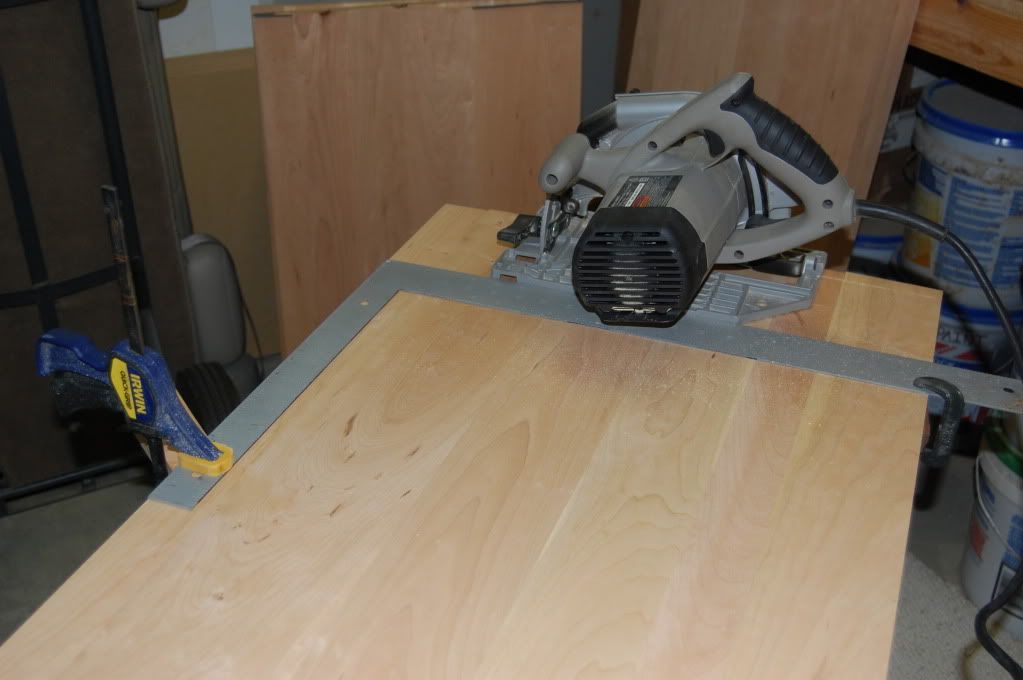
Squaring the rough edges from the sawmill:
Then I start poking "Augie holes":
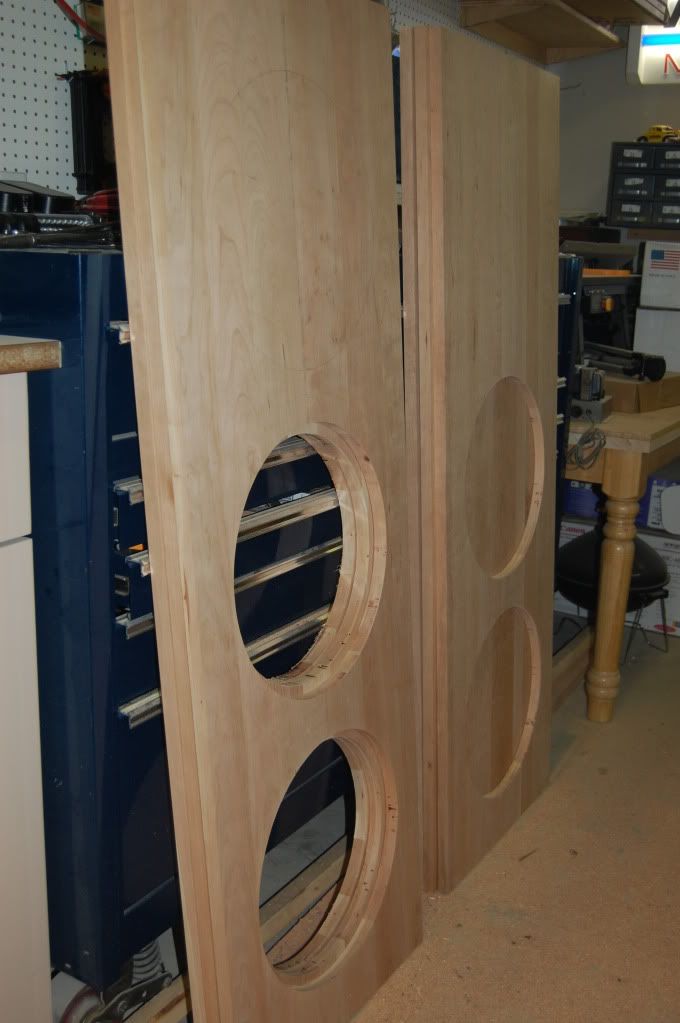
A test fit for the Augies:
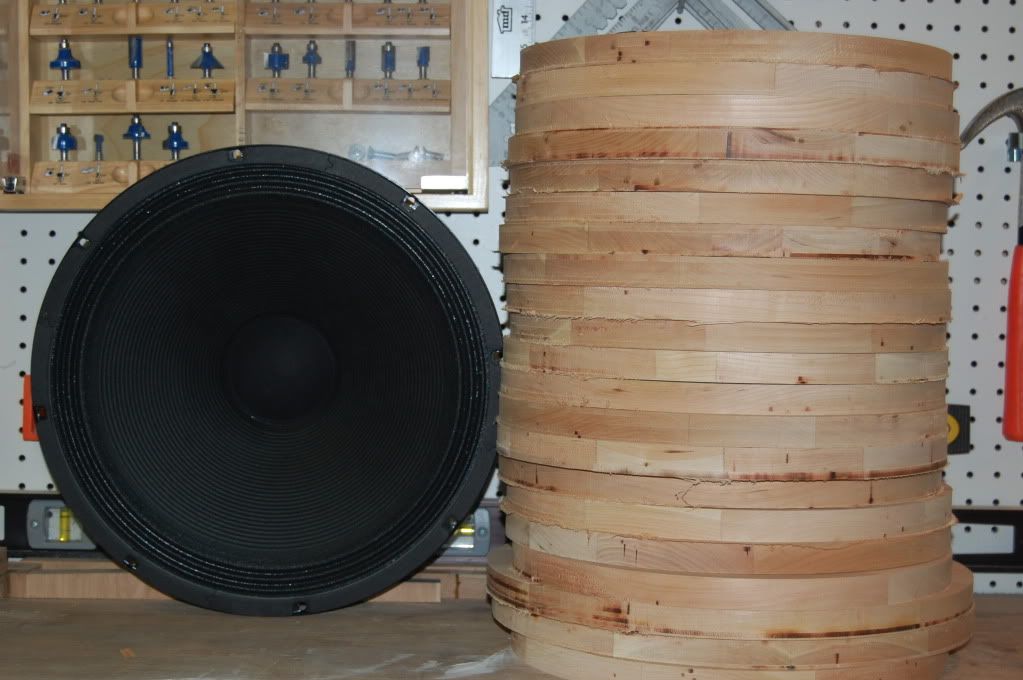
Twenty one pieces of Cherry wood that are 15" in diameter should come in handy for
something....shouldn't it?
More on that later.
Nine pieces of Cherry, ready for glue, and sand:
This should get the juices flowing. That's about what things will look like when it's all said and done. However, there's much more to do:
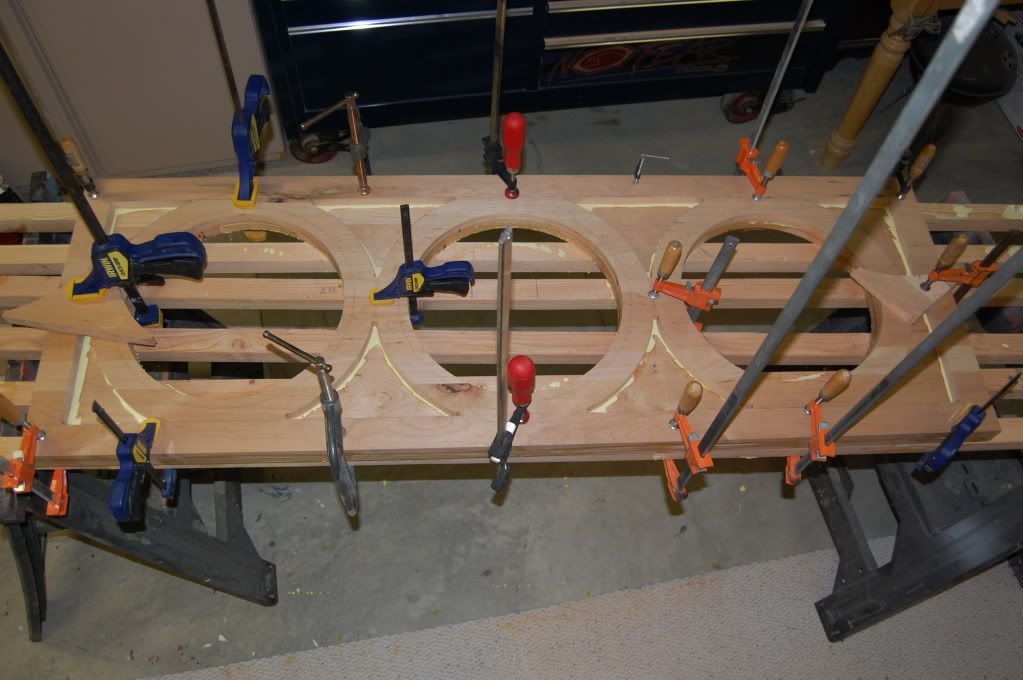
The middle layer is glued, nailed, and clamped to the rear layer:
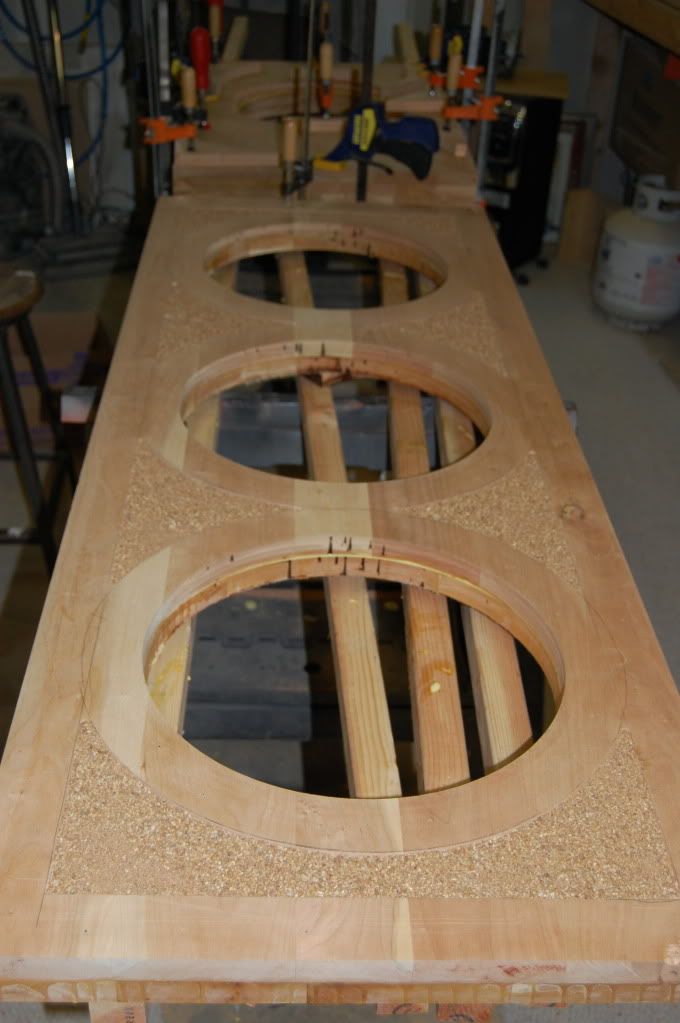
After the glue dries, it's time to fill the voids/cavities with sand:
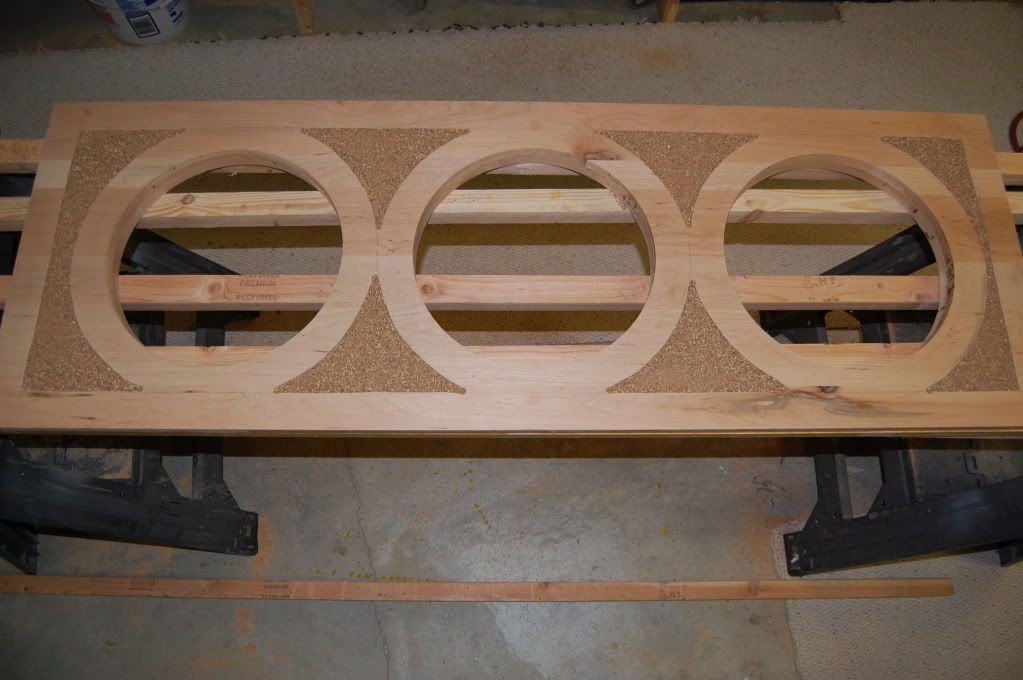
Center channel cavity with sand:
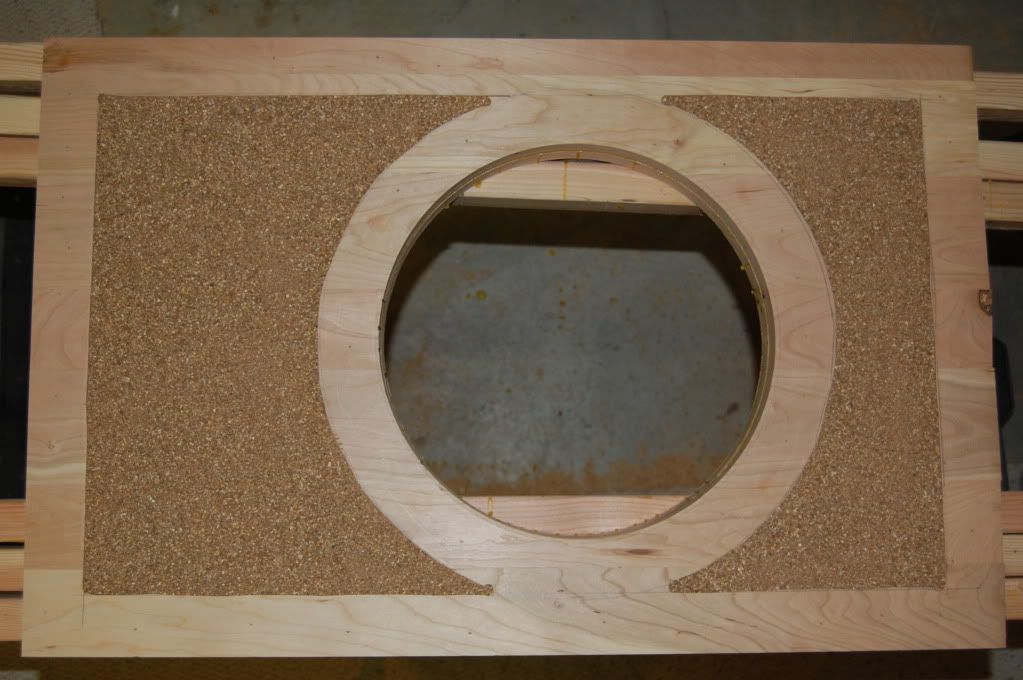
Center channel front layer clamped on. Note the scrap block to protect the face of the baffle. Don't want to damage the wood:
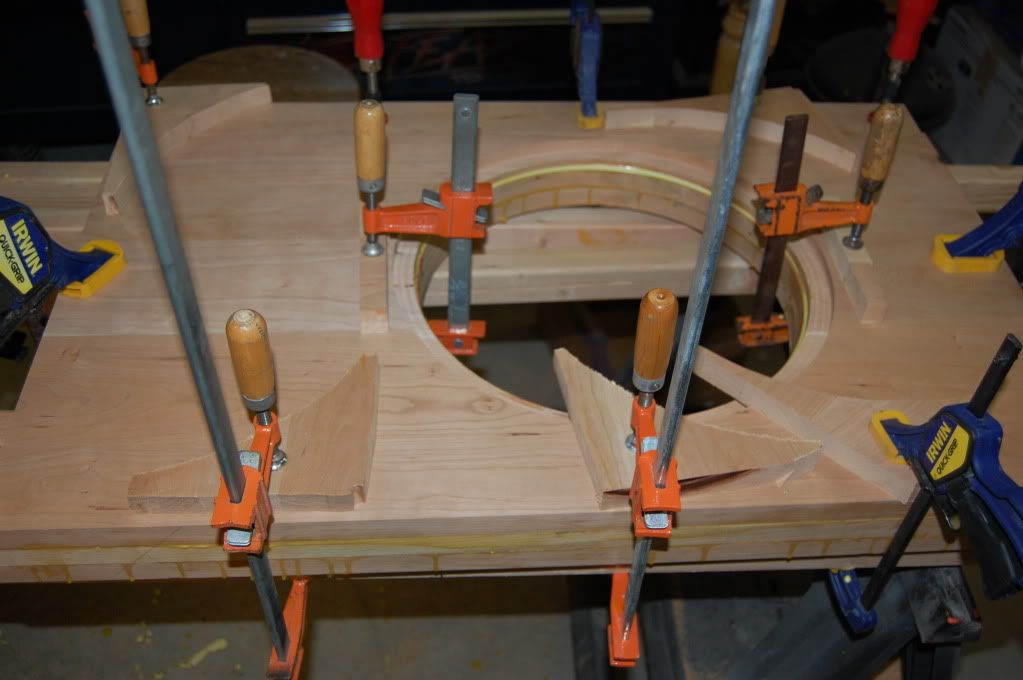
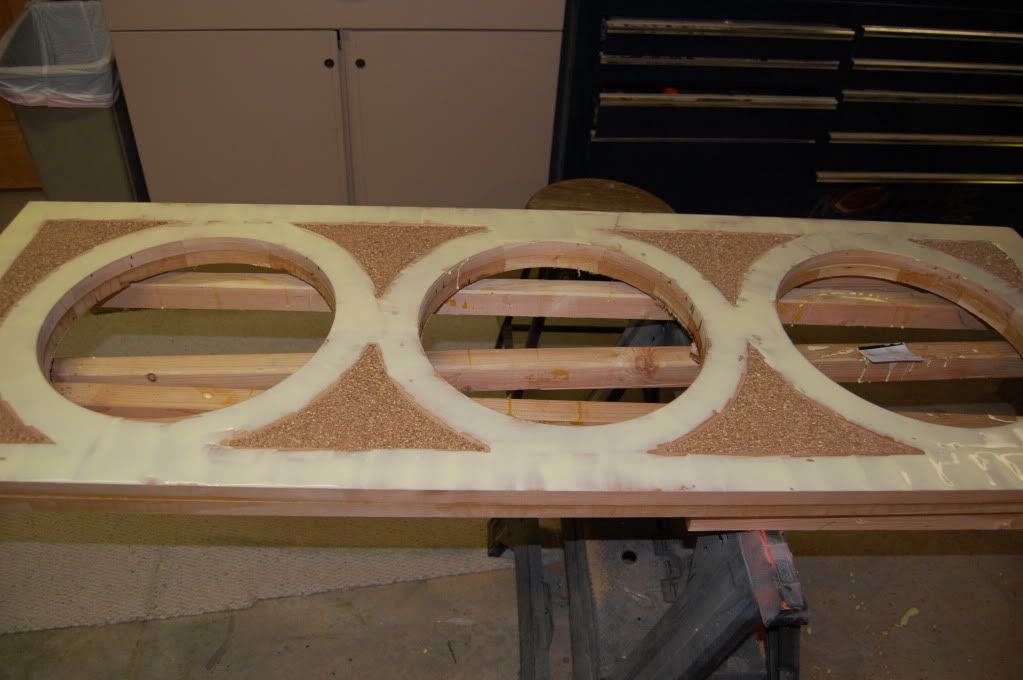
Another baffle sand filled. Note the other baffle in the background that has it's face layer clamped to the middle layer, hence sealing the sand in it's final resting place:
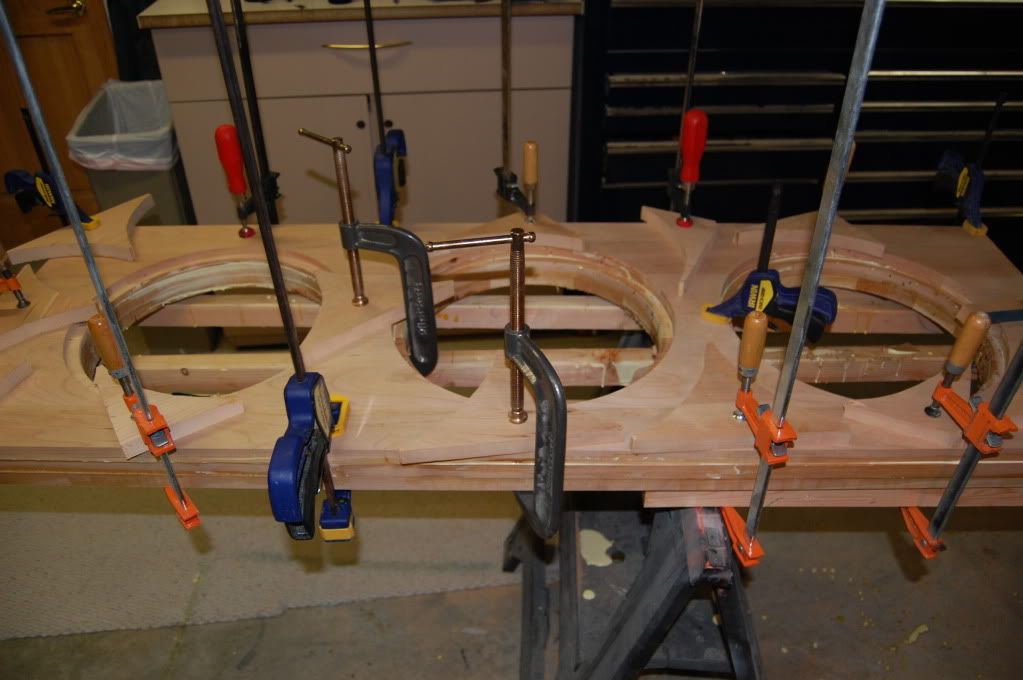
The other baffle: Spreading glue on the middle layer, awaiting the face layer to be clamped on:
Lots of clamps, and lots of blocks to protect the wood:
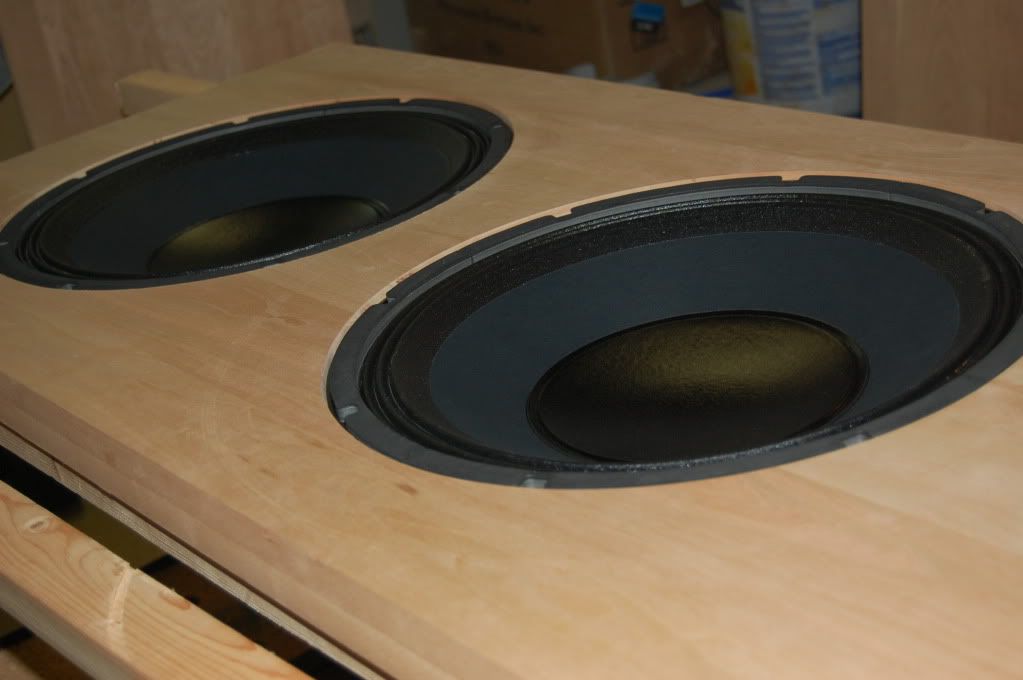
Another test fit of the drivers. Note; the baffle is laying flat across sawhorses, and I'm standing on a stool to take the picture:

Ok......from all that "scrap" created by using a router to make 21 holes that are 15" in diameter, there SHOULD be something a fellow could do with all that material.
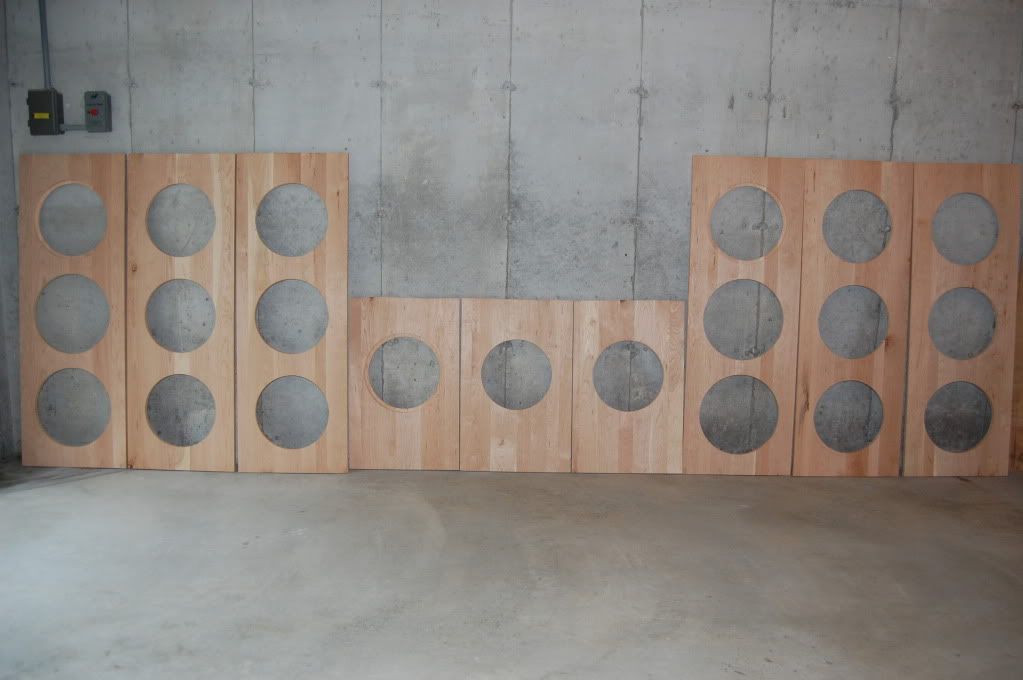
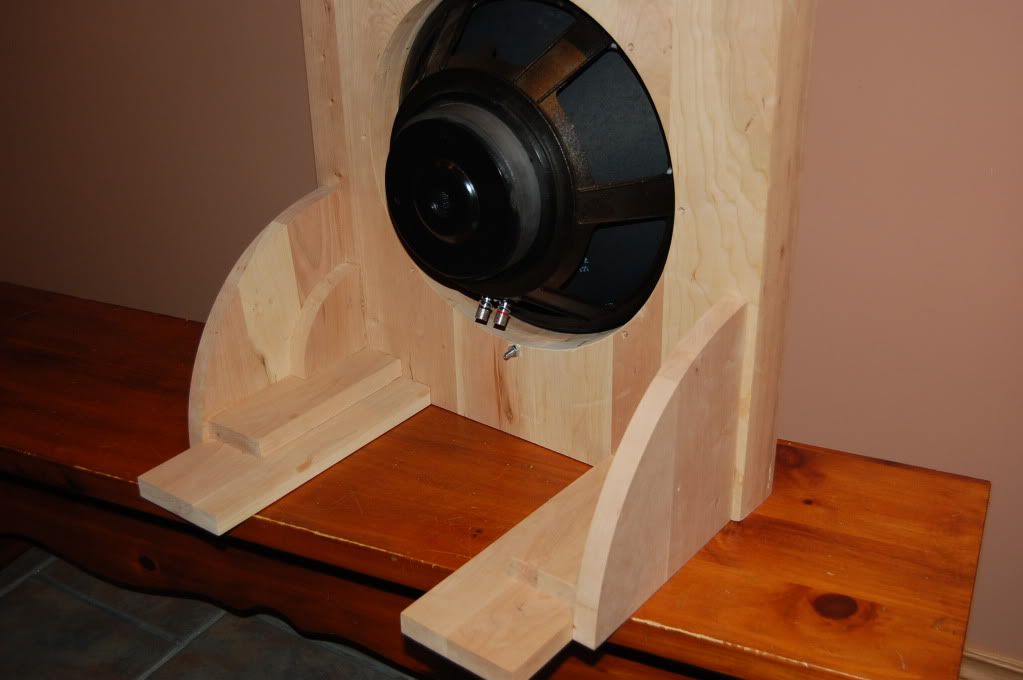
How about using that Cherry to create the legs for the baffles. Here are the individual components used to make six legs. All pieces have been cut out of the 15" holes, then clamped together and sanded to make identical pieces to create the legs.
On the extreme right and left of the photo, you can see the two MDF "test mules" used as a "proof of concept":
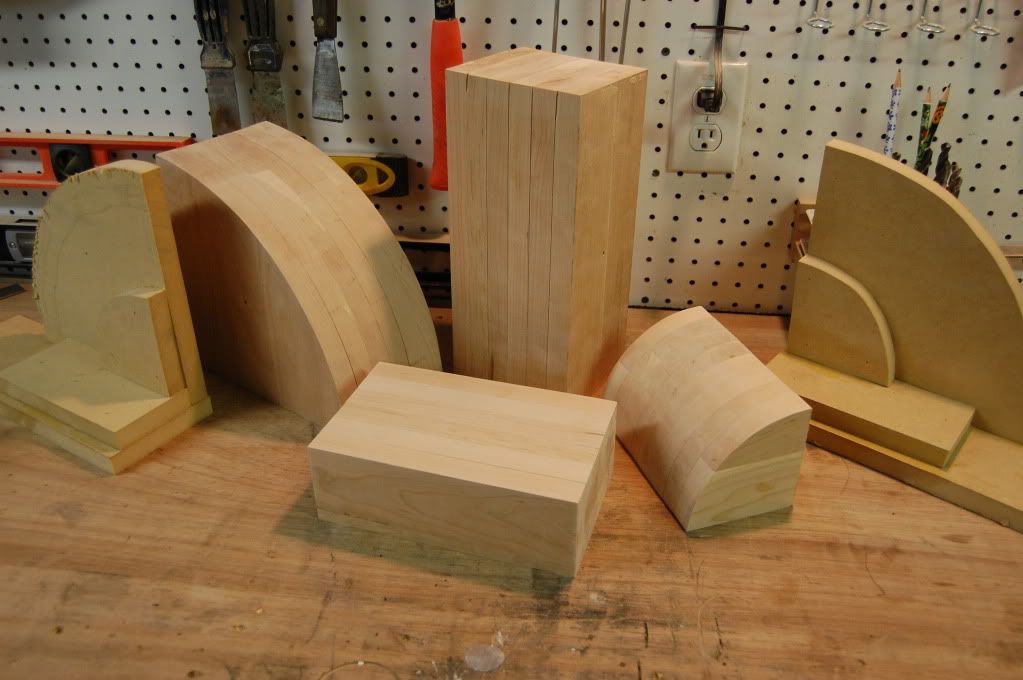
Here are the Cherry "scrap" pieces assembled to be used as legs for the Trios:
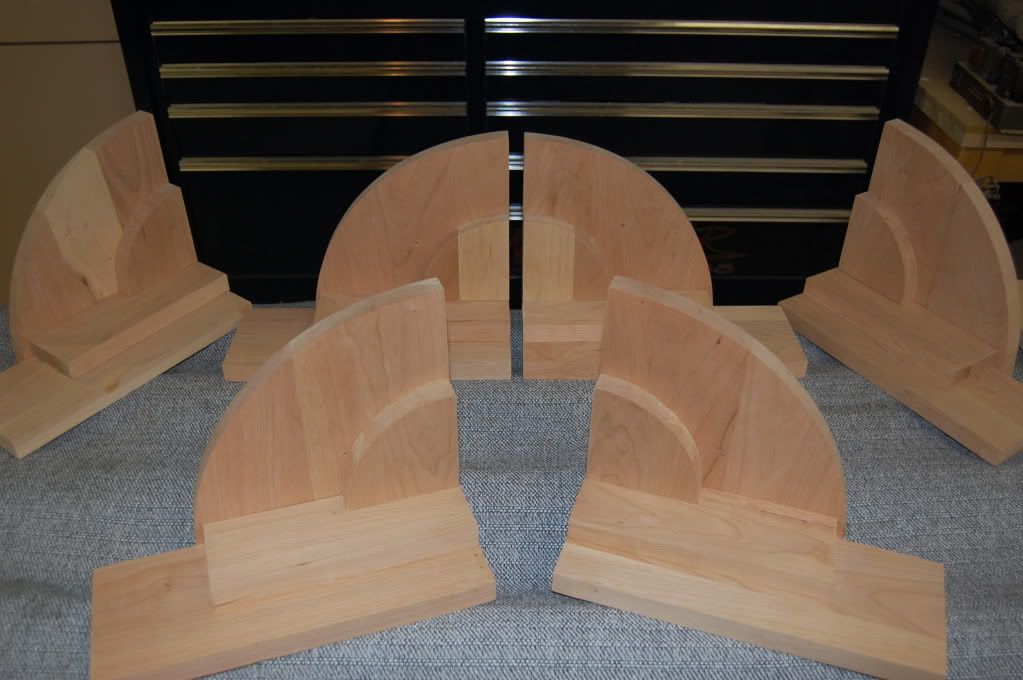
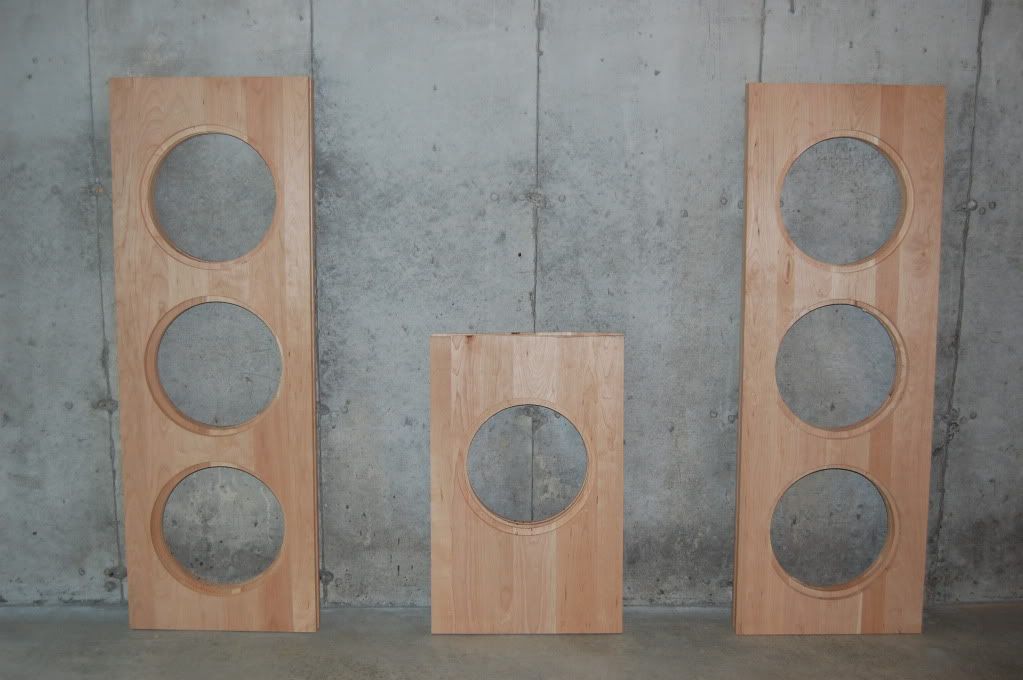
Ok.........Time for a photoshoot, and final test fit of the drivers.
I wanted to make sure the legs are going to be stable, the drivers fit correctly, and everything is ..... RIGHT !!!!
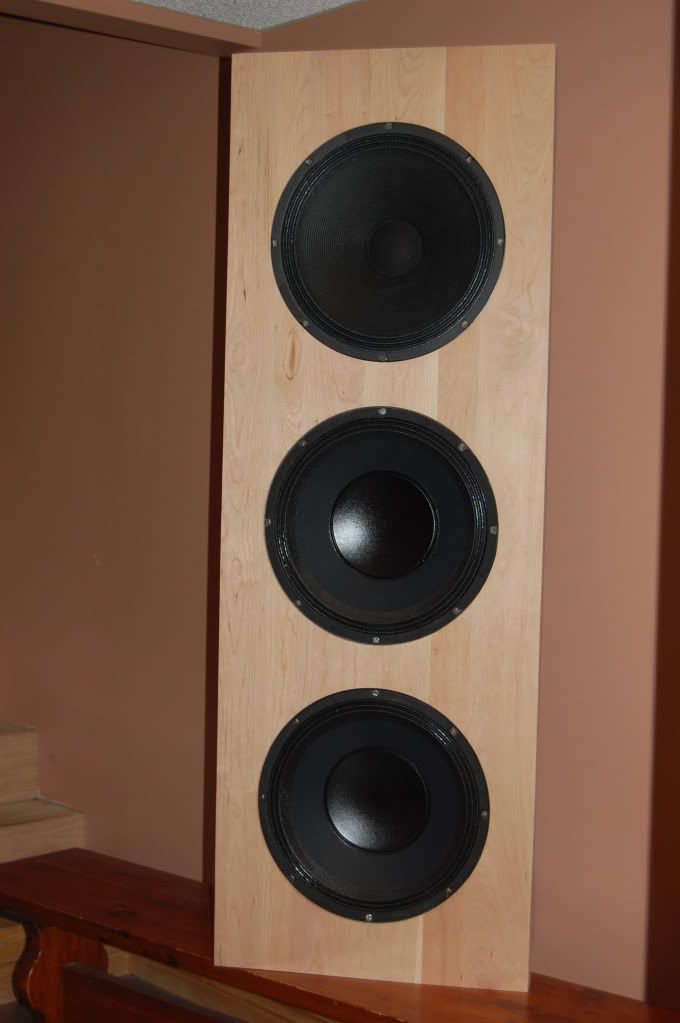
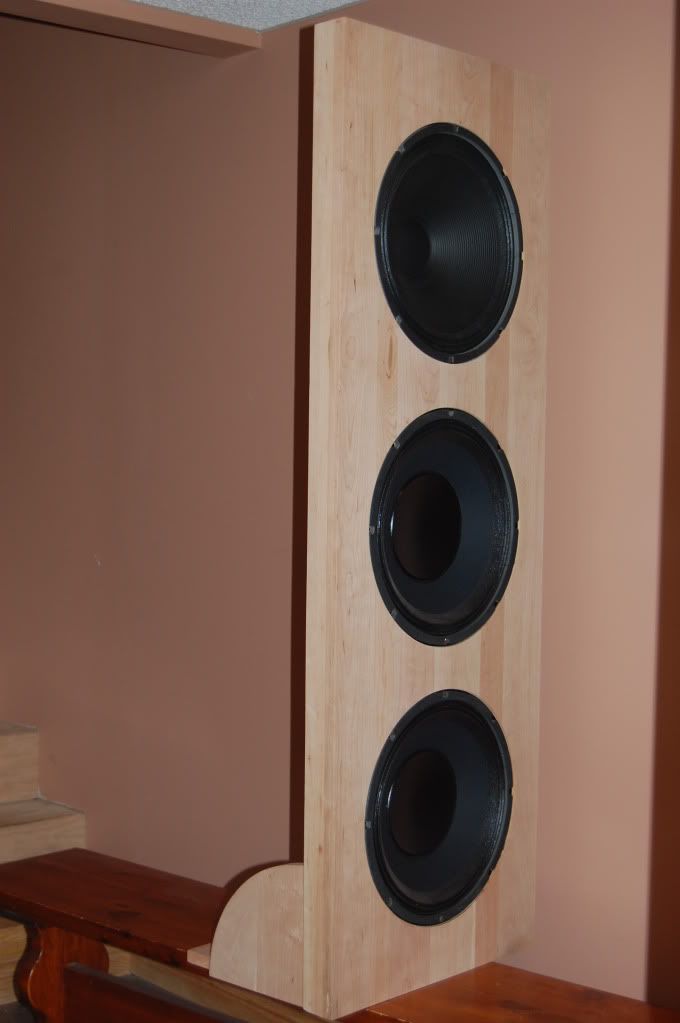
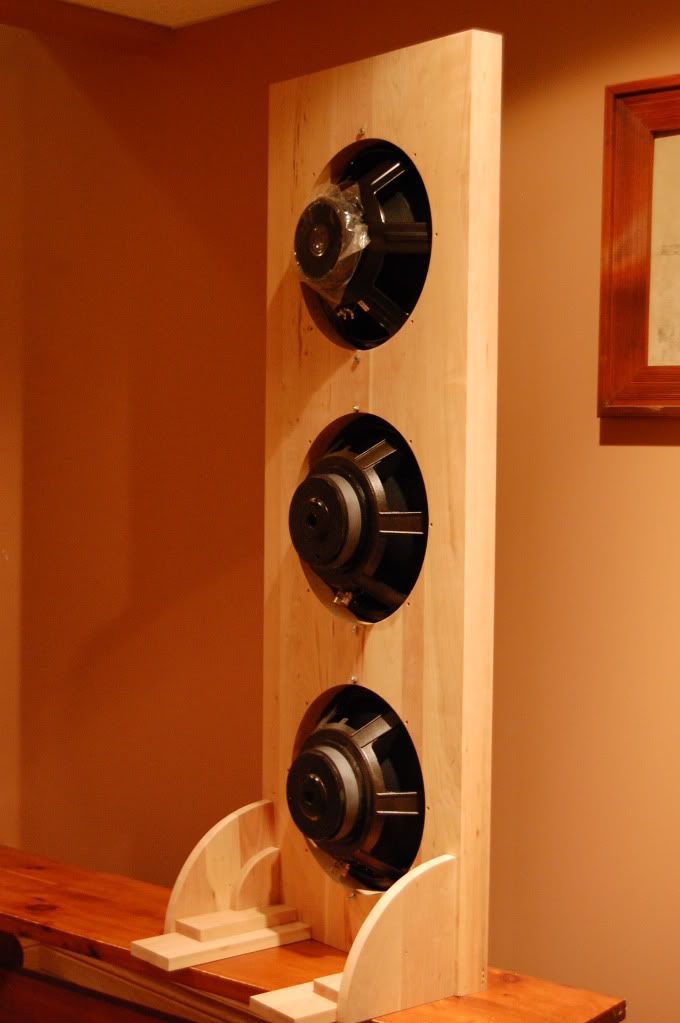
That's about as far as I've gotten as of today. There's a little more finish work to do before the fellow comes to pick up his speakers, but it looks pretty good.
I'm happy with it.
Bob


