OB-5 Construction by Carlos

0 Members and 1 Guest are viewing this topic. Read 71521 times.

Voncarlos

  • Jr. Member
  • Posts: 156
  • OB5s in Stripes
OB-5 Construction by Carlos
« on: 9 Sep 2008, 10:29 pm »
I have finally started my construction of OB-5's. The design of the speakers will be a bit different than the usual and will incorporate curved sides. I thought about curving the braces and then wrapping thin MDF in several bands around them, but decided on actually cutting curved sides out of 1⅛" MDF (that is some heavy stuff). So of course, this required building a jig to cut the curve. Well, I was going to add some photos here but can't see how I get the photos from my album to post here??? Okay, figured it out. Thanks for the help ebag4. :thumb:

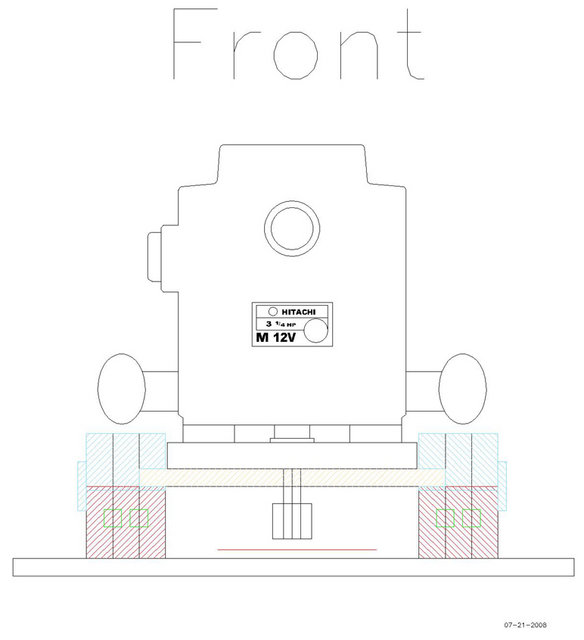
I drew this up using AutoCad 2004 so I could get a good idea of what was needed and the dimensions necessary to make things fit.
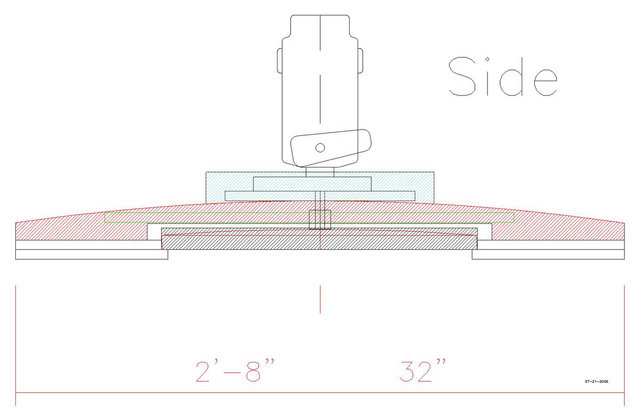
Side view of curved-side cutting jig. This will make a 9' radius cut.
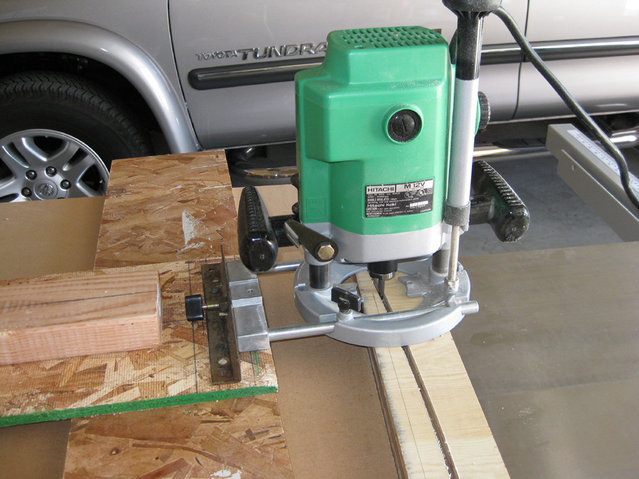
The first task was to accurately cut the bottom rail and top carriage runners at a 9'1.77" radius. This required a lot of preparation.
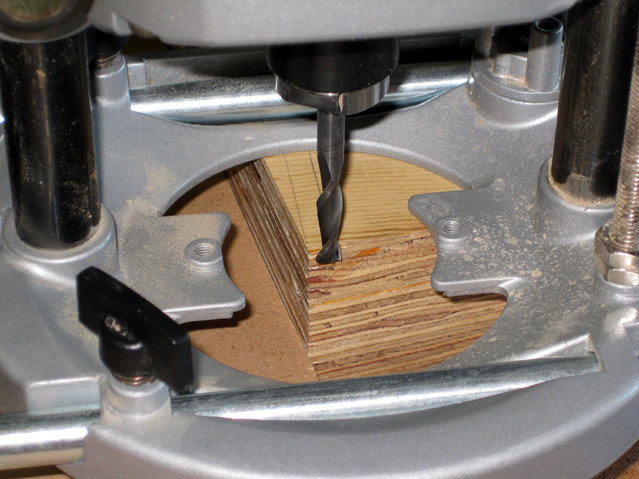
The cutting bit is a BOSCH micro solid carbide, upcut, end mill. ¼" cut ¼" shank, 2½" OAL.
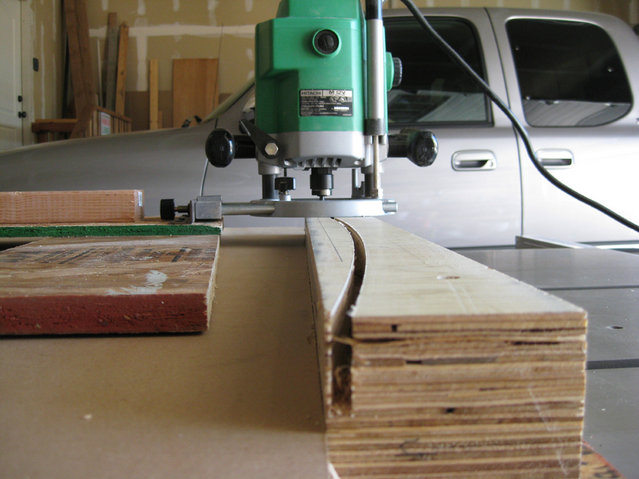
The cut had to be perfect at 90 degrees. Each pass would cut about ⅛" (2mm) off.
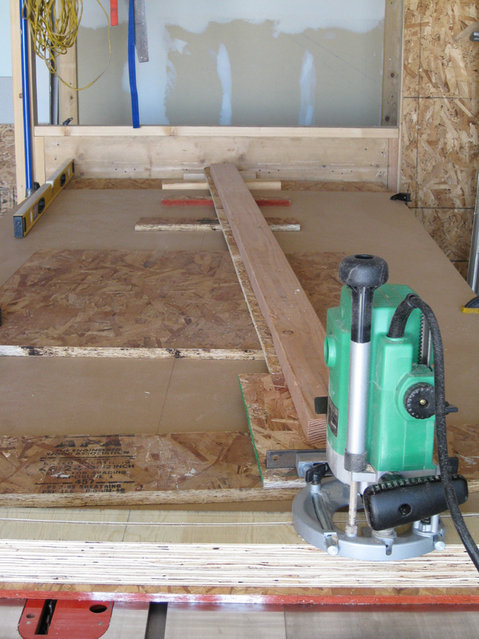
Here is the 9' extension to hold the router.
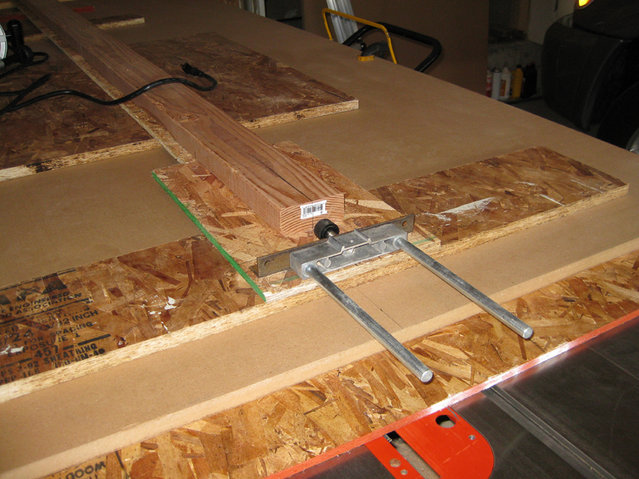
The edge guide that came with the router made the perfect connection piece.
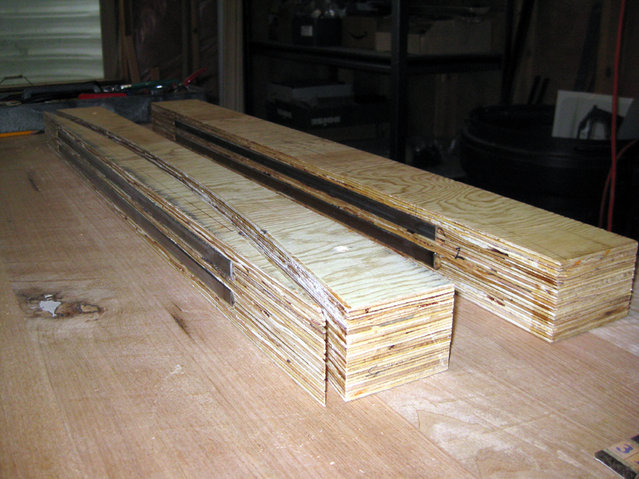
Here is one side of the guide rails cut. I've embedded two ½" rectangular steel tubes into the bottom of the rails to help support the weight of the router.
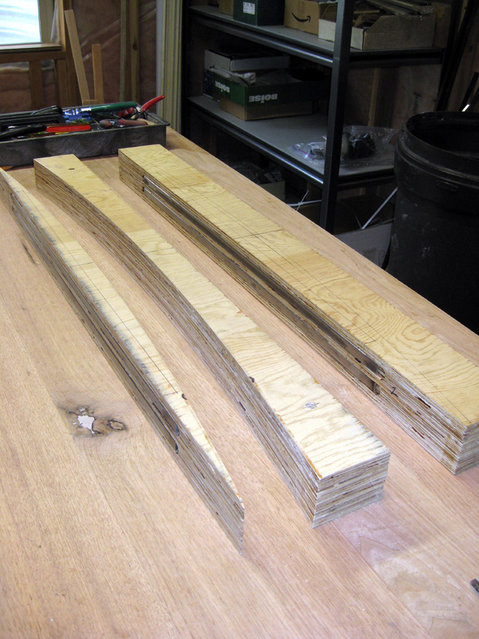
The top parts of this will be the carriage for the router and the bottom are the rails.
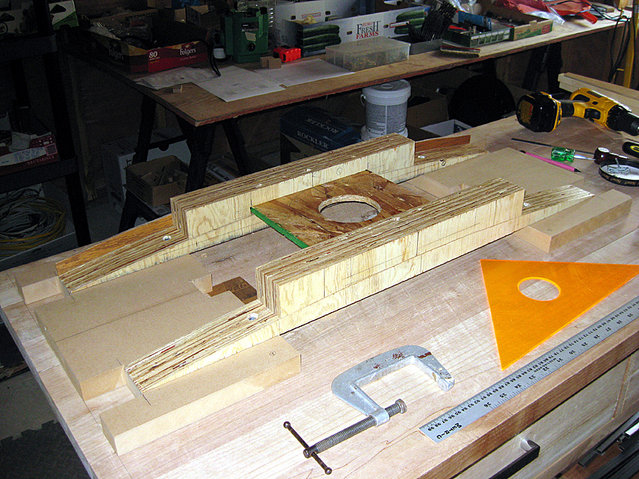
The first test fit of the jig with one edge guide attached.
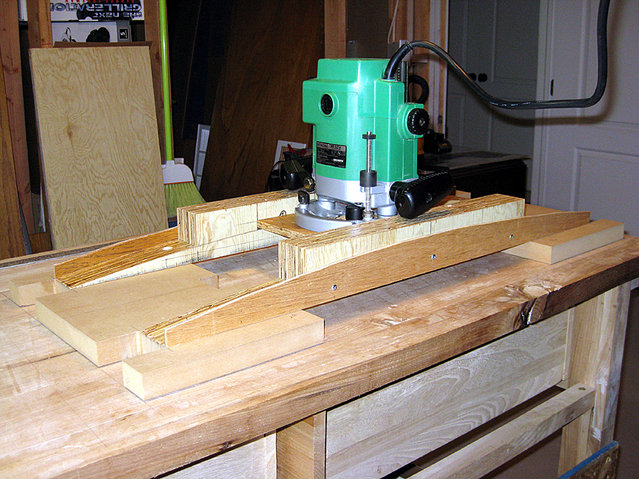
With router attached and all mating surfaces sprayed with lacquer and waxed. It slides very well back and forth.
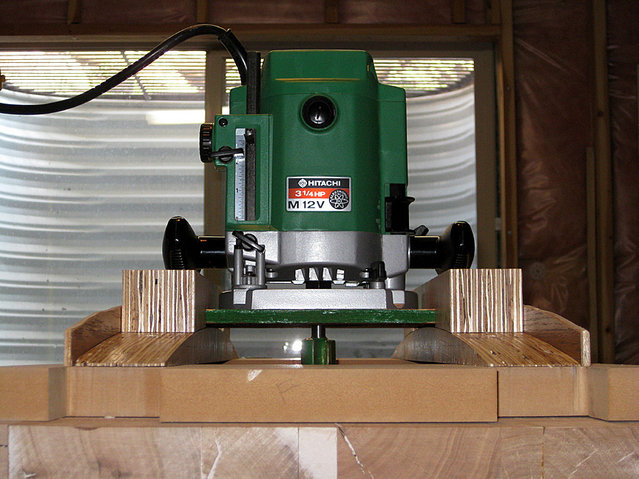
The router is the venerable Hitachi M12V at 15A, 3¼HP. It will accept a ¼" or ½" shaft bit and weighs in at 12.4lbs. The bit is a Grizzly double fluted straight bit, ½" shank, 1¼" cutter diameter and 2⅝" OAL.
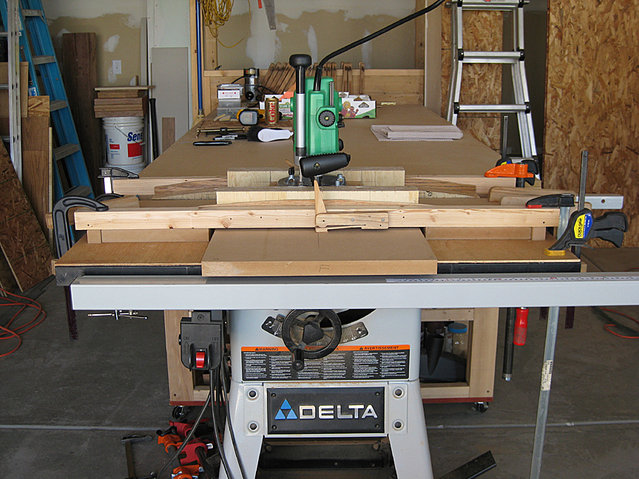
This was a test layout of the jig setup on the table saw. I used the table saw because it has a perfectly flat surface to keep things all on the same plane.
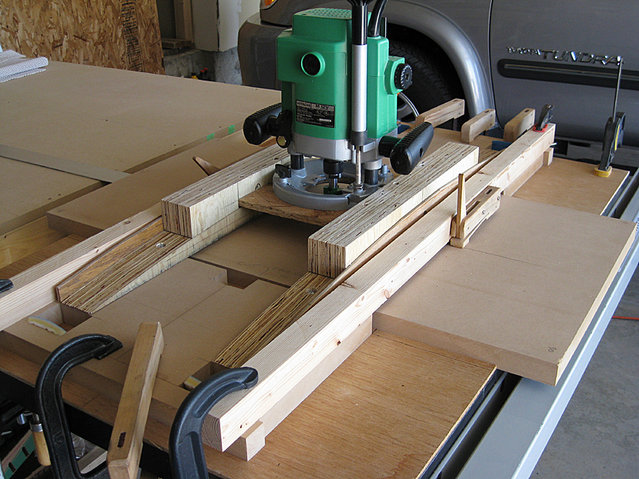
As the router is slid back and forth, the side being cut will be pushed under the router. I used the top half of some cam clamps to act as hold-downs to the side piece.
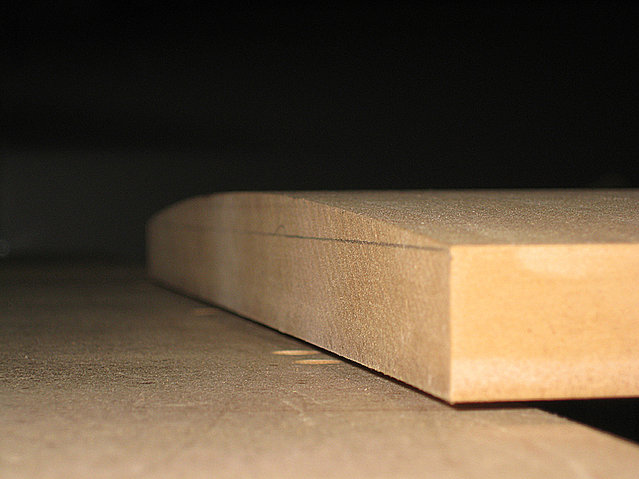
It produced a beautiful 9 ft. radius curve. The material is 1⅛" MDF. I removed about 1mm from the apex and that left a ¾" edge.
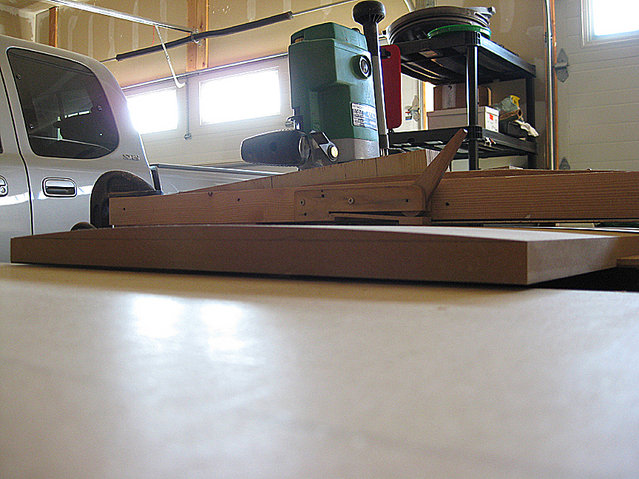
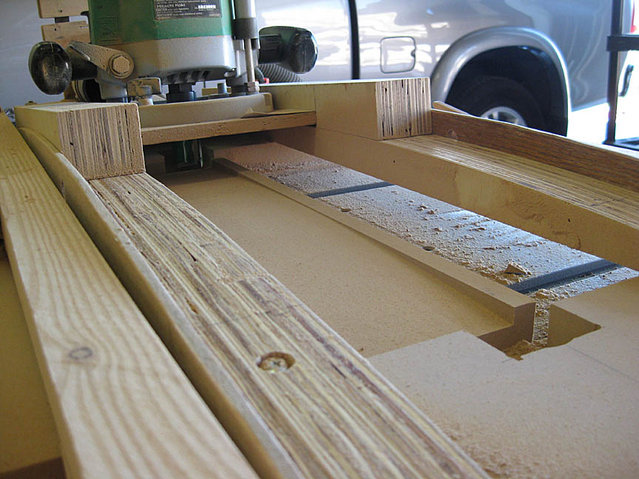
The last ½" still to cut.
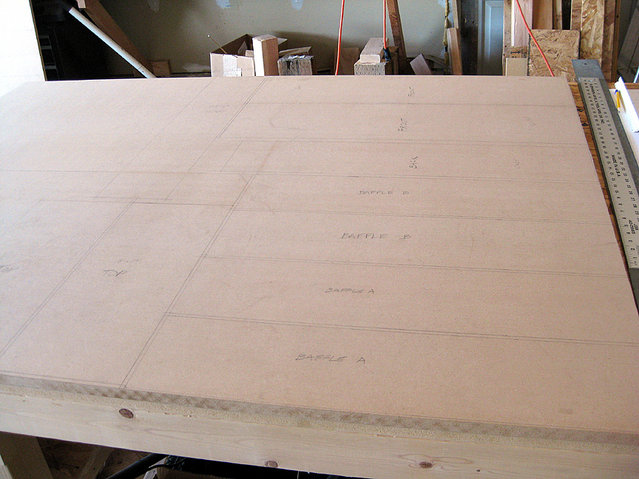
Layout of the pieces on ¾" MDF. I bought the ¾" and 1⅛" MDF from a local lumber yard and not one of the "big box" stores. I don't think the MDF from the "big box" stores is of very good quality.


« Last Edit: 10 Sep 2008, 03:06 am by Voncarlos »

ebag4

Re: OB-5 Construction by Carlos
« Reply #1 on: 9 Sep 2008, 11:46 pm »
Very interesting, here you go:


Danny Richie

Re: OB-5 Construction by Carlos
« Reply #2 on: 10 Sep 2008, 01:40 am »
This looks like it will be really cool.

cplnclag

  • Jr. Member
  • Posts: 6
Re: OB-5 Construction by Carlos
« Reply #3 on: 10 Sep 2008, 02:23 am »
I'm glad you're posting pics here of your project. So far, your jig is going to be better looking than my completed speakers, though I doubt that your router will sound as good as the ob5's.

Hank

  • Full Member
  • Posts: 1206
    • http://www.geocities.com/hankbond1/index
Re: OB-5 Construction by Carlos
« Reply #4 on: 10 Sep 2008, 03:10 am »
Voncarlos, I salute you on your jig creativity - looks like you've got the time available for such a project.  Keep us posted on this.  Be careful to add plenty of braces.  Tip:  I do not space my braces equally apart - sorta like the Golden Ratio thing.  Anyway, what do you plan for an exterior finish?

mgalusha

Re: OB-5 Construction by Carlos
« Reply #5 on: 10 Sep 2008, 03:34 am »
Very cool. I love the jig, that is mighty ambitious and a great way to get a perfectly rounded front panel. I have one of those big Hitachi's as well, it's a heavy beast but nothing seems to slow it down. :)

Those should be some awfully nice speakers when you get them done. Looking forward to more photos and comments.  :thumb:

Mike

Voncarlos

  • Jr. Member
  • Posts: 156
  • OB5s in Stripes
Re: OB-5 Construction by Carlos
« Reply #6 on: 10 Sep 2008, 03:41 pm »
Thanks for all the kind words.  :thumb:
Showing the finished look of the speaker I'm going to save until the end, but it will incorporate 2 wood-backed veneers, cherry and maple.
So, now to start on the braces. The basic box shape is a trapezoid, and of course this created it's own set of problems.
Since the cuts are not 90°, I used a template to cut the shape so that each brace will be the exact size.


The braces laid out on the same one sheet of ¾" MDF (Medium Density Fiberboard).


I used a template to cut the internal braces to make sure that each one is exactly the same size and shape.


In the router table is a Bosch Flush Trim Bit, ½" x 1", triple flute Carbide tipped.


My technique for cutting the circles out of the braces is to use a Jasper Circle Cutting Jig and a piece of non-slip liner. This is the stuff you use to put under a rug to keep it from moving and it's also sold as shelve and drawer liner.


When you drive the ⅛" pin into the center of the circle and scrap backing, it acts like a nail and compresses the cushy liner material and prevents anything from moving. And yes, that is a Black & Decker 7620 router that dates back to 1975.


Braces cut and rounded over.

Voncarlos

  • Jr. Member
  • Posts: 156
  • OB5s in Stripes
Re: OB-5 Construction by Carlos
« Reply #7 on: 11 Sep 2008, 08:44 pm »
Time to glue up the box. When I did a dry fit test, I discovered that because of the trapezoid shape, the sides wanted to creep toward the back as I applied clamping pressure (can you imagine what would have happen with the slippery glue on) :o. So, I drilled holes and used ⅛" dowels. I assembled the unit, front down with weight on top of it to keep everything aligned. I have a huge amount of cam clamps left over from my guitar making days, I just knew I'd use them again sometime.


The urgent action of glue up did not allow me the time to take a picture, so this is a staged reenactment.


It's always nice to have plenty of clamps.


Cacophonix

Re: OB-5 Construction by Carlos
« Reply #8 on: 11 Sep 2008, 10:04 pm »
u used to make guitars??  :o

Can't wait to see the finish that will go on these speakers!   aa

Great pics!

Bill Baker

  • Industry Participant
  • Posts: 4893
  • Musica Bella Audio- Custom Design and Manufacturi
    • Musica Bella Audio
Re: OB-5 Construction by Carlos
« Reply #9 on: 12 Sep 2008, 12:42 am »
Beautiful job Carlos. A man after my own heart with the custom made jigs. I am working on a few myself for some production products.
 Be sure to keep us up to date. Can't wait to see the finished product.

Voncarlos

  • Jr. Member
  • Posts: 156
  • OB5s in Stripes
Re: OB-5 Construction by Carlos
« Reply #10 on: 13 Sep 2008, 01:16 am »
Now I have to get the front and back ¾" edge of the side panels to be on the same plane as the braces. It's all because of the trapezoid shape. Anytime you deviate from a standard 90° edge, things become more time consuming. This was a bit tricky because the router weights 12lbs.


Here's a better photo of what I'm talking about.


« Last Edit: 14 Sep 2008, 02:04 am by Voncarlos »

ebag4

Re: OB-5 Construction by Carlos
« Reply #11 on: 13 Sep 2008, 02:22 am »
Very cool and interesting build Carlos!  Please keep the pics coming  :thumb:

Best,
Ed

Daygloworange

  • Industry Participant
  • Posts: 2113
  • www.customconcepts.ca
Re: OB-5 Construction by Carlos
« Reply #12 on: 14 Sep 2008, 04:11 pm »
Very nice Carlos. The tapered look along with the curved sides looks really nice.

Cheers

mmmanich@comcast.net

Re: OB-5 Construction by Carlos
« Reply #13 on: 17 Sep 2008, 03:57 am »
Carlos,

I really like your cabinets. If i build them I'm thinking about doing the curved sides and the angled brackets. could you give the deminsions of the bracket?

do you expect the sound to change do to the less volume of the cabinet?

thanks
marty

Voncarlos

  • Jr. Member
  • Posts: 156
  • OB5s in Stripes
Re: OB-5 Construction by Carlos
« Reply #14 on: 18 Sep 2008, 02:34 am »
Thanks Marty, the length of the D and H braces is 16.50". The front width is 6.50" and the back is 3.75". The internal volume of the box is exactly the same as in the instructions that come with the OB kit. The volume area removed by the taper is returned by increasing the depth. I can tell you that making this style is quite time consuming and a bit difficult for a seasoned woodworker. Good Luck  :D

Voncarlos

  • Jr. Member
  • Posts: 156
  • OB5s in Stripes
Re: OB-5 Construction by Carlos
« Reply #15 on: 18 Sep 2008, 02:55 am »
Time to glue the backs onto the body.

I had a little hiccup while I was rounding over the uninstalled backs and had to make a little patch. Finally got to use those tiny 1" C-clamps.


Ever wonder why those little 1" clamps are included when you buy a clamp kit?


hoosier21

Re: OB-5 Construction by Carlos
« Reply #16 on: 18 Sep 2008, 05:28 pm »
Save all those jigs, so when you make mine pair it will be easier on you :)

HT cOz

Re: OB-5 Construction by Carlos
« Reply #17 on: 18 Sep 2008, 09:14 pm »
Amazing  aa

mfsoa

Re: OB-5 Construction by Carlos
« Reply #18 on: 18 Sep 2008, 09:53 pm »
Wow.
I don't know if I'm envious or jealous.

Whichever one means that you are great and I suck - Yeah, that's the one

 :thumb:

mmmanich@comcast.net

Re: OB-5 Construction by Carlos
« Reply #19 on: 19 Sep 2008, 03:53 am »
Carlos,

I hope you do not mind me asking a lot of questions about your cabinets. I really like them. I thinking about making them a lot like yours. If i do copy a lot of your ideas, I hope that you don't get offended.


To make assembly and glue up easier, any reason you did not make the braces a 1/2 wider and make a 1/4 rabbit for the braces in the sides? This should make them stronger, larger glue surface. If you make the sides as one piece, cut the rabbits, then cut them to width, (slightly wider) then all the rabbits will match. Then you could curve the sides. Is there anything wrong with my thinking?

Did you also make the sides wider so that you could then flush trim them?

thanks again

Marty