Fred's Home Theater Project

0 Members and 1 Guest are viewing this topic. Read 14054 times.

fcraven

  • Jr. Member
  • Posts: 107
  • Don't mess with this baritone
Fred's Home Theater Project
« on: 30 Jul 2008, 04:19 pm »
After asking many questions, bugging Danny a bit, I'm finally on my way to finally having some nice speakers. So, instead of sticking something up on my blog (which I have neglected anyway) I'm posting my progress here. That way y'all can make interesting comments.

My first discovery was that I really don't have any time during the week to work on these things so the weekends will be a fun time for me.

The first Items to arrive were my AV1RS's, and the Subwoofer. The AV1RSs are being built exactly to the plan--no creativity on my part yet.


And here's a test piece for the front baffle of my Left and right speakers... I'm getting creative here:


Yeah, it's more interesting. This is 3/4 MDF but the final product will be 1".


Hank

  • Full Member
  • Posts: 1206
    • http://www.geocities.com/hankbond1/index
Re: Fred's Home Theater Project
« Reply #1 on: 30 Jul 2008, 05:15 pm »
Congrats on jumping into the MDF dust, Fred!  :thumb:  A little OB action there?  Keep us posted.

fcraven

  • Jr. Member
  • Posts: 107
  • Don't mess with this baritone
Weekend number Two, Saturday
« Reply #2 on: 3 Aug 2008, 01:05 am »
First a note about the Subwoofer. The Amp was dropped shipped from Rythmik, and it is very nice, but the instructions are... let just say entertaining. When I start building it, I'll say more but for those who have never seen 'em, they are short, and to the point. :)

Now on to my festivities.

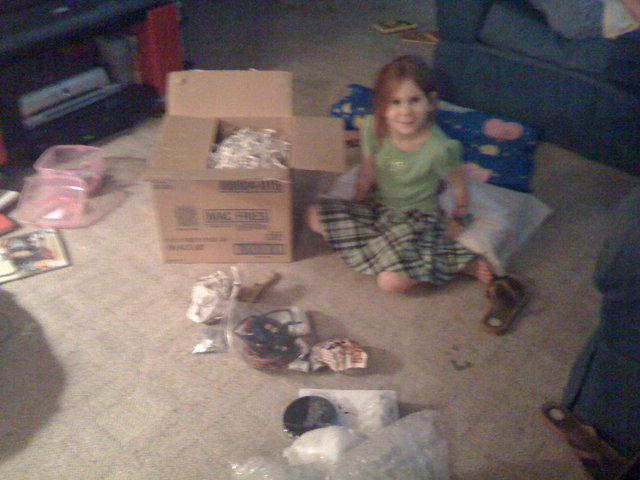
The Neo-2Xs arrived on Friday.  So much speakerage in such a small box (re-gifted from a French Fry order). Bellow you can see my 8th child, Judith, as she helps me make a mess.


Notes:
    It was fun to dig through the various packaging and padding.
    Sonicaps are really light.
    Wow, is that enough shrink rap?
    ooooo chrome feet.
    Is something Wrong with the tweeters? What's that fuzzy stuff on the sides!
    Wait, they all have it must be normal.
    I knew the M165X had a "polymer frame" but it looks more plasticky in person.

I'm a little sad about the inductors. Although it probably won't matter in my system, once built no one will see thes, and they will be easier to solder, I was hoping to get Alpha-cores--you know from that last order... :cry:

With the Tweeters, I could finalize my slightly creative design for the center channel, and get ready to build. Of course I had to lay everything out (for the three fronts) on my one sheet of 1"MDF. There's no room for mistakes. So I spent about an hour or two figuring that out, then drawing everything on the MDF just to make sure. So, my Variation on the RAV-6 will be slightly shorter and slightly deeper (keeping the same internal volume of course).

Here's a picture of the beginning of the cutting.


So, for whatever it's worth, note the lack of dust. Yep. Them there Festools work that well, seriously that's right after I made the cut. almost NO dust. Cool.

OK, so a little bit later in the day, and it's 102 degrees and I'm trucking along, all the pieces are cut out, and I move to some final dimensioning on the Table saw, but I was getting a little tired, and I found one annoying error in my layout... I cut something too short. DOH  :x

Time to clean up, shower, recover from the heat and write this post.


TomS

Re: Fred's Home Theater Project
« Reply #3 on: 3 Aug 2008, 01:22 am »
Looks like dusty fun and a very cool Festool saw.  You're going to love the AV1-RS's.  Good luck with the build!  Tom

fcraven

  • Jr. Member
  • Posts: 107
  • Don't mess with this baritone
Weekend number two; Sunday
« Reply #4 on: 4 Aug 2008, 08:56 pm »
So the Festool plunge saw is most awesome, and I highly recommend it to anyone. That being said, my table saw (which has very good dust collection) is not so good, and the router... well, I don't have Festool's new routers and I wish I did, all to say, my garage is now full of MDF dust.

I got most of the pieces, OK, maybe all of the pieces cut out for the left right and center speakers, and I got some "special" gluing done, (more on that later), which took up a lot of the day, along with cutting a bunch of holes, and chauffeuring children here and there.

Because I like 'em, and the help to hold things together, all the major joints are rabbeted. (besides I have that lovely dado head to cut such things (more dust).

Hank

  • Full Member
  • Posts: 1206
    • http://www.geocities.com/hankbond1/index
Re: Fred's Home Theater Project
« Reply #5 on: 5 Aug 2008, 02:08 am »
8th child???!   :hyper: :bounce:  You must have a lively home! Congrats!  I have more drawings, including two brace variations, if you want them.

cujobob

  • Full Member
  • Posts: 1262
Re: Fred's Home Theater Project
« Reply #6 on: 6 Aug 2008, 05:48 am »
So the Alpha Core Foils didn't come with the Neo 2Xs or the other speakers?  Really hoping I get the Alpha Core Foils with my latest Neo 2Xs..

Your HT is going to rock!  :thumb:

fcraven

  • Jr. Member
  • Posts: 107
  • Don't mess with this baritone
Re: Weekend number two; Sunday
« Reply #7 on: 7 Aug 2008, 04:52 am »
Here's some more pictures of what I did on Sunday, first off the gluing of the three front baffles.


As you may notice, they aren't flat, more on that later. Here's the very nice epoxy that I used to bond the two front pieces together. This is usually used for architectural restoration.


There's also a "wood putty" epoxy by the same manufacturer   as well, but I may not need to use any of that for the speakers...but then again.

It actually took about three hours for the epoxy to cure, even with the heat of the day.

Hank

  • Full Member
  • Posts: 1206
    • http://www.geocities.com/hankbond1/index
Re: Fred's Home Theater Project
« Reply #8 on: 7 Aug 2008, 05:18 pm »
Westlake Ace Hardware saw horses + "heat of the day" = are you here in the Austin area?

edit:  Never mind - I see in your profile that you're in Dallas.  Good guess, though.

fcraven

  • Jr. Member
  • Posts: 107
  • Don't mess with this baritone
Re: Fred's Home Theater Project
« Reply #9 on: 11 Aug 2008, 07:18 pm »
It was another hot and dusty weekend, but less so then before. The center channel box is mostly together, but there's a lot of work yet to come. In the mean time, I was trying to find a faster way to put up my photos, without having to think to hard, so for those of you who like such things you can go to:http://gallery.me.com/operadad#gallery for "all" my speaker building photos. I don't have any explanations up yet, just the photos.

Fred

fcraven

  • Jr. Member
  • Posts: 107
  • Don't mess with this baritone
Got some work done on a weekday
« Reply #10 on: 12 Aug 2008, 11:30 pm »
So here's some photos of what I did this morning. Since my front baffle is not flat, it requires a little creative routing


fcraven

  • Jr. Member
  • Posts: 107
  • Don't mess with this baritone
If only I didn't have to work during the week
« Reply #11 on: 19 Aug 2008, 11:39 pm »
I've been trying to get a little work done in the mornings before work, but that's complicated by late night olympic action and sleep. This past weekend went a little better, but the best thing was that the speakers are just starting to actually look like speakers. As you can see there are now holes for the speakers. yay!

The mini-towers are a lot less mini than I expected, and some of the braces give me hard time...dern glue. But it worked out in the end. Sorry the photos aren't the best, they were taken with my phone (as are most of these photos), in low light.


I'm waiting to glue the rings in until I get some other case details done. but in the following photo you can see the before and after (or vise versa). Not pictured, but last night, I finally got the center channel's tweeter to fully poke out.... more on that later.


fcraven

  • Jr. Member
  • Posts: 107
  • Don't mess with this baritone
Re: Fred's Home Theater Project
« Reply #12 on: 27 Aug 2008, 08:25 pm »
It's amazing to me how many things get scheduled for the weekends! I keep working on the speakers, and they are coming along well, but, when the creative bug gets in the mix, it's going to take longer. For the last couple of weeks we have had a birthday party and we have another one coming up next Sunday (along with a "send the eldest back to college" party). It's just that time of year. Don't they know that I'm trying to self actualize?

I've added a few more pictures to my .me gallery. http://gallery.me.com/operadad#100015 but nothing really exciting yet.

Since I went with the wedge front, and they are stating to look really cool (hey this things need to SOUND cool) (or warm) (or otherwise like they aren't there), I new realize that the subwoofer will likewise have to be real cool...

This past weekend I got the front baffles all glued on, and in the mornings I've been working on the ports.

And for what it's worth I like working with epoxy more than Titebond.

Fred

Hank

  • Full Member
  • Posts: 1206
    • http://www.geocities.com/hankbond1/index
Re: Fred's Home Theater Project
« Reply #13 on: 28 Aug 2008, 06:06 pm »
Quote
Don't they know that I'm trying to self actualize?
Fred, THAT is funny :lol: Good luck getting to that ultimate level.
Looking forward to seeing your finished speakers.

fcraven

  • Jr. Member
  • Posts: 107
  • Don't mess with this baritone
Re: Fred's Home Theater Project
« Reply #14 on: 1 Sep 2008, 05:06 am »
Ah well it's been another weekend, but this time I get a bonus day!

The party's got put off until next week because we have some sickness going around and Grandma Jo is still recovering from surgery and thus has a weakened immune system. So I purposed myself to concentrate on the subwoofer this weekend. And it is coming along nicely. As I write the "inner box is essentially built, minus the front panels which will get glued on tomorrow fairly early. Then I'll be wrapping it with the outer MDF, and hopefully filling her up with sand (which makes a great "weight clamp").

For enclosure I've fully separated the amplifier from the speaker airspace, so now I have to figure out how to create a little passage for the wires :)

I also started cutting No-Rez, and I must say that It does cut quite well on the table saw, but be careful, or you might could get "interesting" cuts. and I'm pretty sure I'm going to need to clean up my 12" Forrest WWII.

More pictures at my gallery. Here's the Alien--skeleton. Since I'm doing a down firing, I wasn't sure what to do to brace the top, so I just made some braces. Also, My sand-spacers will go vertical where as the ribs are horizontal. I went all out and this will have a full 3/4 of an inch of sand. Yeah, baby.

Not seen but the feet are kind of cool, unlike the rest of the speaker they are oak. So I'll have some nice contrast to the painted surface.


fcraven

  • Jr. Member
  • Posts: 107
  • Don't mess with this baritone
Re: Fred's Home Theater Project
« Reply #15 on: 7 Sep 2008, 01:01 am »
well things are starting to feel close to approaching done.  :o

On Friday evening (yesterday, Sept 5), I got the amplifier mounted, got the speaker attached and mounted, and carried it to the listening zone.
.....Yeah, so.... I didn't expect it to be so heavy yet.

So, this is the funny part, I thought I was going to have these really cool looking oak feet, yeah, well, I'm going to need something else (and it can still be oak, but, it seems that even without sand... this is very heavy, In fact, wheels might bee a good idea.

I spent about an hour trying to get any sound to come out of it...dern receiver... but it's working just fine now. The best word I can think of to describe it's sound, is "sublime". So far it's going exactly what I want it to do. And this is before sand, and before it goes to its final location in the room, facing down, with feet, or wheels or something. It's been quite nice to pull out some old CDs that I've never heard all of before.

In other news the main speakers are getting ever so close to being done, Today the magnets got installed, and I got all my fillets in (which is important to the design). I even pulled out some of my old paint which will go to painting the speakers.

fcraven

  • Jr. Member
  • Posts: 107
  • Don't mess with this baritone
Re: Fred's Home Theater Project
« Reply #16 on: 11 Sep 2008, 07:28 pm »
I want to get these things built. Which means--provided that we aren't being swamped by some "named storm" this weekend (which we probably will be)--I would like to get them all ready for finishing (paint) this weekend.

To do that most efficiently, I need my surround channels ready as well, but they are wide open (no sides), because I would like to put my extra No-Rez into my two surrounds. This creates a problem in that I don't know how much No-Rez is going to be left over for me to use. So over a couple of mornings and one evening, I cut up the No-Rez for the front three channels and then I knew I had enough.

So, I needed to build me a couple of crossovers! woo hooo! here's one 'em.


And here's where I got this morning.


This evening I'll glue up the second surround, and begging actually sticking the No-Rez to the front three speakers.

I still need to make the crossovers for the front three speakers, add the bracing to the center channel, and finish my sculpting. Then comes primer, and paint. It has been suggested that I paint them "Ferrari Red". While that might be fun and look real cool, it would be too much for a home theater, so they will be gray, BUT. I'll be making the gray by combining some of my old red and green paint I have so it will be a more "complex gray". Really, this will be quite a cool yet subtle color, which will meet with high WAF (very important) and it won't cost us any extra...

Danny Richie

Re: Fred's Home Theater Project
« Reply #17 on: 11 Sep 2008, 08:00 pm »
If you are going to allow the inductors to be that close to each other then turn the smaller one up on its edge so that if it were to roll, it would roll away from the larger one. This will minimize them effecting one another.

fcraven

  • Jr. Member
  • Posts: 107
  • Don't mess with this baritone
Re: Fred's Home Theater Project
« Reply #18 on: 11 Sep 2008, 08:29 pm »
If you are going to allow the inductors to be that close to each other then turn the smaller one up on its edge so that if it were to roll, it would roll away from the larger one. This will minimize them effecting one another.


So that would have been nice to know before I glued (caulked) in the components and before I glued the sides on one of the speakers...

This is why I started with the rear.

Zero the Hero

  • Jr. Member
  • Posts: 81
Re: Fred's Home Theater Project
« Reply #19 on: 12 Sep 2008, 12:45 am »
very nice work

some good info on coil placement:
http://www.troelsgravesen.dk/coils.htm