Alright, back with what I hope everyone will think is a good update

And I've got pictures to boot!
There's a few reasons it's been a little while since my last update.
1. I think I mentioned it before, but I realized I had to paint all the bracing that goes in the back - I had to go back through the whole process - sand, shellac, prime, paint. It just takes time (and baseball season cranked up for my sons) - so this took some time
2. I was constantly unhappy with the finish results I was getting on my baffles. I redid these things I don't know how many times - let's just say I spent some time and money on sandpaper and spray paint!
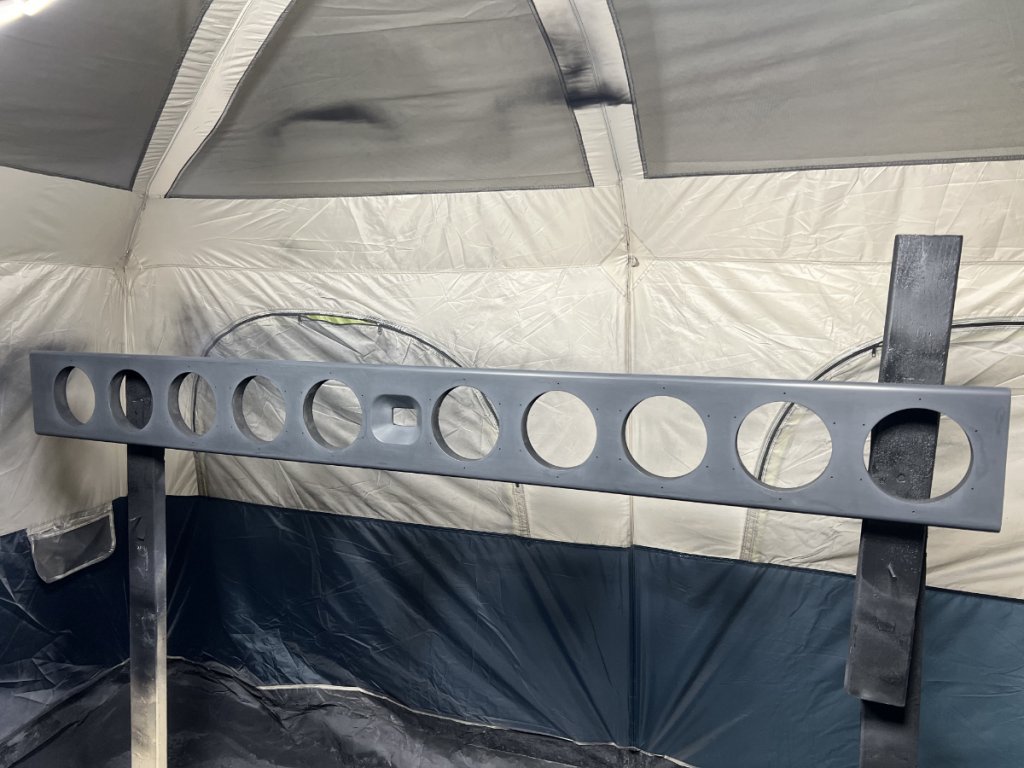
Quick notes on painting the backs of the speakers (and the bracing / parts). I don't have any pictures of the bracing pieces yet - I'll add those later, but for those I did NOT use the SprayMax simply because they won't be seen that much and the cost is 5x that of the Rustoleum satin paints you can get in the store. The SprayMax Hot Rod Satin black is consistently $30/can. You can get the American Accents Rustoleum Canyon Satin Black for ~$6/can. I want to say I used maybe 8 cans of paint to finish all the back bracing pieces plus hitting the baffles a couple of times. Come to think of it, I don't think I got a picture of the back of the baffles either - I'll add those later as well.
As mentioned above, I did do the entire process for finishing the bracing - shellac, etc. I tried to finish those things off decently well. If I got a run or something that just was an eye sore, I would go back and redo it. If they weren't 100% perfect I did't stress too much about them though because like I mentioned, they won't be seen that much. I just wanted them to look nice at a casual glance. If you were to scrutinize the finish on them, I'm sure you could find some issues...
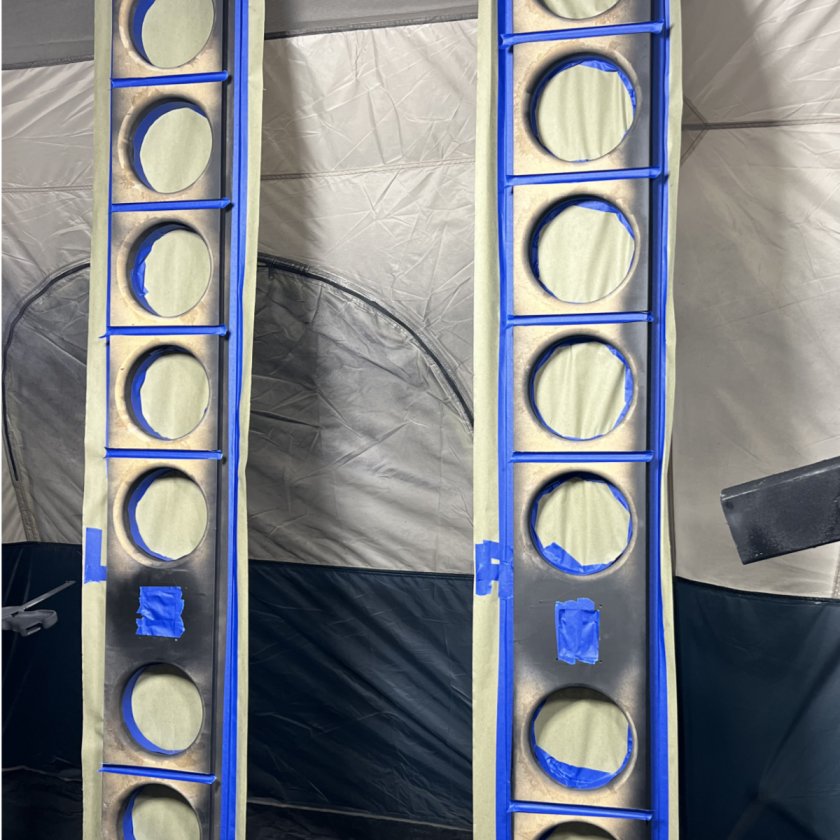
On the backs of the baffles themselves, I didn't do anything special here because MOST of the area will be covered by speaker drivers or NoRez. There should be very little of this exposed and for that reason I simply hit the back of the baffles with some black primer, and then I sprayed a few coats of the Rustoleum American Accents Canyon Black Satin over that. I did tape off the groves where the bracing go (to keep a clean spot for glue to adhere) and I did mask off the fronts of the baffles with paper and tape through the driver holes to keep paint off the front. The tape in the driver holes MOSTLY worked - I did have a spot or two where some overspray made it through which really ticked me off...In hindsight, I would have done things right and sprayed the backs of the speakers FIRST before doing anything else. Live and learn I suppose. Here's some photos of the primer and the masked off baffles...
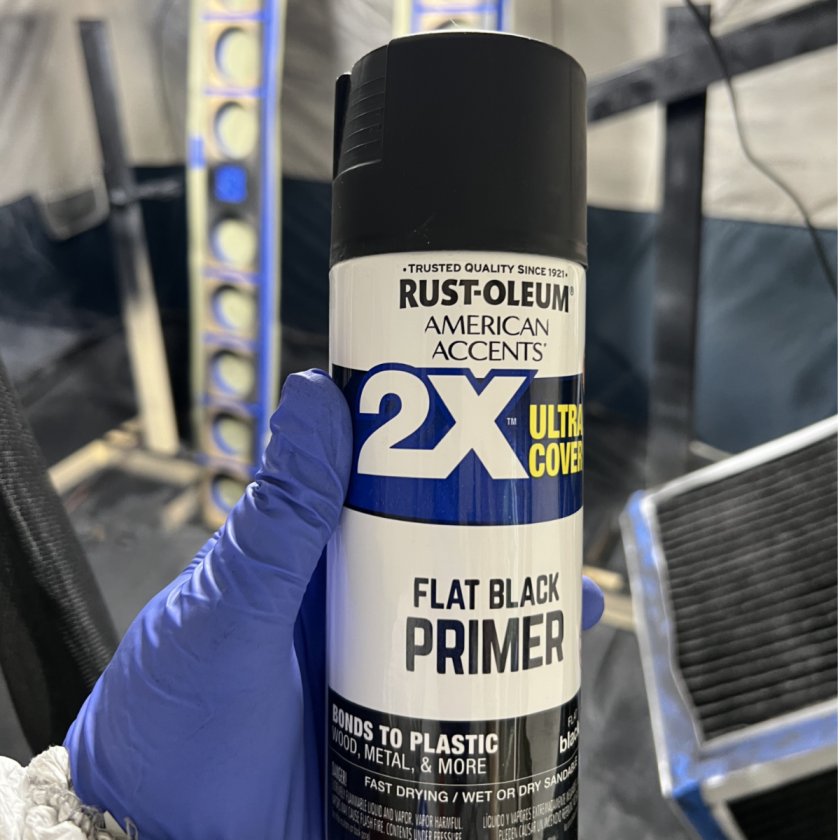
Primer I used for the back of the baffles:
Here's the baffles masked off so I could spray on that primer:
Like I said, I'll get some photos of the back of the baffles and post those later.
Now, onto the heart of everything...getting the baffles RIGHT. Man it took a lot of learning. I really...REALLY got tired of sanding those things down all the time, but I got better at it all the time and got way more confident. A couple tips I can share that may help some people along the way. If you're sanding off a finish coat you put on (a clear coat or a paint/clear combo) - don't be afraid to go straight to 150 grit - hit it until all the dark spots disappear, then go to 220 - hit that lightly just to smooth out the 150 grit sand marks - you're not really trying to take off any finish at this point. Then, same thing - move to 400 (I was using the Assilex blue at this point), get smooth out the previous scratches - removing very little finish. Then onto 800, again, just smoothing things out. After you do that, hit it with the gray scotchbrite pad (or the Duragold in my case) and get the ultra fine, shallow scratche on the surface.
Sanded baffle - the entire thing looks nice n' dull
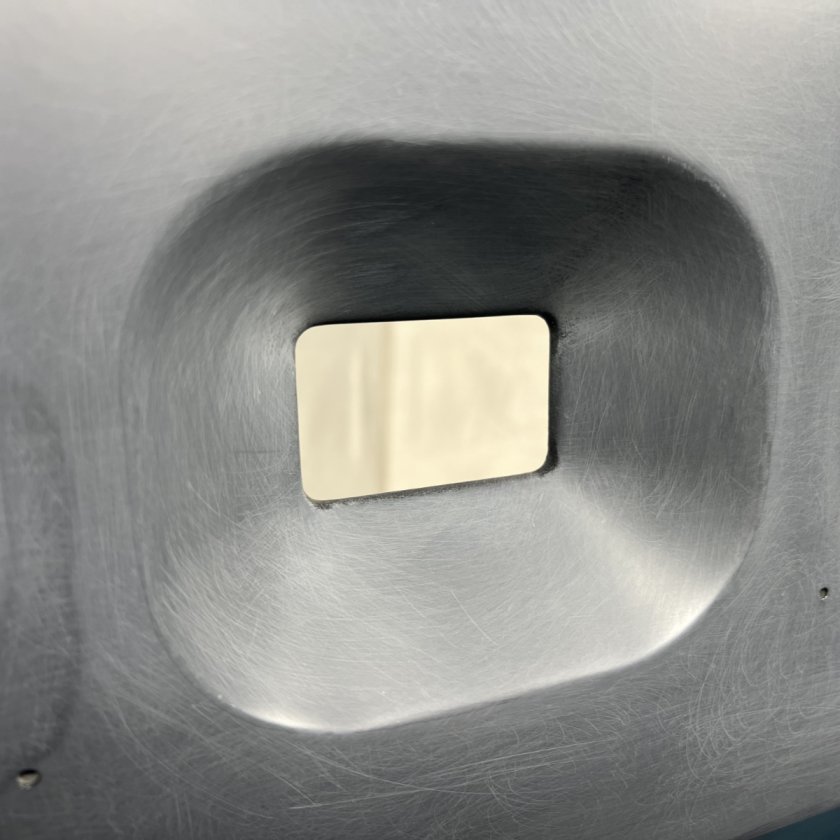
Closeup of the sanded tweeter - have to be super delicate when sanding in and around this thing. Easy to burn through the layers if you're not careful!
Sounds like a lot of work, and it kinda is. I'd say every time I had to go through this process it was probably 45 minutes per baffle. I did get faster at it though as time went on. One thing I learned is it's much better to hit it with the more aggressive grit to start to take off the finish faster (with less effort) and then just smooth that out along the way. It seems counter-intuitive, but it absolutely works better if you do this rather than trying with a high grit number like 320 because you're afraid to burn through the finish. Ironically, what I found is that using that higher grit, you have to spend more time in a single area to try and get rid of any high spots and you inevitably burn through those areas because you have to focus on smaller areas so much, whereas using the lower (more aggressive grit) allows you work less strenuously and cover a larger area faster so you have less of an opportunity to accidentally sand through an entire layer of finish. Again, counter intuitive, but I got more comfortable with this as I went.
Also keep in mind - if you want a PERFECTLY smooth and SATIN finish with ZERO orange peel, the sanding step is critical - don't skimp here - you'll just be mad at yourself later!
So, painting the perfect finish. I honestly thought it wasn't even possible. I swear to you I probably painted one of those baffles more than 10x. OMG is it frustrating to feel like you're so close only to screw up ONE little thing - this would happen to me nearly every time. What do I mean? Like maybe I didn't go thick enough in one area so it had overspray look to it or stippled, or maybe I went back over an area after it'd already dried so now it stuck out like a sore thumb. If you could make the mistake, I made it! I do have the answer though...
For the Perfect Painted SprayMax Hot Rod Black Satin Finish with ZERO Orange PeelI've got to thank both Pete from SprayMax and Lloyd from the forum here. The combination of information the provided me got me here...so here's how you do it (for my setup).
Keep in mind, I had my baffle mounted horizontally due to space (the things are freakin' 7' long!).
The key is spraying in the direction of the narrow part of the baffle...so in my case because they were laying horizontally, I needed to be spraying up and down over the baffle and overlapping a good 50-70% with each pass. The SprayMax paint cans come with nozzles that can be rotated to have a spray fan that is either vertical or horizontal. I changed the spray fan to be horizontal that way I was overlapping each vertical stroke nicely. There are a few reasons you absolutely NEED to spray across the narrow part of the baffle...
1. You want that paint to be very wet when you pass back over it with each pass
2. You want the entire fan of that spray to hit the edge of the baffle - when I was trying to spray longways with the baffle, VERY LITTLE spray paint was hitting the very edge (the back side lip) o the baffle so the coating was hyper-thin to non-existent there. When you have the fan in the same orientation as the edge of the baffle, quite a bit of paint is hitting it on each pass which is key
3. The same went for the top and the bottom of the baffle (the extreme left and right because it was lying horizontally) - going over these edges in multiple passes allowed me to build up a nice layer of paint as I worked my way onto the flat baffle surface - this will be more clear when I post the videos
While this next bit of information doesn't necessarily have anything to do with the horizontal position, this was crucial in me finally getting the finish I wanted. DO NOT spray all the way around the edges of the baffle first before going on and spraying the main portion of the panel. I was doing this every single time and I finally realized that doing this was putting micro amounts of paint on the baffles (think overspray) that were drying before I'd get back to putting the real layer of paint on the baffles and that little amount was enough to screw everything up! Rather that going all around the edge first (like you'll see in many car painting tutorials on line showing how to paint a panel) - simply start at the extreme left or right of the baffle (if horizontal) and work your way around the edge of it all the way down the entire length and off the other side.
And LASTLY - as Pete from SprayMax told me - and I believe Lloyd even alluded to but I didn't fully understand it at the time - you want to spray this stuff on the way you want it to look. ie - you're not spraying on a "tack coat"...you're not spraying on a thin layer or even medium layer...no...if you want a glass smooth finish, you need to continue to spray thin layers (overlapping thing layers up and down) until you achieve the look you want. For me, I wanted perfectly smooth, no orange peel - so that meant I needed to continue overlapping my spray layers until I got a beautifully smooth and glossy finish - once I saw that, I'd move over to get a good 75% overlap until that looked the same, and keep moving down the board like that.
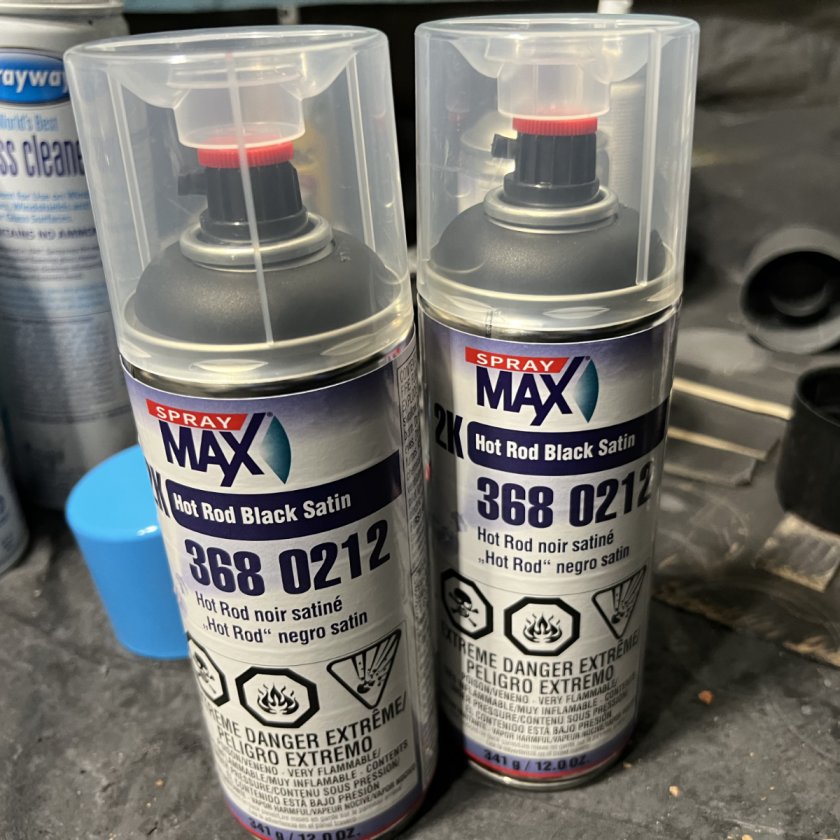
Now, another thing that just about sucked the soul out of my body at some point. 1 can of SprayMax Hot Rod Black Satin is
NOT enough to spray the entire baffle...just don't try it. If it starts spitting paint rather than the beautiful fan it should be putting out - you're toast. Might as well stop because you're going to have to redo it if you care. Do yourself a favor and just bite the bullet and know that you're going to spend $60 and use two cans of paint to fully coat ONE baffle. I'm telling you - I screwed this up at least 3 times thinking I could get by with a single can - it's not worth it. I guarantee you I lost days and $$$ trying to save money. Shake up two cans of paint, bust the bladders and have them both at the ready when you start painting the baffle. After you get to the halfway point on the baffle (ie to the other side of the tweeter) - put that first can down (don't try and pinch pennies here, you'll regret it), go pick up the other can of paint and finish off the baffle. I PROMISE YOU, you'll walk away much happier if you just commit to this up front.
The super frustrating thing is I absolutely tried to get by with a single can and for SURE came up short just by inches at least three times. That was three more times of having to sand all the way back down and start over. And every time you do this, you lose at least two days. SOOOOOOOOOOOO not worth saving $30. If you've decided you want to do this just commit to spending a little extra money and saving some sanity and time (and ultimately money). You'll be throwing away about 1/3 of each of those bottles....live with it and be happy :-p
Here's some shots of what that paint looked like wet when I finally did it right - you'll see it looks just beautifully smooth....here's the corner where I started
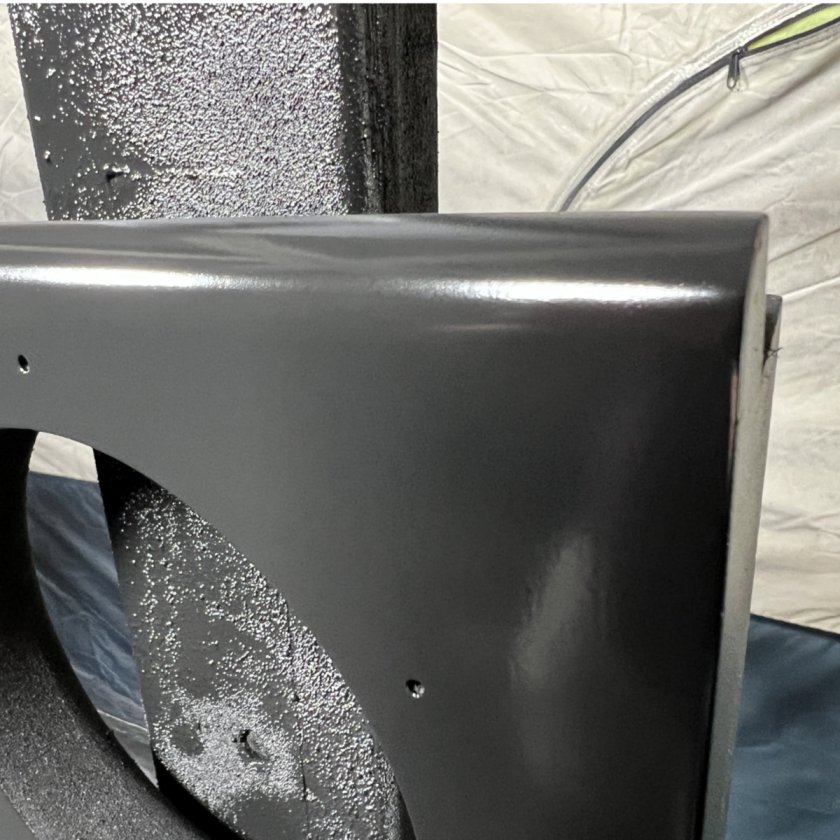
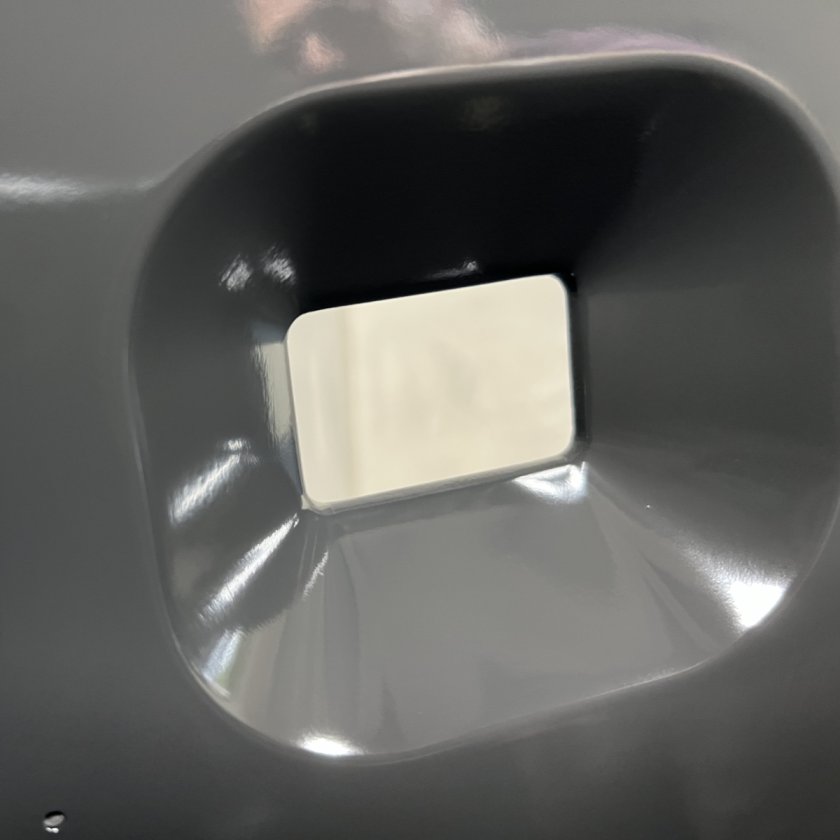
And here's the tweeter when it was wet right after I finished painting the entire baffle
Again, have two of these things shaken and ready to spray...just make it a foregone conclusion!
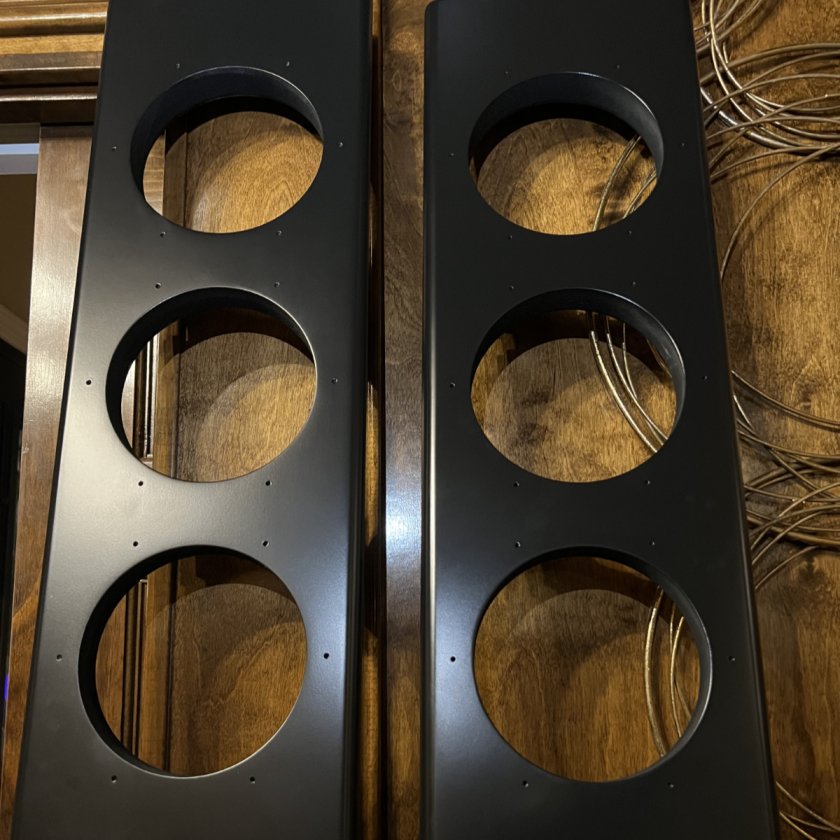
Here's a nice shot showing how nice the black looks just sitting in a room
This shot shows the speaker base of a purchased "black" speaker where you can see that the base is a dark gray but the baffles actually look black - I LOVE how the SprayMax Hot Rod Satin Black turned out! What you see there is a pretty accurate representation of what my eyes saw - it wasn't that the light was way brighter on that speaker stand, it was just that the black on those baffles was much darker than the paint on that speaker stand...
Here's an extreme closeup of the tweeter...I didn't even notice I had an area in there I need to clean up / smooth out...but, if you look at the surround, you can see just how beautiful that finish turned out - it really does look like a professional paint job!

So now you're mostly caught up! My next step is to get started on the veneer! I'll be getting rolling with that in the next couple of days...super excited to share that soon!
Oh, one last note...I had run out of the Hot Rod Satin Black at some point and I thought I'd just try and do the Clear Coat and HOPE the two baffles would match....NOPE....the baffle that had the sanded down hot rod satin black with a true clear coat over the top of it ended up looking very much like the gray speaker stand above. On its own it looked decently black, but put right next to a baffle that was finished with the top coat of the hot rod satin black...it was just no contest. So I HIGHLY recommend if you want a beautiful, strong, durable satin finish, go pick up some of that hot rod satin spraymax paint...it's just awesome when you finally get it right!