Well, Hi folks.
I started this thread on Feb 6, 2013. Rather a prophetic thread title at the time as this
must be one of the last Super V builds going on in this world.
"...you still don't have them built??"Ahh, no. I've had a nice system over all these years and it still sounds great, so no
real hardship.
I worked for basically one company my entire career. In 2005 we were informed the company had been sold and would be moving to another state. It wasn't an easy move as an entire production facility had to be designed and built-replicated and hundreds of products qualified in the new equipment. I'm a retired polymer chemist. Many polymers are known as a "product by process", meaning, if you run the same formula/process in different equipment you'll be getting a different product in the end. Transferring a few hundred million pounds of 100's of products (both solvent and waterbased) to new equipment in another state..it isn't easy. Fast forward 6 years (into 2011) and we got the new production plant up and running with qualified product and had mostly happy customers. And, as I chose not to move, my job ended. Fortunately, at a time when jobs in my field were hard to come by, particularly in a small town..at my, by then, senior pay grade, in comes an offer from the old parent company. "We'd like you to do global analysis and optimization of our logistics transportation networks!" Huh? I don't even know what that is. It was a good job and local for the same company I'd worked for, for over 20 years. "Sure!, says I..it's just numbers." So, I basically didn't miss a day of work. Fast forward to 2013. As a diversion to maintain some sanity, I dove into understanding some speaker design basics and, for some reason, this lead me to the possibly of building a set of speakers. At about this time yet another announcement rolls in..the company division has been sold and is moving to another state! I mean, like, WTF. I was in my mid 50's and just trying to hang on long enough to reach the promised land..retirement. That sale and move took another few years. It wasn't pretty, nor fun. "Hanging-on" took about all the mental energy I had. Fast forward to 2016..the sold-company division closed its local doors and moved on. I, once again, declined the offer to move(turns out..really good decision), but I was close enough to the promised land that I retired. From that point on I've been busy enjoying..lots of things. Mostly outdoor stuff, kayaking, bike touring, camping, traveling, and a new love-of-my-life has kept me more than busy. Retirement..I'd highly recommend it. If you're not there yet, hang in there, if you're retired then you know what I mean. Now that all that dust has settled somewhat I've been in the shop building lots of tables, benches, and cabinets. I've been a woodworker for many years. With a number of key items done and out the door, and recently installing a new audio-streaming setup in my system, I figured it's time to build something for me...my long lost, though well stored, Super V parts are still just parts, not speakers. It's finally time to build them up.
With respect to the discussion up-thread, I've adopted about all the suggestions folks had back in '13. The model has been updated and I'm working off that model now.
I'm using 3/4" and 3/8" Medex MDF for everything. 3/4 material for the sub boxes and sub baffle, 1.5" thick for the coax baffle, 1.125" for the sides(plus a veneer).
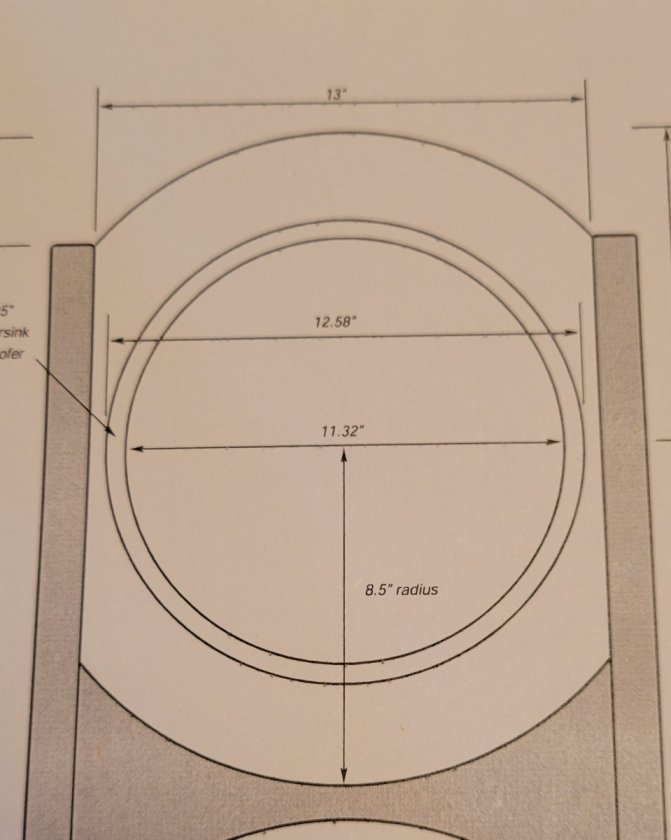
So, my first question is mounting the coax drivers in the upper baffle flange. The plans call for an outer baffle diameter of 12.58". The inner flange diameter on the plans is 11.32". This yields a flange width of 0.63". I cut it at 5/8" (0.625") wide and the coax driver fits in nicely. The outer edge of the coax flange fits into the outer MDF flange edge snug, not tight nor loose.
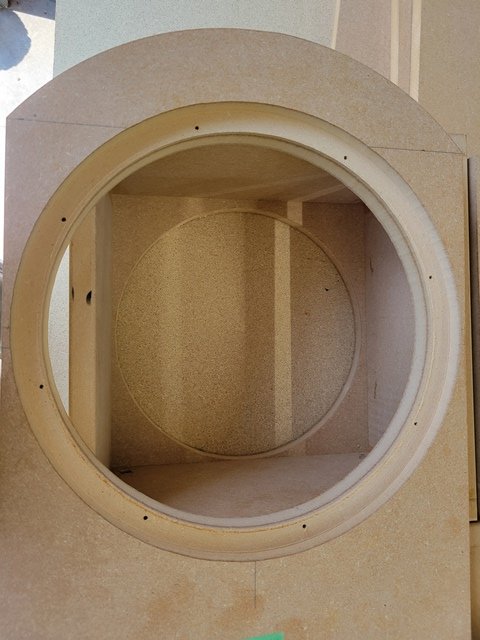
I inserted the coax into the MDF flange and located the mounting holes for the coax with a vix bit.
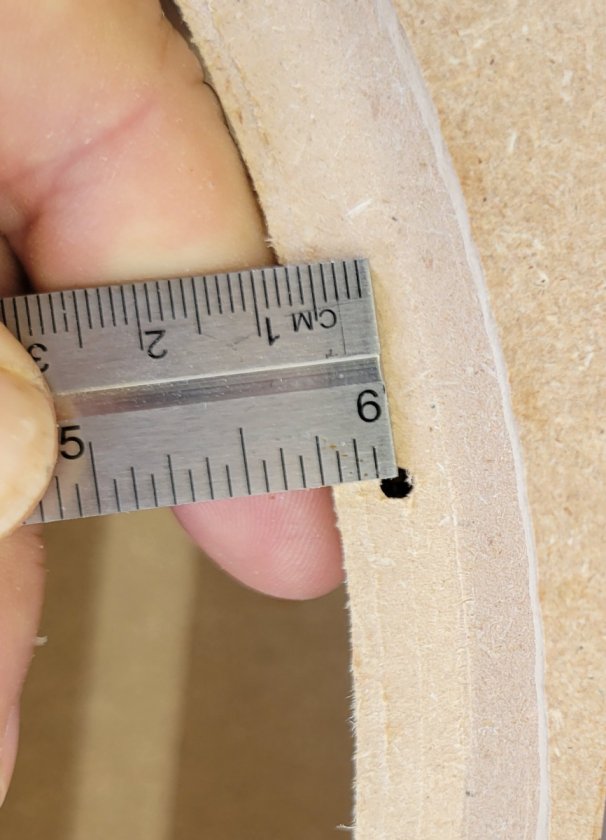
I planned on mounting the coax drivers in the flange with a 10-32 threaded insert(thread in the insert, remove it, slather epoxy around the hole and re-thread the insert in) as, hopefully, eight of them would be enough to hold the coax securely (using plenty of blue thread-lock on the bolt) while the small-ish (9/32") insert bore hole wouldn't be too large for the MDF flange. The vix bit pilot hole edge location looks to be very close to the edge of the flange. It's on the shy side of 3/16". Too close for even a 9/32" insert bore hole. I could drill a 9/32 hole, but the inside edge of that hole would be
very close to the flange edge and not very secure, with or without epoxy.
So, lots of people have dealt with this issue in the past. Does anyone have advice on how to mount the coax drivers? I could use screws, but I'm not feeling good about screws holding in the MDF to secure the heavy coax driver well enough for the long term. I could reinforce the area around the insert holes with epoxy and fiberglass or use a 10-32 through bolt with lock nuts on the backside. In pics I've seen of other Super Vs, the coax drivers are not through-bolted. What have other people done?