Over the last eight weeks I have been engaged in an on and off mission. The misson was to assemble a box of bits that I acquired from Hugh.
Hugh assured me at the time that this box of bits would prove to be an Aspen GK-1M pre-amp. This has fortunately proved to be true.
But not without incident. There's no fun if there's no incident. And probably not a lot to be learned either!!
To prove it's done...
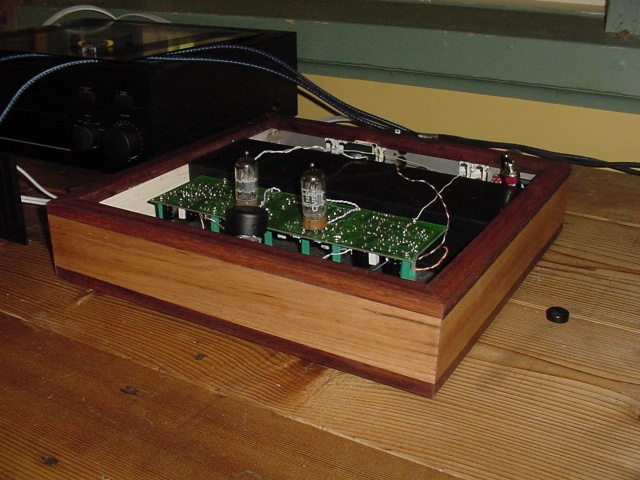
And the whole gallery is
HEREWhat does it sound like? Better. That's about all I can say. It's better that what I had before (the pre-amp portion of a Yamaha integrated amp). More detail, better image and a more wholesome organic feel that what the Yammy offered.
The assembly was a bit of an epic. Mostly due to an initial stuff up on my account then compounded by my dissatisfaction with the first version of the case.
Assembling the PCBs was a breeze - very enjoyable and not all that tricky - easier than the amp in my mind. Unfortunately it was here that I did make a mistake. I made an assumption and without further research I carried that assumption through to its conclusion. I reversed the polarity of C12 and C14 on both channels. Fortunately, they didn't explode when I applied the power but they did make the circuit do some interesting tricks. These tricks didn't exactly lend themselves to finding the problem (and the lack of explosion also didn't help). Hugh thought the problem might've been Z2 or the nearby transistors - new ones were sent up - no go. Eventually, luck solved the drama when I took better notice of the front cover photo on the instruction book......
HINT 1: Take repeated good notice of the photo of the completed analogue board on the cover of the instruction bookProblem solved! Next bit is to insert completed bits into your case. In my case, this case was a 2U rack case. The result was rather unattractive. In fact it was appalling. This wasn't helped by my distinct lack of metal working skills. Well the sort of skills that result in a fine result - you want dents, scratches and out of square then I'm your man.....
HINT 2: Avoid a rack case if you want to build an attractive GK-1Conversations with Hugh at this point went a long way to fixing my issues. After some small financial persuasion from myself (tears were insufficient unfortunately), Hugh parted with a prototype GK-1 Swift chassis that he happened to have lying about. Now this I could work with. All I had to do was build some timber sides and Rob's yer fathers brother.
True. Yes, on the latter (kind of- mothers cousin actually), but not the former.
A small headache with the new chassis was that it is designed for a variant of the GK-1EL. I have a GK-1M. Biggest difference is that source selection is manual plus there is a manual HT bypass switch. The source selector is behind the sheild and sits quite high. To get the switch control to the front you'd need to get the extension rod through the sheild without hitting a transformer (no big deal) and under the analogue PCB to the front panel. This bit was impossible. The switch sits high enough that its traverse would pass through the PCB - not a chance. Source control stays confined to the rear and a permanent solution has yet to be finalised - options await.
The real drama turned out to be the HT bypass switch. The GK-1 is designed to have its signal earth occur within the amp to which it is connected (or something like this) so there can be no connection at all between the GK-1 chassis (which is earthed to mains) and signal earth off either PCB.
When I connected the GK-1 to the AKSA all I got was a horrible squealing through the speakers. After an informed and inventive amount of swearing I tried the GK-1 on the Yamaha. Same result.
Eventually, it was established that the problem was caused by an earth connection between signal earth and the chassis. This took a couple of days to solve due to a combination of high temperatures (up to 44 degrees celcius), high frustration levels and very low temper threshold.
I eventually realised that he body of the HT bypass switch is grounded to the input/output PCB. The chassis of the GK-1 is uncoated stainless steel. To fit the HT bypass switch I had to drill a new hole in the chassis too. Basically the body of the switch was in contact with the chassis. And therefore earthed. Not good. Once isolated from the chassis with a combination of larger hole, liquid electrical tape and plastic washers, there was no connection between the signal and the chassis.
HINT 3: that HT bypass switch needs to be isolated from a metal chassis that is connected to mains earth.Problem solved? It bloody was not. Running through the Yammy as an initial test it went very sweetly. Bewdy! Hook it up to the AKSA.
SSSCCCREEEEEEEEch....Crap.
Earth drama in the amp. Surprisingly, I found this one quite quickly. One ot the bolts holding the output devices to the heatsink was in contact with the heatsink. Not surprisingly this problem took longer to fix than to find. Fiddly little prick of a job.
Interestingly, this amp has been in this state since November and has been working just fine when hooked up to the Yamaha and a satellite decoder - probably cause neither are connected to mains earth.
Anyway, it's now all good. Sounds great. Very happy.
However, all tales need a leveller for an ending (sting in the tail perhaps?)and this one has one. Interconnects. The AKSA combination has found a problem with some of my G-Snake interconnects (I've had sheilding problems with these before). The combo is obviously quite sensitive in this regard. And while I get the sound through quite fine, I found that one interconnect introduces audible levels of hum when at idle - so now I'm forced to buy or build new interconnects. Tried an interconnect built from Belden 9259 (non Teflon version of 89259) which had the outer jacket removed and replaced with plumbers tape. Much better but not silent....hmmm. More project work. Yahoo.
In summary, the result has been well fought for but very much worth the effort. There appears to be a great deal gained from the addition of the GK-1M to my system - both audibly and in terms of personal satisfaction. I've learnt heaps too. The GK-1 is a highly recommended piece of kit.
HINT 4: Get a GK-1. It's worth it.At this point, I have to thank Hugh for putting up with a bombardment of emails and countering with helpful advice and encouragement. Without his help, I'd probably still be struggling with it or more likely it'd be sitting on the shelf. One of the best parts of the GK-1 experience is surely the help you get from Hugh with getting the thing up and running - he does as much as humanly possible to make sure you convert a box of bits to something you will be very very happy with. Hats off to you, Hugh