X-Statik and X-Voce build

0 Members and 1 Guest are viewing this topic. Read 1841 times.

dryan01uk

  • Jr. Member
  • Posts: 75
X-Statik and X-Voce build
« on: 11 Oct 2021, 01:45 am »
Thought I'd post a photo log update on progress with my X-Statik and X-Voce build - still can't work out to straighten up the images though... 

I starting way back in July when I received my parts from Danny.


Time to start developing some wood working skills.  Learning to cut straight was never so much fun - next time I'll buy a cheap table saw:


Found out about dust collectors and DIY cyclones from You-Tube along the way.


and ended up looking like a yellow Darth Vader with all the PPE - because, y'know, MDF:


Lots of parts cut up at this point:

and


First glue-up on my DIY assembly jig- used local Perbond F20 polyurethane glue to hide a multitude of sins:


...

dryan01uk

  • Jr. Member
  • Posts: 75
Re: X-Statik and X-Voce build
« Reply #1 on: 11 Oct 2021, 01:57 am »
continued:

you can never have enough clamps - started at 4 now have 10 - Irwin must make a fortune from DIYers.

Current stage - dry fit and test fitting of tweeters and woofers - the tweeters are a very tight fit which I assume is normal.


Next steps ...

  • make bases
  • route cables in baffles
  • make grills
  • assemble cross-overs
  • paint
  • veneer
  • etc etc.

Impressions so far with working weekends only, as a lock-down project, its a lot of fun and it may be getting me a bit fitter - beats sitting in front of the silly box when I'm not working.

My wood working skills have grown exponentially, and it keeps my out of trouble with her indoors.

Can't wait to find out what they sound like - maybe this side of Christmas (this year!).  Then, once new floors and kitchen are in, room treatment (diffusion and absorption),  some OB subs and some rears.

David

AlexH

Re: X-Statik and X-Voce build
« Reply #2 on: 11 Oct 2021, 02:56 am »
Congratulations, those are coming along nicely. Be careful with the wood working, it can become addicting. Then not only will you start collecting speakers and stereo equipment you become a tool collector as well.
Don't ask me how I know. :lol: 

Peter J

  • Full Member
  • Posts: 1876
  • Hmmmm
Re: X-Statik and X-Voce build
« Reply #3 on: 11 Oct 2021, 04:54 pm »
Current stage - dry fit and test fitting of tweeters and woofers - the tweeters are a very tight fit which I assume is normal.

...

FWIW, I wouldn't consider this normal or desirable. If it's tight now, it will get tighter after finishing because of film buildup. Whether veneer or paint is intended, I would error on the larger side and black out sides of rabbet if raw MDF is peeking through.

dryan01uk

  • Jr. Member
  • Posts: 75
Re: X-Statik and X-Voce build
« Reply #4 on: 11 Oct 2021, 08:56 pm »
FWIW, I wouldn't consider this normal or desirable. If it's tight now, it will get tighter after finishing because of film buildup. Whether veneer or paint is intended, I would error on the larger side and black out sides of rabbet if raw MDF is peeking through.

Thanks Peter - I was a bit worried about that - I'll open up the pass through port for the tweeters a bit further - the recess is a nice 'snug' fit.  I've allowed for the thickness of the veneer, so they should come up 'flush'.  I was also planning to paint the inside of the ports and back of the exposed baffles with black matt rustoleum.  I've seen some people use that here to great effect - I'll plan to do the same with the recesses.

Do you have any thoughts on how to strengthen the screw locations for the various speakers - I was planning to pilot the screw holes then fill with CA (super) glue, so that I can run them in and out a few times, if necessary?

@AlexH - thanks for the encouragement - its slow but steady progress.  I know exactly what you mean about woodworking being addictive - I'm seriously thinking about designing and building my own media cabinet to match the speakers.....  :lol:

Peter J

  • Full Member
  • Posts: 1876
  • Hmmmm
Re: X-Statik and X-Voce build
« Reply #5 on: 11 Oct 2021, 10:25 pm »
Thanks Peter - I was a bit worried about that - I'll open up the pass through port for the tweeters a bit further - the recess is a nice 'snug' fit.  I've allowed for the thickness of the veneer, so they should come up 'flush'.  I was also planning to paint the inside of the ports and back of the exposed baffles with black matt rustoleum.  I've seen some people use that here to great effect - I'll plan to do the same with the recesses.

Do you have any thoughts on how to strengthen the screw locations for the various speakers - I was planning to pilot the screw holes then fill with CA (super) glue, so that I can run them in and out a few times, if necessary?

@AlexH - thanks for the encouragement - its slow but steady progress.  I know exactly what you mean about woodworking being addictive - I'm seriously thinking about designing and building my own media cabinet to match the speakers.....  :lol:

The CA glue can be used to good effect but let's clarify. You intend to thread screws in, remove them and fill with glue, correct?  If that's right, all you really want to do is consolidate the wood fibers in the vertical walls of threaded hole so I'd limit to a drop or two so as to just wet the walls. I suspect if you fill the hole, you'll create a hard plug that will deflect screw to side when you go to reinsert after glue solidifies. It also depends somewhat on MDF being used. Pithy core will  be more absorptive than high density. I suspect you could gently run screw in and back out while glue is still wet to eliminate excess. I sometimes use accelerator with CA, but wouldn't in this case and just let it dry overnight.
I'd be inclined to experiment on a scrap to get methodology down pat. Also be aware that bottoming screw in pilot hole or continuing to drive once head contacts panel can just auger out the threads created.  Gentle is the key, methinks, especially with big box MDF.

dryan01uk

  • Jr. Member
  • Posts: 75
Re: X-Statik and X-Voce build
« Reply #6 on: 12 Oct 2021, 12:55 am »
Awesome advice Peter.

'Wet' the thread walls is a great description, as all I want to achieve is a solid core for the screw thread to lock into.  I have sourced MDF from a dedicated local manufacturer - it seems to have a good structure and fibre integrity - but it's still MDF, so fragile if the wrong forces are applied.

'Gentle' is very much the key, as you say - tight but not overly so.

I'm discovering the joys of practice pieces - my tweeter apertures were the result of four practice attempts to get the depths and spacings accurate before cutting the baffles .... :D  I'm going to do the same when I start veneering.

Thanks again - its a great community that exists here - incredibly sharing and helpful.

David

dryan01uk

  • Jr. Member
  • Posts: 75
Re: X-Statik and X-Voce build
« Reply #7 on: 17 Nov 2021, 10:27 pm »
a bit of an update ... veneer finally turned up.... now to learn all about veneering .....  :roll:

This is paper-backed Jarrah wood - a native wood from Australia.


Thank goodness for youtube and Peter's detailed speaker build videos.

I'm going to test finish a few pieces before moving onto the 'main event'.  I'll post some pics when I get that far.

D

tortoiseman2542

Re: X-Statik and X-Voce build
« Reply #8 on: 18 Nov 2021, 02:05 am »
a bit of an update ... veneer finally turned up.... now to learn all about veneering .....  :roll:

This is paper-backed Jarrah wood - a native wood from Australia.


Thank goodness for youtube and Peter's detailed speaker build videos.

I'm going to test finish a few pieces before moving onto the 'main event'.  I'll post some pics when I get that far.

D

Are you going to stain that veneer?  Cool looking veneer for sure.

Robert

dryan01uk

  • Jr. Member
  • Posts: 75
Re: X-Statik and X-Voce build
« Reply #9 on: 18 Nov 2021, 06:52 am »
There are two sheets there, so plenty to go around.

In terms of finish, I’m planning  to iron / glue the veneer using Titebond 2 (Heat Lock is silly expensive to ship here) - apparently it will work quite well and has up to 12 hour reactivation window, so all good.

I’m going to do a sample board to help work out what to do and either do multiple coats of polyurethane with bouts of fine sanding or clear danish oil then multiple coats of poly.  I want to enhance the natural colour and grain of the wood whilst protecting it from daily knocks.  I’d also like to get a high gloss finish.

Jarrah, if exposed to UV, like most woods will mellow and eventually turn a sliver gray (which I quite like), but in this case I’m hoping to keep the rich red colour, with uv protection from the poly.

I’m a total wood working noob, so there will be lots of trial and error before I’ll commit.

It’s all great fun, keeps me quiet (as her indoors says) and hopefully gives me something i’ll be proud of in the end.

Still weeks away from firing up the drivers … I reckon that’s going to be a great Christmas present for myself!

Once these are done, roll on the next step….

D

Peter J

  • Full Member
  • Posts: 1876
  • Hmmmm
Re: X-Statik and X-Voce build
« Reply #10 on: 18 Nov 2021, 04:44 pm »
FWIW,  it's my understanding that Titebond I has the lowest melting point of the product line and within the range of typical clothes iron. Titebond II and III being incrementally higher which works against you. Melting point of Titebond III really isn't consistently achievable with a clothes iron, thus would counterintuitively be worst choice. I used plain jane Titebond I for some years before I got acquainted with Heat Lock.

In my mind, Titebond II seems like the oddball without a purpose, its only virtue being light color when compared to III.

Somewhere along the line I read what the actual temps were. I've tried to find that in my reference books, (yep, actual books!) without success, so you'll be depending on my memory.

dryan01uk

  • Jr. Member
  • Posts: 75
Re: X-Statik and X-Voce build
« Reply #11 on: 18 Nov 2021, 08:35 pm »
Thanks Peter.   You memory is not wrong… here’s a reference I found from ‘way back when’, when I was selecting my glues for the cabinets :

http://www.webherrera.com/blog/2009/04/19/titebonds-franklin-internationals-iron-on-instructions/9/

I picked glue based on reactivation window hence Titebond II.   I must check the temperature of my iron - maybe they get hotter here in Oz due to higher current / voltage ?

It says it’s a 2400W unit and can hit 200 degC (400+ degF), so looks like I might get away with it.  I’ll still do my sample slab and see what happens.

 :|   D


dryan01uk

  • Jr. Member
  • Posts: 75
Re: X-Statik and X-Voce build
« Reply #12 on: 7 Dec 2021, 12:19 am »
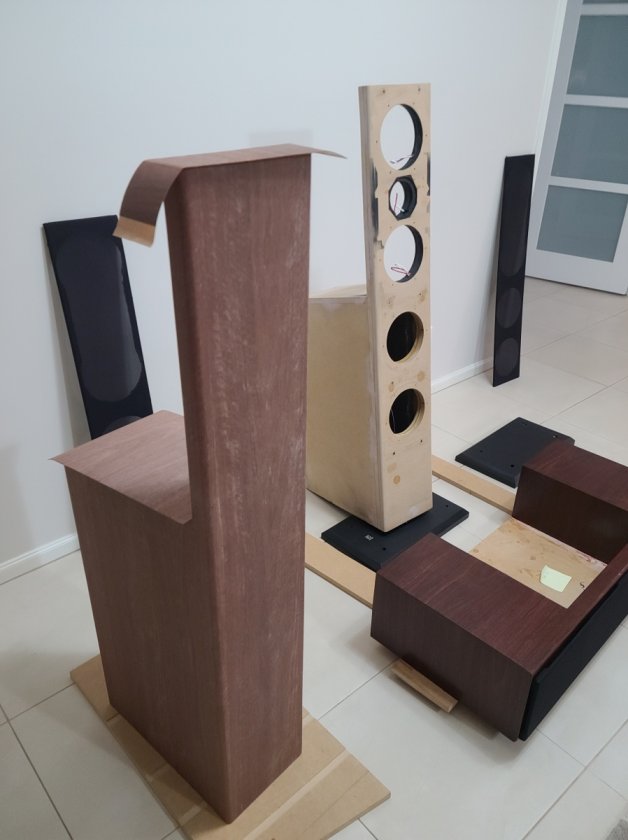
Some further updates and progress (albeit slow):

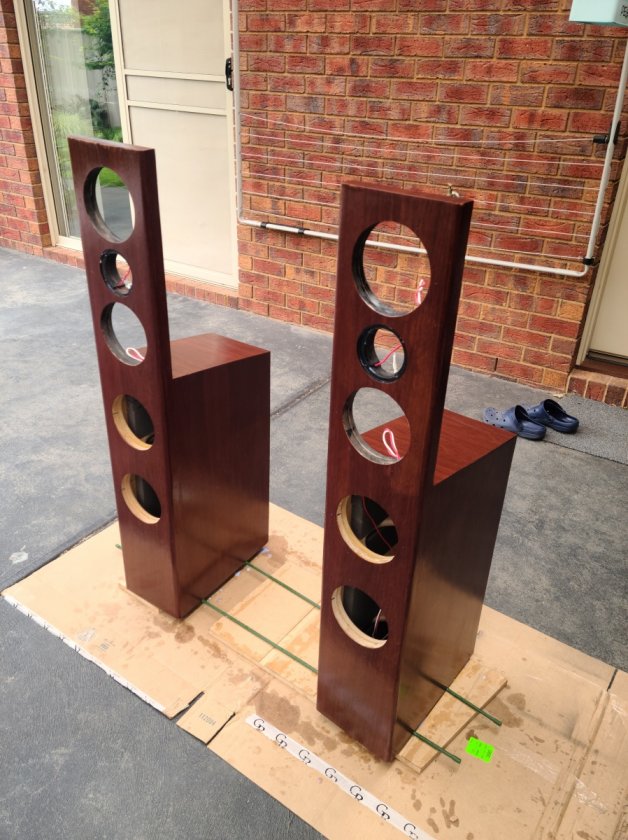
Veneering in progress ... Titebond II seems to have worked well.


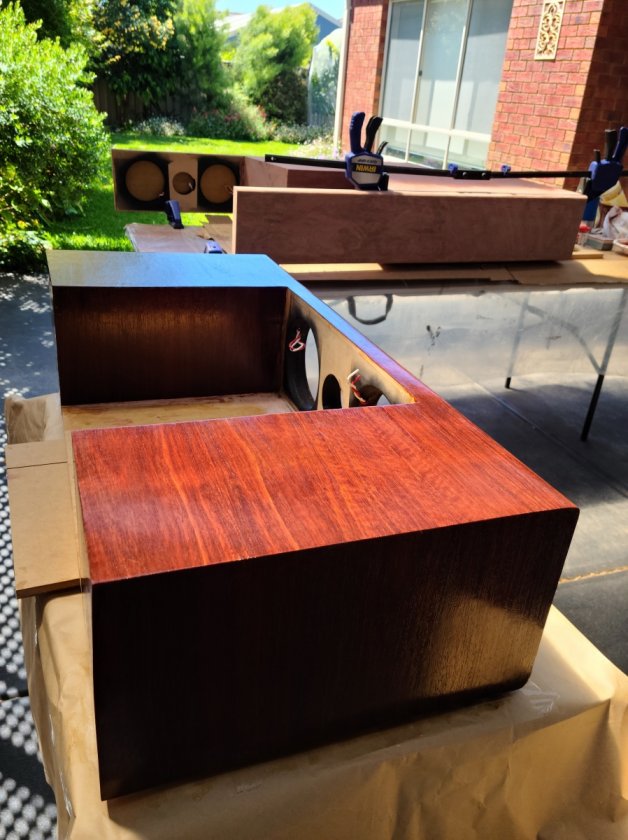
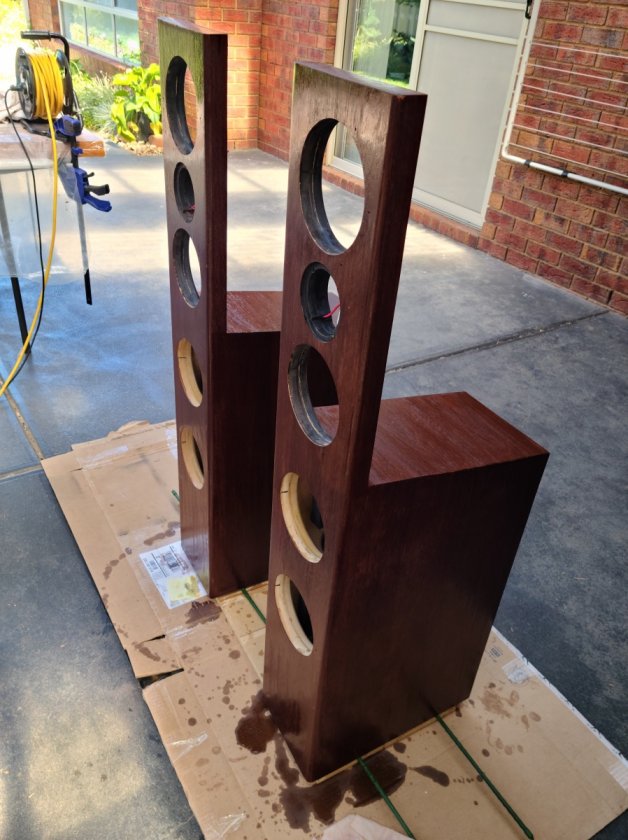
Danish oil going on:


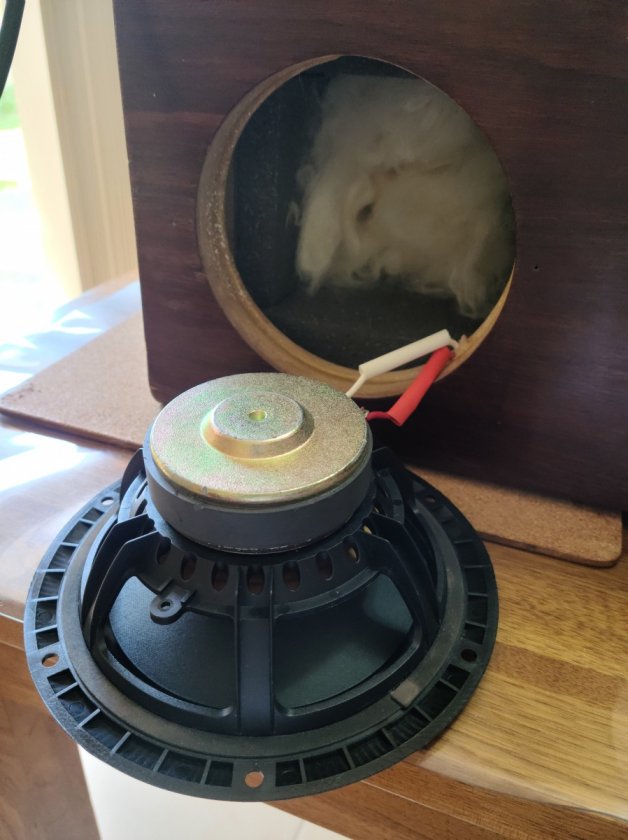
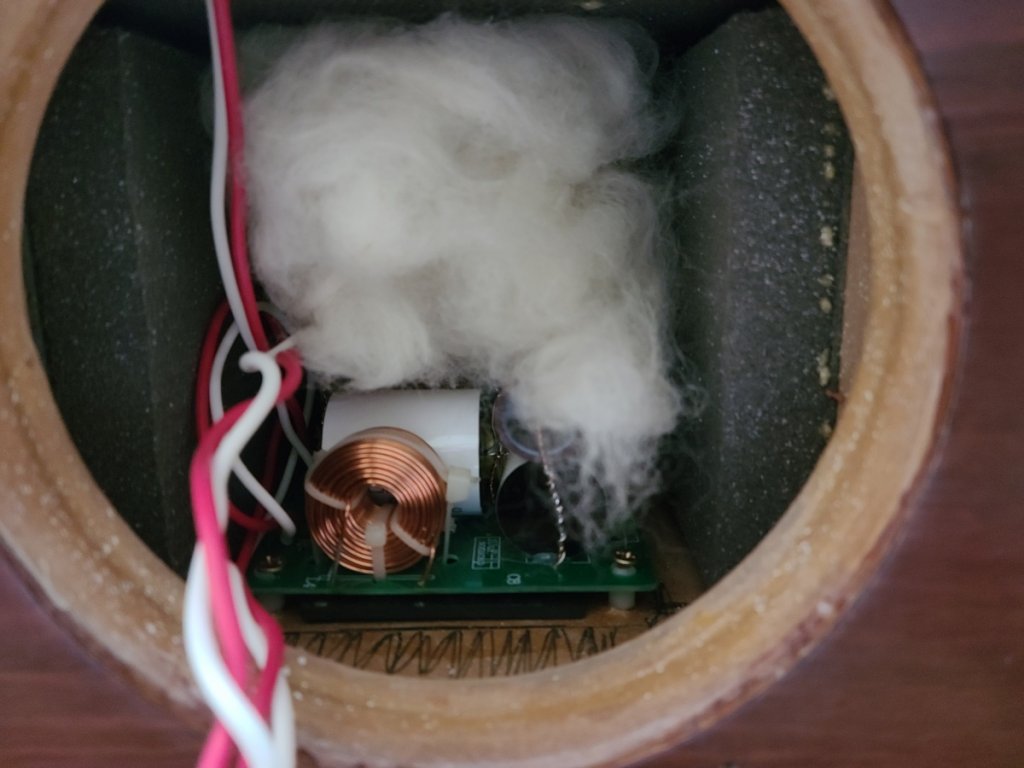
X-Voce speaker wiring - I went with carded lambs wool for the fill.


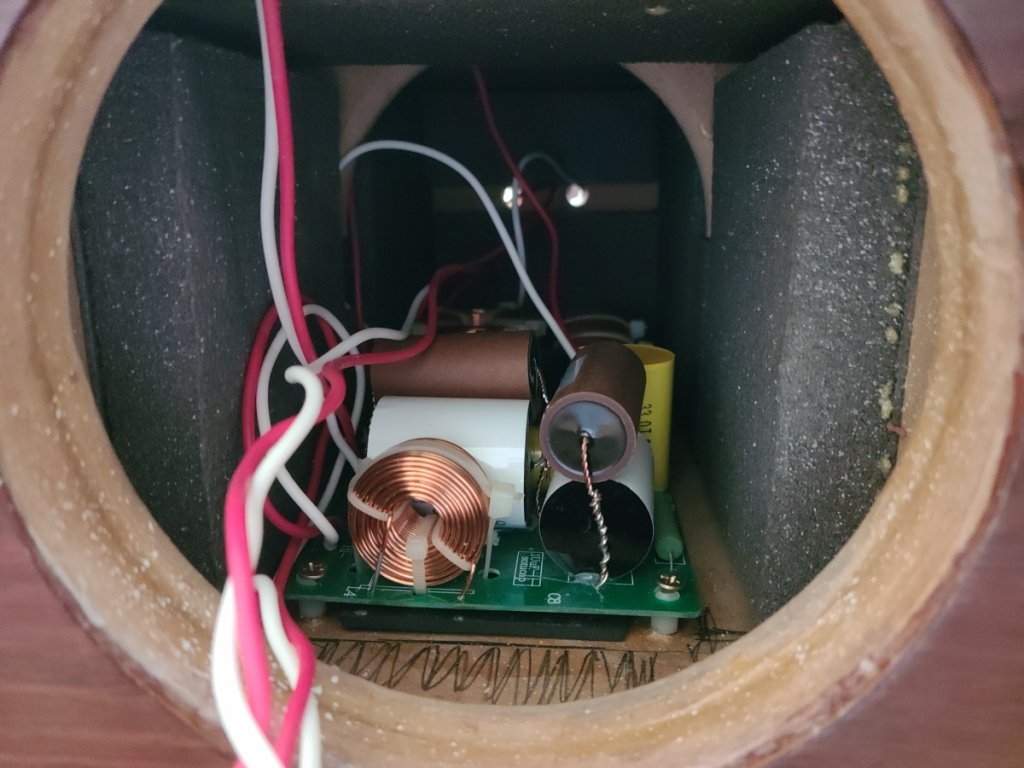
X-Voce cross-over in place - this was the most fiddly bit - not a lot of room to get the screws in to hold the cross-over in place.....


X-Voce up and running.  A BIG step up from the Q-Acoustics centre I had previously....  I need a new media centre.  The Dayton Audio HTA100BT amp is my first 'tube' amp. I'm impressed when it feeds my existing speakers.  I'm really excited to hear how well it sounds feeding my X-Statiks.


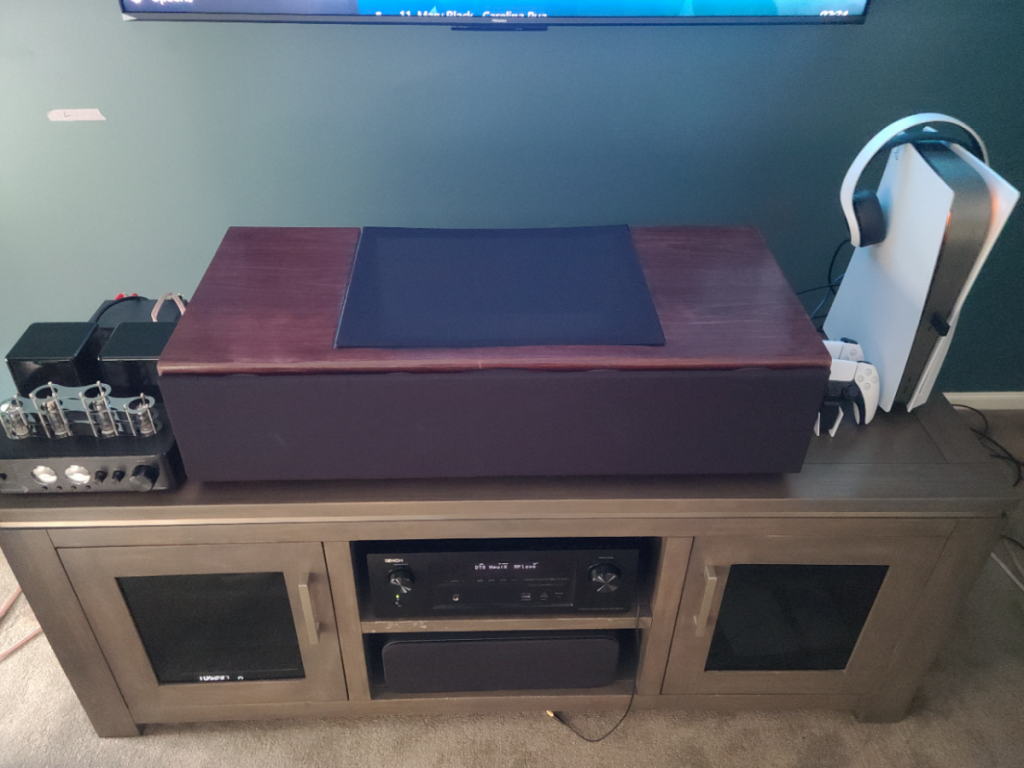
 My wife wanted a cover over the OB section, so I knocked up a quick 'dust' cover.  It's just resting on the No Rez in the OB section, but seems to do the job.  I'm still going through 'burn-in' - about 40hours on the clock so far using the 'fry baby' file at night and music / movies during the day.  So far - I'm very impressed.

5th coat of polyurethane over the Danish oil on the X-statik.  I'm waiting for it to fully 'cure' before polishing and buffing.


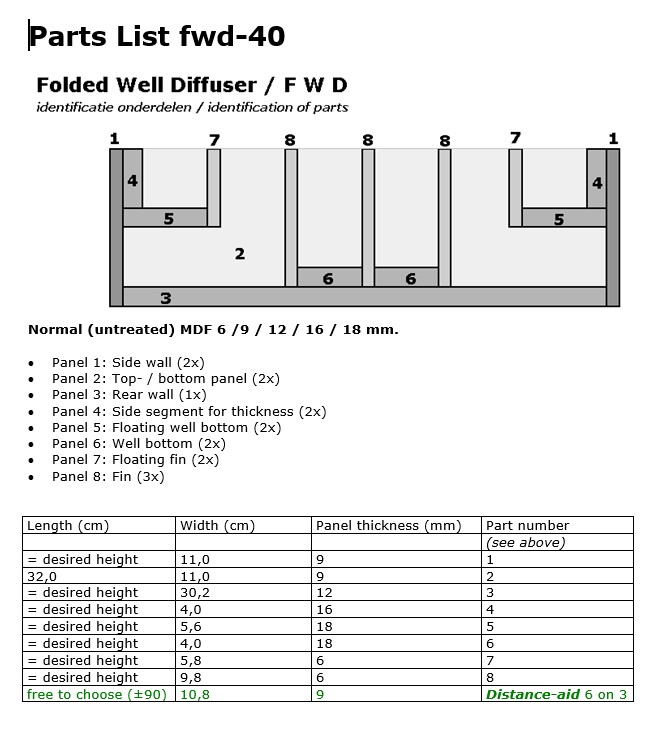
I can't wait to hear how it all comes's together.  I'm also planning to build some folded well diffusers for behind the speakers.


Then OB subs ...... then rears  :P

I've got to say, I'm really enjoying the journey AND the current outcome.   :D

D

corndog71

  • Full Member
  • Posts: 1672
  • Some people call me Rob.
Re: X-Statik and X-Voce build
« Reply #13 on: 7 Dec 2021, 02:00 am »
Those look good!

Jmitchell3

Re: X-Statik and X-Voce build
« Reply #14 on: 7 Dec 2021, 03:04 am »
Wow!

Tyson

  • Full Member
  • Posts: 11111
  • Audio - It's all a big fake.
Re: X-Statik and X-Voce build
« Reply #15 on: 7 Dec 2021, 03:09 am »
There's a lot of great builds here on AC, but the ones that look like they are cut from a solid block of wood are my favorites.  Nice work so far!

dryan01uk

  • Jr. Member
  • Posts: 75
Re: X-Statik and X-Voce build
« Reply #16 on: 7 Dec 2021, 04:27 am »
Thanks Guys.

The community here is very supportive and is an added benefit of working on these builds.

David

Shives

  • Jr. Member
  • Posts: 250
  • I like French fries
Re: X-Statik and X-Voce build
« Reply #17 on: 9 Dec 2021, 05:29 pm »
How did you go about the grills?

I’m looking to make some for my Statik and Voce. Was thinking of using like 2 1/8 MDF, or 1/4 and 1/8. I was thinking to seal off the back side to hide the cloth. Using magnets for the attachment (which are coming)

You happen to have any photos of how you did them!? Great work many! Real wood looking sharp!!

Vince in TX

  • Full Member
  • Posts: 368
Re: X-Statik and X-Voce build
« Reply #18 on: 9 Dec 2021, 06:04 pm »
How did you go about the grills?

I’m looking to make some for my Statik and Voce. Was thinking of using like 2 1/8 MDF, or 1/4 and 1/8. I was thinking to seal off the back side to hide the cloth. Using magnets for the attachment (which are coming)

You happen to have any photos of how you did them!? Great work many! Real wood looking sharp!!

Just a side note about grills in general, my X-Static and X-Voce didn't have them, and they weren't available since I had picked them up second-hand.   But a few weeks ago I did a frequency sweep of the theater room to isolate rattles, and I found that not only were my can lights buzzing around 40-50 Hz, so were the grills in my ceiling speakers.   Now ALL of my speakers in my theater room are grill-less.   I think I have it nailed now because this latest episode of Hawkeye has a flashback sequence that has very heavy, sustained low frequency, and not one single thing rattled or buzzed.     :thumb:

Shives

  • Jr. Member
  • Posts: 250
  • I like French fries
Re: X-Statik and X-Voce build
« Reply #19 on: 9 Dec 2021, 07:01 pm »
Just a side note about grills in general, my X-Static and X-Voce didn't have them, and they weren't available since I had picked them up second-hand.   But a few weeks ago I did a frequency sweep of the theater room to isolate rattles, and I found that not only were my can lights buzzing around 40-50 Hz, so were the grills in my ceiling speakers.   Now ALL of my speakers in my theater room are grill-less.   I think I have it nailed now because this latest episode of Hawkeye has a flashback sequence that has very heavy, sustained low frequency, and not one single thing rattled or buzzed.     :thumb:


Hey what's up bro!!?? Hope T-day was good!

So, I do have the original metal grills, they are not on the speakers currently.. (back room those suckers) SO, maybe that was a huge design flaw the metal shaking grills, no big deal. Day one I removed them. How ever, I would like to make some magnetic easy remove, easy install grills that will help keep the dust away. (maybe, maybe I need a project)  I do clean them on the weekly. Plus, will be a good way to get myself aquatinted with my router and abilities again. Been a while, might as well start small.. Or may try try and use my friends Glowforge. I think 1/4 MDF will cut. and the 1/8 backer as well. Also deciding if I want to make the Statik's grills all one piece..SO was wondering what Dryan did??