Building a Pair of X-SLS Encores

0 Members and 1 Guest are viewing this topic. Read 4452 times.

russellberg

  • Jr. Member
  • Posts: 112
Re: Building a Pair of X-SLS Encores
« Reply #20 on: 12 Sep 2020, 05:36 am »
The easiest place to mount it is on the back wall right behind the lower woofer.

That's a good idea. I was imagining putting it in the bottom compartment and then I was concerned about reaching it if I ever needed to do repairs or changes.  It doesn't hurt the response of the speaker to have the crossover right behind it?

Ixnay

  • Jr. Member
  • Posts: 25
  • We may argue and you may win. You're still wrong.
Re: Building a Pair of X-SLS Encores
« Reply #21 on: 24 Sep 2020, 05:20 pm »
 Russell,
 The deep end for us woodworkers is in using purpleheart. 'Nature's brass'. As much as I love this wood, I just have to step back and brace myself for the reminding of sharpening plane blades, cleaning saw blades, and the like. Same thing as Mesquite.

russellberg

  • Jr. Member
  • Posts: 112
Re: Building a Pair of X-SLS Encores
« Reply #22 on: 28 Sep 2020, 04:30 am »
I finally got the top on my speakers and did the round over with a 2 ½" thumbnail bit. 


The bit did burn on the end grain but it sanded out pretty easily.


This was the first time that I had used a thumbnail bit.  I was a little concerned because I have never used a bit this wide before, (I even had to cut the hole in my router plate a bit wider to accomodate the increase diameter).  I was really happy with the profile and it was not difficult to handle at all. 


You may recall that I was planning to do a box joint on the pieces at the top.  I abandoned this when the I could not get the fit right but I still wanted something a bit more interesting on the top of the speaker.  I had some pretty spectacular pieces of maple with very interesting grain structure that I had left over from making a bar but it had some cracks in it.  I broke the boards  at the crack line that I intended to use for the top and then glued them back together before I glued them to the MDF top of my cabinet.  Then I decided to make some bowtie keys out of purple heart to go over the crack line.  I cut the keys out of purple heart then traced them on to the maple.  I used a small router to hog out most of the wood then finished up with a chisel and mallet.


Bowtie keys are traditionally used to make sure cracks don't open up.  They are very effective for this.  The fact that I opened up the crack completely, glued it back together, then glued it on to an MDF surface means that there was almost no chance of it opening up but I wanted another visual design element to provide contrast with the spectacular grain structure of the maple. 


Norman Tracy

Re: Building a Pair of X-SLS Encores
« Reply #23 on: 28 Sep 2020, 04:44 am »
russellberg, so fine.... :thumb:   Love the use of bow ties and that maple.   Cannot wait to see them with the finish.

Speaker Challenged

  • Jr. Member
  • Posts: 161
Re: Building a Pair of X-SLS Encores
« Reply #24 on: 28 Sep 2020, 06:19 am »
WOW!  :thumb: :thumb:  8) 8) Simply stunning cabinets and they are not finished yet. As others have said I can't wait to see them finished.

SC

AlexH

Re: Building a Pair of X-SLS Encores
« Reply #25 on: 28 Sep 2020, 11:24 am »
I love curly maple, it is  one of  my favorites. Excellent work by the way. Let us know how much those  things weight when you are done. :lol:

russellberg

  • Jr. Member
  • Posts: 112
Re: Building a Pair of X-SLS Encores
« Reply #26 on: 28 Sep 2020, 04:45 pm »
Thank you all for your kind words.  The figure in the wood is very muted right now because I have done a rough sanding.  It will really glow once the finish goes on.  Yes, Alex H.  they are very heavy.  I am guessing that they are already over 100lbs before the drivers or the back are installed!

russellberg

  • Jr. Member
  • Posts: 112
Re: Building a Pair of X-SLS Encores
« Reply #27 on: 12 Oct 2020, 05:03 am »


I cut out the locations for the three bowties on the second speaker.  I didn't really need three but I thought it would look more interesting if the two speakers were not the same. 


The bowties went in pretty well but there were some places where I had to use filler to close some gaps.


Then it was time for sanding.  I went up through 60, 120, 220, 320, and 400 grits of sandpaper and then I rubbed down with 0000 steel wool. 


Then it was time for buffing.  This time I could only get these blue pads and I wasn't happy with the result as they tended to leave a blue tint to the wood if things got the slightest bit hot.  I had to sand out those bits of colour.  Anyway, I have a perfect buffing system on my lathe for small parts but I am still looking for a way to attach those buffing wheels to an angle grinder.


Then I painted on three coats of oil based Varathane, sanding with 400 grit between each coat.


I wasn't happy with how it turned out.  I had brush marks and a few small drips and I just wasn't happy with how the finish felt.  I was torn on this project because I love the way that Varathane makes the grain in quilted maple really pop but I don't like the way a plastic finish makes the wood feel.  I love the feel of waxed wood.  So, anyway, I hand sanded the Varathane off and got it prepped for waxing.


Oh, yeah.  I also did the crossover and the wiring.

cedman1

  • Jr. Member
  • Posts: 38
Re: Building a Pair of X-SLS Encores
« Reply #28 on: 12 Oct 2020, 12:57 pm »
Very good progress!  I'm really loving the grain on the cabs as well.

Chris Adams

Re: Building a Pair of X-SLS Encores
« Reply #29 on: 12 Oct 2020, 01:05 pm »
Beautiful cabinets! I love curly maple. Yum. :D

hawkeyejw

Re: Building a Pair of X-SLS Encores
« Reply #30 on: 12 Oct 2020, 01:34 pm »
These are really going to be stunning. Thanks for sharing your progress, it's a lot of fun to watch & read about the process too.

russellberg

  • Jr. Member
  • Posts: 112
Re: Building a Pair of X-SLS Encores
« Reply #31 on: 28 Oct 2020, 03:58 am »


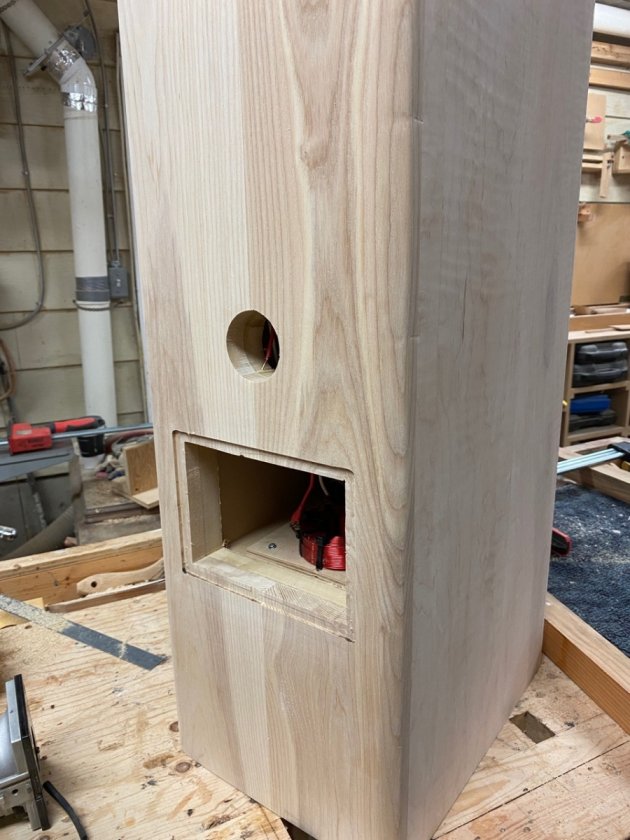
I finally got the backs on.  I didn't have enough maple so I made it out of this wood that I had hanging around in my wood storage.  I think it is possibly ash or some kind of oak.  You will notice some divots in the side where I was not able to hold the router stable when I did the flush trim bit.  Next time I will build a much larger base for my little flush trim router so I can avoid this.  I decided to make my own binding post plate out of aluminum as I wanted access to the crossover in case I had made any mistakes or need to make repairs in the future.  It will sit flush to the back in the little inset.


Well I am finished and they sound amazing!  I didn't take as many pictures in the intermediary but suffice it to say that I finished it three times before I was happy.  You saw the poly finish above.  I hated the way that looked and felt so I sanded it out.  Then I went with a straight wax hand rubbed finish.  The texture felt really good (I really like touching the things I have made :)) but it didn't pop the grain the way that I wanted so I sanded that one out too and started again.  One benefit of all this sanding is that it smoothed out the divots in the back.


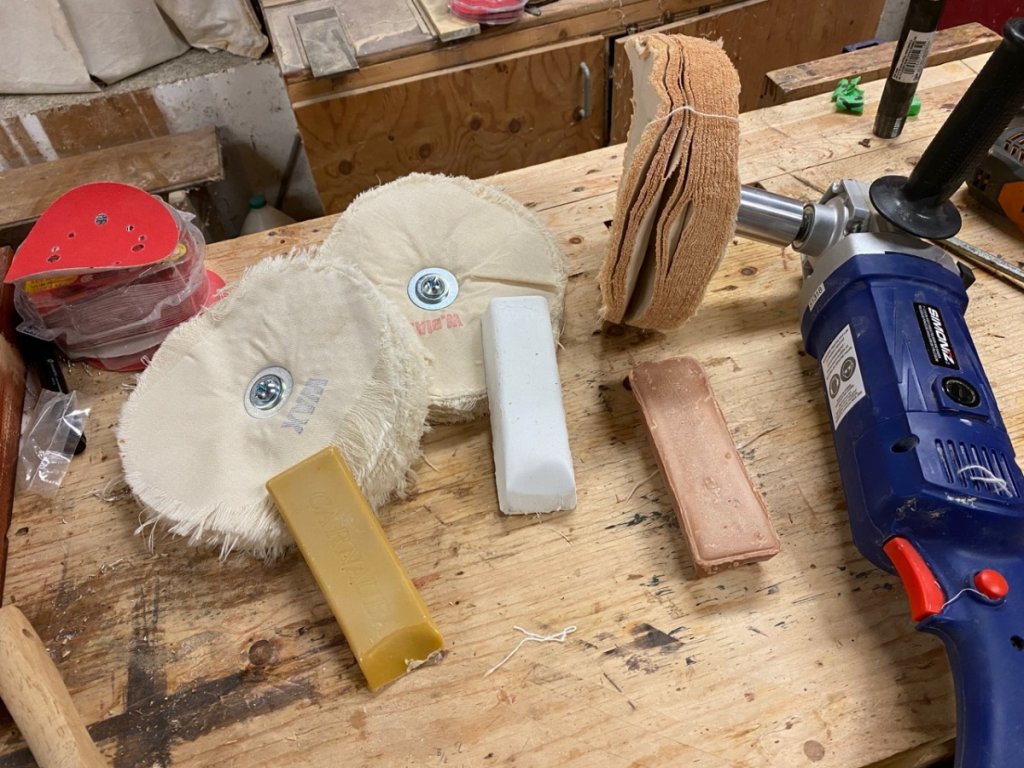
I finally got the right look and texture when I oiled the speakers with Tung oil finish and then waxed it with the Beall buffing system.  I had used these buffing wheels on my lathe for smaller parts and they produce my favourite finish but there was no way I would be able to hold up an 80lb speaker up to a buffing wheel on my lathe.  I scoured Lee Valley and they had a replacement wheel system with a mandrel to attach it to a bench grinder.  I took a chance and ordered it.  Lucky me! It fit very nicely on my Simoniz angle buffer.  I tried it out on my regular angle grinder but the RPM was too fast.  The Simoniz is designed as a buffer so it has a variable speed option.  The first two wheels use very mild abrasives to polish the wood and the third wheel applies the wax.  It produces the most luxurious silky finish.  Exactly what I was looking for.


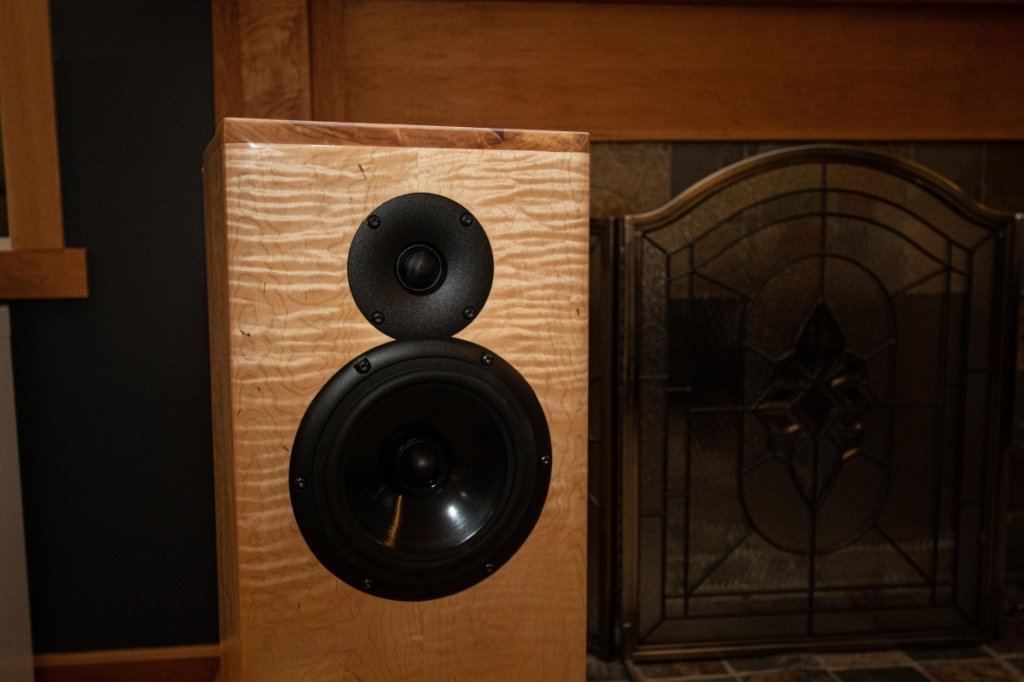
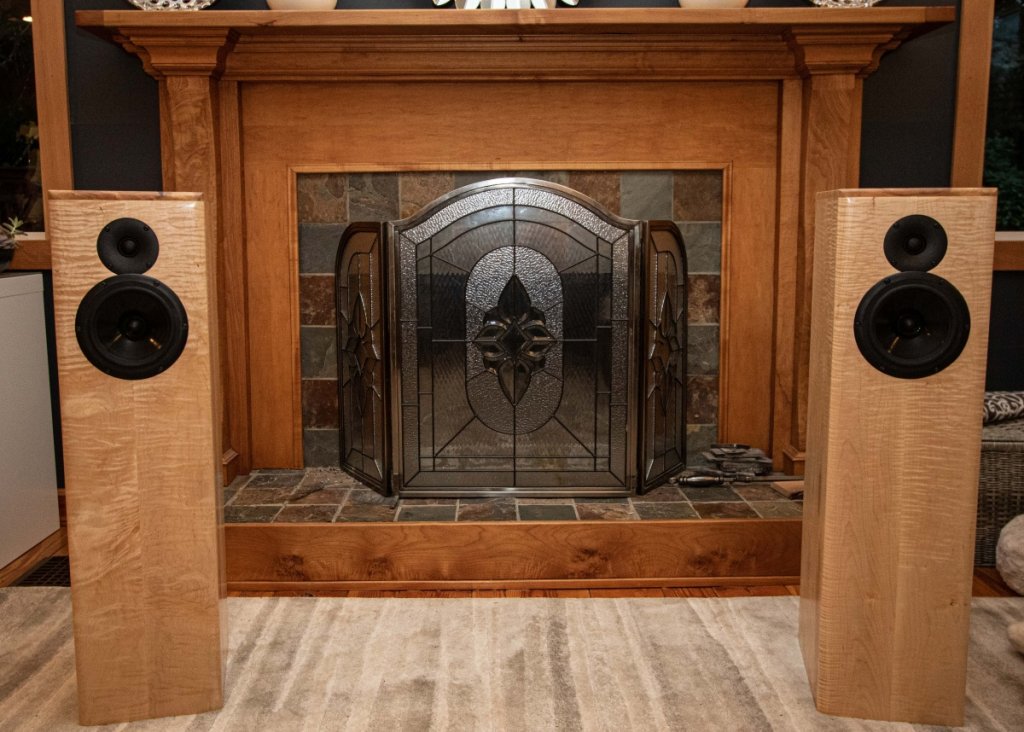
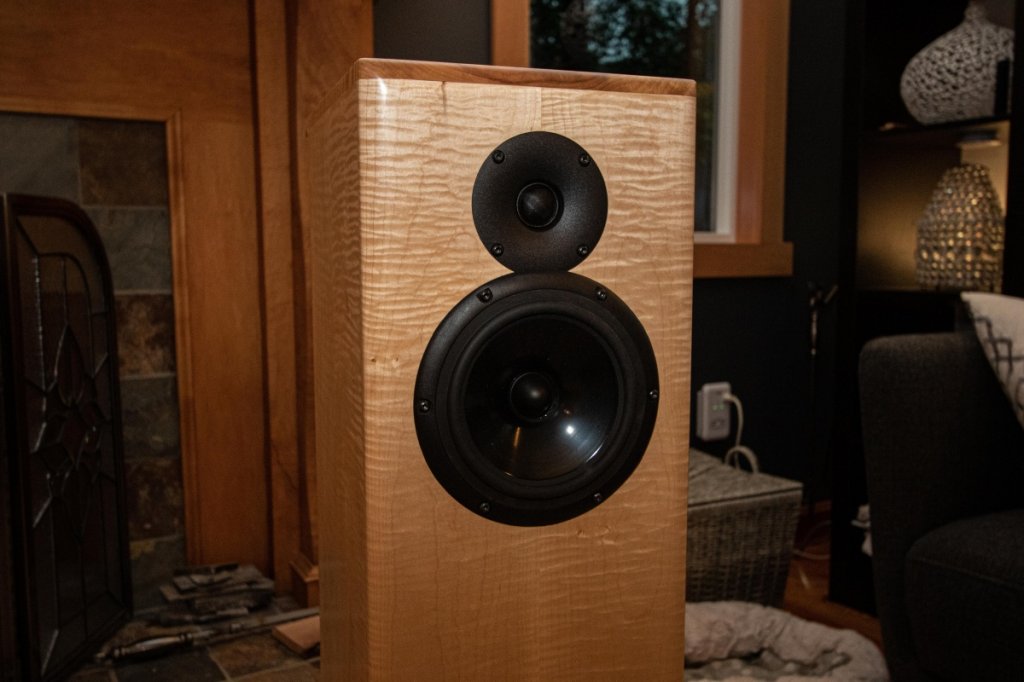
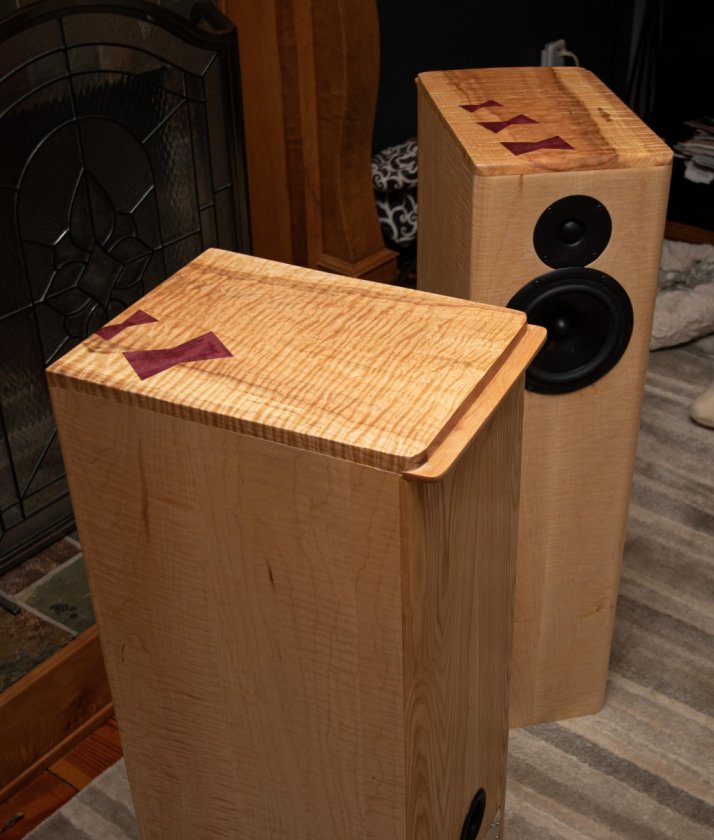
The grain just jumps out of the wood and that tweeter is so wonderful.  It has a much more revealing sound than what I was used too.  The decay on a piano in a concert hall is full and open.


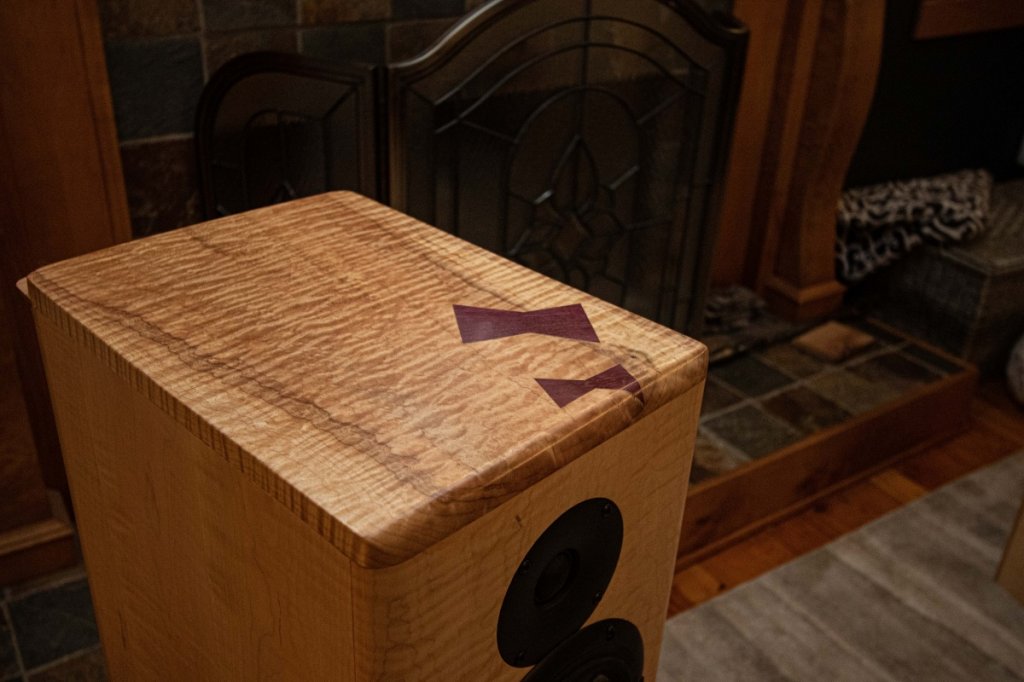
The tops where quilted maple from a very different tree so it provided a nice contrast.  I was happy with how the purple heart bow ties turned.


I found that the integration with my sub was much smoother with these X-SLS's than with my previous speakers.


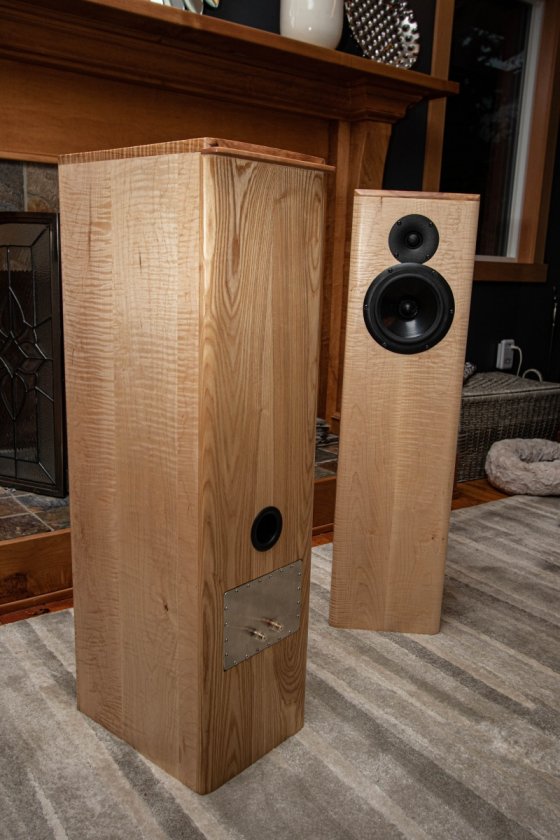
The speaker walls are 1 ½" thick and man are they stable.  Even at very high volumes I cannot feel any vibrations on the sides of the speaker. I know that this was over-kill but I wanted to give it a shot.  In the future I think I will probably just be building the boxes straight out of hard wood.  I really hate working with MDF.  I am interested to see if I get any wood movement issues.  I will keep you updated.


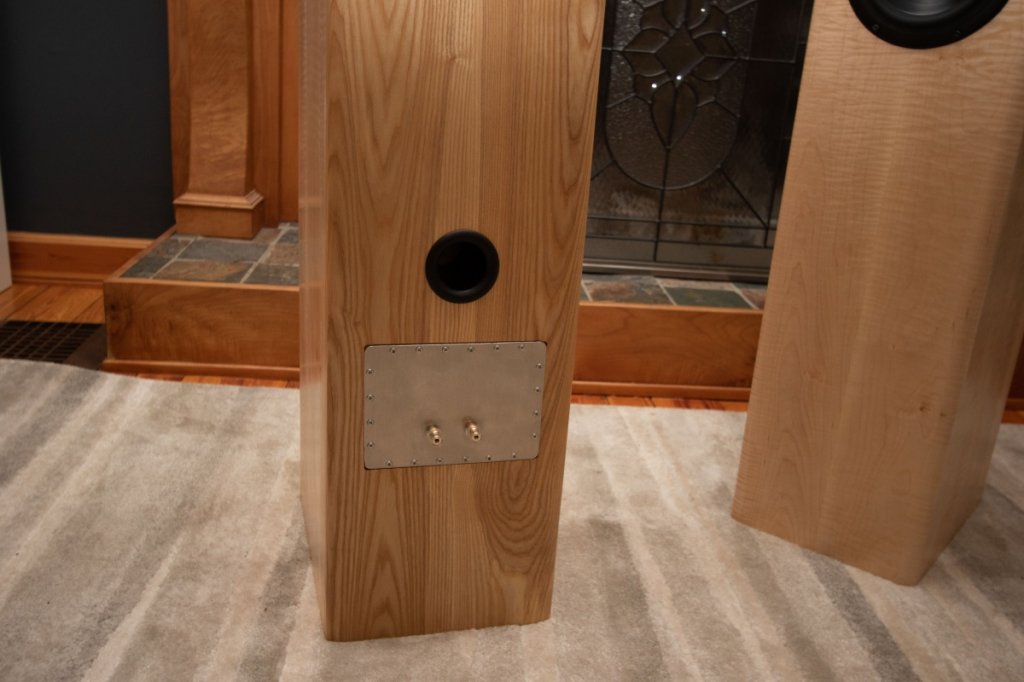
Here is the ash/oak? back.  The aluminum plate works nicely as a more interesting replacement for the binding post cup.  It also gives me access to the crossover should I have any issues.


Being a great woodworker means you make very few mistakes.  Being a good woodworker means that you know how to hide your mistakes.  I had a large gap on the back of the speaker between the top and the back piece of ash.  I also had the problem of how I would move these things around when I had finished them to a very slick polish.  My gap was ¼" at its widest so I cut a piece of ¼" cherry and routed out a consistent ¼" groove across the back over top of my gap.  I then glued in the piece of cherry which acts to fill the gap completely and provide enough a ledge that I can lift the speakers.

This was such a fun project and the satisfaction that I am feeling right now as I listen to something that I made as I type this so worthwhile.  Thank you to Danny for the wonderful design and for supplying the electronics and the drivers.  It is such a pleasure to have such an affordable entry point to such high quality speakers and we all owe you a great debt for making it so accessible.
-Russell

Wig

Re: Building a Pair of X-SLS Encores
« Reply #32 on: 28 Oct 2020, 04:17 am »
Outstanding craftmanship and a beautiful build!

Job well Done!

Wig :thumb:

corndog71

  • Full Member
  • Posts: 1672
  • Some people call me Rob.
Re: Building a Pair of X-SLS Encores
« Reply #33 on: 28 Oct 2020, 05:53 am »
Man!  Those look fantastic! 

Tyson

  • Full Member
  • Posts: 11112
  • Audio - It's all a big fake.
Re: Building a Pair of X-SLS Encores
« Reply #34 on: 28 Oct 2020, 06:02 am »
Damn those are beautiful!!

cementhead

Re: Building a Pair of X-SLS Encores
« Reply #35 on: 28 Oct 2020, 01:16 pm »
VERY nice!


hawkeyejw

Re: Building a Pair of X-SLS Encores
« Reply #36 on: 28 Oct 2020, 01:25 pm »
Man, those look absolutely amazing! Great job.

Agree on the T26G, it's really a great tweeter.

AlexH

Re: Building a Pair of X-SLS Encores
« Reply #37 on: 28 Oct 2020, 05:51 pm »
 :thumb: :thumb:

Its great when a plan comes together.

Hobbsmeerkat

  • Industry Participant
  • Posts: 2544
Re: Building a Pair of X-SLS Encores
« Reply #38 on: 28 Oct 2020, 06:12 pm »
Absolutely beautiful! Excellent work!

Coreyportelli

  • Jr. Member
  • Posts: 69
Re: Building a Pair of X-SLS Encores
« Reply #39 on: 12 Jan 2024, 01:49 am »
Very nice job they finished up very nicely