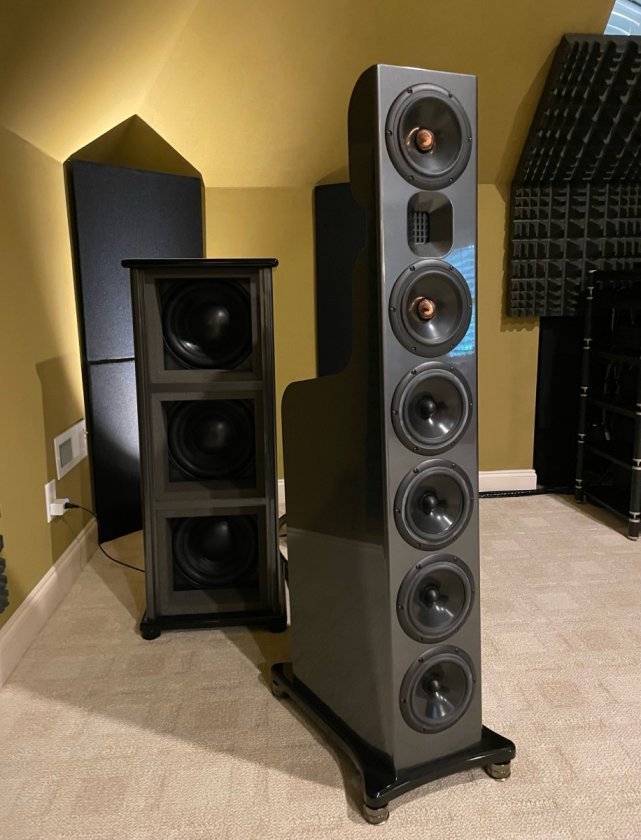
It has been a little over 7 years since I completed my NX-Oticas and companion triple 12-inch servo subs. Over those years, all of my equipment has been recycled at least 2 or 3 times, with the exception of the Oticas. They definitely have stood the test of time and remain the foundation of my system. Digital room correction (DRC) has evolved to the point where I have fully embraced it and have made it part of my system architecture. So I decided to take the next logical step and integrate digital crossovers and DRC into a full digitally-based software solution. To accomplish this, I utilized Audiolense XO
https://juicehifi.net/ to define crossovers for a 4-way stereo configuration and provide correction filters based upon the crossovers and room target curve. The program provides a high degree of flexibility in regards to controlling all aspects of the correction filters, including driver time alignment, target type (minimum/linear phase), crossover points and slopes. Based upon my experience with other DRC software, the learning curve for Audiolense was reasonably short.
Of course the software is only part of the requirements for this type of solution. Additionally I would need 6 channels of amplification and an 8-channel DAC. For the amplifiers, I went with my current ‘go-to’ amplifier, the Denafrips Thallo. I used two of these, one for the woofers and one for the mids. For the tweeter amplifier, I stayed within the family and picked up a Denafrips Hyperion amplifier, a cousin to the Thallo with less power output. The DAC I decided upon was the exaSound s88
https://www.exasound.com/Products/s88StreamingDAC.aspx, an 8-channel DAC with integrated streamer. One of my requirements was the ability of the DAC to handle DSD256 input. I am a long-time HQPlayer user and have enjoyed the results of upsampling my music to high rate DSD.
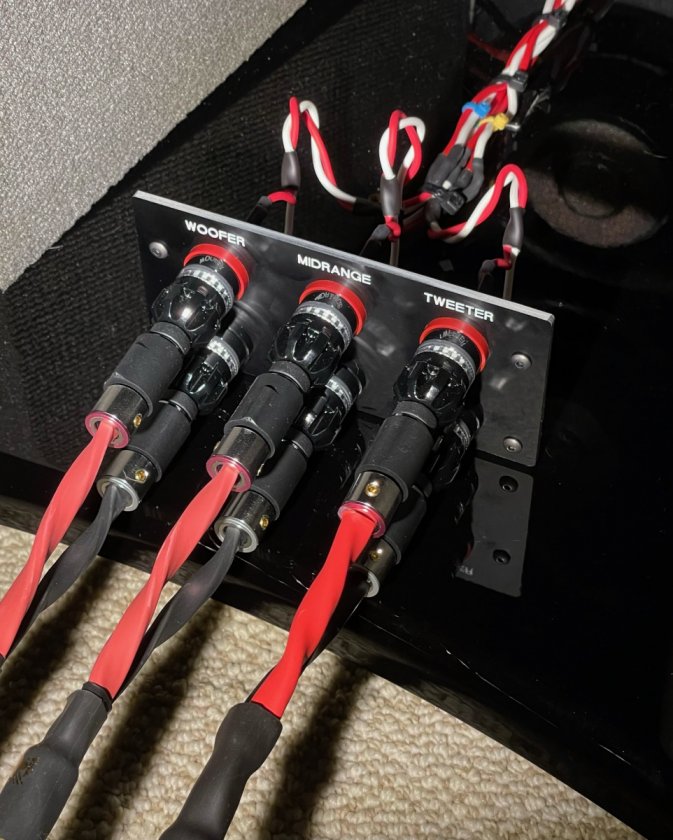
The first step was relatively easy; remove the passive crossovers and route each driver(s) to individual binding posts. I used Danny’s stranded speaker hookup wire to extend the current wiring to WBT low-mass binding posts mounted to a custom small panel. For speakers wires, I used custom-built cables fabricated using Neotech NEMOS-3080 cable terminated with Furutech locking banana plugs. Again, by keeping all three speaker cables the same, I eliminate variability between what the drivers will see.
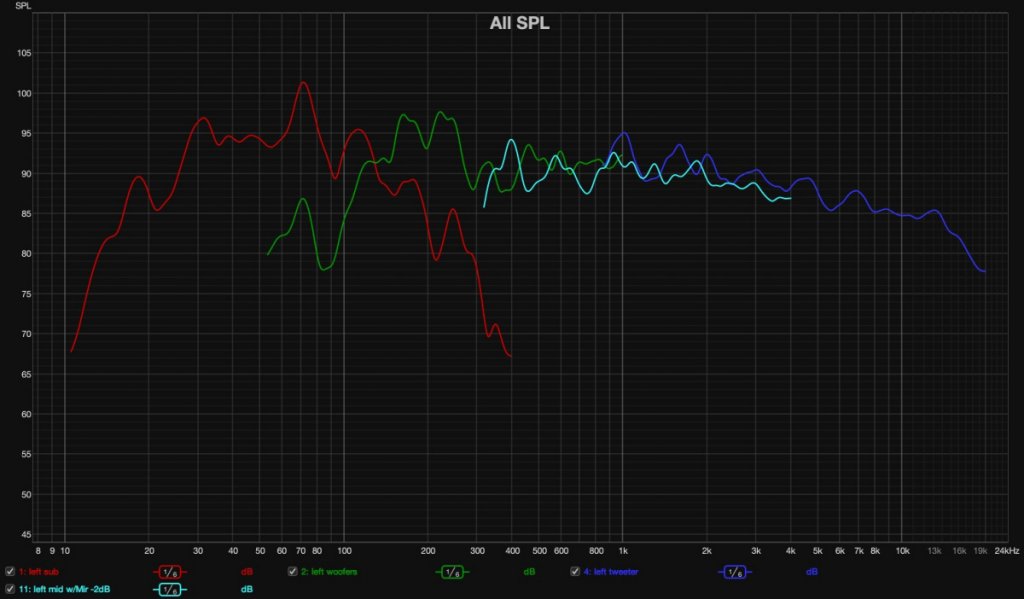
Initial measurements were made using Room EQ Wizard (REW) and are shown below (left channel shown). The role of these first measurements was to set the subwoofer levels and to ensure there were no glaring disparities between the driver responses. Levels were consistent to using a single amplifier since all three amplifiers had the same gain of 26 dB. The measurement equipment was an Earthworks M23 microphone connected to a MOTU UltraLite Mk5 USB I/O interface. The microphone was positioned at the main listening position pointed forwards.
I won’t get into the details of using Audiolense, but will present some of the key results one can obtain graphically and evaluate from the program. The best source for user walk-throughs and examples can be found in the material presented by Mitch Barnett of Acourate Sound Reproduction Services under DSP Resources
https://accuratesound.ca/resources-audio-digital-signal-processing/
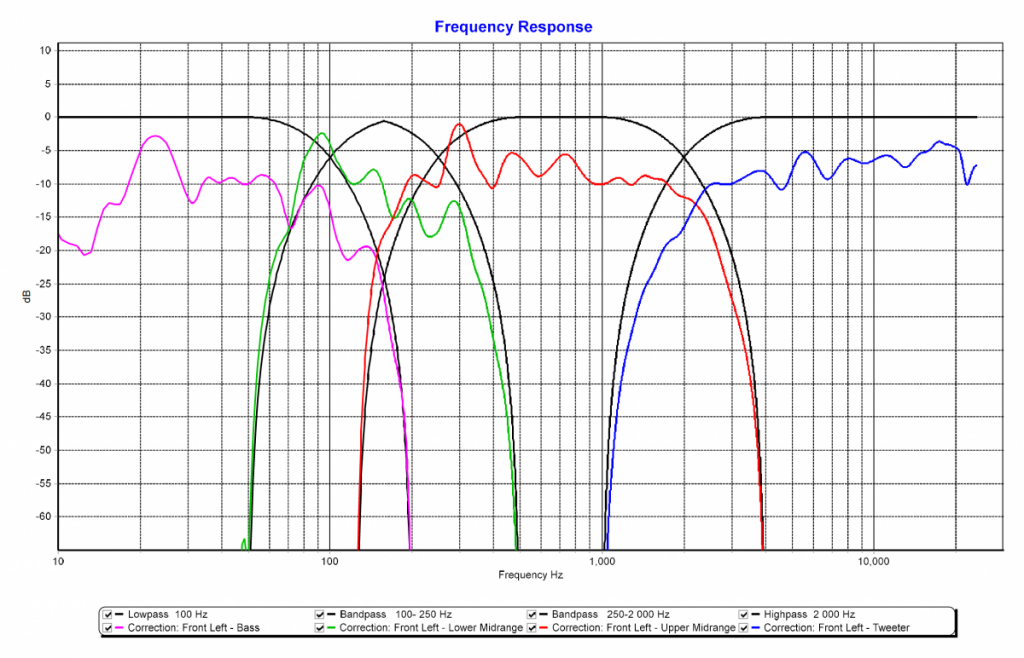
The following graph shows the correction filters plotted along with a set of selected crossover curves. Here I chose crossover points at 100, 250 and 2000Hz for demonstration (left channel shown for clarity) and you can see how the filters follow the crossover roll-offs.
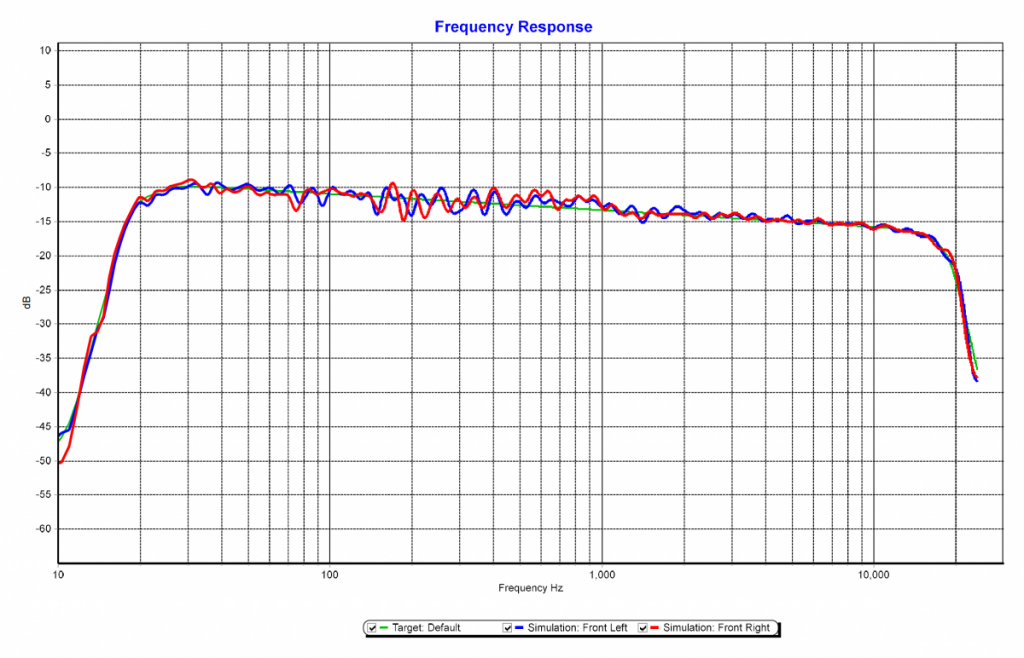
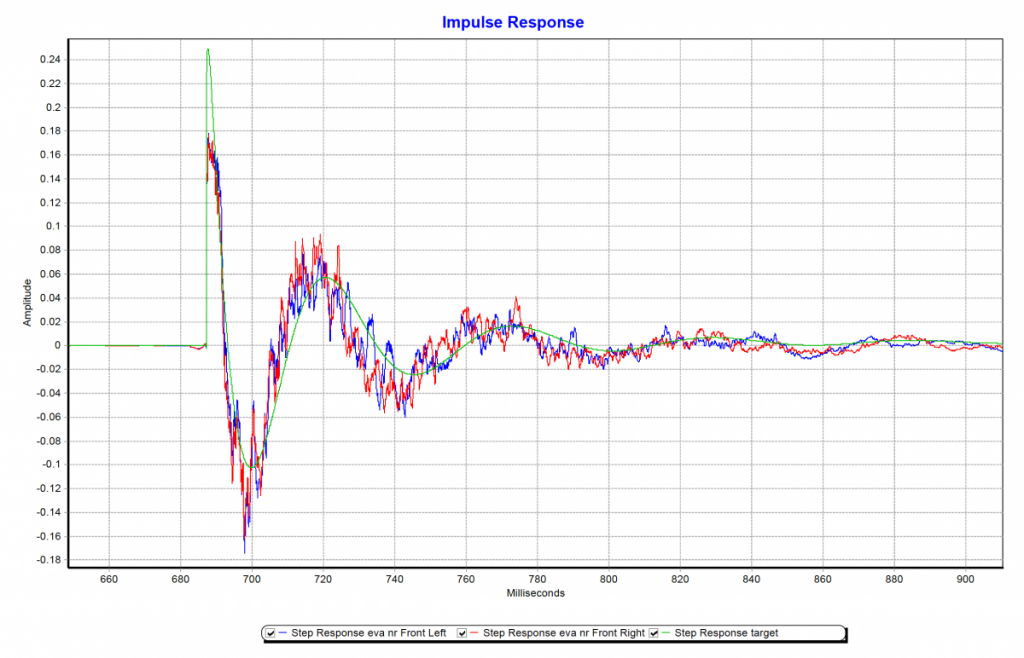
Two of the primary parameters used to evaluate the effectivity of the correction filters are the predicted frequency and step response functions as shown below. Here I have generated a 6dB downward sloping target curve extending from 20 to 20kHz for a frequency response target. This of course is something the user defines and tailors to work with the acoustic characteristics of the room and personal preference. The results show that the predicted frequency and step response functions match their respective target curve shapes very well.
For digital playback, I use Roon to serve music files to HQPlayer which runs on a dedicated, higher-powered computer. Eight channels of correction or convolution filters (per configuration) in the form of .wav files are loaded into HQPlayer’s Matrix Pipeline and can be selected on-the-fly during playback. There are several other programs, including Roon itself which can handle applying convolution filters to the music stream.
Listening ImpressionsThankfully, the answer to my first concern “Could this all result in a disastrous impact on the wonderful sound characteristics of the Oticas with passive crossovers?” is a resounding NO. Nothing but pluses to the listening experience. Timbre was noticeably improved, and the attack and decay of instruments such as my favorite acoustic guitar based music was very realistic. I now have a new “knob” I can turn that definitely has an impact on the soundstage layering and imaging, and that is the ability to easily control the crossover frequencies and slopes (over a reasonable frequency range of course). In essence I can control the voicing of the speaker. I confirmed this effect with a good friend familiar with my speakers and system. He could easily hear the differences as I switched between two crossover configurations with differing woofers/mids and mids/tweeter crossover points. I won’t comment on specific crossover settings we both preferred, but would rather leave that to Otica owners who may want to pursue a similar experiment to mine.
While I can safely say I am not going back to my passive crossovers, this solution is certainly not for everyone. Significant investment in time and money should be anticipated, depending upon the level of equipment selected. I personally am very comfortable with digital audio playback and measurement using a computer and have a working knowledge of DSP.
Questions and comments are always welcome,
Steve