DIY adjustable height speaker stands /Sand vs steel as ballast

0 Members and 1 Guest are viewing this topic. Read 1215 times.

E-Zee

  • Industry Participant
  • Posts: 149
    • Diy speaker resources and crossover assembly services
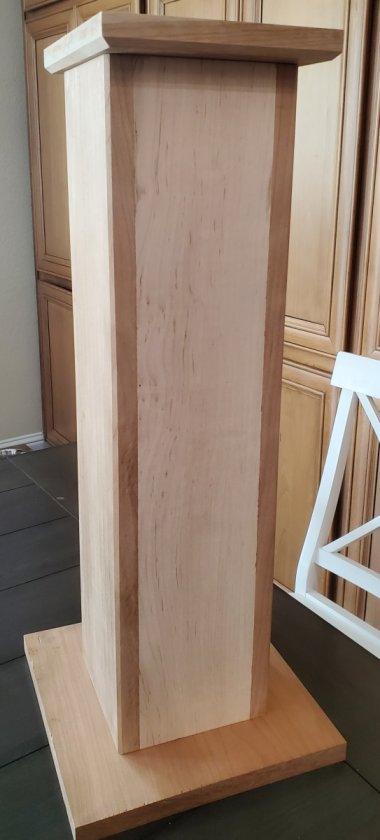
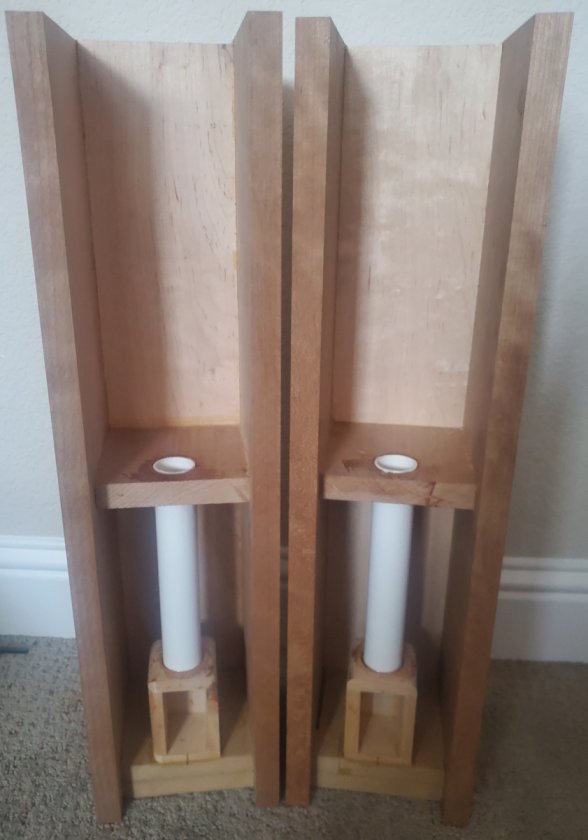
I'm putting these together for use in my garage, which ironical is where most of my music listening happens lately.  Wood materials are cherry and light hard maple.  Both are readily available in my area at $5/bf.  This was basically a "what can i build with these left over pieces?

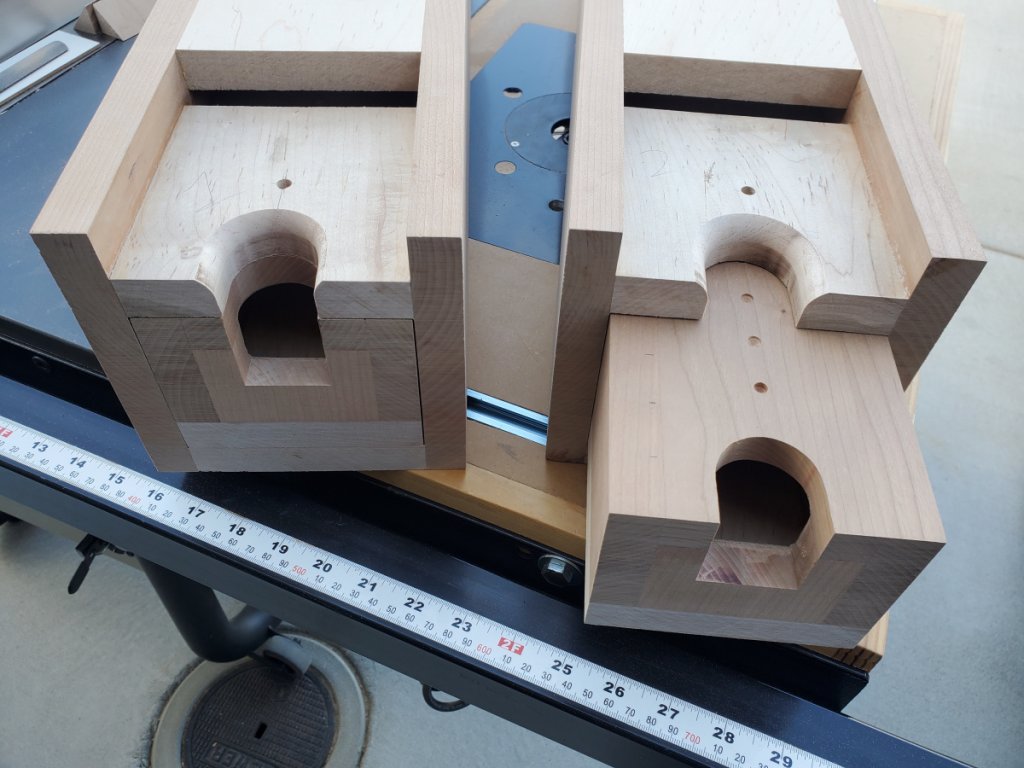
Main lower column is 24". The adjustable height insert has 10 position adjustments, adding up to 9" additional height if desired.


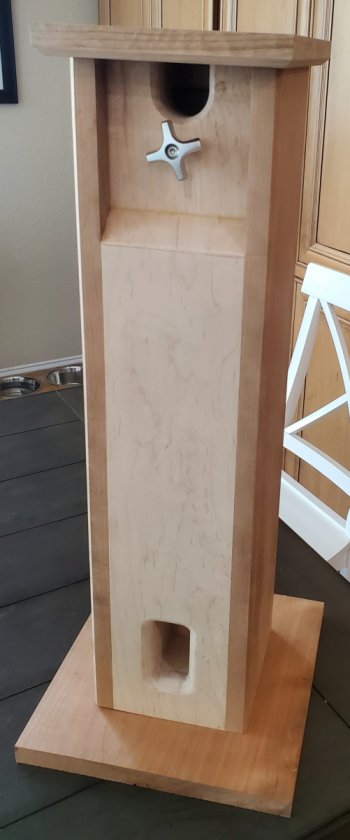
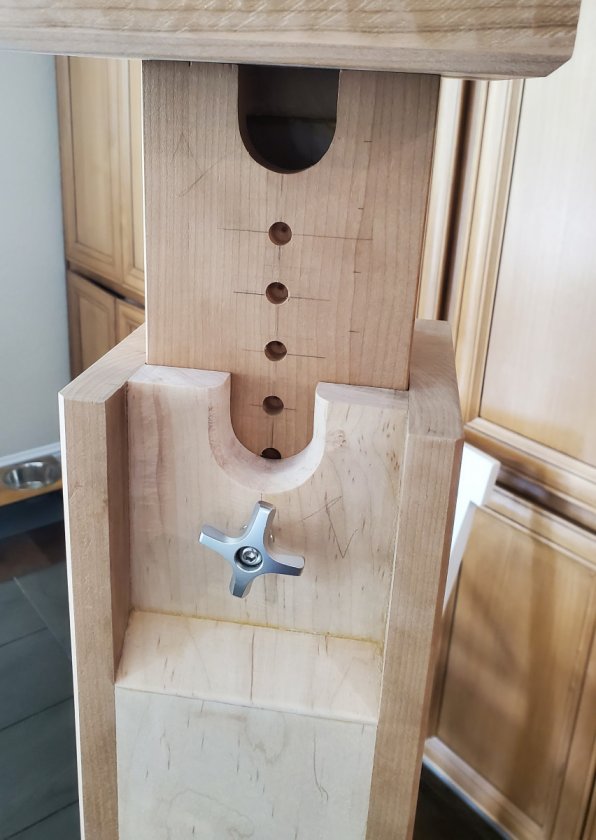
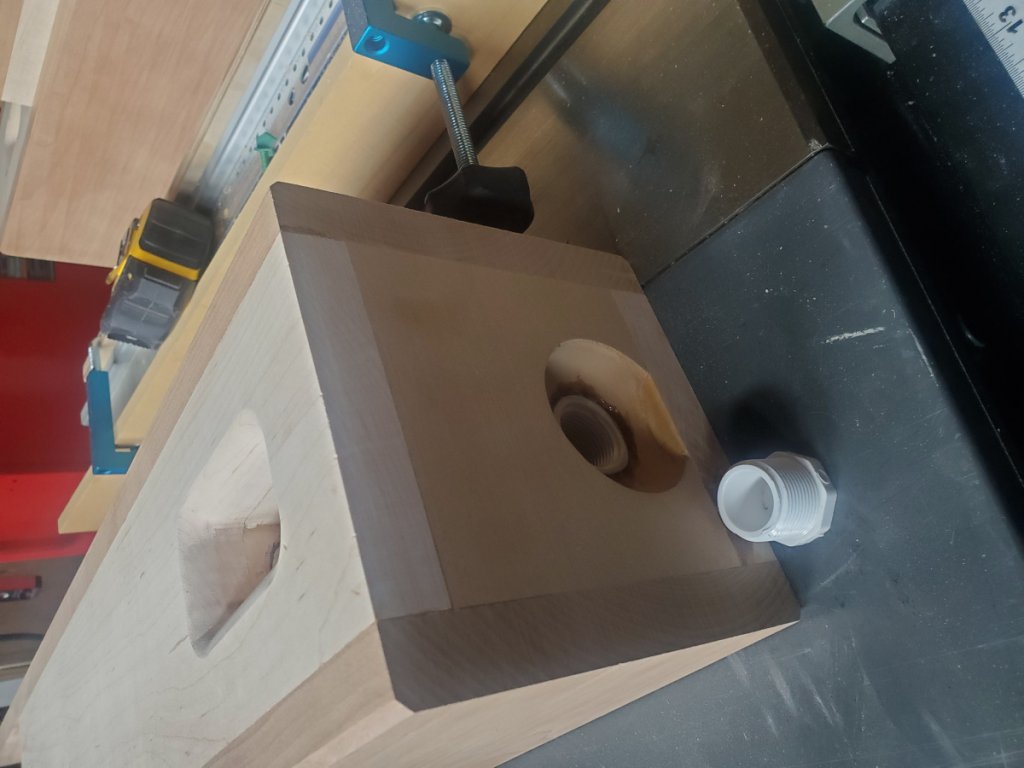
Above photos were yesterday before adding the threaded insets. 


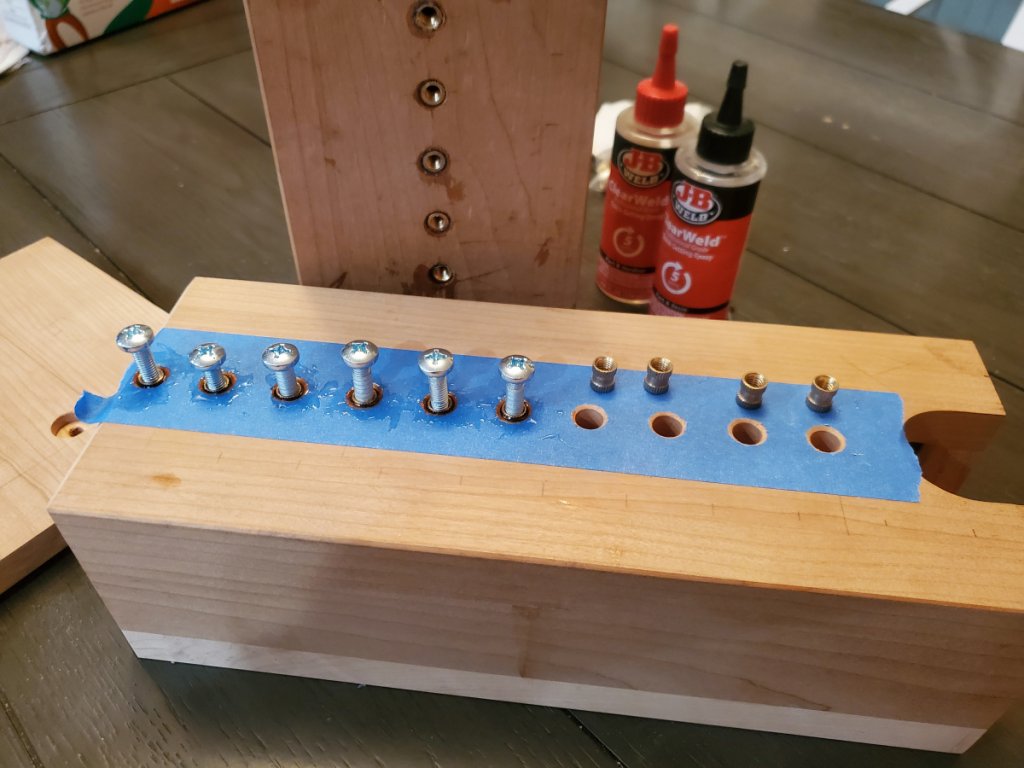
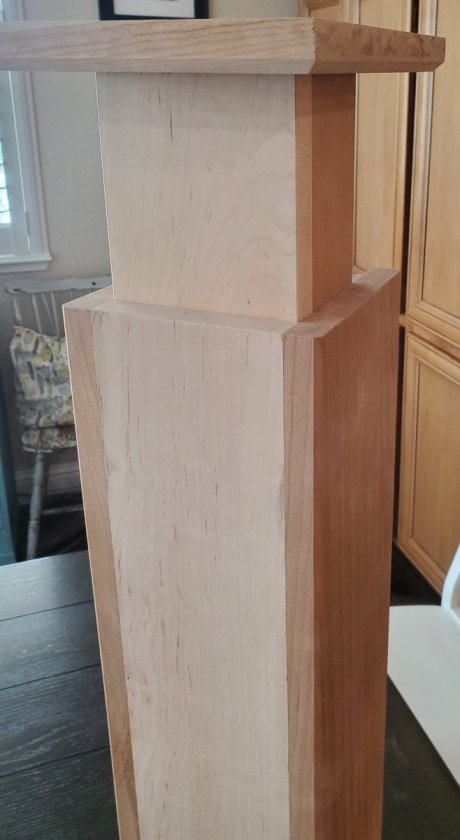
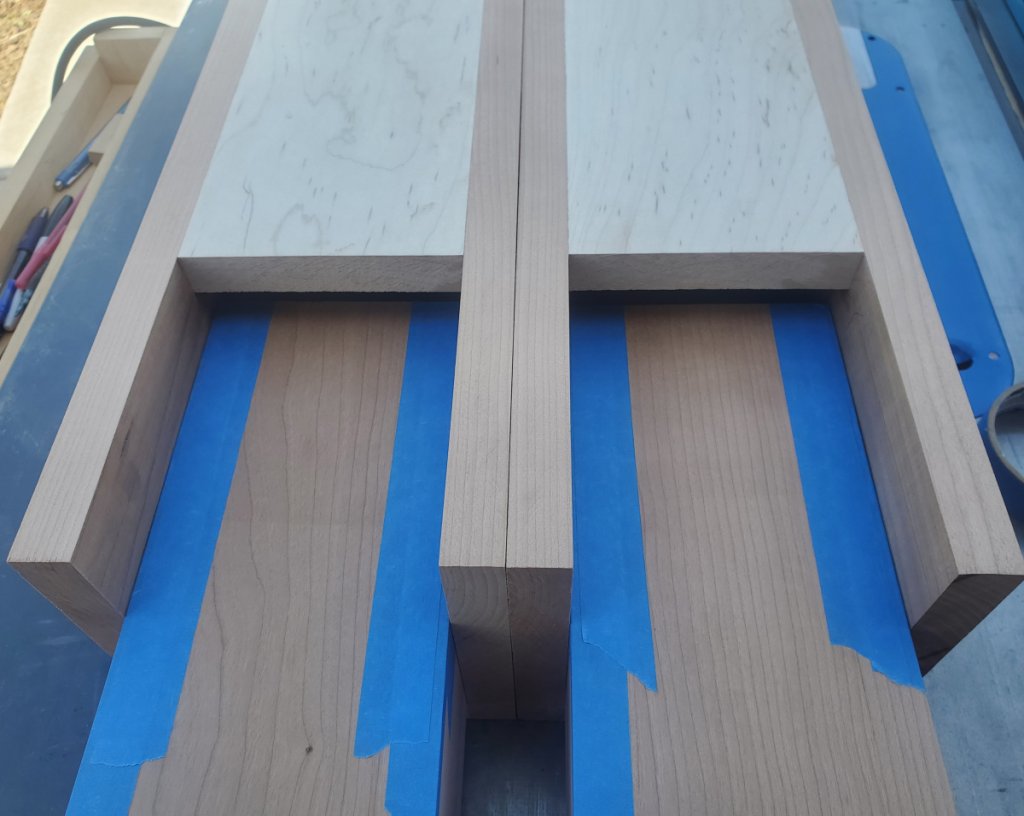
A few earlier progress photos below.


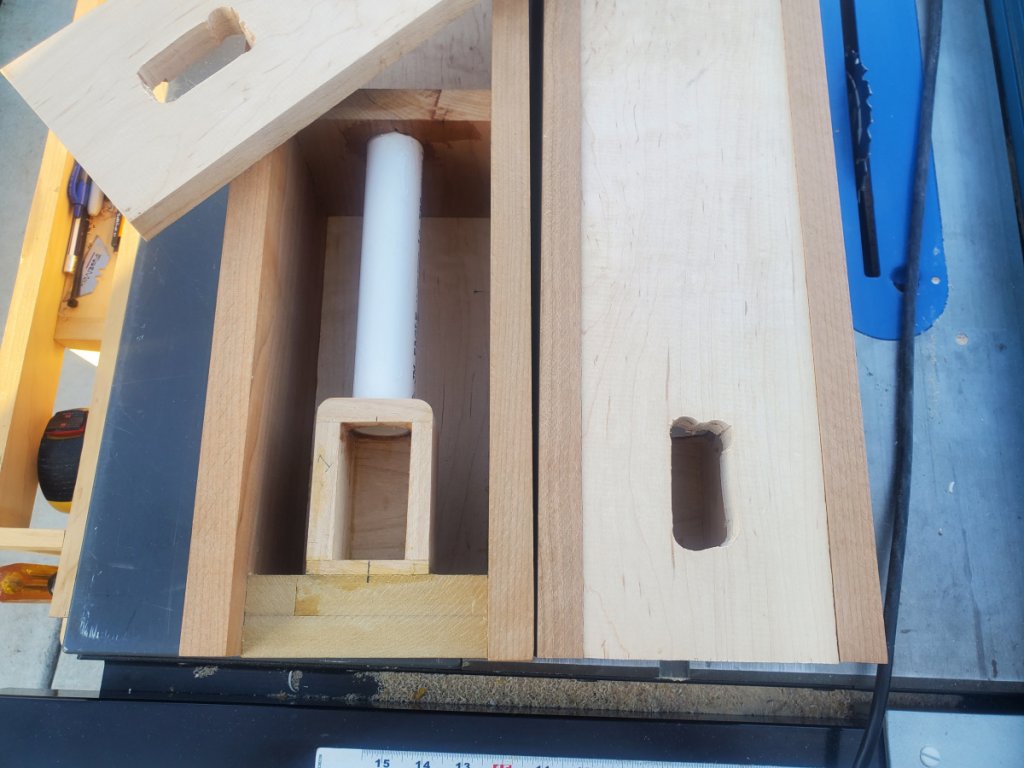
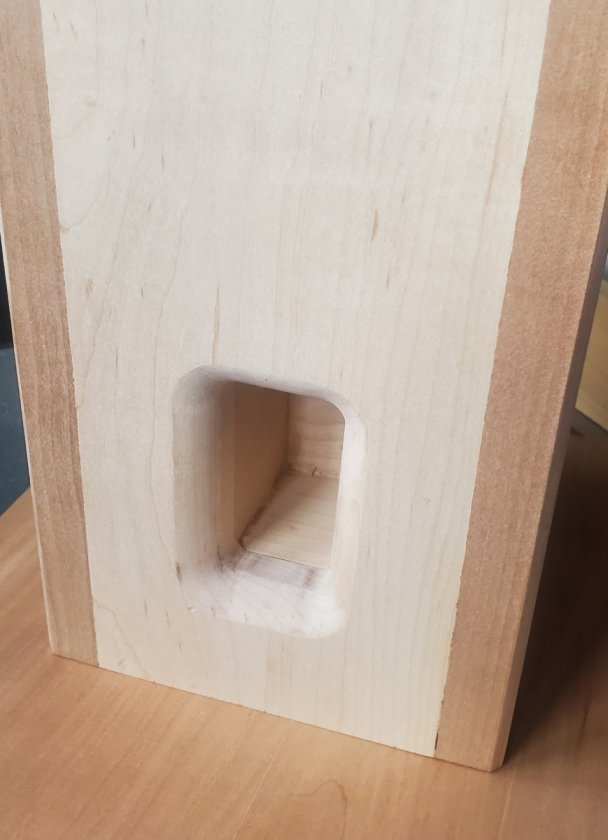
Lower half is sealed to contain ballast, using 1" thin wall pvc as a pass through for internally routed speaker wire.


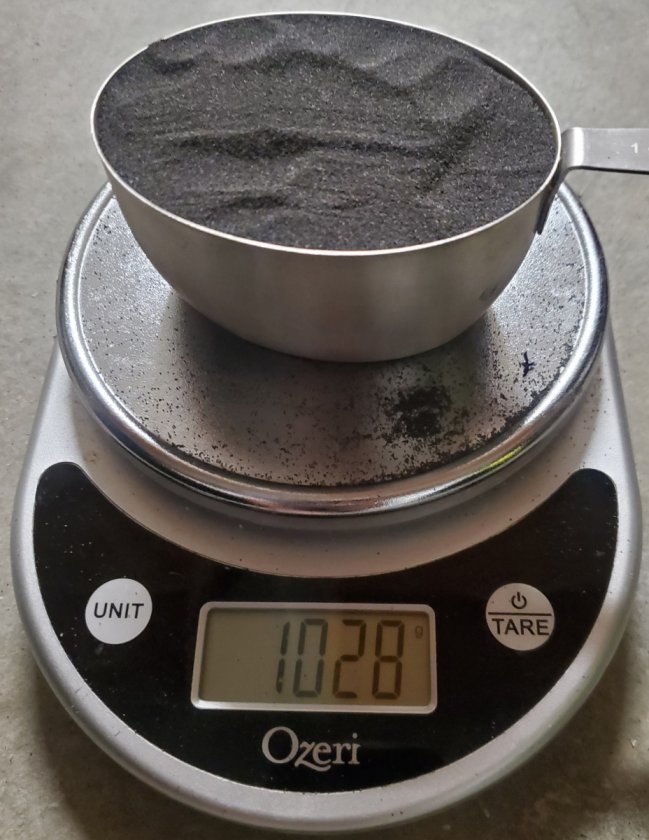
I haven't taken many photos as I wasn't initially planning to post anything.  However, with a few recent posts discussing stands and ballast, I decided to post for the purpose of sharing the differences in mass between sand and steel ballast. 


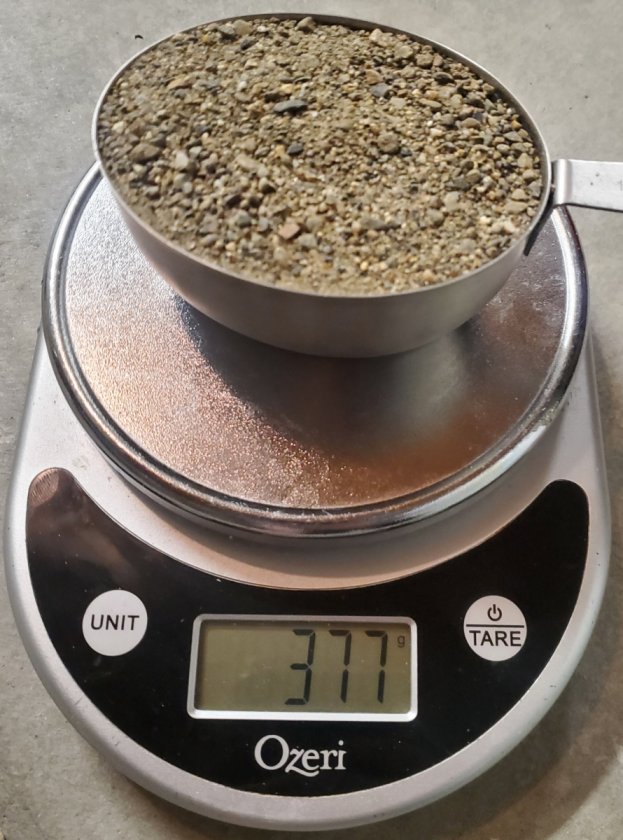
As you can see, the tared weight of 1 cup of a high-density sand ballast is 377 g, or 13.3 ounces.

Tared weight of 1 cup of steel ballast is 1028 g, or 36.26 ounces.   

For these samples the steel ballast is 2.73 times heavier than the sand.  Using steel to fill a complete column, would be incredibly heavy.   In use with this stand, it let's me fill the bottom sealed cavity only, and have the same weight or more, than if I had filled the entire column with sand, at a lower center of gravity, with a steeper topping angle.

I'm still deciding how I want to shape the base. The top wood platform is probably temporary, and I may replace at some point with a thinner steel plate.  I still have finish sanding to do, need to add threaded inserts to bottom to secure the base,  and decide on a finish.  Mostly likely finish will be a clear color.  Maybe even just a polyacrylic spray.

I planned to work on those last few items today, but it's raining. Instead I'm posting a few pics to share.

Elon
« Last Edit: 17 Apr 2022, 08:14 am by E-Zee »

E-Zee

  • Industry Participant
  • Posts: 149
    • Diy speaker resources and crossover assembly services
Re: DIY adjustable height speakers stands
« Reply #1 on: 14 Apr 2022, 09:35 pm »
Saved for a few later photos

AlexH

Re: DIY adjustable height speakers stands
« Reply #2 on: 14 Apr 2022, 09:46 pm »
Cool!

nlitworld

  • Full Member
  • Posts: 1980
  • Strange things are afoot at the Circle K
Hey Elon,
That looks like a fantastic project and should work really nicely.  :thumb: I like the idea of steel media filled bases vs sand or kitty litter. Were you just using fine blast media for your demonstration or something more specific?

E-Zee

  • Industry Participant
  • Posts: 149
    • Diy speaker resources and crossover assembly services
I've looked at different options for steel ballast including steel blasting media, steel shot for shotgun loading, loose, factory seconds, and recycled steel pellets for ballast.  Other options were significantly higher cost. 

What you see in photo, is steel ballast for boats.  Search "50lb wake ballast".  The 50lb bag I purchased was $65 w/free shipping.  Amazon has a $50lb bag for $70 shipped, same as several other resellers.  It shipped in a USPS Priority mail box which barely held together but the bag itself is very sturdy.  Seam ripping one corner to get some out was a chore. I like this format a lot.  The grains are very fine so it conforms to shape well with very small amounts of airgap.

It's certainly more expensive than play sand at local hardware store, but if you need the extra weight, than it's the best option.  The sand I compared against is a rather fine grain, with high density granite types of gravel, so possibly already denser than "play sand", but still nowhere close to the steel ballast.


listenermark

  • Jr. Member
  • Posts: 40
A thoughtful design, well implemented.  Nice work....you've inspired me.

HT1278

  • Jr. Member
  • Posts: 152
Elon, those speaker stands are beautiful!

E-Zee

  • Industry Participant
  • Posts: 149
    • Diy speaker resources and crossover assembly services
I finally got these finished up.  This project started as, "what can I do with these left over pieces?"  My hesitation near the end, was for the poor condition of one of the bases.  The end of one of the pieces of lumber had a decent amount of splitting.  I was aware of that at the beginning, but wasn't too concerned since it was a scrap project.  At some point about 4/5 through assembly, as I was starting to sand and smooth everything out, I realized how much the splitting base was going to stand out. Replacing it meant making a drive and probably buying at least a 6 ft board, which then meant leftovers.  After epoxy filling all the splits and cracks, I was again reminded how much I enjoy that look of repaired cracks.  One photo shown of the largest group of splits. The others mostly disappeared.


Final weight is 16.6 lbs each,  before adding any ballast. 
I added 25lbs of steel ballast to each stand.  There's a little bit of room left for a few lbs more but the final weight of just over 41 lbs is plenty for my needs. 
I'm happy with the extra weight that the steel offered, compared to using sand. 


I initially configured these with a dense rubber anti-vibration mount between the column and the base. Those combined with the current rubber feet, was too much.  At some point I'll replace the rubber feet with metal spikes but for now the rubber makes it easier for me to move around for testing purposes.  With metal spikes on later, I may try the rubber disks between column and base again.

This is the first time I've built speaker stands so there are certainly a few things I wish I'd done differently and would improve upon if I ever do it again.   

Hopefully somebody finds benefit in viewing the overall design and seeing the weight comparison between steel and sand.

Elon

Elon@ezeescrossovers.com

Cheytak.408

  • Restricted
  • Posts: 152
 Brilliant and well done!

 :thumb:

Early B.

Incredible!!

jjss49

  • Full Member
  • Posts: 776
Re: DIY adjustable height speaker stands /Sand vs steel as ballast
« Reply #10 on: 14 May 2022, 04:30 pm »
pretty cool... awesome handiwork and skills

i do feel fixed height stands suited to the speakers they are meant to support are more elegant and of course, much simpler

timind

  • Full Member
  • Posts: 3848
  • permanent vacation
Re: DIY adjustable height speaker stands /Sand vs steel as ballast
« Reply #11 on: 14 May 2022, 06:36 pm »
Very nice work. I currently use 24 inch stands, but have a pair of 28 inch, and 20 inch stands in a closet. Although I wouldn't give up my 24 inch stands, it would be nice not to have the extras hanging around.

jazyes

  • Jr. Member
  • Posts: 31
Re: DIY adjustable height speaker stands /Sand vs steel as ballast
« Reply #12 on: 20 May 2022, 02:03 pm »
Brilliant and beautiful, like all of your work! Your last name wouldn't happen to be Musk?  :wink: -JAZ

E-Zee

  • Industry Participant
  • Posts: 149
    • Diy speaker resources and crossover assembly services
Re: DIY adjustable height speaker stands /Sand vs steel as ballast
« Reply #13 on: 20 May 2022, 09:22 pm »
Thank you all for the kind words.  This was a fun project and if someone benefits or has an idea sparked as a a result of sharing than I'm even happier.   

Now for lessons learned or improvements for next time: 

24" is maybe a little tall for a minimum on adjustable height stand.  Stand has about 9" of adjustment,  so currently 24" to 33" range.   If I had shortened the main column by 3", I would have to also cut 3" off of the adjustable insert (or remove some volume from the lower ballast portion) resulting in a range of 21" to 27" which I think may be a better height range.  Also giving up 1" of ballast space would allow 21" to 28".

Having a recessed area where the adjustment thumb knob is located, is not necessary.  I like it cosmetically,  but leaving the main column square and uniform all the way to the top would streamline assembly quite a bit. 

Unscrewing and rescrewing even 3/8" of thread with each height adjustment can be a little bit cumbersome.  As alternative,  a push-button release detent pin would provide similar stability and make for almost instant removal and insertion. plus it reduces build time since the threaded inserts would no longer be needed.


Finally, the small recessed box that the speaker cable conduit dumps the cable into (lower rear of stand) is not necessary.  An alternative that might be easier for some would be to instead just use a 90 degree elbow that is epoxied into a recess on the inside of that rear panel.  The outer portion of that panel where the elbow is located could still be radiused with a roundover bit.  This would just be less work and leave a tiny bit more room for ballast.

With the above changes, I think this becomes a very quick and easy project.  Someone asked me about building them a similar pair of adjustable stands in walnut.  If I give that a go, than I'll make more of a build guide as I go and make that available to anyone who wants to attempt it on their own.

Elon
Elon@ezeescrossovers.com