Klipsch RP-600M Upgrade

0 Members and 1 Guest are viewing this topic. Read 76914 times.

Cblan1224

  • Jr. Member
  • Posts: 34
Re: Klipsch RP-600M Upgrade
« Reply #300 on: 15 Mar 2021, 03:54 am »
Well...both woofers and tweeter are outputting sound. How would you know if polarity is incorrect?

Cblan1224

  • Jr. Member
  • Posts: 34
Re: Klipsch RP-600M Upgrade
« Reply #301 on: 15 Mar 2021, 04:03 am »
Wow. Its a new speaker. Finally sounds like a true center channel.

Hobbsmeerkat

  • Industry Participant
  • Posts: 2542
Re: Klipsch RP-600M Upgrade
« Reply #302 on: 15 Mar 2021, 04:10 am »
Well...both woofers and tweeter are outputting sound. How would you know if polarity is incorrect?

You'll notice a deep hole in the overall tone of the midband.

Wow. Its a new speaker. Finally sounds like a true center channel.

Thats great! Sounds like it worked perfectly then!

Cblan1224

  • Jr. Member
  • Posts: 34
Re: Klipsch RP-600M Upgrade
« Reply #303 on: 15 Mar 2021, 08:28 pm »
If you're short on wire its probably best to use the alternative wire for the outer woofers since it's least the least sensitive to wire quality, but at least you're just about finished!  :thumb:

Just called Danny. He will throw in 5 extra feet of wire to my rp8000 order! Still waiting on tube connectors for that order. Should be shipping in a week or so. Can't wait to have all 3 done. Hearing the center...its like, I can see where the mains have room to improve.
Not looking forward to taking the center back apart but at least I just need to replace the jumpers and don't have to mess with the xo.

I highly recommend this for anyone with the 504c. With the tweeter and woofer levels evened out, voices have the appropriate amount of bass, and the clarity is on another level.

Hobbsmeerkat

  • Industry Participant
  • Posts: 2542
Re: Klipsch RP-600M Upgrade
« Reply #304 on: 15 Mar 2021, 08:31 pm »
I'm really excited to hear that its been such a successful process!

I'm really interested to hear what you think about the RP8000 upgrades. And how much more of a difference it makes, esp in the midband.

 Cheers! :thumb:

Shives

  • Jr. Member
  • Posts: 250
  • I like French fries
Re: Klipsch RP-600M Upgrade
« Reply #305 on: 13 Apr 2021, 03:11 pm »
Hey all.. My take on the RP-600M network build.

Did things a little different then what was displayed by Danny!

I think I’m correct... but you know that feeling when you look at something to long, and get crosseyed? Lol.

Did NOT come out as I intended.. But I have not built crossovers since HS. Tried a different approach with the negative wire. Rather then the jump from coil to resistor.. I ran them together.. sort of the same thing you just tying them together.

Pro tip, Tin your leads and clean off the extra. Silver solder flows and move a crap ton different then tin solder.

Next step.. add the wires, brand and install.


Shives

  • Jr. Member
  • Posts: 250
  • I like French fries
Re: Klipsch RP-600M Upgrade
« Reply #306 on: 14 Apr 2021, 10:55 pm »
I made a "cut sheet" for the no-res sheet I used on the RP600M kit.  I thought I'd post it here to save others the time who may be assembling the same kit.


Just like to say thanks! This helped out! Made it easy for cutting! Good amount left to put in other places in the box!

Thanks again

Shives

  • Jr. Member
  • Posts: 250
  • I like French fries
Re: Klipsch RP-600M Upgrade
« Reply #307 on: 16 Apr 2021, 01:47 pm »
Well, I’ve come to the end of my RP-600M upgrade! On to the 504C! Then I’m going to pull apart the SPL-120 and re-work that.

For now, some photos! I think the kits should be in stock very soon, and should be shipping for those waiting. I hope! Or maybe I’m the last one to do this, late to the ball game as per-usual. 

Anyways... Somethings I found.
1. Heat shrink.. maybe I did not get enough, but I pulled out some from my own stash. Not a big deal!

2. Board length. Make sure your not exceeding 6 to 6.5 inches.

3. Tube connector location. I feel it’s better to pick the higher location in the binding post cup! I went lower, it works, but is tight with longer network board. 7/16th on a mult-bit (stepped bit) is perfect! I did not use hot glue! That can let go and be messy! I used a very good 2 part epoxy. Still, hot glue or not I suggest to sand or scuff-up the area you plan to glue! IE the tube connector plastic area, and the plate they are mounted to! Wipe plastic off after.

4. To gain some extra room, cut the black posts off the binding cup where the stock xover was mounted to! Those four posts can be cut down! This will allow less interference when installing! More so if you’ve added no res to the bottom of cabinet in front and behind the network board. Just makes things clean and nice. Just make sure your cuts don’t end up flying through the air, back into the box!! (Was a crazy shot tho! Lucky for me it was sitting on the no res I added behind the binding plate.

5. Before adding the no res, cut all your no res! I used Homers cut sheet, with a modification to it (swapped location on sheet to get a larger extra piece)  this cut sheet was awesome! Thanks again! If you don’t have a table saw, get your self a flexible hand saw for flush cutting! I used this saw going in one direction.. it provided very flat and nice cuts! Wipe your walls down before applying! Harbor Freight for the saw, I’m add a photo.

6. If you don’t have a solder gun, and are using the pencil style.. buy a flathead tip this will make your soldering a lot easier!! Please make sure, more so with silver solder to clean your tip, and tin your wires! This is a huge help! Don’t forget to flip your polarity on the tweeter!! I kept the network as it should, flipped colors at the driver! Red to small terminal, and white to the large terminal. This flips the polarity as the schematic shows.

7. Follow Danny’s directions for crimping and soldering the tube connectors! Remember the idea is to have the wires from the network touch the end of the new connection. So use the male side to size the female size like he’s stated here https://www.audiocircle.com/index.php?topic=94014.0

No photos, but he does have some on his website if needed. The big thing to remember is to crimp the connection the right way.. the slice in tube connector should be met with the round side of the crimpers! Meaning the pecker pushes from the solid side, while its held from the slit side. Going to try and photo this. Then solder and heat shrink.

Don’t cut your extra wire in the cabinet, tuck it in and keep it all whole. This will aid in removing if ever needed.

Most important... Enjoy!

You can also put a multimeter on the tube connections to make sure everything is good before hooking to your amp! Just in case you’ve shorted anything! You don’t want your amp seeing that! So, if your not sure... make sure! Test and measure!

I apologize if this post has bothered anyone. It’s only meant to help folks! Most posts are about network setup.. I wanted to add a bit mode content for those in the future looking to do this upgrade! It’s not hard, but does take time!  If you have experience with soldering, electronics and wood working.. you’ll be great!! Even if you don’t, please don’t be scared! Lots of people around to help you! If they respond! And if they don’t, just find someone else to message! Don’t let it get you down!

Anyone can always feel free to message me and ask anything without judgement! Nor will I make you feel bad or unable! Some folks pride and ego can get the best of there intentions. I just love to help people!
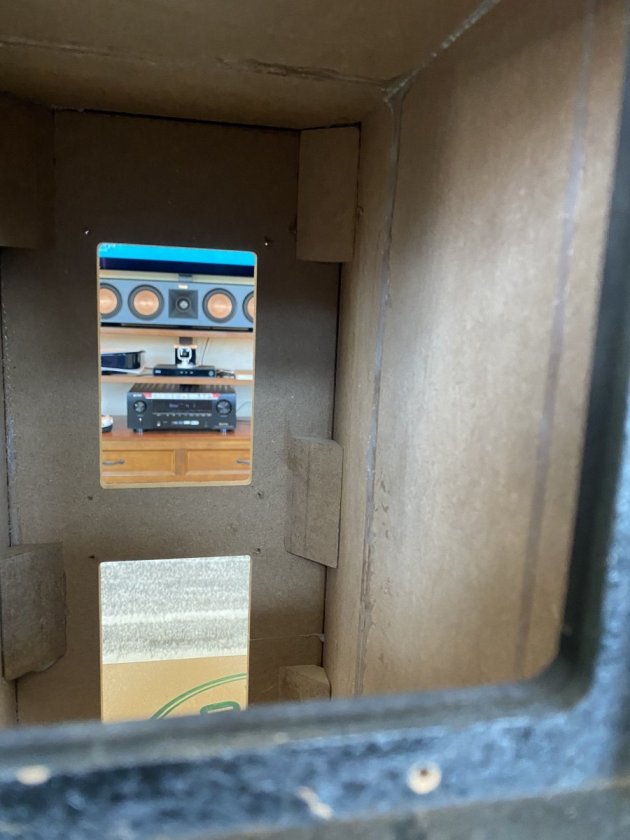
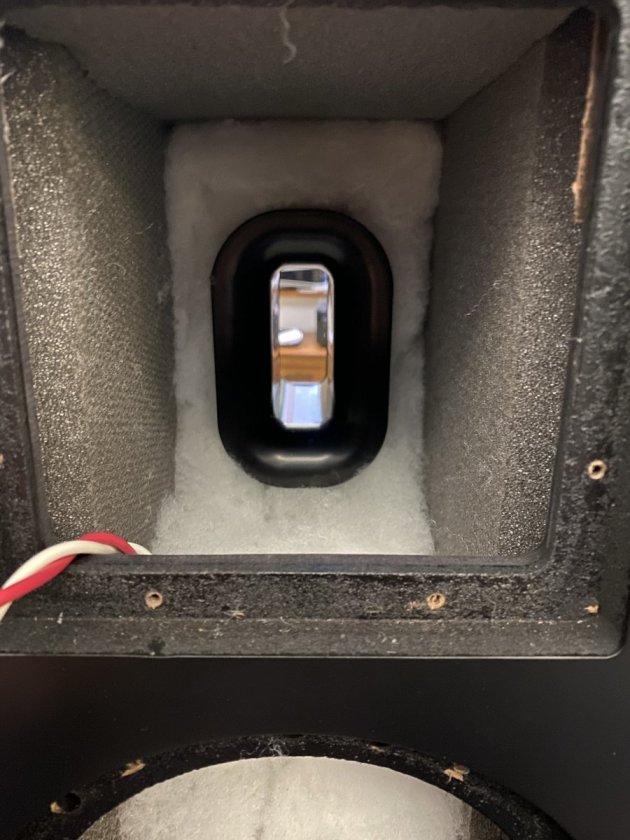
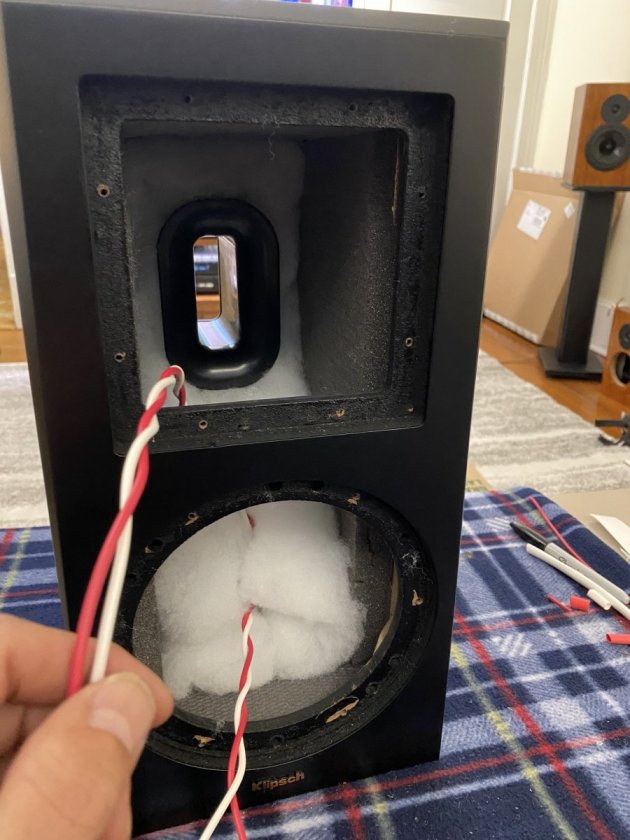
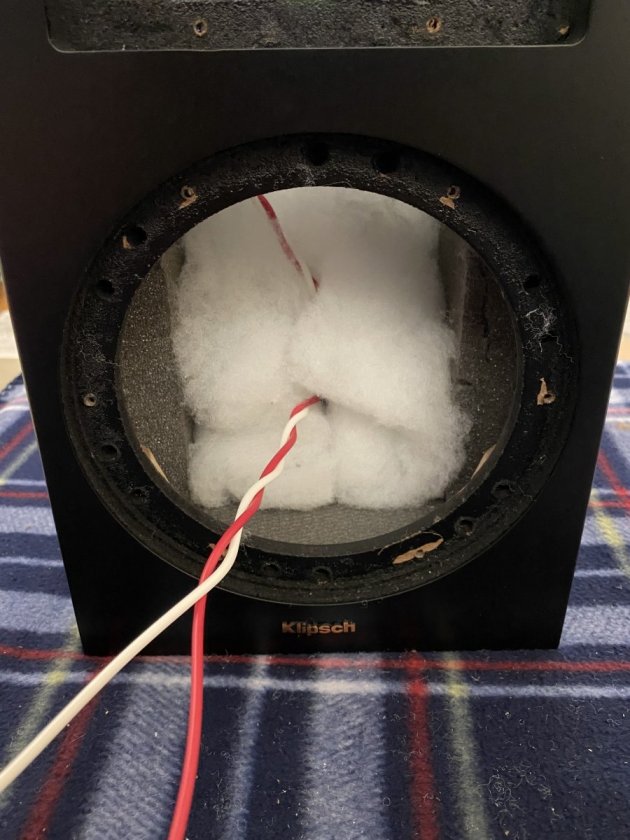
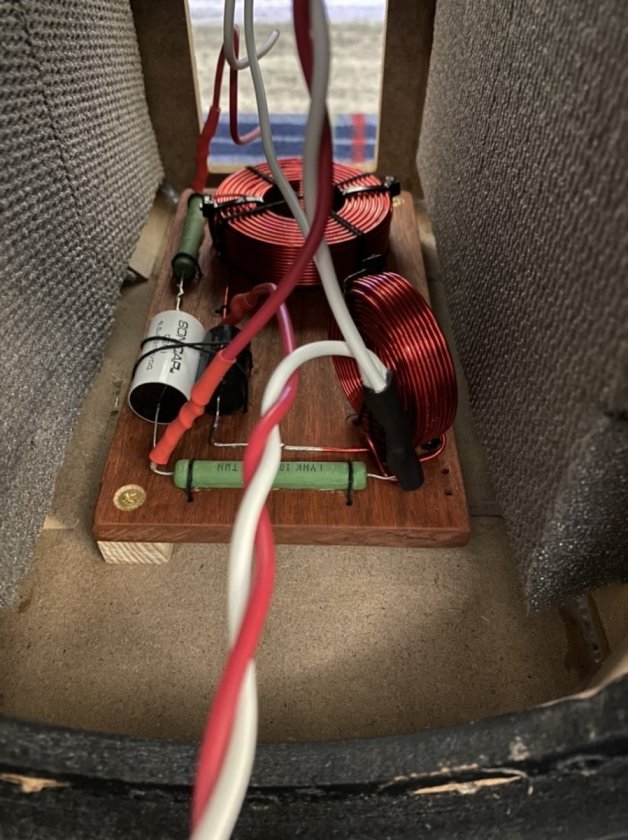
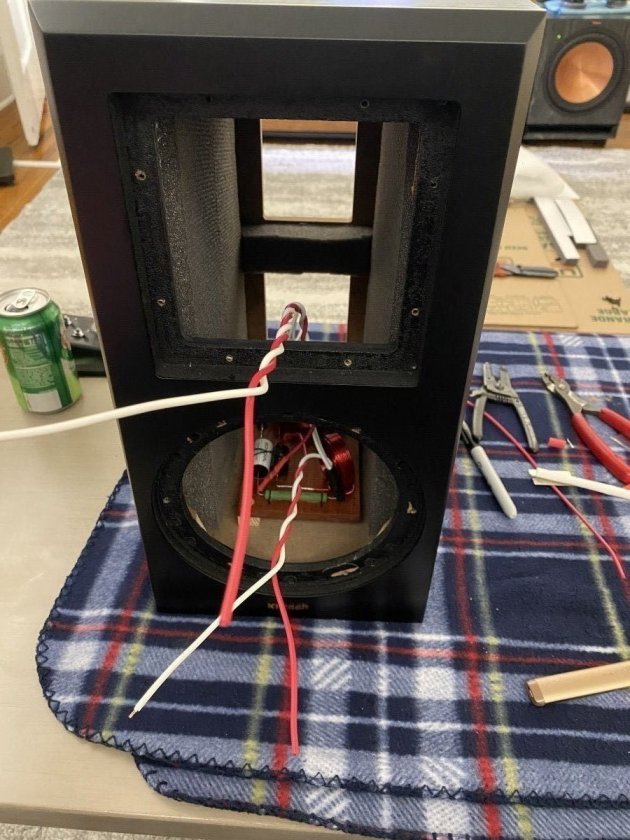


Few more photos in my Gallery. I also have more I did not upload.

Don’t worry!! You got this!!

So, I’m going to write a nice in-depth review on the sound, at least from my perspective! But not here..

What I will say is, while I was doing my second cabinet, I listened to the first one made.. comparing to other speakers I have here.. really.. you don’t have to focus to hard to hear the difference! Granted my EQ is done all automatically and not set right for the new networks... (you will have to redo your time alignment and any room corrections EQ correction software)

But even before doing that... Wow!  The big difference I hear right now is in the middle. Then the highs and lows. But.... more about that later on in my next post.

More projects to come.   


Cblan1224

  • Jr. Member
  • Posts: 34
Re: Klipsch RP-600M Upgrade
« Reply #308 on: 17 Apr 2021, 05:34 am »
Looks nice. I like your standoffs.

This is a good idea. I have seen others ziptie the wires after the solder point, or even route the wires underneath, so if there is ever any pressure, while soldering the other end, or just in general, it won't be put on the connection.
FYI on the 504c, I ran about 5 feet short on wire. I know Homer2 also ran out of wire, so I would ask for a few feet extra.
I did the center channel first. It was my first crossover. Then I did the rp8000 upgrade. Each one looking significantly better than the last. For the rp8000, I used 2 sheets on dynamat extreme. I've heard of people doing similar things by ripping the foam off the norez and using the adhesive material, but dynamat is much cheaper and works better in this case, because it is less dense. I used pine for my xo board, and it is extremely hard and reflective, so I layered the bottom of the xo board, and the bottom of the cabinet with dynamat, then screwed through it into the cabinet, using a lot of silicone on the components as well. I pretty much went above and beyond to minimize any hard surface reflections. One could argue that I am messing with the cabinet design, to which I would say that it sounds amazing, and I'm not sure klipsch puts much thought into airspace/cabinet design anyway. Beyond the port, the tweeter and the woofers, I think all they care about is that it looks nice.

You have PLENTY of room for the board on the 504c. You can do a 5x9" comfortably. Not that you'll need to.
Doing the main speakers was good. They measure so much better. I'm sure you saw the rp8000 video. All my klipsch speakers have a dip at the xo, and these were the worst.
The mains sound great, but being movies are my thing. I am 85% HT and 15% music. The 504c is such a substantial upgrade. It is not the same speaker. This thing rocks. Everything has an appropriate amount of bass behind it now. It is so much more...full. just watched godzilla vs Kong and the clarity on some of these roars..wow. it is really a great speaker now.
As a side note, my room calibration is now reading it as "large" just like my mains. Which means it is recommending to run it at full range, even when the factory has it in the 50s for frequency response. In other words, we are digging deeper! I cross it at 90hz, which is best for my specific setup.. I wouldn't recommend actually running it full range, obviously.
Anyway, I agree with your points. I mapped it all out, took norez to my office and cut it all before starting. That cut sheet is gold! Takes time to do that yourself lol, especially when it's 3 sheets of norez on 2 floorstanders.

When you say to tin your leads, are you saying to solder the connection point first?
I would bend the copper lead wire and wrap it around the connections, securing it better with small pliers. Do this with everything that needed to be connected to that point, then solder it all.
My connections were solid, but was there a better way to do this? Was I not supposed to be bending the hell out of that solid copper lol
Thanks

Shives

  • Jr. Member
  • Posts: 250
  • I like French fries
Re: Klipsch RP-600M Upgrade
« Reply #309 on: 17 Apr 2021, 05:10 pm »
Looks nice. I like your standoffs.

This is a good idea. I have seen others ziptie the wires after the solder point, or even route the wires underneath, so if there is ever any pressure, while soldering the other end, or just in general, it won't be put on the connection.
FYI on the 504c, I ran about 5 feet short on wire. I know Homer2 also ran out of wire, so I would ask for a few feet extra.
I did the center channel first. It was my first crossover. Then I did the rp8000 upgrade. Each one looking significantly better than the last. For the rp8000, I used 2 sheets on dynamat extreme. I've heard of people doing similar things by ripping the foam off the norez and using the adhesive material, but dynamat is much cheaper and works better in this case, because it is less dense. I used pine for my xo board, and it is extremely hard and reflective, so I layered the bottom of the xo board, and the bottom of the cabinet with dynamat, then screwed through it into the cabinet, using a lot of silicone on the components as well. I pretty much went above and beyond to minimize any hard surface reflections. One could argue that I am messing with the cabinet design, to which I would say that it sounds amazing, and I'm not sure klipsch puts much thought into airspace/cabinet design anyway. Beyond the port, the tweeter and the woofers, I think all they care about is that it looks nice.

You have PLENTY of room for the board on the 504c. You can do a 5x9" comfortably. Not that you'll need to.
Doing the main speakers was good. They measure so much better. I'm sure you saw the rp8000 video. All my klipsch speakers have a dip at the xo, and these were the worst.
The mains sound great, but being movies are my thing. I am 85% HT and 15% music. The 504c is such a substantial upgrade. It is not the same speaker. This thing rocks. Everything has an appropriate amount of bass behind it now. It is so much more...full. just watched godzilla vs Kong and the clarity on some of these roars..wow. it is really a great speaker now.
As a side note, my room calibration is now reading it as "large" just like my mains. Which means it is recommending to run it at full range, even when the factory has it in the 50s for frequency response. In other words, we are digging deeper! I cross it at 90hz, which is best for my specific setup.. I wouldn't recommend actually running it full range, obviously.
Anyway, I agree with your points. I mapped it all out, took norez to my office and cut it all before starting. That cut sheet is gold! Takes time to do that yourself lol, especially when it's 3 sheets of norez on 2 floorstanders.

When you say to tin your leads, are you saying to solder the connection point first?
I would bend the copper lead wire and wrap it around the connections, securing it better with small pliers. Do this with everything that needed to be connected to that point, then solder it all.
My connections were solid, but was there a better way to do this? Was I not supposed to be bending the hell out of that solid copper lol
Thanks

Hey!! Thanks man! I appreciate your words! I’m currently on the road, and will answer this much better when I get home.

Really quickly... thanks for the update on the wire! Board length will be easy with this one. Not going to lay it long, but lay it so all take the positive input together, and then negative will be one from input to tweeter, then I’m going to try and put the neg from rest together best o can. Large coil laying, other two standing.

Tin wires like speaker wires and such. It helps when you go to make your final solder connection. The solder from the wire and terminal will melt a lot better together as you add a little more to make it a solid connection.

Tried to keep all metal away.. and have them look a bit nicer then zip ties. Brass screws counter sunken down again.. with the better components bringing it to the next level.. I like my installs to follow. Was little hard with some small issues. What I know now, I can whip these out. Lol.

The cut up pre-ready items made things go smoother. Also I matched my cuts to my section installs to try and keep them as seamless as possible. Overboard.. yea.. I’m sure! Lmfao. But it makes me happy.

I have to run.. Allow me to re-read and answer better later. Just wanted to say thanks! I appreciate it.. been looking for some feedback, I highly appreciate yours!

I’m glad your projects have come together for you! It’s very rewarding!! Congratulations!!

Talk soon. Thanks again.

Cblan1224

  • Jr. Member
  • Posts: 34
Re: Klipsch RP-600M Upgrade
« Reply #310 on: 17 Apr 2021, 10:00 pm »
It is most definitely rewarding. As I said I think the center channel is an entirely new speaker. The mains are great too. As I've said before, I really can't even put it into words how much better all of these speakers sound. If I could go back, I would build a pair of Danny's X statik's, with an x voce center or a third x statik. Before doing the crossover, I was really kinda bummed. I could have those speakers for the same price I spent on these! I couldn't wrap my head around it. But after this upgrade, I'm not craving anything. I am satisfied with choosing to stay with these, and I will one day throw these to the rear of the room and build some x statiks. I do wonder how these upgrades are looked at when it comes to resale. The board in the 504c, being my first, isn't too pretty, and the Tube Connectors do not look great. I have a bit of super glue around them. Just something I always wondered. I am proud of my rp8000 build, though i have not uploaded it to this forum.. These are very clean. The board is still a bit bigger than some of the pros on here, but those things are built to last.

Anyway, thanks for the clarification. That's what I thought it meant, and it makes perfect sense to tin the wires.
I'm on to room treatments now. I've got quite a bit coming Monday. Thinking about norez-ing my subs. Can't hurt right. Theyre built well though and weight about 100lbs so maybe I'm just looking for more to do lol

alanhuth

  • Jr. Member
  • Posts: 36
Re: Klipsch RP-600M Upgrade
« Reply #311 on: 19 Apr 2021, 06:13 am »
Tweeter polarity:  I followed the videos and it seems like in video 3, when adding wires to the crossovers, we already swappped red and white for the tweeters at the crossover board.  I was surprised, in the later video 4, that Danny said to attach red to negative and white to positive when wiring up the tweeters.  Isn’t that reversing the polarity twice? 

I apologize if this question has already been asked and answered.  i did a search on “polarity” and this issue did not surface. 

Thanks,

alanhuth

  • Jr. Member
  • Posts: 36
Re: Klipsch RP-600M Upgrade
« Reply #312 on: 19 Apr 2021, 06:25 am »
At minute 29 of part 2, Danny says “it’s a positive wire (red) but, again, we are going to switch the polarity, so it is connected to the negative of the tweeter”.   That means that this red wire was attached between the capacitor and the resistor of the tweeter circuit.  That junction on the wiring diagram is negative, but we used a red wire.  Doesn’t that mean that when we wire up the tweeter, we should attach red to the positive post of the tweeter?

Cblan1224

  • Jr. Member
  • Posts: 34
Re: Klipsch RP-600M Upgrade
« Reply #313 on: 19 Apr 2021, 06:34 am »
You could do it either way, but what you are describing doesn't sound right to me.
I'm a beginner though, but I just did it this way:
Tweeter positive to xo negative.
Tweeter negative to xo positive.
Or you can hook them up normal and just reverse it on the speaker tabs.

In mine, it was easy to tell. Rp8000 is also reversed. I had a bunch of white wires on the xo negative, and one red wire going to the positive tab on the tweeter.  Following the line on the diagram, I just went positive in, then negative out to tweeter negative. Negative in, positive out to tweeter positive. I tied in the woofers negative also. So where the tweeter was getting a positive out, both woofers were getting a negative out, from the same connection point.
I hope that helps. If you email Danny, he will get back to you within a day usually.

Bottom line is, you either do this at the crossover, or at the tweeter. Doesnt matter which side you do it on, as they both achieve the same exact thing
Someone PLEASE correct me if I'm wrong here. I swapped the negative and positive on the board, and ran red to pos. If the junction on the diagram is negative, it should be going to the negative.

Edit:
The diagram reverses the polarity. You don't have to then do it again afterwards. The diagram has positive in to negative out, just for the tweeter, right? I know he had the diagram in the video, minus the values, so i don't think we are giving away state secrets here. If that connection shows negative on the diagram(meaning on the right side of the diagram), then it needs to be going to the negative post on the tweeter. Doesn't matter what color wire. So just follow the diagram. Don't think about reversing the polarity as something you need to do. If you follow the diagram, it's already done.

Fyi on all the klipsch rp models I've taken apart, the positive is the big tab, and negative is the small tab, same as the woofers. I got lost when doing my 504c and took tweeters out of 7 speakers across 3 different rp models before I was satisfied that they were all the same lol

I've asked someone with more knowledge, who helped me along, to come on and verify what im saying is correct

Shives

  • Jr. Member
  • Posts: 250
  • I like French fries
Re: Klipsch RP-600M Upgrade
« Reply #314 on: 19 Apr 2021, 12:50 pm »
Just waking up but I’ll dive into this in a bit.

First, as seen in Danny’s schematic.. the tweet is reverse polarity. Now, some people like to swap the wire colors at the network, some at the driver it’s self. I went and swapped them at the driver itself.. cause that’s true to schematic. I also took a piece of white shrink and used it on red, and red on white wire! Why? To help mark them reverse polarity. I put my shrink on my wires (before soldering lol) to which this also helps you remember, oh yea.. reverse polarity. Don’t forget!

Also, most drivers I’ve ever used.. Since 1994 have the positive as the larger male lug or spade on the drivers, while as the small is the negative. This is in true form today, factory standards.. least all I’ve ever seen. So that should help.


As far as the video goes... I don’t watch so closely as to what and where he connects. I sort of watch them to just hear what he’s saying to keep in the back of my head when doing. Cause again, we are human!!! It’s possible that he could have doubled back on his wires.. Again, why I leave all mine matching the xover!! Then wire at driver! I don’t know if he did! It’s possible.

Now, I won’t lie.. we all have those moment of WTF did I swap that?? And yes... Next morning I took the tweeter out to double check! Thank god I followed my own advise and tips. Lmfao. Tweeter is reversed!!

The best advise is to follow the diagram! Normally positive in and positive out... Right!? But on some of these being flipped.. Just make sure to double check! All this means is that extra white wire the one that should be all one length from negative input, all the way to the tweeter will be installed to the positive post! No big deal! So long white wire to the fat post in tweeter! This long white wire I take and cut a 2 inch section in middle then twist around my negative on the crossover. So, you get that one wire from input to output.

The tweeter is more sensitive to anything! Any signals interference and such! So one wire from input to xover to speaker is a good thing to have.

PS, silver bends easy! You can run, then twist if you wanted!

Don’t over twist your wires! I’ve seen people snap them off the caps!!

I’m located in the New England area! People are more then welcome to message me, ask questions, and I’m happy to answer them, point out, trouble shoot and such!

I’m also available in my area for folks that want to do the upgrades but can’t, and or build Danny’s sets of speakers.

Well, on to the 504C. Don’t see many crossover board options or photos.. So I think I’m going to start a post for one. I don’t want to mix that info here! This post already has a couple Klipsch speakers we are discussing.

Hope everyone has a great Monday!!

Cblan1224

  • Jr. Member
  • Posts: 34
Re: Klipsch RP-600M Upgrade
« Reply #315 on: 19 Apr 2021, 01:00 pm »
Right. Thats a good idea with the cutting out 2" then bending it around. I did separate connections. White in, red out just to take all the thinking out of it.
I appreciate the knowledge. (Am in Florida, grew up in western mass. Still have pats season tickets)
Yea you guys are awesome. Little tips go a long way!

Shives

  • Jr. Member
  • Posts: 250
  • I like French fries
Re: Klipsch RP-600M Upgrade
« Reply #316 on: 19 Apr 2021, 02:22 pm »
Right. Thats a good idea with the cutting out 2" then bending it around. I did separate connections. White in, red out just to take all the thinking out of it.
I appreciate the knowledge. (Am in Florida, grew up in western mass. Still have pats season tickets)
Yea you guys are awesome. Little tips go a long way!

Thank you!! I appreciate the feedback as well!

Wait a darn second... Is this Nick???? Lmfao

It’s Shivers.. D Stearns. If you are Nick... lol.

Anyways.. few of my friends just moved to FL... So far they like it... But work wise, pay and the cost of car insurance (holy Shit man.. FL car insurance is INSANE) They are starting to wonder if they made the right move! Over 7000.00 for two vehicles. One 2018 truck and one 2021 SUV.

I just got back from visiting Danny in Texas! (Considering a move to Texas!!!) (Anyone who’s thinking about visiting GR and Danny, PM me and I’ll give you tips for the area, places to stay and such!! Also flying from NE make sure you budget about 700-1000 for 3 to 4 days for hotel, food and rental car)  But holly crap!!! I thought Fl and CA roads were dangerous... Texas takes the whole driving thing to the next level!! Some places you’ll have 12-16 lanes of traffic! And make sure you get the fast pass for your tolls! Don’t believe the lady! It cost me an extra 50.00 because of a detour and a 1.00 toll..  And Texans love there guns!! Yup!! I got to see a shot gun sticking out of a window, going down the road! All I could do was laugh and pull right.
If you are not Nick, I think I just answered my own question why you moved.. was your girl and her job I think.

After reading your first response to me, I was like... Ok who is this guy? Then reading more.. and when you said something to the fact that you want to take other items apart like your sub (I’m doing mine next..lol) I said to my self... This guy could be a good friend!  Ha ha ha.

Anyways... To help all the people out... I’m going to try and make a nice post/video of the Klipsch 504C. No idea if it will become a sticky, or just be hanging around.. But keep an eye out for it! You said you did yours!? You have any photos? I’m just curious, and beyond excited to get this done.

I just spent sometime making wall treatments that are hung and latched in place by a magnetic. (Easy removal when company comes) But I put some matting under my sub, some traps and panels.. I need to re-setup my crossovers and such.. I think it was you who said after you re-did your setup the Rp600m came up as large rather small. My first time doing this before any upgrades my 600’s came back as large too! So I had to change this so my sub would function. Currently I think I have my 600’s set to 60hz? And my sub is someplace right above that 60. I think 80.

Going to play with that more once I’m done the 504C. God... When I set up these speakers new I said to myself.. This is it? They look great, but sound ehhhh. Due to fact I purchased them from my buddys company’s... and he gave me a great discount, I did not want to return them. I know Danny’s speakers will sound better.. and trust me... His setup in his house about brought me to tears listening to music, and being in a lucky position to hear his daughter sing! It was something I won’t soon forget! The Klipsch are nice! They sound so so so much better.. But... The GR stuff moves me to tears, pushes that envelope of feelings that... when most speakers will not!

Ok... I have to run and eat! Time to get working.

I’m really glad to see this post moving again! I do hope that anyone who has questions or anything to post them! Or message one of us! We all love this shit, and want everyone to have a great experience! So allows us to help.

Cblan1224

  • Jr. Member
  • Posts: 34
Re: Klipsch RP-600M Upgrade
« Reply #317 on: 19 Apr 2021, 02:38 pm »
Hahah man that is funny. Because I am not nick! Haha.
I don't have the 600s. It was the 504c that came back as large after the install. This thing roars man. I have the 22" sanus center stand under it though, and it damn near tips itself right over. I've gotten a quote from soundanchors for a stand that would just be absolutely perfect..but its 680. Predamped and filled, and I could drive 2 hours to pick up and save shipping. I think I'm putting that stand on my list. Unless I find something else, I won't really be able to afford it until summer. I've got a few projects going. Built a 3 channel amp, tomorrow my modules for my 8 channel amp ship out finally, so I'll be 11 channels all external.
Good stuff though. These hypex modules are so damn quiet.
I've become sensitive to high noise floors. Buy a cheap amp...you will be too!

Maybe I ought to reach out to this Nick. Hahah. I have a couple pictures of my boards. They aren't nearly as pretty as Homer2's 504c build, which i used as sort of a guide. I'll clean up the values and post some pictures of both my builds soon. And remember, function over form ok! Haha it was my first one and there was some trial and error

Shives

  • Jr. Member
  • Posts: 250
  • I like French fries
Re: Klipsch RP-600M Upgrade
« Reply #318 on: 19 Apr 2021, 03:36 pm »
Well your not Nick... lol actually Nick reached out to me for fixing his stuff. I just thought you might be him.. He  just move to FL.. but I did not know if he had any audio. I was just taking a guess, seeing you like to take shit apart as well he does. Again, I don’t think I would trust his electric work tho! But good luck! Ha ha ha.

I’m considering making an amp, or 2. I was looking to build a 2-ch tube amp.. But also played with making a couple of the icepower amps.. I hear good things on.. as well I have the info on how to wire them, to which was the hold back I guess for people trying to configure and build them. Hearing Danny’s 300b I was really wanting to get something of the same sort.. But that’s proving hard.. (communication, availability) So I’m just taking it day by day.

So, I’m going to send you a PM. We are getting to far off topic here. I don’t want to clutter the boards with us chatting back and fourth over our toys and projects! So... I’ll message ya now! 

CaptainBill

  • Jr. Member
  • Posts: 40
Re: Klipsch RP-600M Upgrade
« Reply #319 on: 28 Apr 2021, 03:38 am »
Still waiting on NX studio kit.  In the mean time, I have been listening to my GR-Research RP-600m.  They are finally broken in.  The sound is incredible.  In a small office, they have good bass but the real magic is midrange up through treble.  The treble is emphasized on the tube amp but it really adds texture to sounds like cymbals, synthesizers and even the sounds of picks or fingers on guitar strings.  Great imaging and sound stage in mid-field listening. 

I’m playing them through Node2i, Tidal, upgraded 300B TU-8600s. If you can get the tube amp, I think it might sound better than class D amps.  I had a M32 and it was nowhere near the sound quality of this amp.