X-LS Encore & X-CS Encore Build

0 Members and 1 Guest are viewing this topic. Read 24002 times.

Captainhemo

Re: X-LS Encore & X-CS Encore Build
« Reply #40 on: 26 Jun 2013, 10:01 pm »
Very good points Mike.   Sometimes it is  easy to get complacent  and forget that tools / machinery can be very danerous and accidents  can occur  very  quickly
Glad there  were no injuries other than to the piece of  wood

-jay

mlundy57

  • Industry Participant
  • Posts: 3583
Re: X-LS Encore & X-CS Encore Build
« Reply #41 on: 26 Jun 2013, 10:18 pm »
Jay,

Your method of cutting out the frame looks like it would work for the CS frame since it is an MTM design.

Do you try to drop the workpiece onto the saw blade or do you clamp the workpiece to the table then raise the blade into the wood like you were making a zero clearance insert?  If you drop it onto the blade how do you prevent kickback?

Mike

Captainhemo

Re: X-LS Encore & X-CS Encore Build
« Reply #42 on: 26 Jun 2013, 11:04 pm »
 Actually,  it was Neil  that  used the table saw method.   I cut out all the holes on my OB7 frames like  Neil did, but   then   cut out the litle pieces left with a jigsaw  .
When I did the grills for the  X LS Encores  ,  I did them  with 2 large holes then cut the    pieces out like you did.
When I rounded them over,   I just clamped the  frame down   and used a 2nd piece of   1/2" stock  to support the router base.
Be careful how far down the sides you  go as   don't forget the back  of the circles is  recessed and   there will be no surface for the bearing to   run on. You'll have to do the little bit   around the  cutouts  by hand (there isn't a whole lot of material there  anyhow after cutting out the  recess's)

-jay


mlundy57

  • Industry Participant
  • Posts: 3583
Re: X-LS Encore & X-CS Encore Build
« Reply #43 on: 27 Jun 2013, 12:48 am »
Oops, sorry Neil.

I was only trying to do the roundover from where the woofer cutout started, up over the top of the tweeter than down the other side to where the woofer cutout began again. I had cut a 1/4" recess for the woofer so that only left a 1/4" piece over the edge of the woofer. That I sanded by hand.

Next time I'll try a 3/8" roundover then sand. If 3/8" looks iffy I may just use a spindle sander.

Mike

NeilT

Re: X-LS Encore & X-CS Encore Build
« Reply #44 on: 27 Jun 2013, 05:53 am »
Jay,

Do you try to drop the workpiece onto the saw blade or do you clamp the workpiece to the table then raise the blade into the wood like you were making a zero clearance insert?  If you drop it onto the blade how do you prevent kickback?

Mike

I guess drop was not a good term to use. I gently and slowly laid them down on top of the spinning blade, very slim chance of any kick-back. The OB7 grills are big enough to manually control, it might be a little more dicey with a smaller piece of stock. Clamping it and raising the blade might be a viable, alternate method, but be careful when removing the clamp to finish the cut. Or, shut off the saw, lower the blade, reposition and re-clamp the material. Practice first on some scrap lumber.

Neil

mlundy57

  • Industry Participant
  • Posts: 3583
Re: X-LS Encore & X-CS Encore Build
« Reply #45 on: 28 Jun 2013, 03:25 am »
I have another crossover question, this time for the X-CS Encore. In the woofer circuit, at what point do you split off the positive and negative leads to pick up the second woofer?

Mike

Danny Richie

Re: X-LS Encore & X-CS Encore Build
« Reply #46 on: 28 Jun 2013, 01:27 pm »
I have another crossover question, this time for the X-CS Encore. In the woofer circuit, at what point do you split off the positive and negative leads to pick up the second woofer?

Mike

You can split the leads into two sets of wires at the end of the network. Or you can come off of the network with one set and daisy chain the woofers.

mlundy57

  • Industry Participant
  • Posts: 3583
Re: X-LS Encore & X-CS Encore Build
« Reply #47 on: 9 Jul 2013, 02:44 am »
Anybody know a good way to safely secure the small pieces for Barce A to the miter saw to safely cut the angles while using a stop block to set length without getting kickback?

Mike

Captainhemo

Re: X-LS Encore & X-CS Encore Build
« Reply #48 on: 9 Jul 2013, 03:47 am »
Not sure if it si the same or similar to the LS Encores,  but when I did mine,   I cut a fairly wide  piece  to length with the 45's  on each end then  ripped each brace off of that with a push stick

-jay

mlundy57

  • Industry Participant
  • Posts: 3583
Re: X-LS Encore & X-CS Encore Build
« Reply #49 on: 10 Jul 2013, 02:16 am »
Jay,

I hadn't thought about doing it that way. Fewer miter cuts but smaller pieces to round the edges on. I rounded the corners on a long blank and then started cutting them to length on the miter saw. I guess it's a trade off either way you go.

I say started because I have had to stop for awhile. While trying to hold those little pieces in position on the miter saw I got my left hand in the way of the blade so now I have to wait until the stitches come out and the hand heals before I can get back to the project. Luckily I felt the blade hit my hand and was able to back off before cutting any nerves, tendons or bones. 7 stitches but it could have been a lot worse.

Mike

Captainhemo

Re: X-LS Encore & X-CS Encore Build
« Reply #50 on: 10 Jul 2013, 03:53 am »
Mike
Sorry to hear about your hand  .....  you are right thugh,  it  could have been much worse, thankfully it wasn't.   Lucky  you felt the blade making contact and were able to pull up,   many times by that point it is too late

With the X LS Encores, the little diagnol braces are up behid the tweeter and a good portion of them  is covered by no res.  You could easily   just round the   edges off  quickly  with a rasp and run over them  with a piece of  220 .
I liked just having to do the 1 miter cut at each end of the piece  and then ripping  the strips   using the notched  push stick,  seemed  easier to me

Hope that hand heals up quick and you  are able to get back  and  at it 

-jay

Danny Richie

Re: X-LS Encore & X-CS Encore Build
« Reply #51 on: 10 Jul 2013, 03:55 am »
Dang Mike,

I hate to hear that about your hand. 

Peter J

  • Full Member
  • Posts: 1877
  • Hmmmm
Re: X-LS Encore & X-CS Encore Build
« Reply #52 on: 11 Jul 2013, 06:55 pm »

Bummer about the mishap, power tool injuries are never fun. Not to be morbid, but I learned early on that machines have no regard for me whatsoever, wood, flesh, bone...it's all the same to a saw.

There's a reason you work was kicking back. One possibility is work is not well supported on fence...short piece wants to spin into void between fences. A sacrificial scrap against the fence will counteract what the blade wants to do to some extent. Another possibility is carbide teeth pick up work of the table on the upstroke after cut has been made. Sometimes I release trigger and let saw stop before letting it retract upward. Yet other possibility is a dull blade or misaligned fence.

If you'd like, I'll make these and send them to you while you're on the mend. Just give me dimensions and how many you need and it's done.

Jay,

I hadn't thought about doing it that way. Fewer miter cuts but smaller pieces to round the edges on. I rounded the corners on a long blank and then started cutting them to length on the miter saw. I guess it's a trade off either way you go.

I say started because I have had to stop for awhile. While trying to hold those little pieces in position on the miter saw I got my left hand in the way of the blade so now I have to wait until the stitches come out and the hand heals before I can get back to the project. Luckily I felt the blade hit my hand and was able to back off before cutting any nerves, tendons or bones. 7 stitches but it could have been a lot worse.

Mike

mlundy57

  • Industry Participant
  • Posts: 3583
Re: X-LS Encore & X-CS Encore Build
« Reply #53 on: 11 Jul 2013, 10:32 pm »
Peter,
 I know what you mean. What ran through my mind the instant the saw hit my hand was "stupid, stupid, stupid!!! You know better than that"

It is probably a combination of your suggestions. The large gap between the fences leaves the pieces without much support and the piece being cut off with none. The blade is the stock one that came with the inexpensive miter saw 4 years ago so it wasn't that good to start with. In the saw's defense, I bought it for rough framing work and landscape construction. I never intended to use it for cabinetry work.

Thanks for the offer but that's not necessary. For one thing my wife has placed two conditions before I can go back in the shop without major conflict (1) my hand has to heal up and (2) I have to replace the miter saw with a safer one with proper hold-downs and support. Darn, I guess I'll have to get that 12" dual compound slider with all the accessories after all. Then there is the "get back up on the horse that threw you" issue also.

What I am seriously considering getting for smaller part work is a version of the miter saw my father had for finish carpentry back in the mid '70s. Something like this:


Mike

Captainhemo

Re: X-LS Encore & X-CS Encore Build
« Reply #54 on: 11 Jul 2013, 10:44 pm »
So....  everytime you  want some new  tool,  you  need to have an "accident'  and the  other half will   insist that you make the purchase    :lol:

-jay   

mlundy57

  • Industry Participant
  • Posts: 3583
Re: X-LS Encore & X-CS Encore Build
« Reply #55 on: 12 Jul 2013, 12:41 am »
Side benefit of being a klutz  :icon_lol:

However, pressing your luck is never a good thing. It has a way of running out.

Mike

mlundy57

  • Industry Participant
  • Posts: 3583
Re: X-LS Encore & X-CS Encore Build
« Reply #56 on: 13 Jul 2013, 09:37 pm »
Peter,

The zero clearance auxiliary fence worked great even with my current saw (wife wasn't home so what she doesn't know won't hurt me  :green:).  I'm still going to replace this saw with a 12" dual compound slider. The one I'm looking at can cut material up to 14" wide without having to turn it over. That would mean I would only need to use my table saw for rip cuts. I could do all the cross cutting with the miter saw.  I also will get the non-powered version with a Japanese saw blade for small parts. The manual saw will also be very useful in flute making.

Mike

mlundy57

  • Industry Participant
  • Posts: 3583
Re: X-LS Encore & X-CS Encore Build
« Reply #57 on: 21 Jul 2013, 12:06 am »
The stitches are out and the hand is about half way healed. This gives me a chance to get caught op on posting pictures. These will be for the x-CS Encore build.

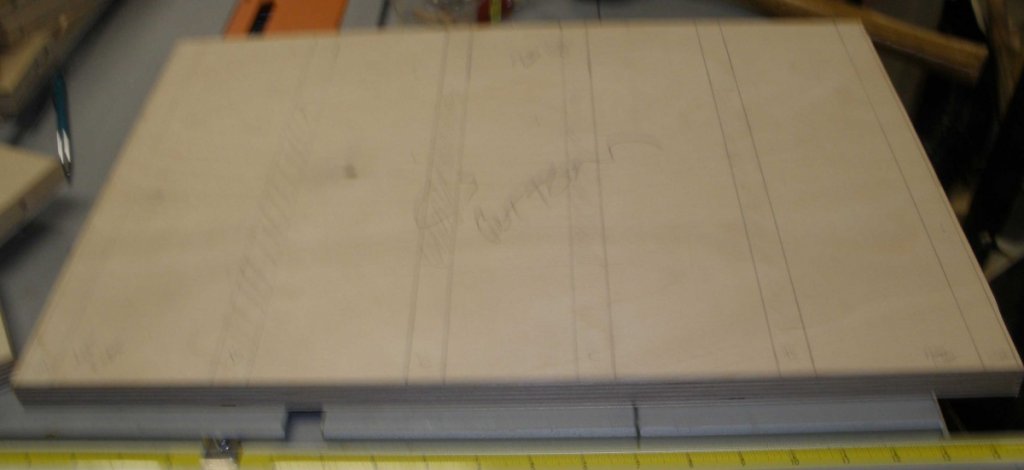
After cutting out all the parts I laid out the positions for the sides, brace B's and brace C's on the bottom. I forgot to set my camera on the "shaky hand" setting.


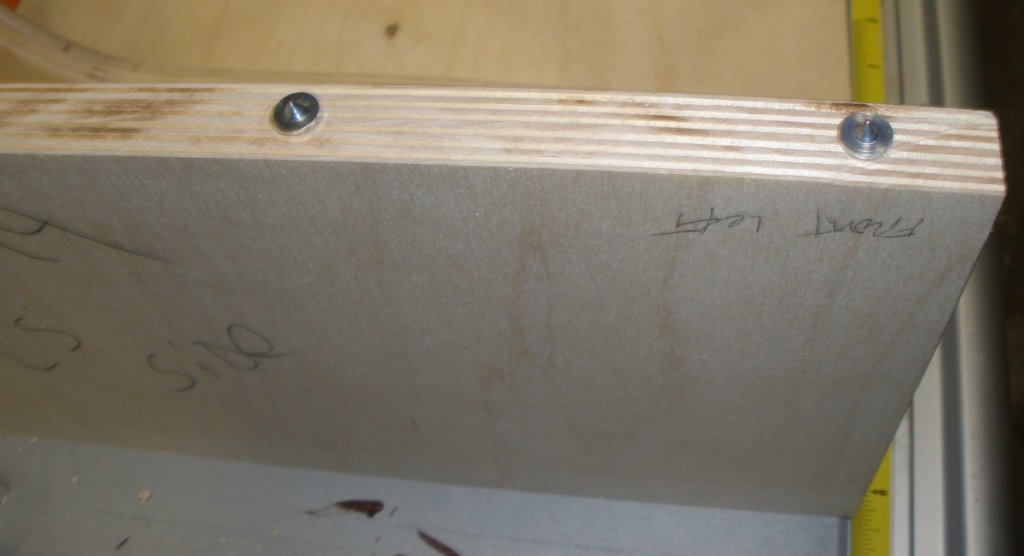
Then I drilled dowel holes along the edges of the sides and braces ind inserted dowel points into the holes.


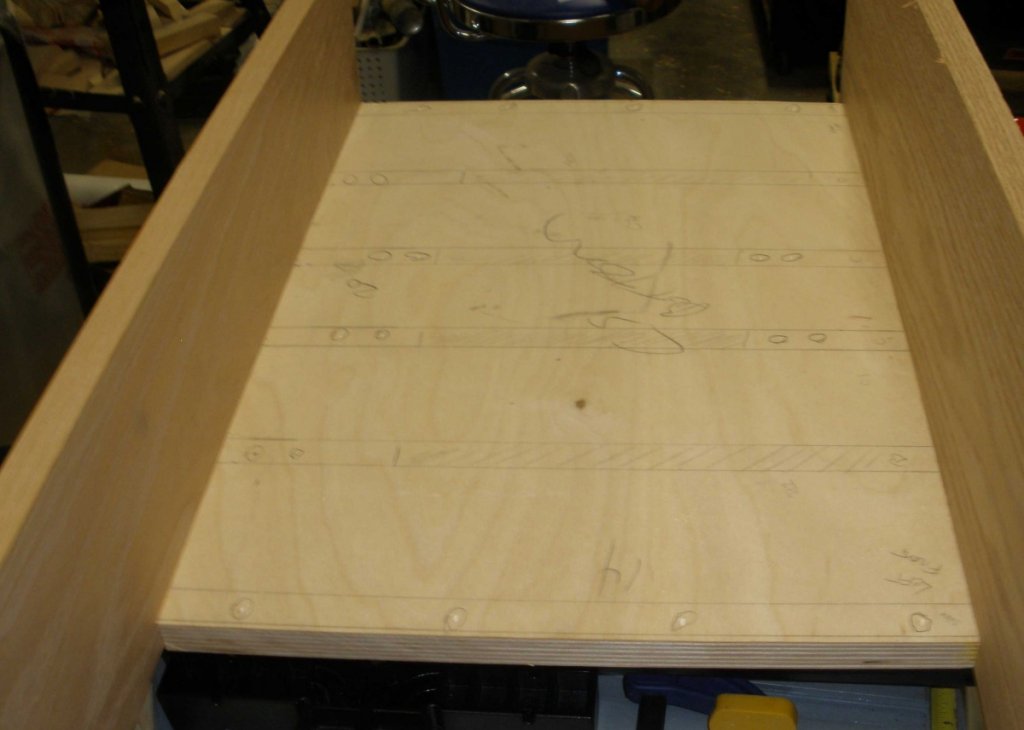
Then I clamped guide boards along the front an back of the bottom to make sure the edges stayed lined up thn marked the position of the dowels on the bottom.


Next I glued up the sides, not sure if I used enough clamps  :green:


Then the Brace C's. I used a spacer between the braces to help keep them parallel.


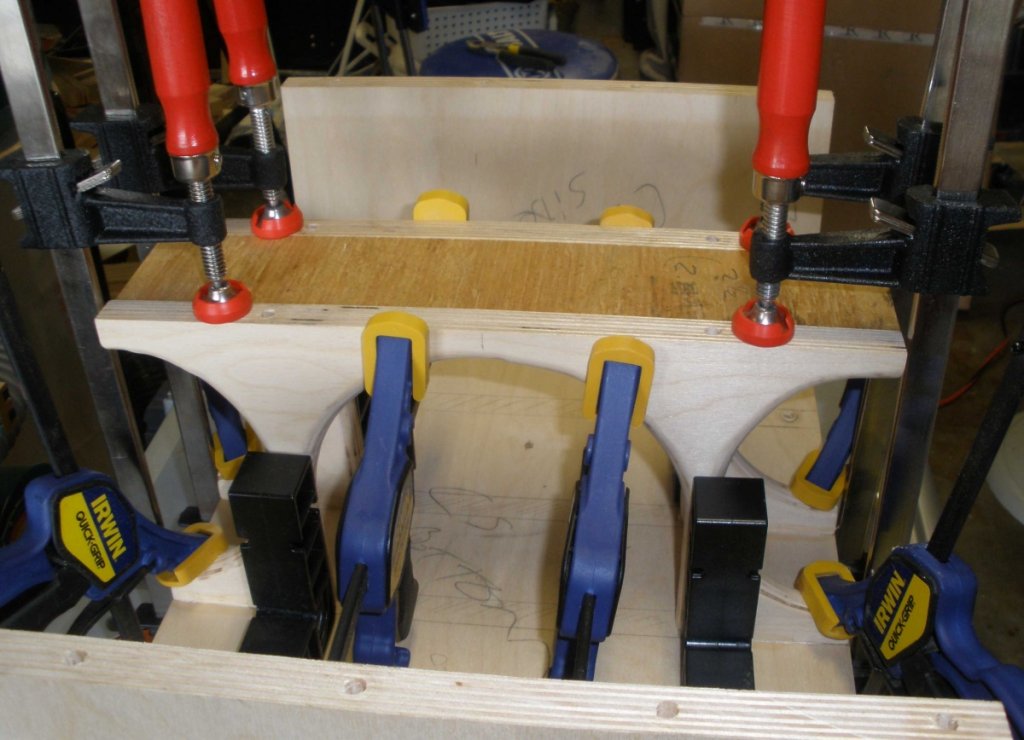
Then the brace B's. At this point the sides and main braces were all glued to the bottom and dowel points were inserted to mark the top.


more to come.

Mike

mlundy57

  • Industry Participant
  • Posts: 3583
Re: X-LS Encore & X-CS Encore Build
« Reply #58 on: 21 Jul 2013, 12:17 am »
Next I lined the top up and marked the dowel hole positions. I used clamps to make the impressions rather than a mallet. I didn't want the top to move even the slightest while transferring the position markings. I had a total of 20 dowels between the six pieces (2 sides and 4 braces.

Next I drilled the holes. I used a guide for my 3/8" hand drill. The top was too big for my drill press (as was the bottom).


Next I inserted the dowel pins and trimmed them all to 3/8".


Then it was time to glue on the top


Stay tuned for the next installment,

Mike

mlundy57

  • Industry Participant
  • Posts: 3583
Re: X-LS Encore & X-CS Encore Build
« Reply #59 on: 21 Jul 2013, 03:03 am »
Here is the CS E set up to flush trim the top and bottom


Here is a shot from the back


and the front


Now the back has been glued on and I have gone over all the seams with an adhesive caulk


I have also roughed out the grill frame. I routed a 7-1/4" diameter rabbit 1/4" deep on the backside of the frame over each woofer then cut out the wood in-between. I had a little difficulty getting a smooth cut with the jig saw around the inside of one of the rabbits. Here is a shot of the backside of the frame


and the front side


I still have to do the round overs on the inside, radius the ends, then smooth everything out before I'll be ready to set the magnets and determine the location on the front baffle.

Mike