Rook's A/V-3 build

0 Members and 1 Guest are viewing this topic. Read 6765 times.

greenklein

Re: Rook's A/V-3 build
« Reply #20 on: 24 Sep 2013, 01:56 am »
Can you post any more pics of that whole area?

Danny, I will try to get some pics of the whole room so you can have an idea of what I'm working with...not much! 

In the meantime, here are some pics of my progress.

Scott, it's probably good that you are following this thread, so you know what not to do!  I'm having a good time hanging in the garage listening to football and trying to figure things out.

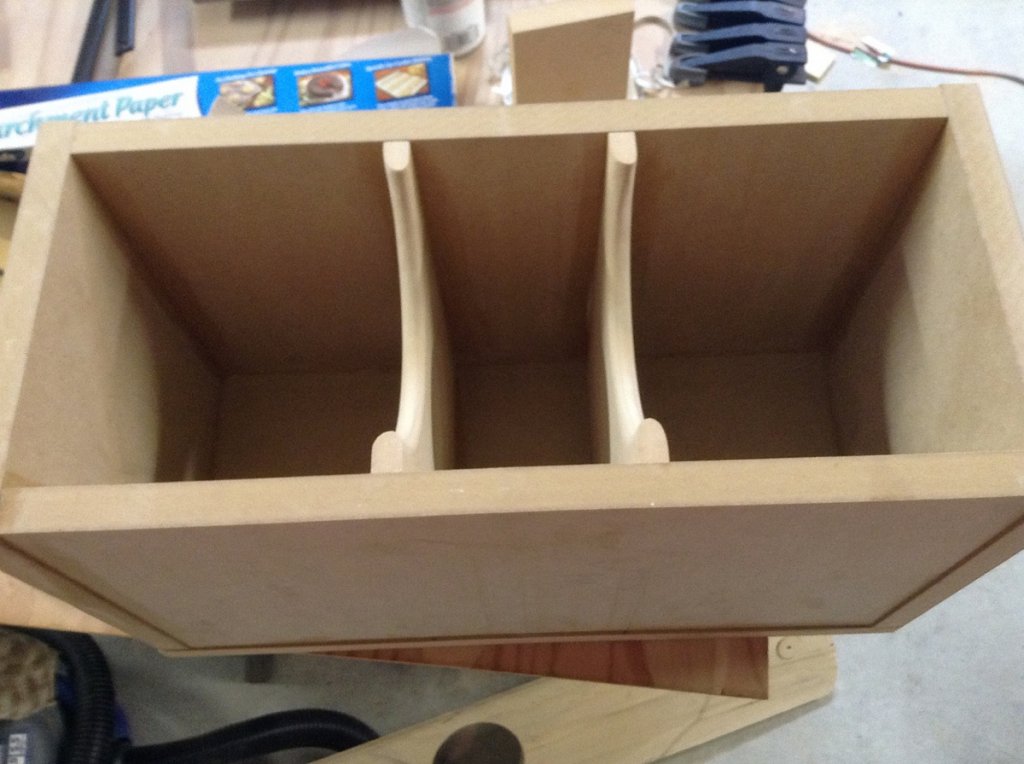
Here is the A/V-3s glued up.  I ran a bead of glue (as I would with caulk) on all of the seams to seal any gaps.  Seemed to work. 


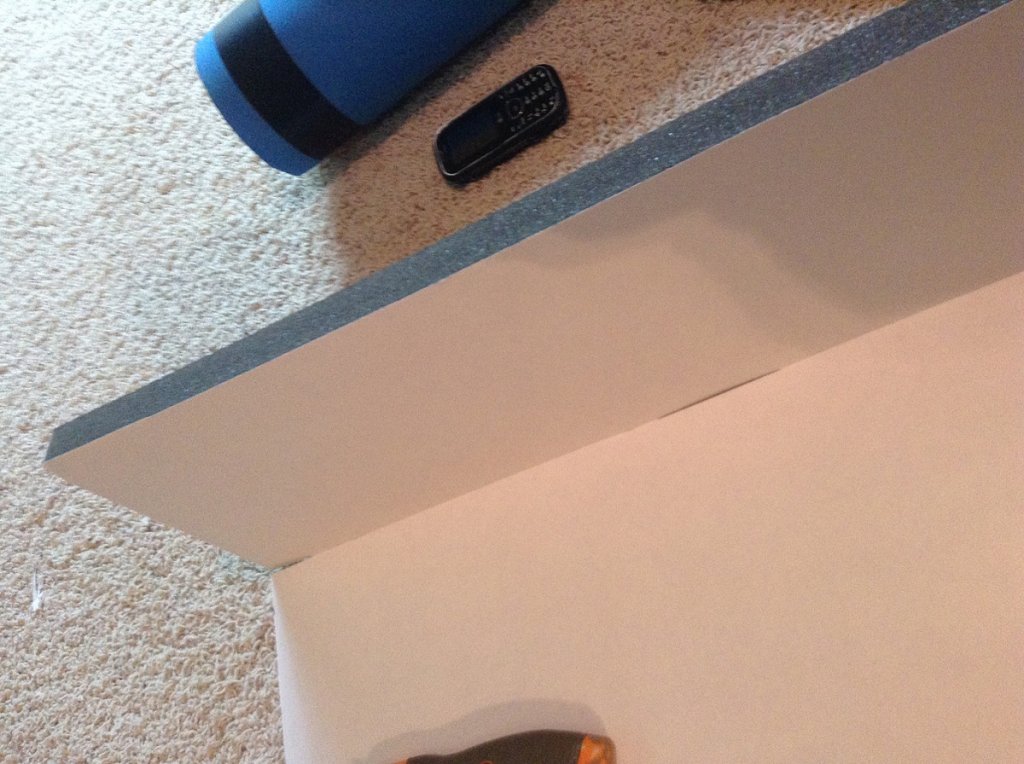
I had to watch the Seahawks thrash the Jags so I spent some time cutting the No Rez for the 3s's.  I used a square w/ a 3/4" piece of mdf to push down the no rez and then made the cut.  Worked well.  Will change the blade after making these cuts.  It didn't seem to cut as well towards the end.  I was still getting clean cuts though.  I put an old piece of plywood under the no rez.


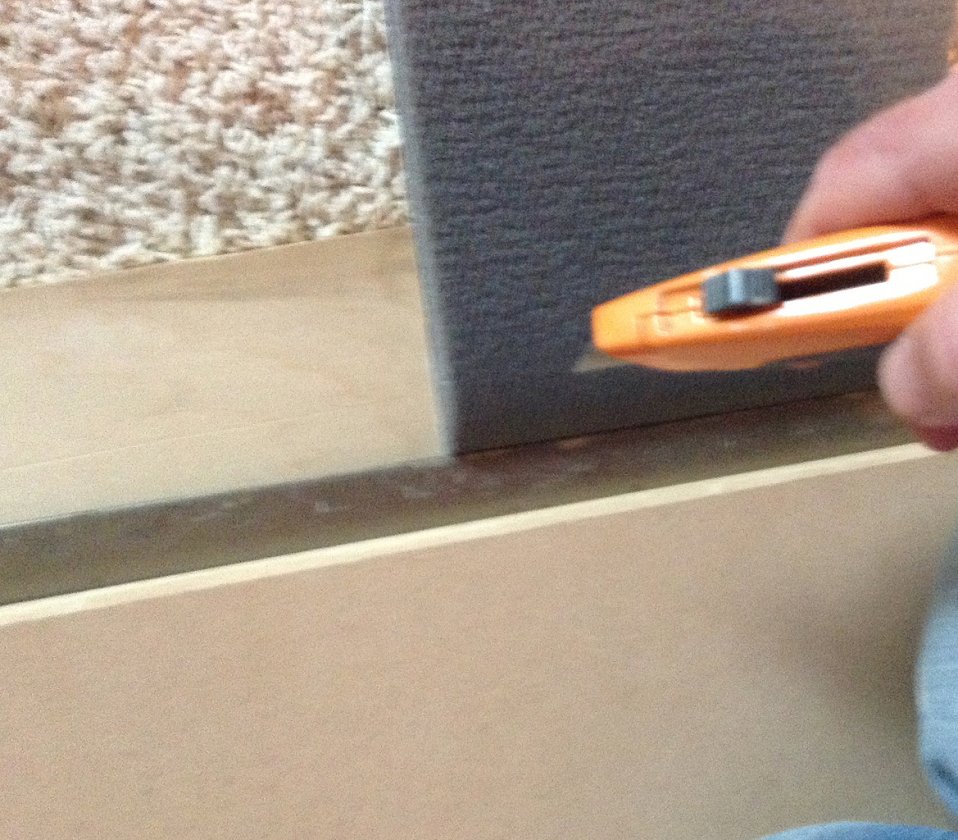
One of the cuts didn't go all the way through...fixed that real quick by folding it back and running the utility knife lightly on the edge...


This is probably not the best way to do it, but I made a couple of little "squares" out of mdf scrap and used those to square up the braces (I put parchment paper btwn the square and the brace...the square comes right up after the glue dries) and hold them steady so I could glue and clamp them.  I glued all of the braces (except C, since I'm not sure which way I'm going to go with the port yet) to one of the sides.  This seemed to work well for me.  If this is the wrong way to do it I'm sure I'll find out quickly! 


Brace B's with homemade squares...


Getting to the point where I'll have to think about how I'm going to finish them...more decisions!  I'm pretty sure I want to paint the front and back black.  Options...use the airless with some good enamel (still thinking about sheen...leaning semi gloss?).  My brother has a HVLP, so using that is an option as well w/ different finishes.  3rd option...I bought a can of truck bed liner and sprayed some scrap w/ it.  That is kind of cool!  Will have to think about that (less expensive too!).  Sides/top...thinking Maple Ambrosia like this build http://www.audiocircle.com/index.php?topic=82227.0 .  I hope mms3 doesn't mind someone stealing his idea! 

greenklein

Re: Rook's A/V-3 build
« Reply #21 on: 7 Oct 2013, 02:36 am »
Well, I've got the sides/tops/bottoms and braces in the A/V-3's and the base done.  Need to get after the crossovers now.  I'm sure there will be a question or two.  I do however, have a couple of questions on what steps to take for the rest of the build.  Here is what I'm thinking:
1. Put the backs on the towers
2. Veneer the sides and tops - hmmm...maybe I should order some...
3. Flush trim the back (I cut it a bit big), Roundover
4. Crossovers/No rez etc etc
5. Put the front on, flush trim, roundover
6. Mask sides/top and spray - got some enamel undercoater and will spray semi-gloss black w/ the airless
7. Finish the veneer

My main concern is the edges of the front and back since they will be painted next to the veneer.  Is this the correct order of events? 

Thanks!

mlundy57

  • Industry Participant
  • Posts: 3579
Re: Rook's A/V-3 build
« Reply #22 on: 7 Oct 2013, 03:22 am »
I'd wait until you have everything glued up before applying any veneer. You are going to want to make sure everything is flat and smooth before applying the veneer. This means sanding, possibly filing, and re-sanding the MDF until everything is smooth and you cannot feel any joints or depressions. Any imperfections in the MDF will show through the veneer. Finally, you don't want to get any glue squeeze-out on the face of the veneer. If you get glue on the face of the veneer that area will not take stain/finish like the rest of the veneer.

Mike

greenklein

Re: Rook's A/V-3 build
« Reply #23 on: 9 Oct 2013, 02:13 am »
Thanks Mike for your response.  Most of my concern deals with the veneer, which I have never worked with before.  I do want to paint the front and back (unless my mind changes!!), so I was thinking that I could flush trim the veneer before the front was put on, then put the front on, flush trim that and then paint the front.  If I glue the front on first (it is oversized a tad) how do I cut the veneer so perfectly that the piece will fit between the front edge and back edge? Very carefully, I suppose.  Would I flush trim the front and back at that point?  Hopefully all of this makes sense!

Thanks for any help, it is appreciated!

Todd

greenklein

Re: Rook's A/V-3 build
« Reply #24 on: 13 Oct 2013, 04:54 am »
Progress has been made.  Most of the no-rez is in... I goofed and didn't attach (or at least mark it) the no-rez to the front piece before I glued the back of one of the towers up.  Oh well...I figured out a fix.  Note to self... Now it's time for crossover work.  I've been putting it off but I don't have an excuse any longer.  I've also picked up some white oak veneer.  I wanted something light and that seemed to fit the bill.  Still trying to figure out the best way and order of finishing everything up.  It seems to me that it would be much easier to trim the veneer without the front on, however glue squeeze would be an issue.  Could I blue tape the veneer edge?  Or even begin to finish the veneer (and then blue tape) before I put the front on?  Well...time for a few pics...

One of the towers with the front setting on it.


One of the bases...sealed w/ glue/water mix (2 coats).  I don't know if it was necessary given the enamel undercoater I have, but I figured it couldn't hurt.  The piece on the top of the base will lift the speaker off of the base a tad (it will be hidden).


Other tower just hanging out on my makeshift bench


A/V3s crossover...ok, what am I doing wrong before I start drilling holes and zip tying, hot gluing, adding wire etc.  Does the layout look ok?  Be easy on me!  I'm working on this in front of the computer reading Danny's crossover thread.  Can I snip off some of the leads or just twist them up as much as possible?


One last thing... I ordered some acousta stuf from Amazon (fulfilled by parts express).  I ordered a couple of other things as well, so it was free shipping.  Ordering directly from parts express would have doubled the price of the "stuf" due to shipping.  Didn't know it cost that much to ship a pound!  Many times it pays to check Amazon!

Todd

Captainhemo

Re: Rook's A/V-3 build
« Reply #25 on: 13 Oct 2013, 06:17 am »
Hey Todd
Cabinets are looking good.   Sorry I can't offer  any advice on the veneering,  I haven't done any myself yet,  someting I also want to have a go at  in the future.

If I am not mistaken...    I think you  want  to turn that  top  inductor (the one on edge)  90 degrees   Double check this with someone with more experience, but if I remember correctly,  yo  want that one on edge  orientated differently

-jay

bdp24

  • Full Member
  • Posts: 884
Re: Rook's A/V-3 build
« Reply #26 on: 13 Oct 2013, 07:09 am »
Is that the whole cross-over? I'm used to seeing the Super-V's---this has only, what, six components?

greenklein

Re: Rook's A/V-3 build
« Reply #27 on: 13 Oct 2013, 02:26 pm »
Thanks Jay.  Does anyone else know if the inductor in the back needs to change orientation?  I'll do some more experimenting.

Is that the whole cross-over? I'm used to seeing the Super-V's---this has only, what, six components?

That's it!  The 3 at the front are for the tweeter, 3 in the rear are the woofer for the A/V3s.  The towers will have the tweeter and woofer cross-over's on separate boards placed on the B braces.   

TrungT

Re: Rook's A/V-3 build
« Reply #28 on: 13 Oct 2013, 03:34 pm »

Captainhemo

Re: Rook's A/V-3 build
« Reply #29 on: 13 Oct 2013, 05:03 pm »
Todd, if you put the boards on the top and bottom of brace b, you should end up with the inductors positined like the "good" image in TrungT's  post  :thumb:

Sorry about that post last night, I didn't even notice they were on seperate boards

-jay

greenklein

Re: Rook's A/V-3 build
« Reply #30 on: 13 Oct 2013, 10:41 pm »
Jay, you were right.  The cross-over I showed was the one for the 3s.  Both the tweeter and woofer will be on one board.  The towers will be on different.  My original configuration looked like I was in "problematic" although they were a bit further away than that.  I've changed it around a bit.  See below. 

Thanks TrungT for posting that diagram.

Here is attempt #2.  Should I snip the extra wire, or just wrap them up together as much as possible?


AV3 Woofer


AV3 Tweeter


I know these are very basic questions, but I do appreciate all of the help.  I just want to make sure I'm headed in the right direction!

Todd


TrungT

Re: Rook's A/V-3 build
« Reply #31 on: 13 Oct 2013, 10:59 pm »
Todd
You are welcome.  ;)
Looking good so far.  :thumb:

Captainhemo

Re: Rook's A/V-3 build
« Reply #32 on: 13 Oct 2013, 11:45 pm »
Hmmm,   I sstill think  on that   AV3S  c/o, you  want the inductors to line up so  that if the one on edge were to rool ,  it would actually roll into the one on irs side, not past it.  Right now if it were to roll ,  it wouldn't.  They do appear to be quite a ways apart so maybe  it's ok.

On the  2 seperate ones,  they are going to be back t back right , one on top of brace b, one on the bottom ?  Wouldn't you still want one on edge  and  when  the oards ar  screwed down, they 'd align  ?

I think as long as you  put a couple twists onthe leads  you  can trim  the  excess  but of course wait until  everything is finalized  !!

I know you are probably anxious  to get  these done but  the  big show will be over soon, might be a good idea  to wait and get Danny's  thougts...

-jay

mlundy57

  • Industry Participant
  • Posts: 3579
Re: Rook's A/V-3 build
« Reply #33 on: 14 Oct 2013, 12:07 am »
I don't know if it makes a difference but on Danny's example he had the largest inductor laying flat and the smaller one up on its edge.

Mike

Captainhemo

Re: Rook's A/V-3 build
« Reply #34 on: 14 Oct 2013, 05:47 am »
I don't know if it makes a difference but on Danny's example he had the largest inductor laying flat and the smaller one up on its edge.

Mike

Also noticed that  bu figured it  probably had more to do with keeping the cross over profile as low as possilbe.... :scratch:

-jay

greenklein

Re: Rook's A/V-3 build
« Reply #35 on: 24 Oct 2013, 05:45 pm »
Well, I have the speakers veneered (will post pics later) and no rezzed and have been working on the crossovers.  I swapped the layout (for the 3s) a bit so that the inductor on edge, if it rolled, would roll into the other.  Other than that it is the same as the pic above.  I hooked everything up and gave it a quick test and heard sound and there wasn't an explosion so I am a tad relieved!  A quick question... the schematic has two lines (for both pos and neg) going into the Electra tube.  Do I shove them both in before crimping and soldering or do I connect one to the other prior to the tube connector and then just have one going into the tube?  Hope that makes sense.

Thanks!

Todd

Danny Richie

Re: Rook's A/V-3 build
« Reply #36 on: 24 Oct 2013, 06:33 pm »
Quote
A quick question... the schematic has two lines (for both pos and neg) going into the Electra tube.  Do I shove them both in before crimping and soldering or do I connect one to the other prior to the tube connector and then just have one going into the tube?  Hope that makes sense.

I usually just run a single pair of wires from the tube connectors to the crossover.

For the positive I will strip a little bit of the insulation off of the positive wire and twist it onto the resistor in the tweeter circuit then onto the inductor in the woofer circuit.

On the negative I will run a continuous wire from the tweeter negative all the way to the tube connector without putting a break in the wire. Just catch one leg of an inductor in the tweeter circuit and the other end of a resistor in the woofer circuit. The negative from the woofer will also tie into that some spot.

See example here: http://www.audiocircle.com/index.php?topic=83325.msg805419#msg805419

Don't miss this one either: http://www.audiocircle.com/index.php?topic=94014.0

greenklein

Re: Rook's A/V-3 build
« Reply #37 on: 25 Oct 2013, 03:37 am »
Perfect!  Thanks Danny.  Easy fix.