History* I purchased this AGI 511 preamplifier, chassis number 8350124, in 1979 from Straight Gain Electronics, Toronto ON. I was very pleased with the sound quality and it performed extremely well with my Revox B790 Linatrack turntable fitted with a Mission 773 MM phono cartridge.
* However, in 1983 I purchased a new Spectral DMC 10 preamplifier (also from Straight Gain Electronics) and since then my AGI 511 had been in storage.
* Bringing it out of storage found it was completely dead, requiring a major overhaul with several components needing replacing to restore it to full operation.
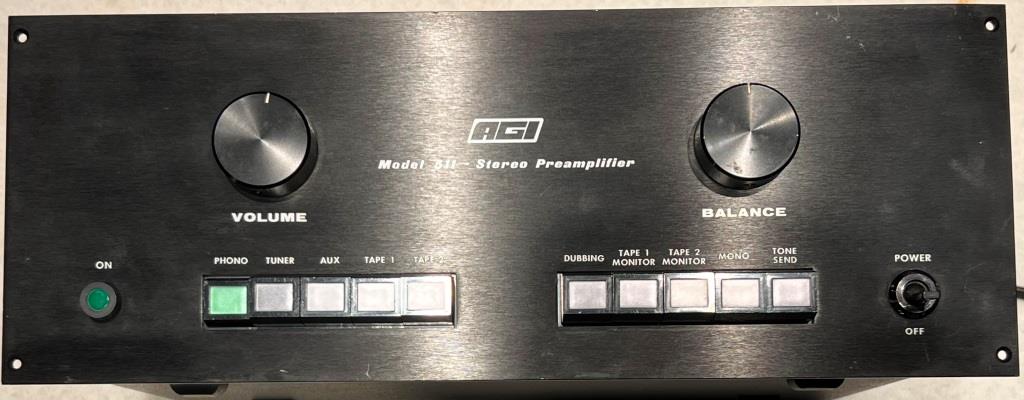 Fig 1. AGI Model 511 Preamplifier front viewFailure Issues
1. The first issue to fix was a completely dead unit, would not power-up.
2. After repairing the power supply, second issue was no audio output from both channels.
3. After repairing and upgrading the preamplifier electronics, third issue was an imbalance between left and right channels.
4. After replacing the volume control and balance control, fourth issue was an unsafe intermittent AC powerline short circuit.
Power Supply* Broken fuse holder replaced with new Fuse Holder Panel Mount, Littelfuse part no. 03480877Z.
* Cartridge fuse replaced with new .062A Slo-Blo 3AG, Littelfuse part no. 0313.062HXP.
* Electrolytic axial capacitors C71 and C75 (500 uF 30V) replaced with axial 1,000 uF 50 V, with 100 nF 50V mylar film capacitors in parallel.
* Electrolytic axial capacitors C74 and C78 (6.8 uF 35 V) replaced with axial 10 uF 50V, with 100 nF 50V mylar film capacitors in parallel.
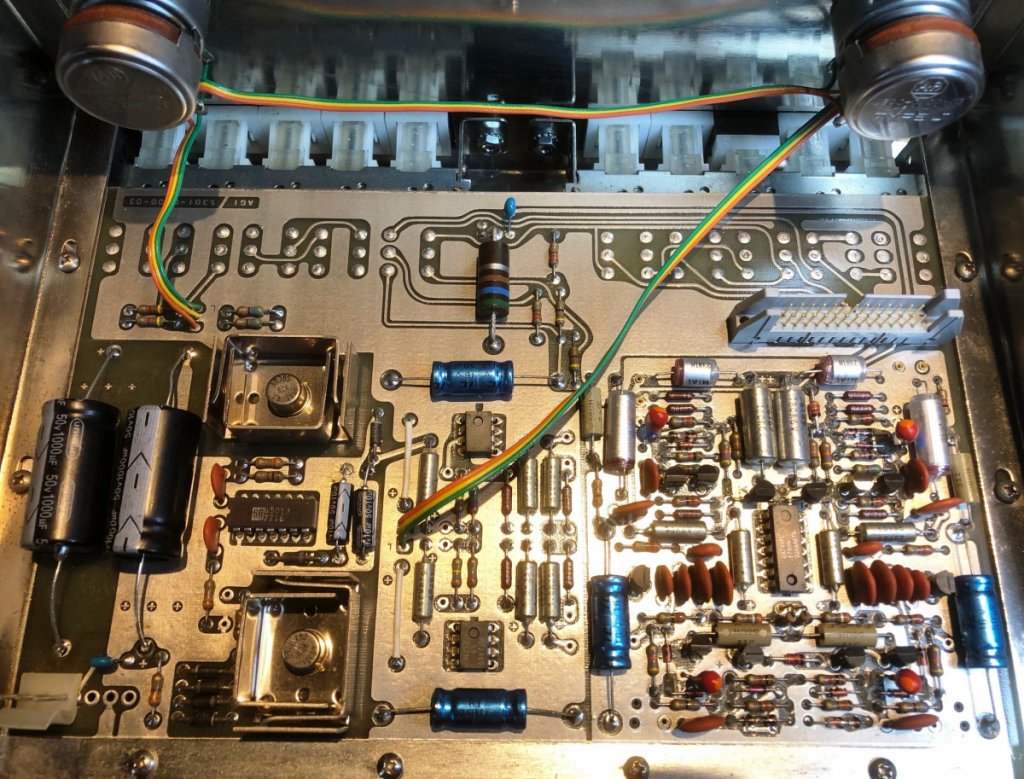 Fig 2. First step in repairs after replacing fuse holder and power supply capacitors - black axials, left sidePhono Stage
* Input coupling capacitors C1 and C2 (56 uF 6 V, electrolytic axial) replaced with Nichicon ES series audio-grade capacitors (100 uF 10 V, non-polarized radial).
* Output coupling capacitors C12 and C32 (50 uF 16 V, non-polarized axial) replaced with Nichicon ES series audio-grade capacitors (47 uF 25 V, non-polarized radial).
* Gain feedback capacitors C16 and C36 (180 uF 6 V, electrolytic axial) replaced with Nichicon FG series audio-grade capacitors (220 uF 10 V, electrolytic radial).
High Level Stage* Op-Amps U2 and U3 (National Semiconductor LF357N) both dead, replaced with lower noise & distortion Analog Devices AD797ANZ.
* Output coupling capacitors C56 and C66 (50 uF 16 V, non-polarized axial) replaced with Nichicon ES series audio-grade capacitors (47 uf 25 V, non-polarized radial).
* Gain feedback capacitors C55 and C65 (6.8 uF 35 V, electrolytic axial) replaced with Nichicon FG series audio-grade capacitors (10 uF 50V, electrolytic radial).
* Dual volume potentiometer (Allen-Bradley 50 k-ohms) had become unbalanced and worn with age, replaced with Goldpoint stepped dual attenuator (V24-2-50K).
* Likewise balance potentiometer (Allen-Bradley 100 k ohms) had become unbalanced and worn with age, replaced with Audio Note 100 k-ohms balance potentiometer.
Special instructions for fitting the new Volume and Balance Potentiometers* Compared to the original Allen-Bradley potentiometers, the new Volume and Balance Potentiometers have a larger diameter threaded mounting shaft, requiring enlarging of the two front chassis holes. For this I used a tapered reamer, being careful to avoid any metal filings left behind.
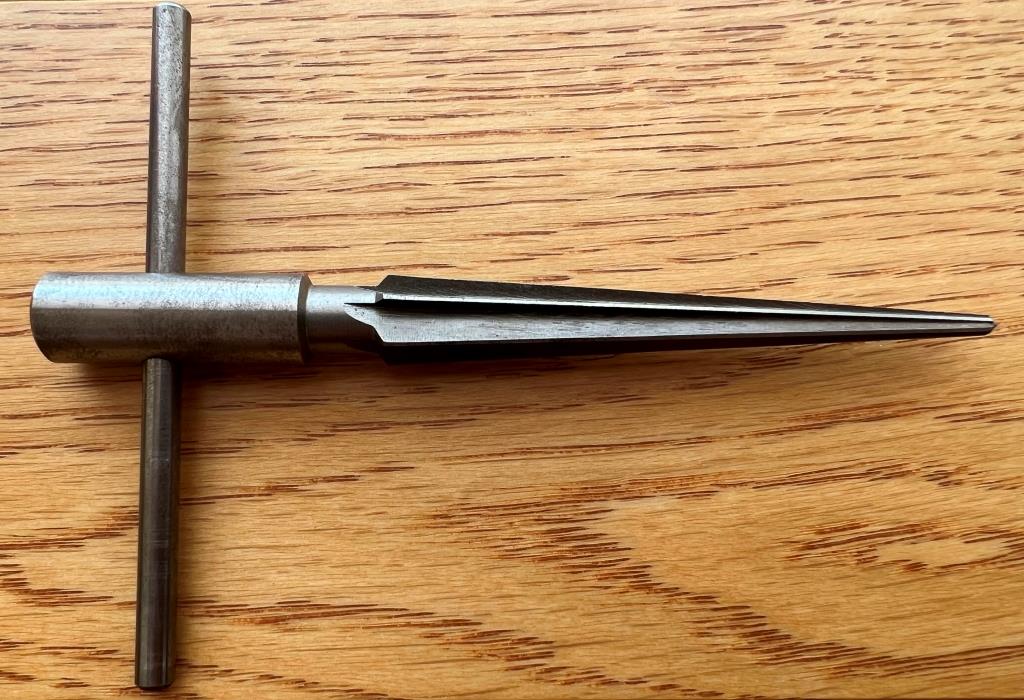 Fig 3. Tapered Reamer (model Hozan K-441, suitable for 3~12 mm diameters)
* While the Goldpoint stepped attenuator was supplied with installation and wiring instructions, the Audio Note balance potentiometer had only a hand-drawn wiring diagram which was not sufficient. Referencing the AGI 511 schematic for the high-level stage I prepared a simple sketch showing how the Audio Note balance potentiometer had to be connected to work with my AGI pre-amp.
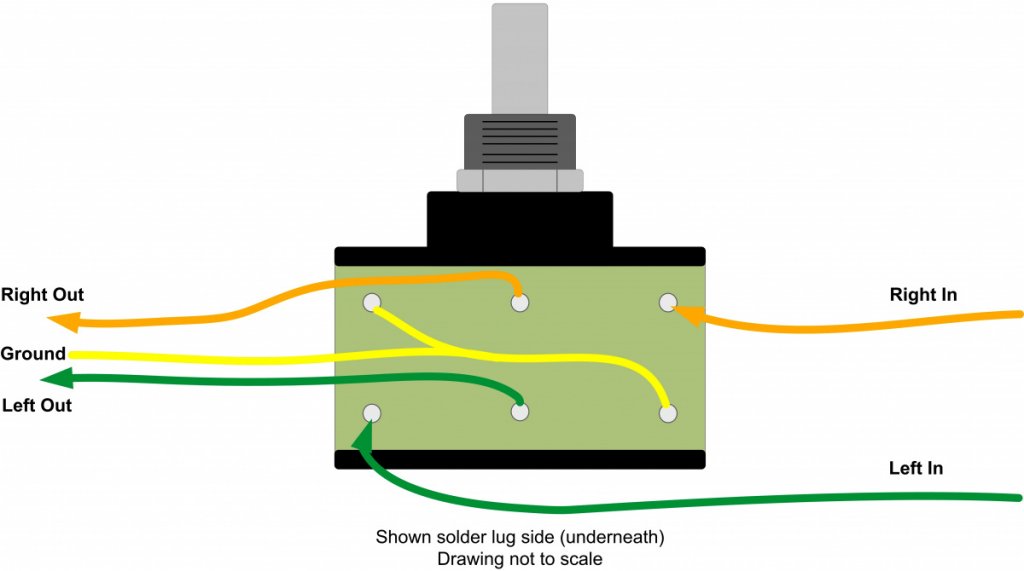 Fig 4. Wiring Diagram for Audio Note 100 K Balance Potentiometer with AGI 511 PreamplifierInternal view of replaced components
 Shown with signal harness disconnected for clarity (Fig 5.).
* Audio Note balance potentiometer - top left.
* Goldpoint stepped attenuator - top right.
* Power supply capacitors, black axials - bottom left.
* Two op-amps - bottom center.
* Audio grade polarized electrolytic radials - gold colored jackets with black polarity stripe.
* Audio grade non-polarized electrolytic radials - green colored jackets.
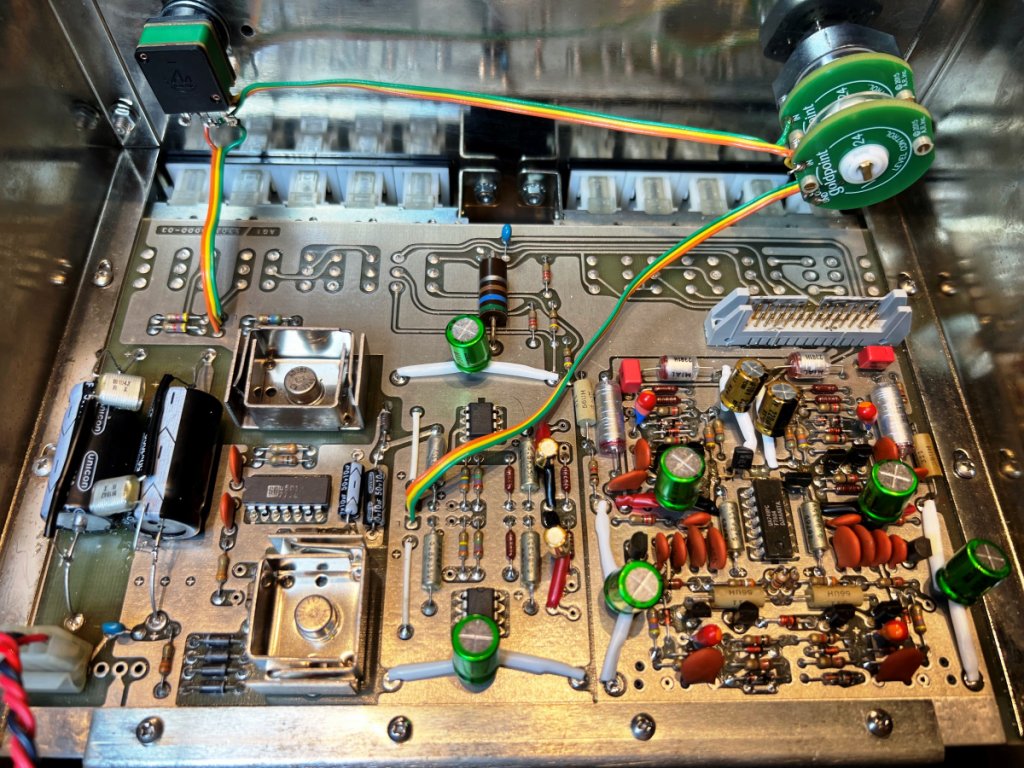 Fig 5. Internal view of completed AGI 511Others
* Disconnected the unused 4 switched AC outlets to eliminate the intermittent powerline short to chassis.
* All 20 female RCA connectors replaced with RCA gold plated connectors (Lumberg 1552 02 V Black).
* Grounding loop wire added to the RCA connector board.
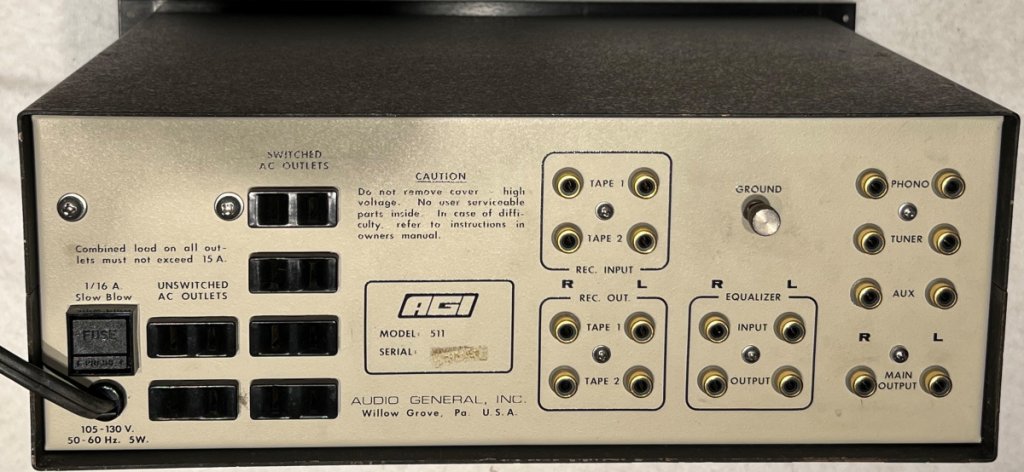 Fig 6. AGI Model 511 Preamplifier rear view with RCA gold plated connectors installed
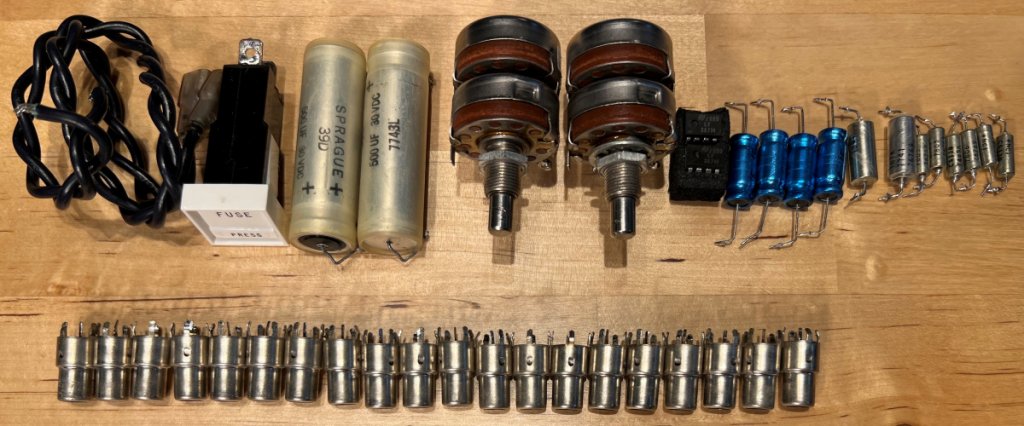 Fig 7. Older parts removed
* Top row: Switched AC outlets wire, Fuse Holder, Power Supply Capacitors, Balance and Volume Control, Op-Amps, Axial capacitors non-polarized (blue) and polarized (silver).
* Bottom row: Female RCA Connectors.
Final notes:* The reason for this writing is to share my experience restoring an AGI 511 preamplifier. It’s not an endorsement of any component supplier and you may not need to go to the extent of repairs documented here, just to share what worked for me.
* At time of this writing all repairs have been operating without issue, now enjoying listening to my restored AGI 511 preamplifier with my rebuilt Revox B790 Linatrack turntable fitted with new Nagaoka MP-200 MI cartridge - it sounds better than ever!


