Tigerwood X-LS Encores

0 Members and 1 Guest are viewing this topic. Read 5860 times.

mlundy57

  • Industry Participant
  • Posts: 3577
Re: Tigerwood X-LS Encores
« Reply #20 on: 31 Dec 2021, 05:53 pm »
5/8" radius is about as big as you can go and not interfere with woofer frame. Although with additional side thickness you've added, perhaps that could increase. Trust me, if you cut the tweeter rabbet the same dimensions as spec., it won't fit right, diameter or depth. On the CNC, I typically allow about .030 clearance on diameter. With a hand router, a shy 16th will be plenty good and not look sloppy. I have a mule tweeter I can lend you for fitting, if you pay shipping back and forth. I might even have a reject baffle you could have for shipping cost.

If I'm not mistaken, Mike did use two different roundovers . Perhaps 1/2" and 1/4". Confirm with him though.

Since I added an additional 3/8" to the width, Danny suggested increasing the vertical edge radius accordingly. I used a 3/4" radius on all 4 edges of the front and rear baffles which were 3/4" thick maple. This ended up with the front baffle 3/16" narrower than it would have been with a 3/8" radius on the stock width of the baffle. I then put a 3/16" radius on the other 4 horizontal edges.

I used 3/16" because that's how thick the maple pieces on the top, bottom, and sides ended up being after sanding. What I was after was having the round over blend perfectly with the seams on the top and bottom of the side panels so no raw end grain was left showing. If you want the same effect, choose the size of the radius based on the thickness of your top and bottom pieces.

mlundy57

  • Industry Participant
  • Posts: 3577
Re: Tigerwood X-LS Encores
« Reply #21 on: 31 Dec 2021, 06:18 pm »
The wife seemed pretty bummed that I was halting the build so I decided to go with Peters suggestions and allow for additional clearances. 

Published specs on Danny's website show these dimensions for the tweeter:
     Face plate size 3.925"
     Face plate depth .2

Depth:
     Since the published depth on the tweeter faceplate is .200" one would guess that includes the gasket since it is attached.  I can see why the drawing at .180" might cause the tweeter to set slightly proud.  I would assume deeper is better since you can build that up if necessary.   I would be interested to hear what depth others are using.

Diameter:
     Peter suggested .030" added diameter clearance so that makes the overall dimension 3.955"-3.96" depending on spec diameter or drawing diameter.  Unfortunately the Jasper jig increments in 1/16".  So I currently have holes for 3 15/16" (3.9375) and 4".  I could scribe a line between these two holes and punch one between them giving me approximately 3.969" or sneak it towards the smaller hole slightly.  That would put me in the ballpark Peter suggested.  I will do that and see what I get on a scrap piece.  Thanks for that suggestion Peter.  I know your OCD would not allow for a sloppy fit :green:.

OK back to work on the faceplates.  I'm starting to feel the need for a CNC machine!

The tweeter opening is very easy to cut with a plunge router and a Jasper jig. 3.925" is 3-14.8/16". I use the 3-15/16" position on the Jasper jig for the outer diameter. However, I don't measure the depth. I use the faceplate of the driver. Like Peter, I have a spare driver that I dropped on the floor and broke a few years ago that I use for set up.

Without a driver to use, a set of feeler gauges would work. Combine feeler gauges until you get 0.210". Raise the depth stop rod on the router most of the way up and lock it down. Set the router on a flat surface and push it down until the bit touches the surface then lock it in place. Put the 0.210" stack of feeler gauges on the depth stop and lower the stop rod until it is tight on the feeler gauges. Lock the stop rod in position. unlock and raise the router. Do a test cut to depth then verify accuracy with the feeler gauge stack. 

When ready to cut the tweeter opening, cut the outside diameter (3-15/16") to depth first. Then reduce the diameter 1/4" (if using a 1/4" bit) and make another pass to depth. Continue reducing the diameter of the circle and cutting to depth until you reach the diameter of the through hole. Readjust the depth stop to the thickness of your baffle and cut the through hole. Tweeter opening cut.


kwhitman

Re: Tigerwood X-LS Encores
« Reply #22 on: 1 Jan 2022, 01:23 am »
Thanks for the reply mlundy57.  I did exactly as you described with one exception.  I drilled a couple holes between the 3 15/16" and 4" hole on the Jasper Jig to give some additional clearance as Peter suggested in an earlier post.  You can see the holes in the jig here.  I ended up with an outer diameter of 3.95" so roughly .020" of clearance.  That equates to .010" all around the driver. 


I then did exactly what you suggested as far as cut the outer diameter first on the tweeter with a depth of .200" (you suggested .210").  I then moved in 1/4" at a time until I did my plunge to cut out the center at 3 1/8".  I repeated for both baffles until the tweeter holes were complete.  I did double stick tape the front baffle to a piece of plywood so the cutout in the middle didn't move once I finished my final cut.


After the tweeter holes were completed I moved down and cut the hole for the larger driver at 5.75" per the spec.  I did remember to round over the back of this hole.


I then went to the router table and cut out for the terminals on the tweeter cutout. 


kwhitman

Re: Tigerwood X-LS Encores
« Reply #23 on: 1 Jan 2022, 01:35 am »
Thank you mlundy57 for the reply on the radius used on your pair.  That makes sense given the thickness of your hardwood skins.  I will do some test cuts to see how everything looks before making any cuts on the boxes. 

I did seal the inside of the boxes today with a coat of de-waxed shellac. It is easy to apply and dries really fast.  I live in South Texas so the humidity is really high most of the time.  It was 82 degrees today with 65% humidity.  I figured it couldn't hurt to give them a quick coat of sealer. 

I also cut some hard maple crossover boards and gave them a coat of shellac as well. That was about it for today.  As always I appreciate the responses from everyone. 

Neo

Re: Tigerwood X-LS Encores
« Reply #24 on: 1 Jan 2022, 06:07 pm »
I think those speakers look great. Love that wood. thanks for posting

kwhitman

Re: Tigerwood X-LS Encores
« Reply #25 on: 2 Jan 2022, 04:46 am »
Thanks Neo.  My wife selected this wood because she too likes the character of the dark streaks running thru the wood.  It is a very dense and heavy wood so these speakers are going to be extremely heavy for their physical size.  Add No Rez and these cabinets should be dead (thats the plan anyway).

I started installing No Rez this morning.  I had some left over from a previous build.  Unfortunately I did not have enough so I will have to finish once Danny ships another sheet that was ordered with the kit.  Things are moving along OK I think.  I am waiting to glue on the front baffle until I have all the No Rez installed to make it easier to measure, cut, and stick.  I'll post a few pics on my progress.


Not much done but this is where I am on both cabinets.  I will need my additional sheet to finish the install.  Once the No Rez is in I can glue up the front baffles, flush trim, and sand.  At that point I should be ready to start rounding over all the edges and do a finish sand before applying the oil finish.

mflaming

Re: Tigerwood X-LS Encores
« Reply #26 on: 2 Jan 2022, 03:47 pm »
I just measured a completed project that I’ve confirmed a good fit. I’m getting 3.940 diameter and 0.200 depth on average.

I would slightly undercut the radius and slightly overcut depth. You can easily sand to fit the diameter and add a gasket for depth if needed.


kwhitman

Re: Tigerwood X-LS Encores
« Reply #27 on: 2 Jan 2022, 07:27 pm »
Thanks for that info.  Given those numbers I should be good with what I wound up with.  My tweeter cutout measures .200" deep by 3.95" diameter.  That is only .010" over your diameter. I might have a slight gap all around but it should be minimal.  The wood is dark so hopefully it will not be noticeable.

mlundy57

  • Industry Participant
  • Posts: 3577
Re: Tigerwood X-LS Encores
« Reply #28 on: 2 Jan 2022, 10:39 pm »
Thanks for that info.  Given those numbers I should be good with what I wound up with.  My tweeter cutout measures .200" deep by 3.95" diameter.  That is only .010" over your diameter. I might have a slight gap all around but it should be minimal.  The wood is dark so hopefully it will not be noticeable.

If you don't like the look after dry fitting a tweeter, you can dye the inside edge of the tweeter cutout black so it blends with the tweeter.

Hobbsmeerkat

  • Industry Participant
  • Posts: 2542
Re: Tigerwood X-LS Encores
« Reply #29 on: 3 Jan 2022, 01:51 am »
Man these are looking Gorgeous! :thumb:

kwhitman

Re: Tigerwood X-LS Encores
« Reply #30 on: 4 Jan 2022, 07:01 pm »
Thanks.  I need to give you guys a call and get No-Rez and crossover parts sent (and I need to do some parts upgrading as well) so I can finish lining the cabinet and building the crossovers so I can start the finishing process while we all wait on tweeters.

I had this crazy idea to start with the basic kit and listen for a while then upgrade parts, burn them in, and listen again.  I wanted to hear the difference myself.  I have not had nice speakers in the past much less high quality crossover parts.  It seemed logical at the time but I decided to just upgrade right away and enjoy.  I have a flat pack sitting in my shop I can build out and populate with the basic kit.  I think this would be easier to do comparison listening since I can switch back and forth.  Who couldn't use another pair of Encores anyway :green:

I will need to upgrade electronics as well.  I am currently running an old AV Receiver from Yamaha.  It was expensive at the time but that was December 2002 :o

kwhitman

Re: Tigerwood X-LS Encores
« Reply #31 on: 7 Jan 2022, 07:16 pm »
I had a little more No-Rez from a previous build so I was able to finish one of the two cabinets.  Once I had that complete I placed the crossover board in the bottom of the cabinet and pre-drilled the cabinet for two screws to hold the crossover in place.  Then it was time to glue on the front baffle. 


kwhitman

Re: Tigerwood X-LS Encores
« Reply #32 on: 7 Jan 2022, 07:19 pm »
I pulled the clamps this morning and proceeded to flush trim the front baffle.  You can see the cabinet is finally starting to take shape.


Hobbsmeerkat

  • Industry Participant
  • Posts: 2542
Re: Tigerwood X-LS Encores
« Reply #33 on: 7 Jan 2022, 07:21 pm »
It's really coming together!  :thumb:

kwhitman

Re: Tigerwood X-LS Encores
« Reply #34 on: 7 Jan 2022, 07:24 pm »
After a little sanding it was finally time to head to the router table once again to round over the edges.  This was a little nerve racking but everything turned out fine.  Now to spend some time sanding.  Here is what she looks like with all the edges rounded over.  Still needs a lot of sanding to smooth and blend everything a little better but you can start to see what it will look like.


mlundy57

  • Industry Participant
  • Posts: 3577
Re: Tigerwood X-LS Encores
« Reply #35 on: 7 Jan 2022, 07:30 pm »
Very nice  :thumb:

kwhitman

Re: Tigerwood X-LS Encores
« Reply #36 on: 7 Jan 2022, 07:32 pm »
Thanks Hobbs :D  I appreciate you helping me out yesterday.  I am getting very excited about this pair of Encores.  While my skill is not up to a lot of guys on this board I am very pleased with the progress so far.  You wouldn't believe how heavy and absolutely dead these cabinets are.  These are being made for my wife so I am doing everything I can to make her appreciate the beauty of the wood she selected. 

kwhitman

Re: Tigerwood X-LS Encores
« Reply #37 on: 7 Jan 2022, 07:36 pm »
Thanks Mike!  You were the inspiration behind this pair.  You paved the way with hardwood over MDF and I fell in love.  I just followed in your footsteps.  I respect and admire your woodworking and speaker building skills. 

mlundy57

  • Industry Participant
  • Posts: 3577
Re: Tigerwood X-LS Encores
« Reply #38 on: 7 Jan 2022, 08:43 pm »
How much shine do you want for the finish?

A dead easy bulletproof, and my current favorite finish, is Rubio Monocoat 2C Pure. One coat will give a satin sheen. Two coats with a coat of Rubio maintenance oil bumps the shine up close to semi-gloss. To bump the sheen up some more you can use a ceramic coating like the one from Black Forest Ceramics.

Check out Blacktail Studios for some videos on Rubio and Blacktail ceramic coating https://www.youtube.com/watch?v=4n1bve8qDtM

Here's some speakers in leopard walnut I did with the Rubio Monocoat Pure but didn't use the ceramic coating


If you want a piano gloss finish you would need a different approach. A high gloss is not achievable with the Rubio Monocoat

Norman Tracy

Re: Tigerwood X-LS Encores
« Reply #39 on: 7 Jan 2022, 10:06 pm »
Outstanding progress kwhitman.

I'll second Michael's endorsement of Rubio Monocoat products for oil finishes. From an aesthetic point of view when we've invested in good woods like walnut or the tigerwood of this project an oil finish protects and enhances the real wood look. But then I see a well worked and polished high-gloss and its L U S T in my heart. Low key or bling that is a personal preference. On the technical or craftsman side for DIY the engineered oil finishes like Monocoat have the large advantage that no spray booth, dust control, or perfected polishing materials and skills are required. In contrast high-gloss has what I refer to as the "tyranny of the polish". That is the more its polished, the more imperfections become visible. Too often I have fallen into the infinite loop chasing a high gloss. Apply 'last' finish coat. Wet sand and polish 'last' finish coat. Admire work and then to my dismay when the light hits it just at the right angle there is that dust in the finish or missed sanding marks buried between coats. So I would sand off the top coat(s) until imperfection is gone and try again. I don't do high gloss at home anymore, paying a professional $500-$1,000 is less frustration with a better result. In the past a couple of times I did have success using Minwax wipe on poly when I would spend days repeating 1. apply layer, 2. cure then sand with 400, 3. apply another layer, 4. cure then sand with 400, and 5. repeat steps 1-4 for days until polish level desired is obtained. Minus a dust controlled spray booth along with training and experience in modern 1k or 2k coating systems all the DIYer can do for high gloss is bring sweat equity and a willingness to take your time over many days.

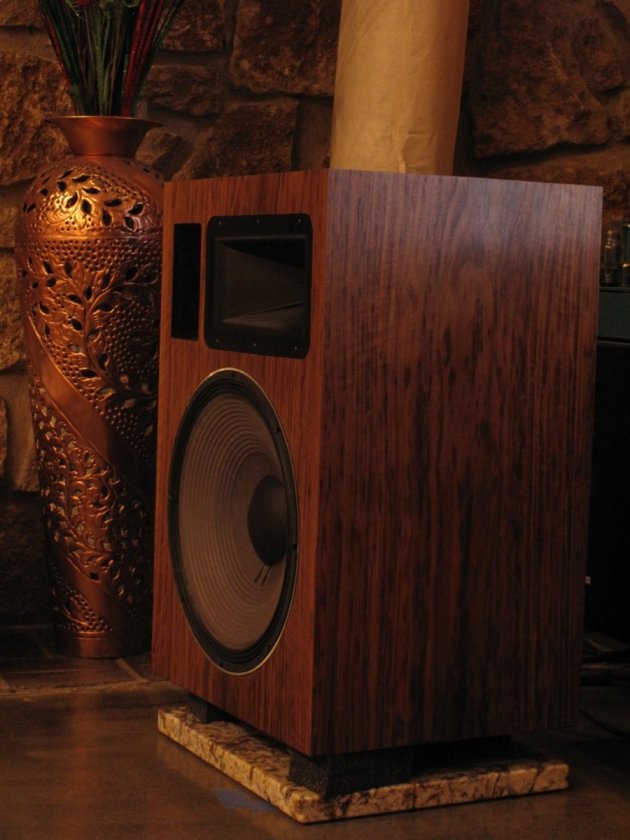
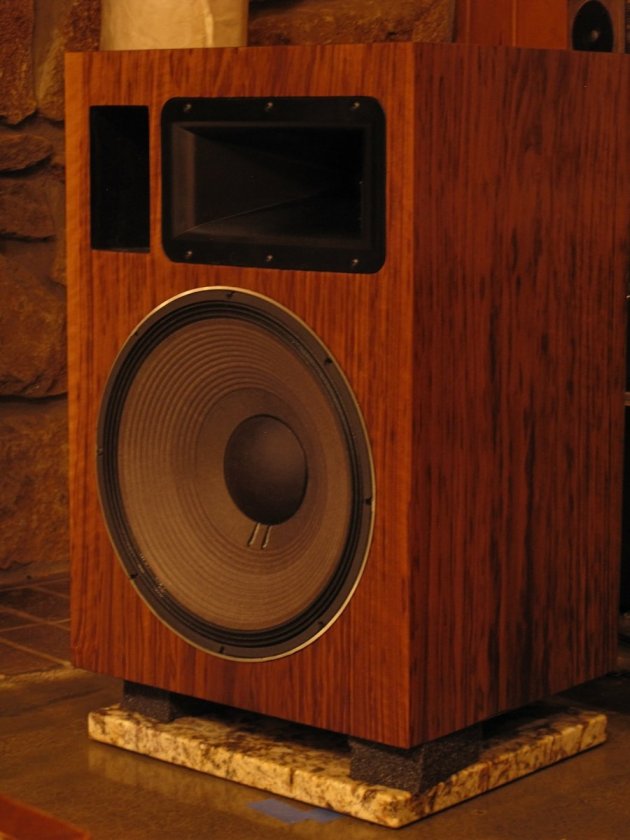
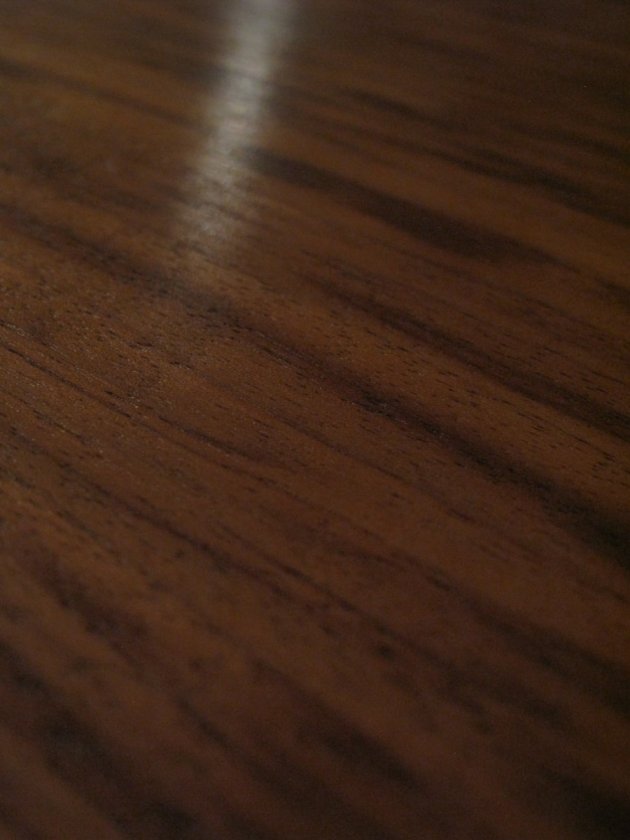
Here are a couple of pics of the leopard walnut 4Pi speakers (https://www.pispeakers.com/Measurements/fourPi.html) Michael used Rubio Monocoat on when they visited my place just prior to going to their lucky owner.