Amateur build of the X-CS and the X-LS

0 Members and 1 Guest are viewing this topic. Read 6810 times.

jonsk2514

Re: Amateur build of the X-CS and the X-LS
« Reply #40 on: 2 Aug 2021, 03:08 pm »
Finished the X-LS speakers...

Once the exterior finish was done I had a few things left to do.

Because of the assembly sequence I used was to put the back on last, the braces for the back needed to be put on after the back was on.  This meant reaching in through the bass driver opening with the diagonal braces with glue on them.  To facilitate this, I used the Titebond Quick and Thick glue.  The glue sets fast and, being thick, the piece being glued may be assembled less than perfectly.


It is tight, but my skinny hands fit...  :green:

Next I found that one of the caps was “loose” on the board.  So I used some Loctite mounting putty to secure it.  I probably should have checked this more closely when I assemble the crossovers.  But this will keep it from buzzing or rattling.  I probably should have put a 3rd zip tie around all of this.  Something to consider in the future.


The ports were next.  I used PL adhesive to mount those. 


The port openings were a little oversized, so the thickness of the adhesive worked in my favor.

Soldering of the drivers went pretty well.  The 2 issues I had were... I could have cut the wires to the binding
 a little shorter and made the wires to the drivers a little longer.  Maybe an inch less on the one to give a half inch to each of the others.

The other issue was soldering iron heat.  My 25w one was not hot enough and the 45w one was too hot and the solder would oxidize quickly, in particular on the smaller tab, which made it hard to make a good joint.  I will be looking into something different to do this on the X-CS when I get to it.

However, with that done, the drivers mounted easily and this is the finish product...


I did a sound check on them and they sound really good.  Just to note, the binding posts have been upgraded to all non-ferrous parts.  I used these as I am unsure as to what my daughter has to hook up to them.  These will make that simpler for her.

Now, I am off to deliver them...  Daughter is very excited...  :hyper:

hawkeyejw

Re: Amateur build of the X-CS and the X-LS
« Reply #41 on: 2 Aug 2021, 03:57 pm »
They look great Jon! I’m sure your daughter will enjoy them for years to come.

jonsk2514

Re: Amateur build of the X-CS and the X-LS
« Reply #42 on: 2 Aug 2021, 04:49 pm »
Thanks  :thumb:

They have been a long time in the making...
And a little past her birthday.  But she has been good about waiting.

jorfila

  • Jr. Member
  • Posts: 4
Re: Amateur build of the X-CS and the X-LS
« Reply #43 on: 25 Aug 2021, 06:46 pm »
great job, well documented... very useful. hope i can build mine in the future. still working the budget phase. ( lacking the budget)

jonsk2514

Re: Amateur build of the X-CS and the X-LS
« Reply #44 on: 31 Dec 2021, 06:58 pm »
Hi once again.

Happy New Year to all.

Sorry for the long hiatus, but this project needed to be put on the back burner for other things.  But I am back and looking forward to completing the X-CS.

A quick update on the X-LS speakers I gave to my Daughter.  She has reported back that they are unbelievable.  Her and boyfriend watched Dune and played the audio through these.  They were both blown away by how good and transparent the sound was.  So - Success.

Maybe a little bit of the reason work on the X-CS has languished is because the X-MTMs I am using just in stereo mode are so freaking good... Wow... They never cease to amaze me.

But, enough about that.  I am once again actively woking on the X-CS.   Previously I got to the point where I needed to assemble the crossover.  Danny has a great video showing how to do this so I won’t bore people with the details of that.  So the next step is the board for it.


One of the things I did on the X-LS speakers was to mount the crossover board on standoffs to place it above the No-Rez.  This way the bottom of the speaker can be dampened with No-Rez with the crossover out of the way.

The board is 4.5” x 9.5”, 1/4” lauan which I covered in shellac, well, just because I like the way it looks.  Holes are drilled in it for the tie downs for the electronics and for the mounting screws.  I also added some stand offs for the 2 resisters in the crossover.  The stand off for the tweeter out resister is oversized so I can fix the driver wire to it and not have to rely on the thin resister wire for support.

As noted early in this thread I modified the internal outboard braces to be like the braces in the X-MTMs with the idea that they would provide additional rigidity to the cabinet.  My initial concern was whether I would be able to mount the crossover in the remaining space.  No problem and it will fit through the base driver opening.


Here it is with the crossover in place:


Note that I have it place as far back in the space as reasonable in order for the in-put wire to clear the left hand brace.  One of those wires will attach to the resister on the left side of the board and both will need clearance to bend around to the back of the cabinet.

I glued the crossover standoffs to the MDF using Titebond Quick and Thick glue.  It is thick so it doesn’t run when tuning the board over to put it in place and it is less particular about gaps than the other glues.  By attaching the standoffs to the crossover board first, then glueing them to the cabinet, it will be easy to reattach the board once the electronics and wiring are on it.

I did do some “creative” clamping while the Quick and Thick glue setup...  :green:


More to come...  :thumb:

jonsk2514

Re: Amateur build of the X-CS and the X-LS
« Reply #45 on: 3 Jan 2022, 04:51 pm »
I got the speaker driver wires soldered to the crossover.  On of the things I did was to start with a single base driver wire to attach to the crossover.  Then I paralleled in a second wire a few inches up, make the remaining length of the 2 wires about the same.  I did the same with the negative side wires.  But for the negative wire, the “single” wire I started with is the wire from the crossover to the binding post.  Then I parallel in the wires from the base drivers and then the wire from the tweeter.  I did things this way as I found that it was hard to deal with more than 2 or 3 of these heavy wires twisted together.

This may not be the best picture to show the wires and how they are joined together, but it does show the base side of the circuit and how the wires are paralleled.


The other thing I did is to make a strain relief for the thin wire coming out of the resister for the tweeter + side wire.


I used the table saw to cut up the No-Rex.  I have a well used (read - “somewhat dull”) blade I use for this as the No-Rez backing is pretty abrasive and no point in wearing out a good blade.


And here is the No-Rez notched for the crossover board stand offs and the center strip notched for the braces.  There are 3 pieces of No-Rez for this; the seams between the center piece and the other 2 pieces is hidden by the braces.


jonsk2514

Re: Amateur build of the X-CS and the X-LS
« Reply #46 on: 16 Jan 2022, 05:28 pm »
I installed the No-Rez everywhere except on the 2 sides where it would hinder my access to the location for the braces between the sides and top.  Note the layout lines for those braces.


I mounted up the crossover in preparation for glueing the top panel on.  While routing the wires in the cabinet, I found that the + wire for the tweeter was short.  I was hesitant to try to unsolder the wire on the resistor and solder on a longer wire for fear of breaking the resistor’s wire.  While ponder this I took a closer look at the layout on the crossover board and realized that it made little sense to have the capacitor located so the wire coming out of the resistor is pointed to the back of the cabinet, not the front.

An easy fix... cut the zip ties to the capacitor and resistor and relocate them.  I also had to remove the support for the resistor.  Ok, this works better...

Previous arrangement with the short + wire...


New arrangement.  Note I kept the support for the resistor and the tie down for + wire itself


I did have to do some custom fitting of the top.  Even though I had the top in place when I glued the sides and back to the bottom, the top was now fitting a little less than square.

It is hard to see in this picture, but the upper righthand corner of the top sits proud with respect to the end of the side.


My fix was to trim the edge of the rabbit on the top to make it a hair less square so the front will fit.  The “unsquare” parts will now hang off the back and sides which will be trimmed later, so not an issue.

Back to reinstalling the crossover with the new arrangement.  I used a little of the mounting putty to secure the screws from backing out.  This is nonhardening so the screws can be removed easily at a later time if needed.


I just put a little into each screw hole. 


There is a small gap between the top and the braces.  This was intentional so the top would sit flush on the side and back panels.  To attach the top to the braces I selected the PL adhesive.  This does well at filling gaps and should keep it all secure.  The other option would have been to use the TiteBond “Quick and Thick” which will also fill small gaps, but I thought it might run a bit before it set.  Other than that I think either would be acceptable.

PL adhesive on the braces.  In hindsight, I should have used a bit more to ensure full coverage, but this was enough to make it secure after all had set up.


Clamping.  Never enough clamps.  For this type of glueing I use the Titebond Original.  I did put a little glue on the ends of sides and back panels just so the open grain didn’t suck up the glue off the top and cause it to setup too quickly or not be enough for coverage.  Ok, maybe I put a little too much on, had a few runs, but all is good.


Note the binding film around the front panel.  This is to keep glue from sticking to the front which is only in place to ensue the top is located properly.  The front will be glued on later...

Oh, I did remember to put the No-Rez on the top in the proper locations before glueing the top on.  Smart, so I didn’t have to fuddle with doing that after the fact.

jonsk2514

Re: Amateur build of the X-CS and the X-LS
« Reply #47 on: 20 Jan 2022, 10:07 pm »
After I glued the top on and pulled the front off, I realized that I had not tested out the crossover...

 :duh:

I figured that now was now or never to do that, since the front was still off and the crossover could be (with some difficulty, removed.  But it would not be as hard now as it would be with the front glued in place....

So I got out my trusty test rig I used before...


Which now supports a set of very sophisticated Harbor Freight multi color test leads with alligator clips.  They are cheap and work, much like their clamps I use.  What’s not to like about these...  :green:

The sound check went well...


Next was glueing the remaining diagonal braces in place.  Titebond Quick and Thick works well for this.


I let that set up for 24hrs before glueing on the front.  But first, the holes for the drivers were taped off on the backside to facilitate the remaining work of sanding, routing, staining and varnishing.


As I did for glueing the top panel, I spread a thin layer of glue (Titebond Original) over the end grain of the MDF that makes up the top, bottom and the 2 sides, as well as on the rabbited area on the front panel.  Then well-clamped the assembly.


Once the glue is well setup, the cabinet will be ready for finishing.

jonsk2514

Re: Amateur build of the X-CS and the X-LS
« Reply #48 on: 15 Feb 2022, 03:38 pm »
I am pleased with the way the gluing ended up.  The joints are all tight.  The next step is to round the edges.  One of the things that Danny talks about is corner distortion from the front baffle and from sharp edges in a grille.  I have not been putting grilles on the speakers I have built, so rounding edges seems to be the right thing to do.


All sanded and ready to go.  Note the tape covering the back side of the driver openings.  I did this for the binding posts also.

One of the things I found when applying the finish to the X-LS speakers is that the MinWax stain appears to have had a change to its formulation.  I have been using a layered up stain on the cabinets.  This has been 3 or 4 coats of stain on the MDF with a day or 2 of drying between coats.  This worked really well on the X-MTMs I built.  But for the X-LS speakers, this didn’t work as well.  The stain was thinner and didn’t layer up as well.  I also noted that MinWax has added a preconditioner to the staining process.  I didn’t use this for the X-LS cabinets, but decided to use it for the X-CS speaker.

The result was dramatic.  I applied the MinWax preconditioner to the left side of this test piece and no conditioner to the right side.  The difference is noticeable; the left side represents the result I am looking for.


But one thing I noted was that the preconditioner and the stain substantially raised the “grain” of the MDF more than what I saw on the X-MTMs where I used the older formulation of the stain.

I figured that I could work out the raised MDF “grain” on the actual cabinet with a Scotchbright pad.  I did this with moderate success after applying the second coat of stain on the cabinet.  It turned out that the 3rd coat of stain raised the high spots that I had thought would not be an issue.  Then I thought this could all be smoothed with a layer of varnish and sanding...

Well, you likely have guessed where this is going...  That didn’t work so well...  The sanding smoothed it, alright.  It also cut into the stain...  :duh:

Fortunately, this isn’t as bad as it could have been.  The spots where the stain was cut away are small.  A while back, in a response to a post of a similar issue, the person noted that there is an Eastern philosophy of embracing the “defects”.  I think will run with that...  :thumb:  I’ll let you know how that works out.

Peter J

  • Full Member
  • Posts: 1877
  • Hmmmm
Re: Amateur build of the X-CS and the X-LS
« Reply #49 on: 15 Feb 2022, 04:00 pm »
Minwax makes both water-based and oil-based stain. I wonder if that would explain some of what you experienced. Photo of can or recommended clean-up solvent would tell at least some of the story.

Pre-stain is usually just stain base with no pigment added, although marketing would lead one to believe it's got some magic in there too.

jonsk2514

Re: Amateur build of the X-CS and the X-LS
« Reply #50 on: 15 Feb 2022, 06:25 pm »
Ya made me look...  :lol:

Really, that thought crossed my mind about it maybe being water based.  The MDF does respond as if water was being put on it.  But, no, the stain is clearly marked as oil based.  I wonder if they changed the solvent in the stain and it now attacks the binder use in the MDF?  As for the preconditioner, I think you are probably right.  The older stuff didn’t mention a preconditioner.  So I wonder if that is something that was removed and put into a separate can. Don’t know.

I would suspect this change has something to do with pollution regulations.  I know, it’s a pain, but I believe it is necessary if it is.  I will figure it out.  So far, what I have done (more to come on that) seems to be working out.  I also noticed a hint on the new can that may have made a difference for me.  They recommend doing a second coat of stain within 2 hrs if a “richer” look is desired.  That might be something to investigate my next pair of speakers (yup, more to come) vs waiting a day or 2 between coats as I have been doing.

I happened to have an old can of the stain (on the left in the picture) laying around.


Interesting thing I just noticed is the new can doesn’t say how to do a cleanup...  :scratch:

It does now warn to protect against spontaneous combustion of rags and the like that are soaked with the oil.

As for the stain itself, another thing I noticed is that it no longer settles out like the old stain did.  Or at least no where as much as it used to.  Less stain solids?

Just a general comment... I know there are other brands of stains out there.  Thing is, I started all of this with this MinWax stain and I would think that some other brand might be a slightly different shade even though it says it is the same color.   Also, I am very familiar with the way this brand performs (the devil you know).  A different brand would be something new to figure out...  Changing at this point would likely not be ideal.
« Last Edit: 19 Feb 2022, 07:05 pm by jonsk2514 »

jonsk2514

Re: Amateur build of the X-CS and the X-LS
« Reply #51 on: 19 Feb 2022, 07:04 pm »
Above I said “more to come”...

At that time I had started my process for “correcting” the cut-through that the sanding had done.  I held off saying anything until I had some results.

The results are in and I am going to decree success...  :thumb:

What I did was to apply a layer of stain over the sanded varnish.  I allowed this to dry for a day, which left the stain tacky.  I then applied a coat of varnish over that.  This was the result...


If you look closely you can see the sanding scratches and uneven coverage of the varnish.  But, hey, this is a process and at this point I was just happy that the varnish stuck and hardened over the stain that I had put on.

I used 3M foam rubber sanding blocks for smoothing out the finish.  One of things that I have been dealing with all along (including the earlier X-MTM build) is the varnish sagging on vertical surfaces when applied with a brush.    :shake:   But, using a brush makes it easy to get a couple of “thicker” coats on that can than be sanded down smooth over the “rough” MDF.  A “fine” 3M sanding block works well for this.  An issue I have with the “fine” sanding blocks is that they have random grains that are larger than those making up the rest of the block.  As a result it leaves random scratches that I have to deal with, which can be seen in the picture.

To get thinner coats of varnish on, I use a piece of terry cloth.  Yup, I have to deal with the random piece of lint, but that is easier to deal with than the sags.  I minimize the lint by going over the cloth with a big piece of masking tape.  Why not just apply a thin coat with a brush?  Well, I find that varnish starts to setup too fast to brush it out to a thinness that won’t sag.  When it starts to set up, the brush then leaves brush groove streaks, along with sags.  No winning with a brush for me for that one.  Maybe it can be done, but I don’t know how...

After the first thin coat of varnish dries, it gets hit with an X-Fine sanding block.  Not sure why, but no significant scratches from these.  That is followed by some 00 steel wool.  That is followed by another thin coat of varnish followed by 000 steel wool and another thin coat of varnish and then repeat this last step at least once.

At this point, I am done.  That is, as long as I don’t find any missed spots.  If I do, than it is the last step all over again.  When it is “good enough”, this is what I get...


I know, boring and somewhat less than at the “Steinway” level of perfection.  But, the whole idea of this finish is for the speakers to disappear in the room (I’ll blame the wife for that one...  :o   :lol:) and these will be in a dark end of a dark room.  The imperfections just add character, if they can be seen at all   :thumb: 

I am happy now to move on to the final step...  Hooking up and mounting the drivers.

nlitworld

  • Full Member
  • Posts: 2007
  • Strange things are afoot at the Circle K
Re: Amateur build of the X-CS and the X-LS
« Reply #52 on: 19 Feb 2022, 09:04 pm »

The imperfections just add character, if they can be seen at all   :thumb: 

That's half the fun of DIY projects is learning new skills and adding your own flair to the finished product. Even if it does result in a few $ contributions to a swear jar. :thumb:

jonsk2514

Re: Amateur build of the X-CS and the X-LS
« Reply #53 on: 20 Feb 2022, 12:17 pm »
You are right.

What’s the saying?  ... It’s the journey and the destination..   :wink:

 :thumb:

Danny Richie

Re: Amateur build of the X-CS and the X-LS
« Reply #54 on: 27 Feb 2022, 12:13 am »
Looking good.

jonsk2514

Re: Amateur build of the X-CS and the X-LS
« Reply #55 on: 27 Feb 2022, 11:59 am »
Looking good.

Thanks...  :thumb:

I had told my Wife about the issues I have been having with the varnish sagging.  So when I showed her the cabinet, she already knew that there would be something in particular to look for.  After looking at it for a little bit, her comment was:

“So, what am I supposed to be looking for?”   :oops: 

I guess that answers my concerns about how it looks....  :wink:

IMHO the cabinet looks really good and will match well with the X-MTMs. 

Time to get onto soldering the wiring to the drivers and get this bad boy hooked up... 

jonsk2514

Re: Amateur build of the X-CS and the X-LS
« Reply #56 on: 5 Mar 2022, 04:22 pm »
The X-CS is finished!   :dance:

And up and running:


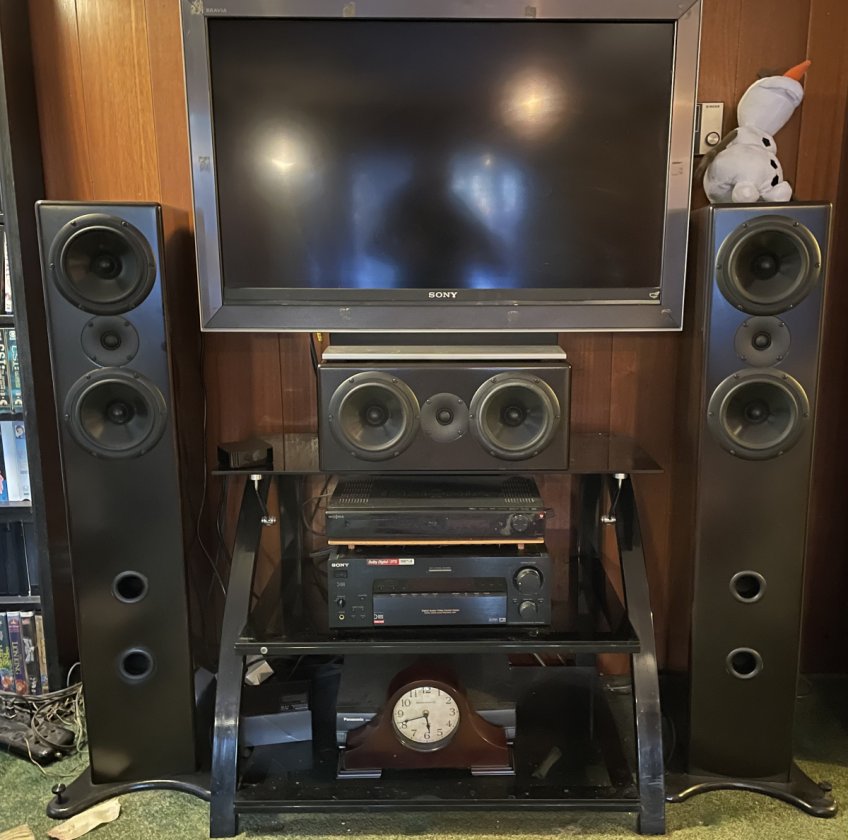
Overall, it is definitely worth the effort...

My overall impressions...  It is tough to compare this center channel to the X-MTMs.  The X-MTMs are so transparent and have such a wide range.  It was even tough to tell which speakers were playing; the X-MTMs in 2 channel or the X-CS in 5 channel produced the identical location for voices.  That surprised me.   The speakers are well matched for that.  Where the difference comes in is the range.  As expected the X-CS drops off in the low end at a noticeable higher level.  Voices are the same, but there is a difference in the level of sounds, other than voices, that come through...  Now, I will admit, this could be a difference in the way the AV receiver divides the sounds between the channels and the fact my 2 rear speakers are pure crap...  :roll:  and I was only playing broadcast TV and not an action movie DVD or the like.  So, this may not be the fairest of comparisons...

If I back pedal to what I said about the center voices, the X-CS is truly up there and worthy of being paired with the X-MTMs...  :thumb:

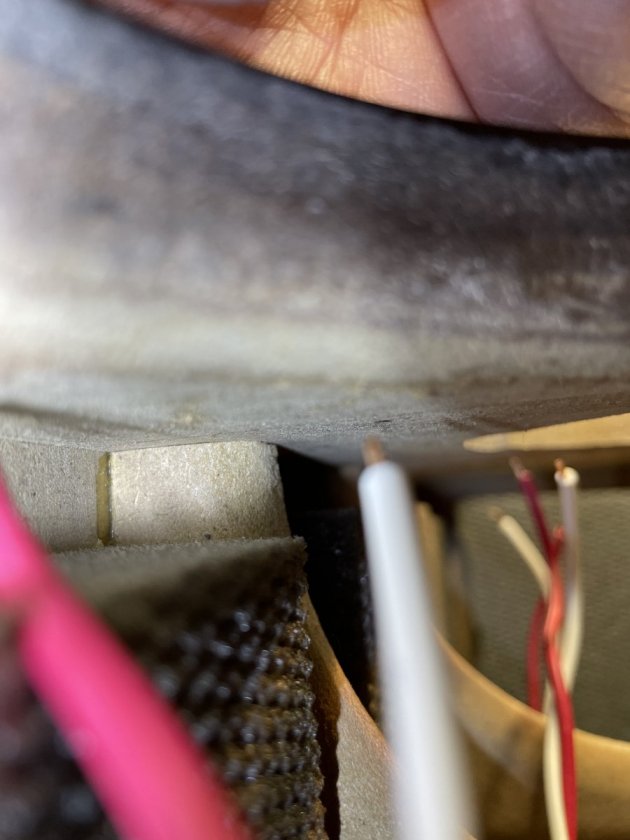
Once I got past the idea of needing to perfecti the finish on the cabinets, I moved onto the soldering of the wires to the drivers and binding posts (yes, I know, tube connectors... Later dude, cables and better AV recover first), and installing the drivers and binding posts into the cabinet.  The soldering went well.  Actually easier than on the X-LS or X-MTM speakers...  Why?  I don’t know.  I know how to solder.  I have done it for years.  Maybe I just took more care this time when I tinned the wires and posts on the drivers.  I also had a higher wattage soldering iron...  that could be it.

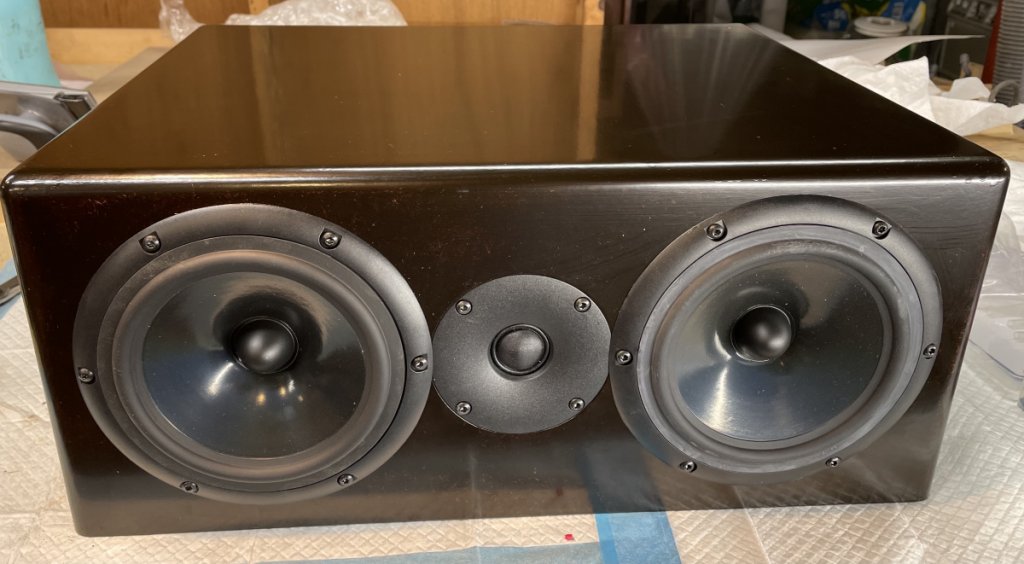
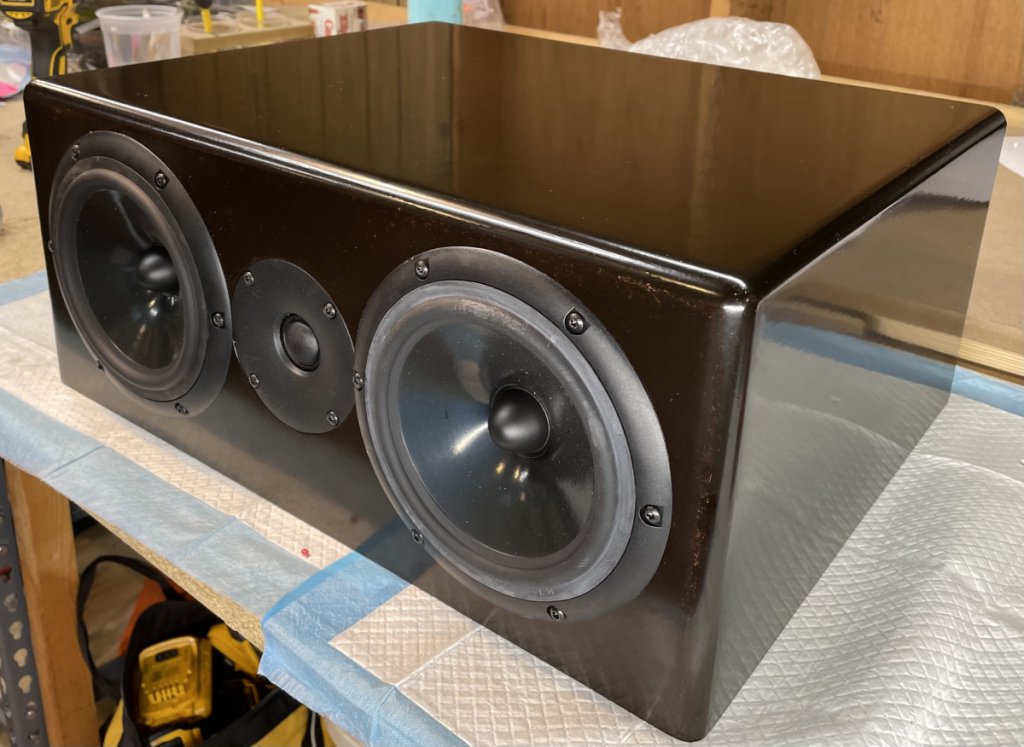
The completed speaker looks great:


The speaker will be on a glass shelf, so I added thick felt feet to the underside:


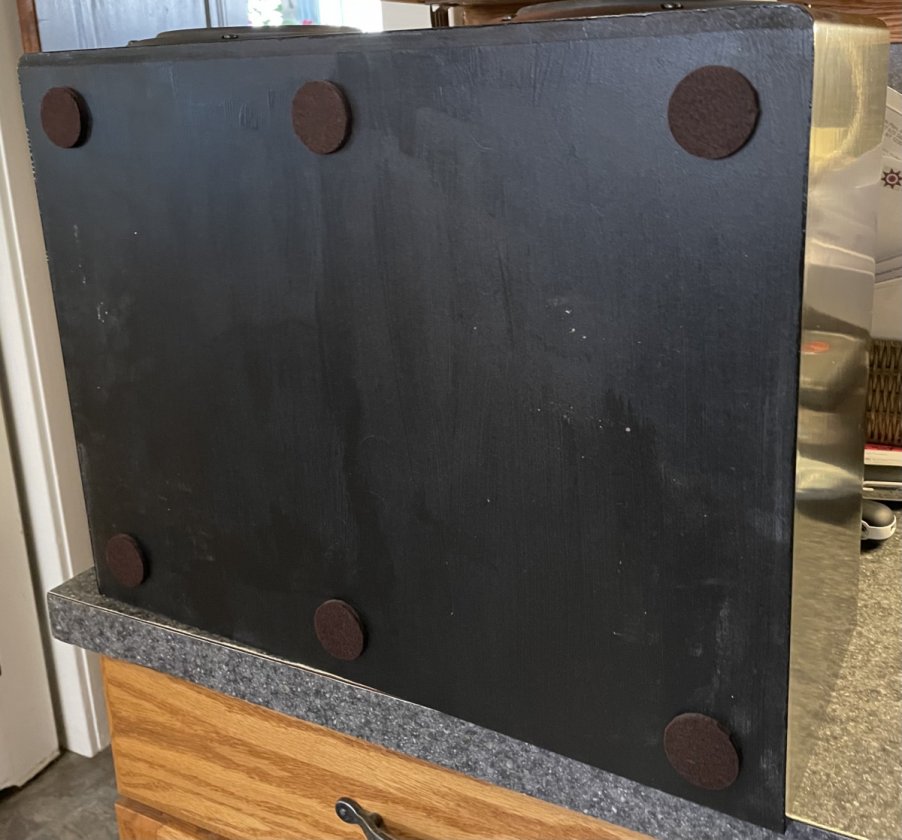
I did the same to the underside of the TV base.  I figure with these there will be little chance of there being buzzing or rattling between these pieces.

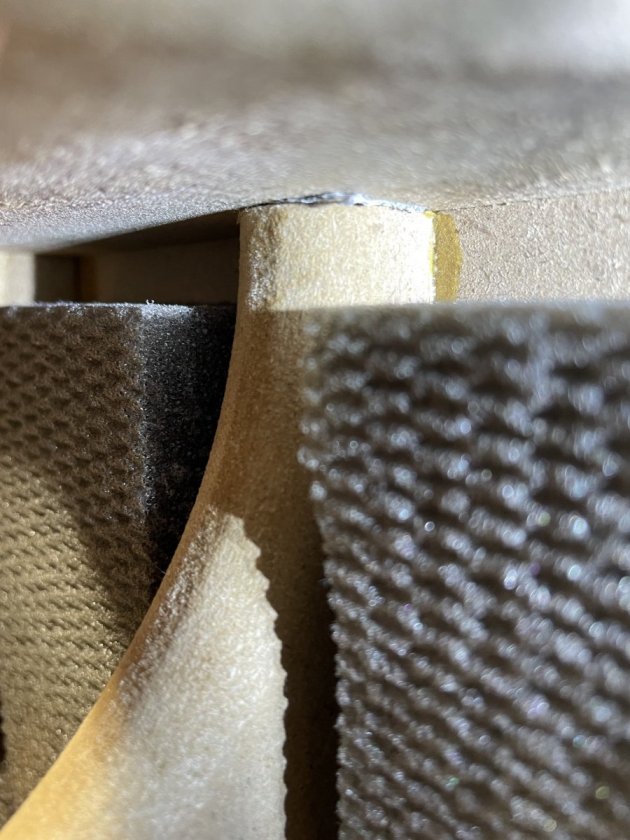
I did find I made 2 small errors when I glued on the front baffle.  The first was not outlining (marking) the locations of the ends of the 2 center braces on the inside of the front baffle.  As a result, the tape I used to seal one of the driver openings got stuck between the end of the brace ends and the front baffle.  Not a big deal as it probably “fixed” the other error I made.  That is, I forgot to put a dab of glue on the ends of those two braces...  Given how close they are to the front baffle I was wondering if they would buzz as a result of missing the glue.  From what I can tell, no buzzing... 

Well, surely there can be no buzzing where the tape is stuck in.  Lucky fix:


At least for the 2 ends of that one braces.

But, I was not so lucky with the other brace.  The tape didn’t get into that area, so, hopefully, the ends are tight up against the front baffle.


After thinking about it for a bit, I figured this will likely not be an issue at all.  The other thing I came up with is that I would have been better off just cutting these two braces 1/8th inch short.  If they were glued, they would provide little if any support to the front, so a space shouldn’t affect the end result.  A space would then make the build slightly easier with not having to deal with my 2 errors and in not having to be precise in their overall length.  Something for the next time.

I hope this was an interesting adventure for everyone following...  I know, I enjoyed it. :thumb:

Now off to do a set of rear speakers, a set of rear speakers... X-Omni?  Yes, I think so.  They should do nicely in the room I have...  Now, just waiting on parts... :popcorn: