Another build of the X-MTM Encore

0 Members and 1 Guest are viewing this topic. Read 1435 times.

Panamarenko

  • Jr. Member
  • Posts: 9
Another build of the X-MTM Encore
« on: 14 Jul 2021, 02:55 pm »
I did two Corona projects to keep me busy during the lockdowns.
The first one was a music streamer based on a Raspberry Pi 4, DAC and stable DC power supply.
https://www.audiophonics.fr/en/dac-and-interfaces-for-raspberry-pi/audiophonics-dac-i-sabre-es9038q2m-raspberry-pi-i2s-spdif-pcm-dsd-usb-c-power-supply-p-12795.html
https://www.amb.org/audio/sigma11/
I played a bit with RuneAudio and Volumio, the latter won for personal preferences.
My audio equipment consists of a Cambridge Works surround sound system and a Pioneer https://www.amb.org/audio/sigma11/. All quite old.
This is fine for watching movies but not for listening to music.

So, the journey started for a set of speakers.
I read a lot of reviews about many speaker systems. But what caught my attention was Mr. Richie's, from GR Research, explanation about value for money when buying of the shelve speakers.
One caveat is that you cannot go to a shop and listen to his speakers. At least not in Belgium. It took some time to decide between the X-LS Encore and X-MTM.

Why the X-MTM? Because with the X-LS's you need to buy stands to put them to listening height. The X-MTM's are at the perfect listening height. And stands don't come for free.

During my 'research', I watched a lot of reviews from the following people:
Steve Guttenberg Audiophiliac - https://www.youtube.com/channel/UC9wBmplRUhaCi-aNrkfgeTg
New Record Day - https://www.youtube.com/user/NewRecordDay
And of course GR-Research - https://www.youtube.com/channel/UCIJHwsTJyrH4YznoJxZmJHQ

The enthusiasm, knowledge they show is phenomenal. Although YouTube cannot provide the sound quality to decide on differences between different equipment, the explanations these people provide set you on the right track.

Before I start explaining the build, let me tell you everything you read about the quality of GR Research does not do justice to the reality, it is amazing.Mr. Richie replies prompt to your questions. The kit contains everything, from OFC copper wire for the internal wiring, to solder, to plans for building the filters. Don't forget to order norezz. And the sound quality, ...

The sound quality is something I cannot describe. The first time I started listening to these speakers was an emotional moment. When I closed my eyes, I was at a live concert. I now understand what the audiophiles mean with sound stage. And the speakers still must be broken in.
Lucky for me, I've done my research, the DAC in the music streamer is able to handle SACD's and high resolution FLAC. Whether the Pioneer is handling these tracks in a decent way is still an open question. Maybe a third Corona project.

If you have the skills, know somebody to help, do not hesitate to put a kit from GR Research together. You will be surprised by the quality and the satisfaction to be able to say that you put it together yourself. Just take the time.
The music I listened to was what Steve Guttenberg recommends:
https://www.youtube.com/watch?v=8omBalTE1Do&t=259s
And Pink Floyd, Al Stewart, Steely Dan, Edith Piaf, ZZ Top, Kraftwerk, and many others.

The build:
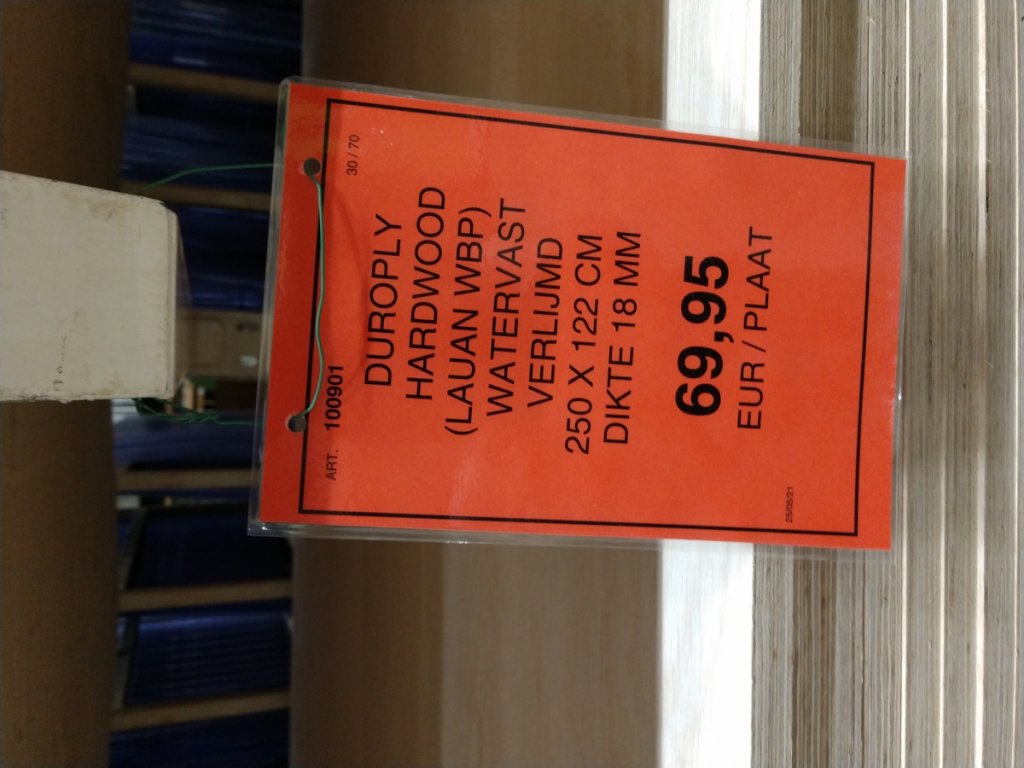
Selection of the material for the cabinets. Since I live in Belgium, getting a flat pack from the US is really expensive. I needed to source that locally. But what material? MDF? Plywood? This review made me decide on plywood:
https://www.youtube.com/watch?v=EEh01PX-q9I&t=2852s
I bought two sheets of Lauan plywood. The density is about 500 Kg per cubic meter. MDF is about 750 Kg.
The shop has a service to cut the plywood sheets in strips 4 mm wider than the required sizes for front, back, sides, braces, …


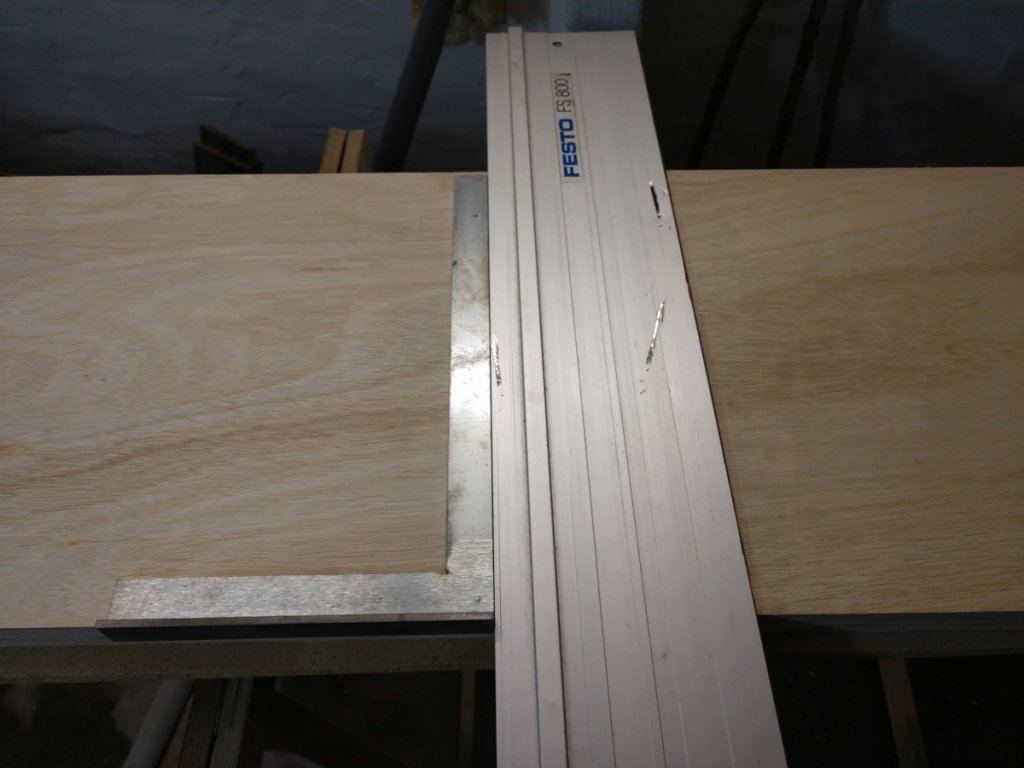
These strips where cut to length in my basement.


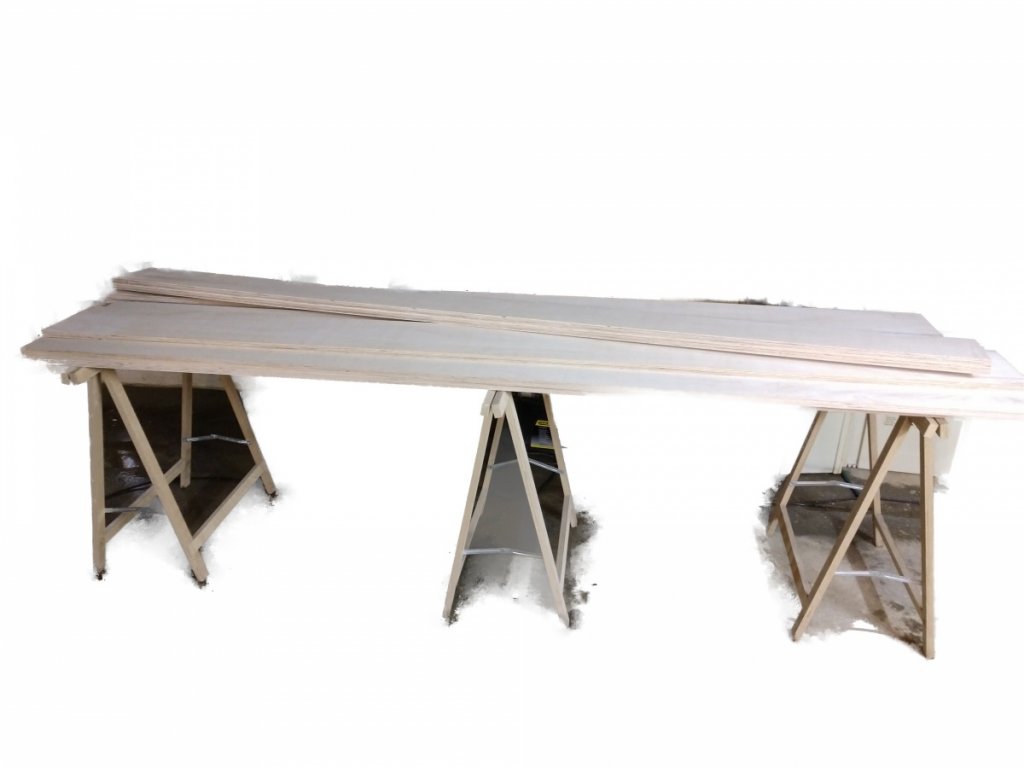
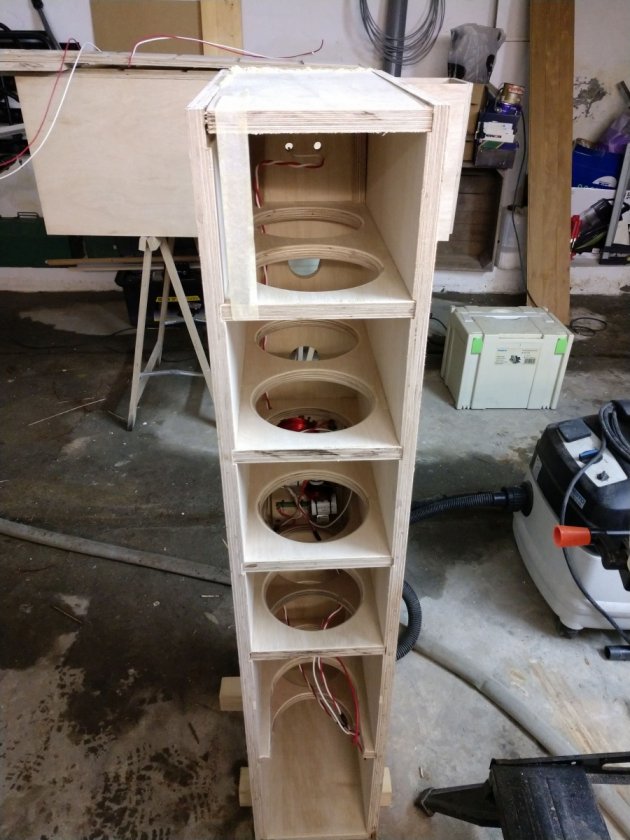
Strips cut to length:


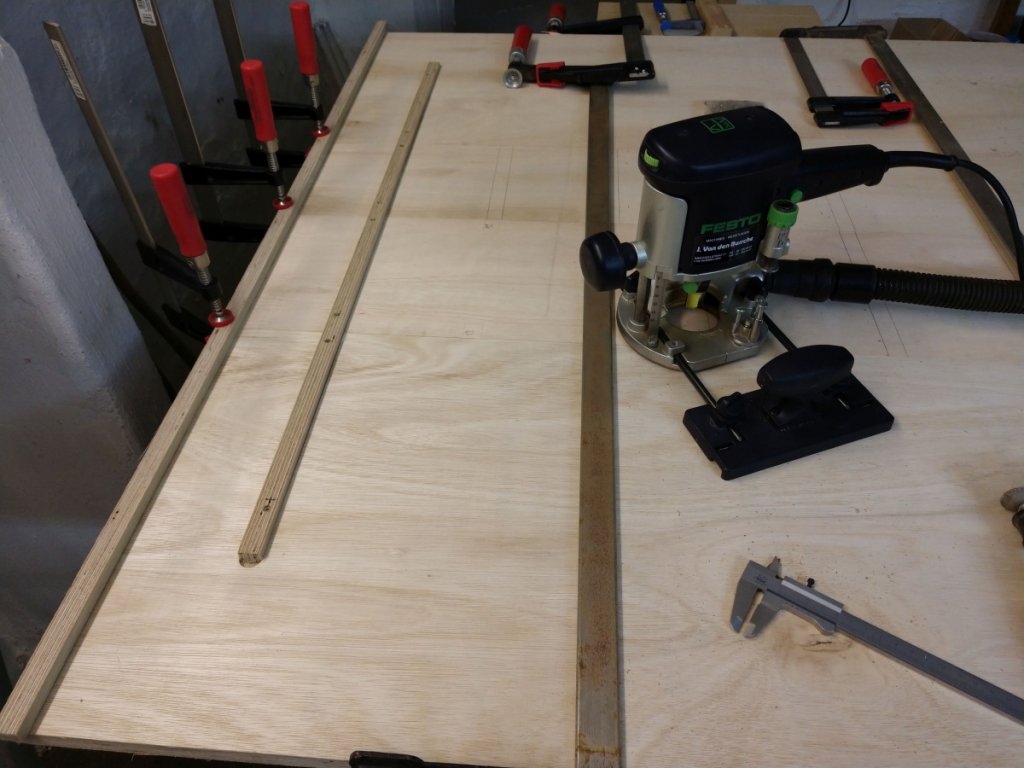
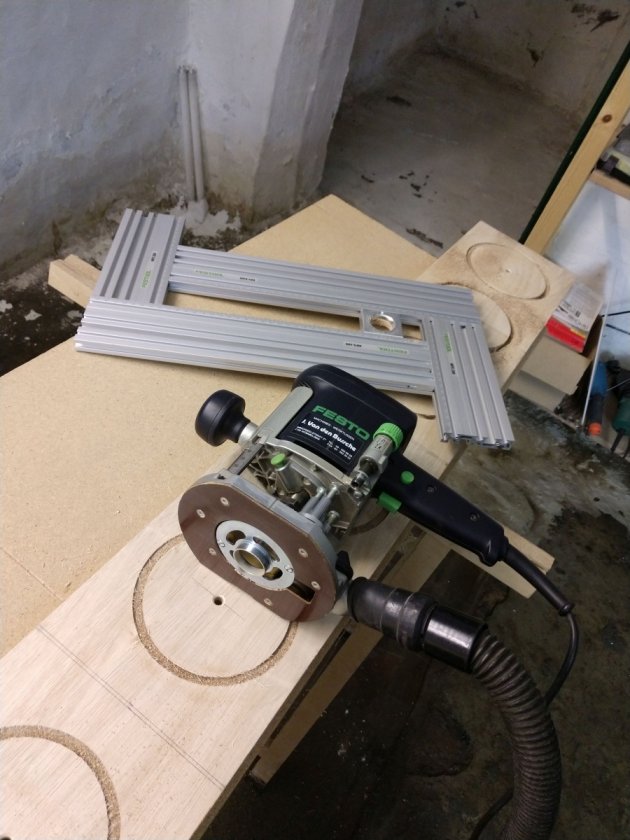
Routing grooves for the braces:


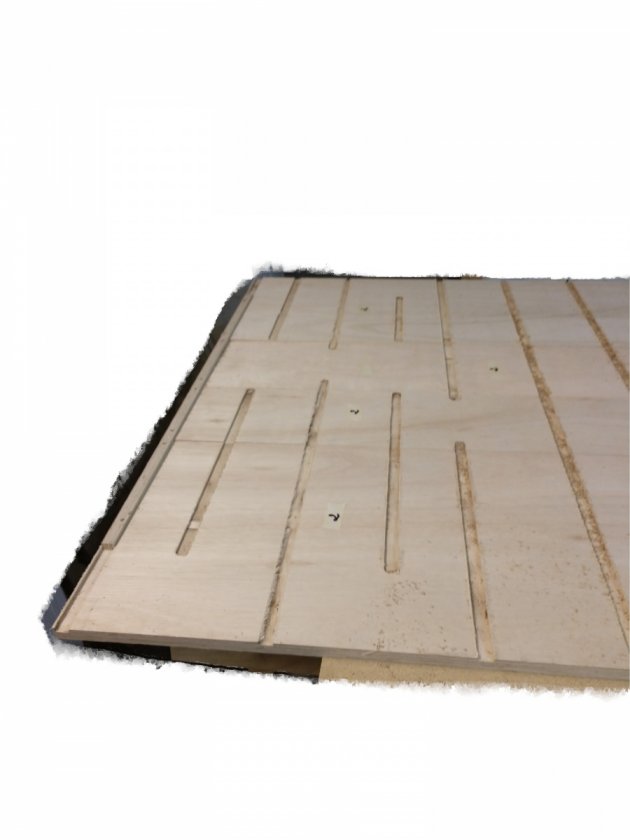
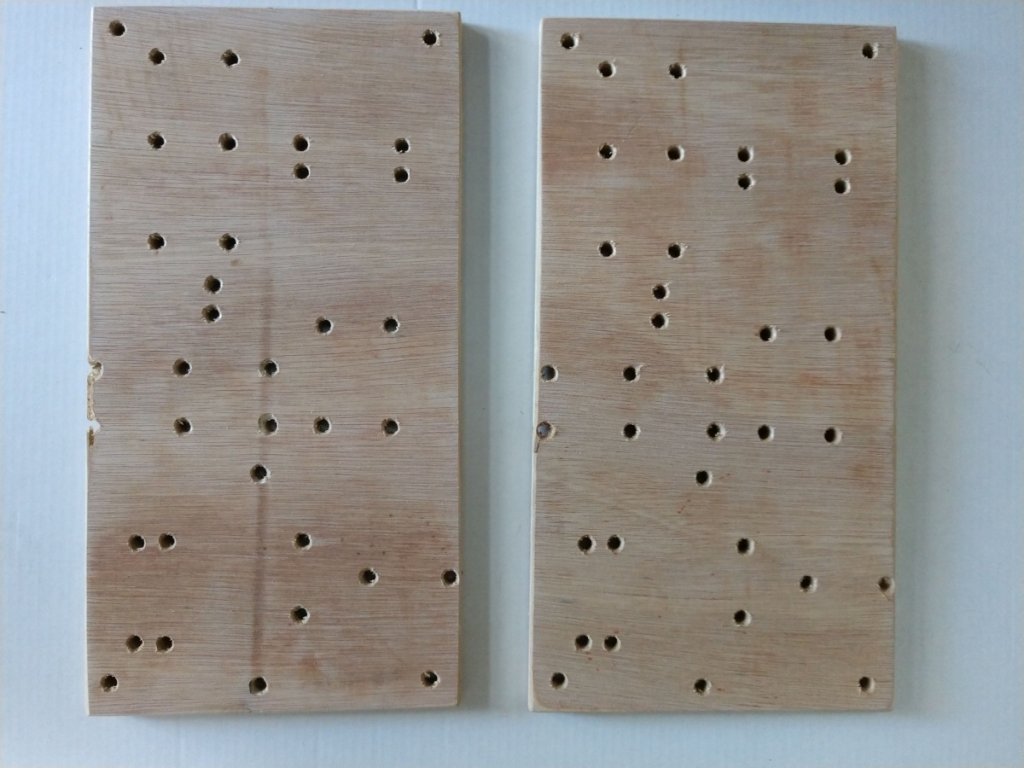
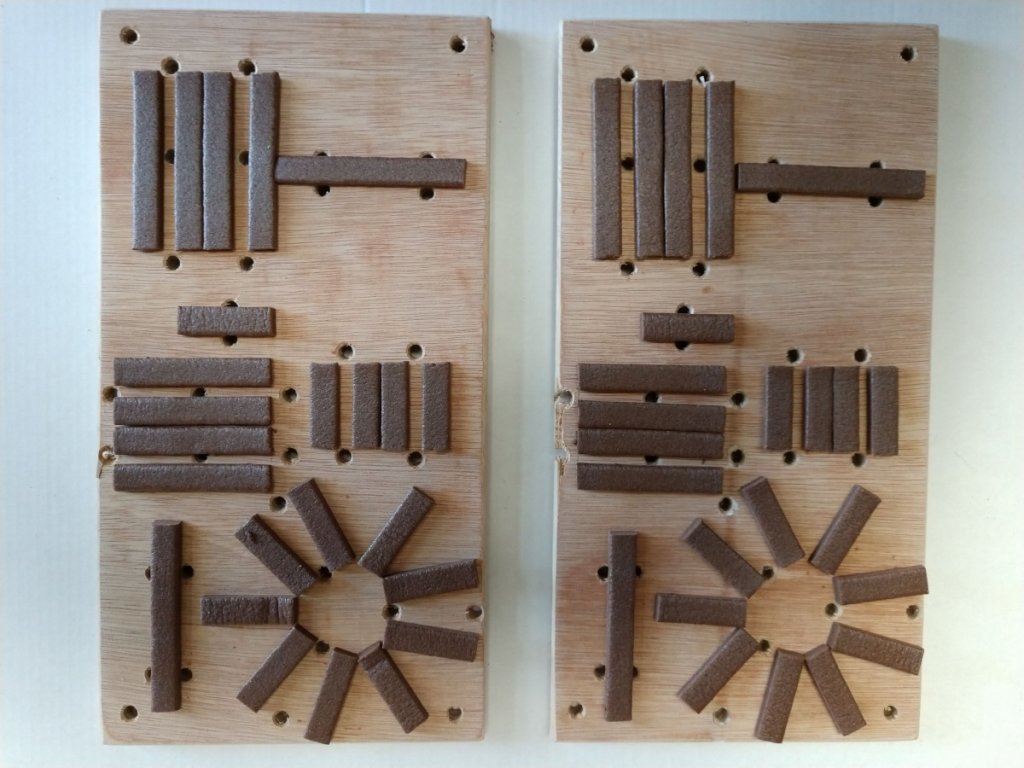
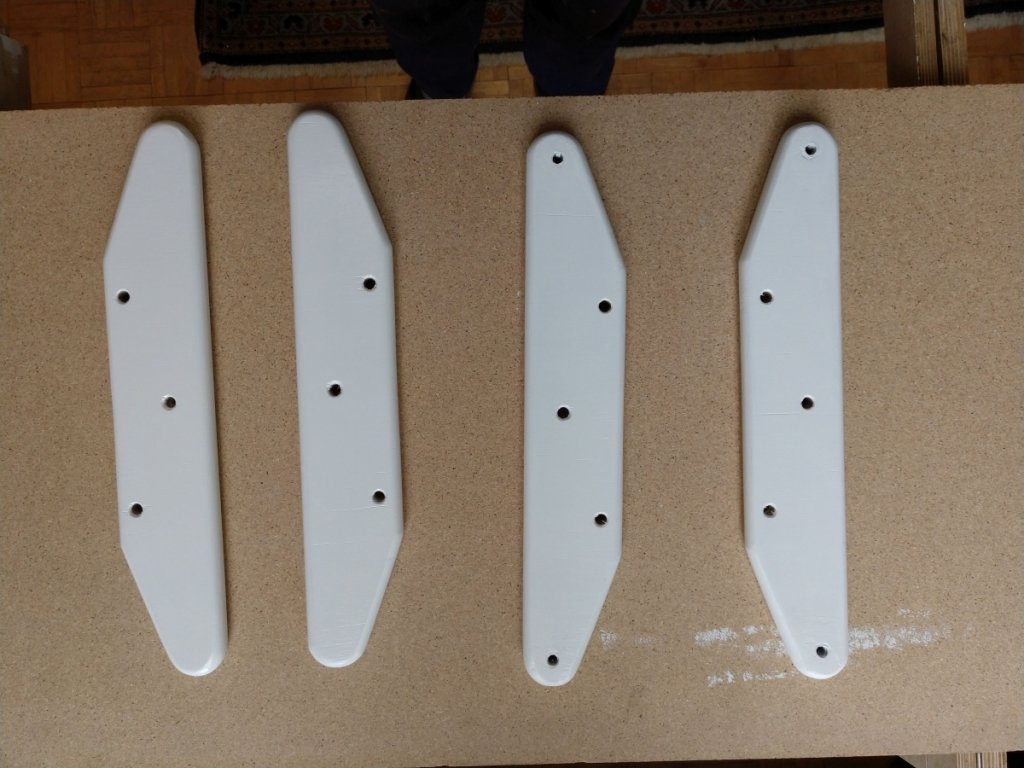
The braces (lots of them):


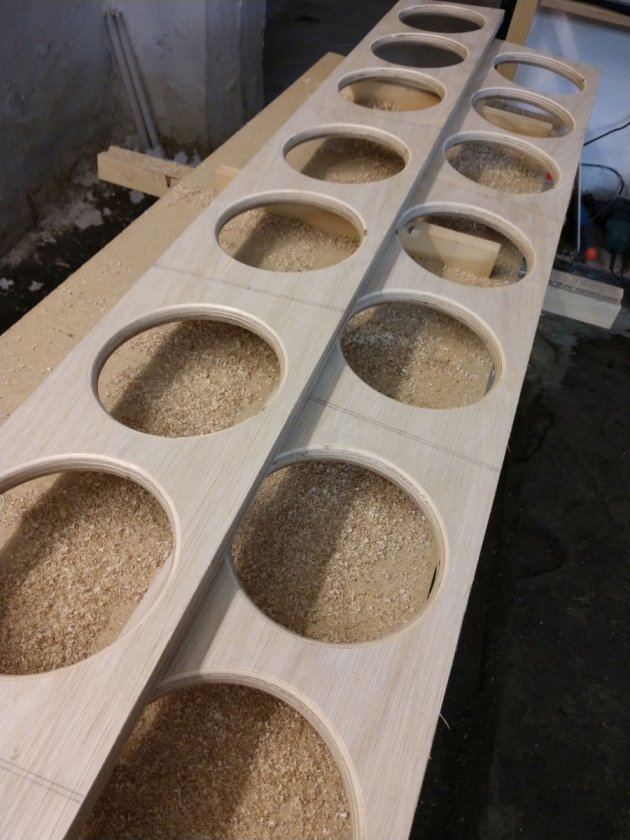
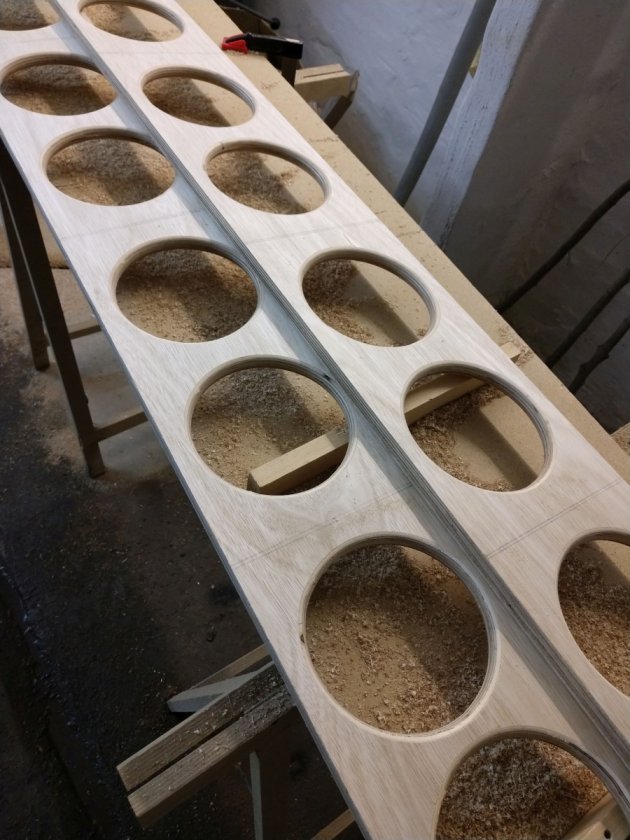
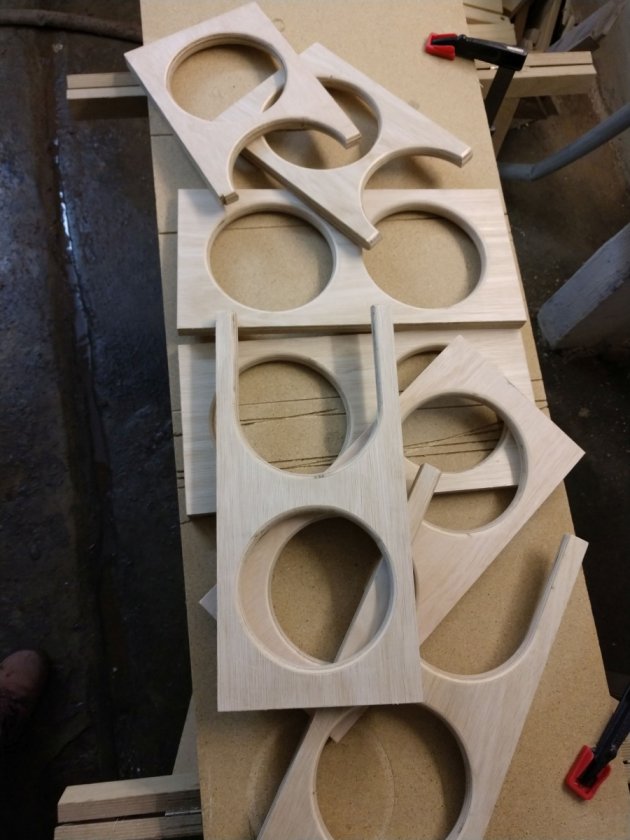
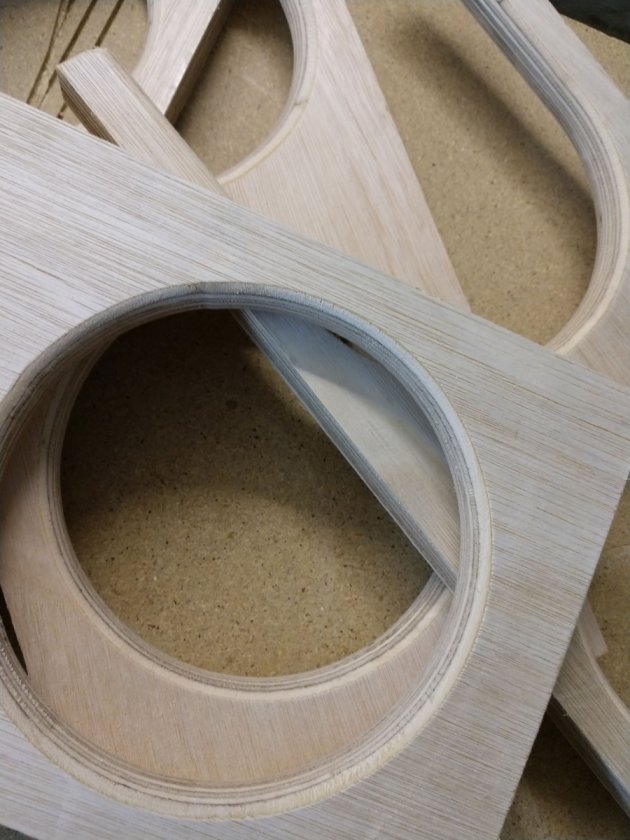
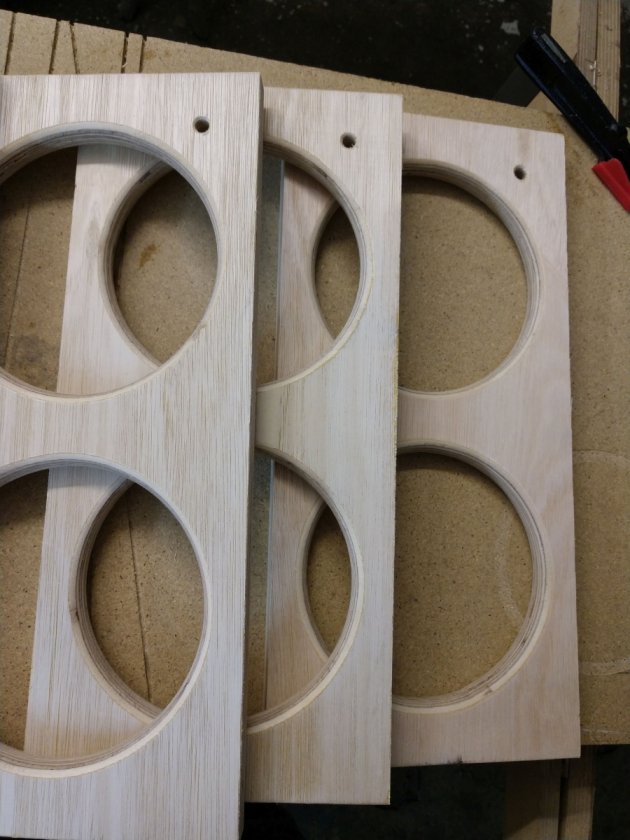
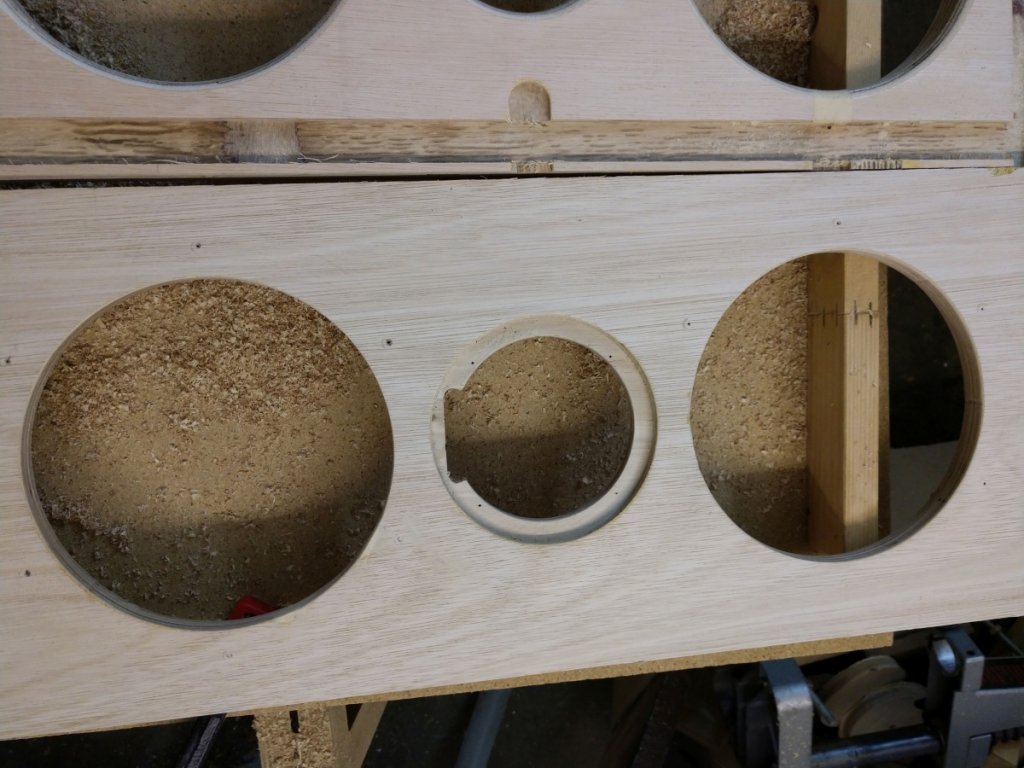
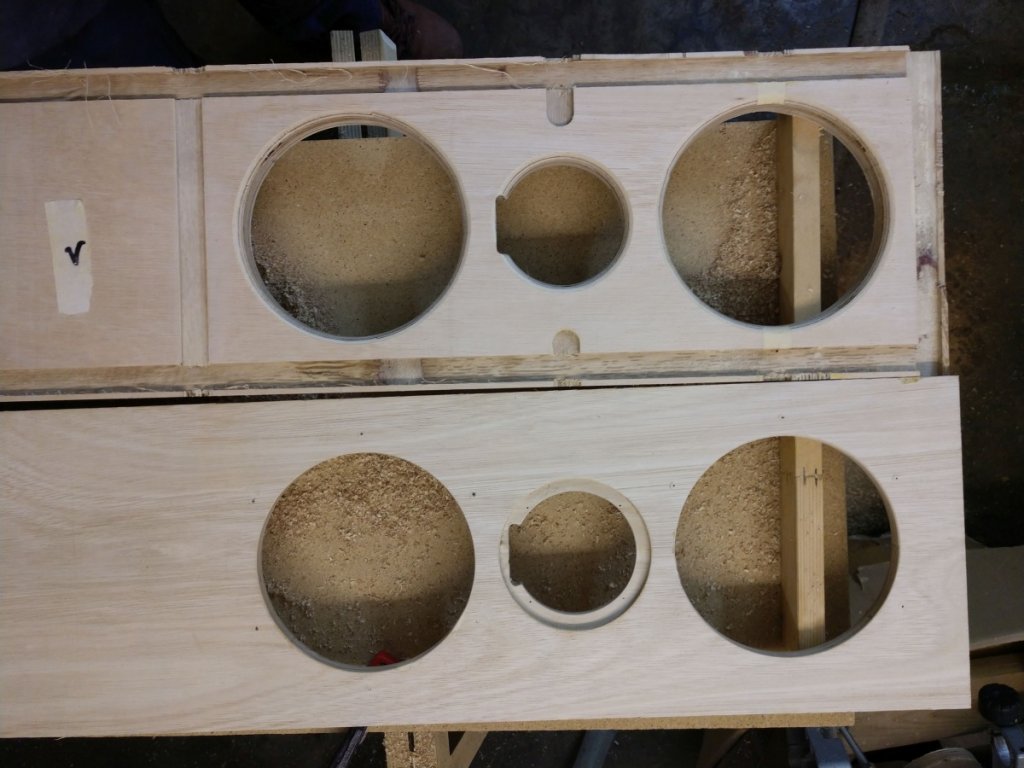
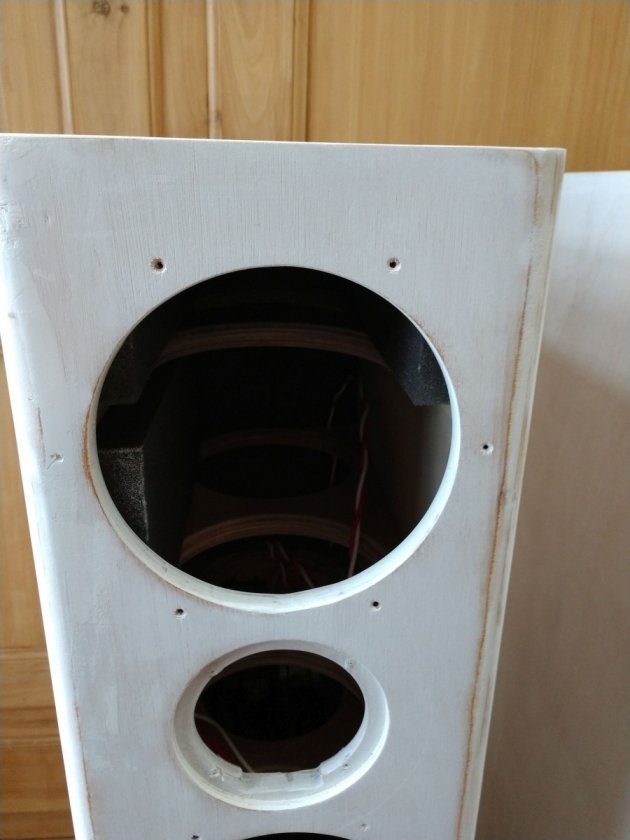
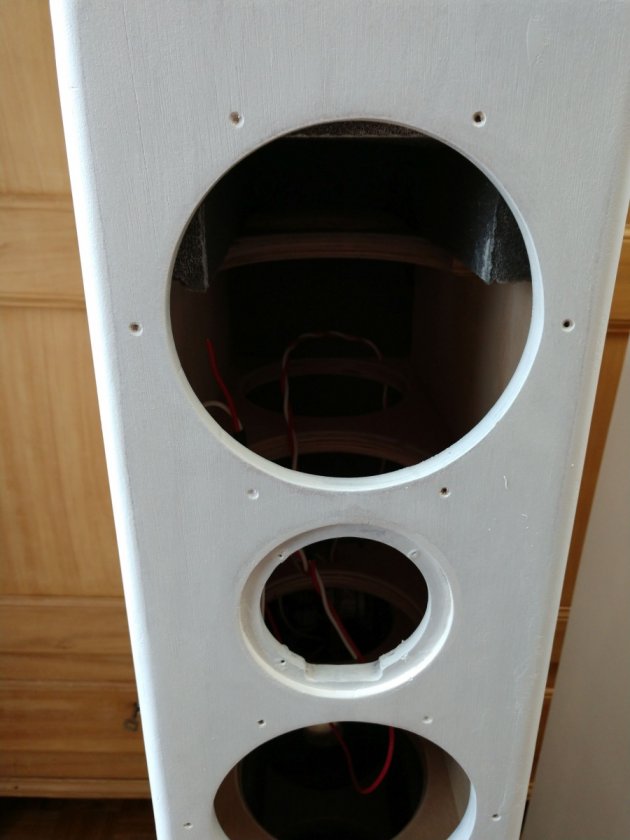
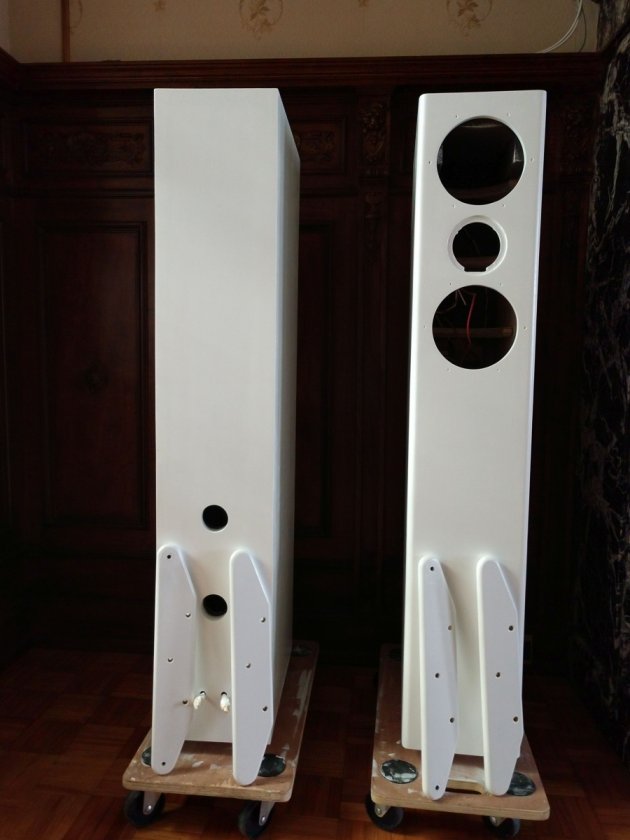
Cutting the front panels:


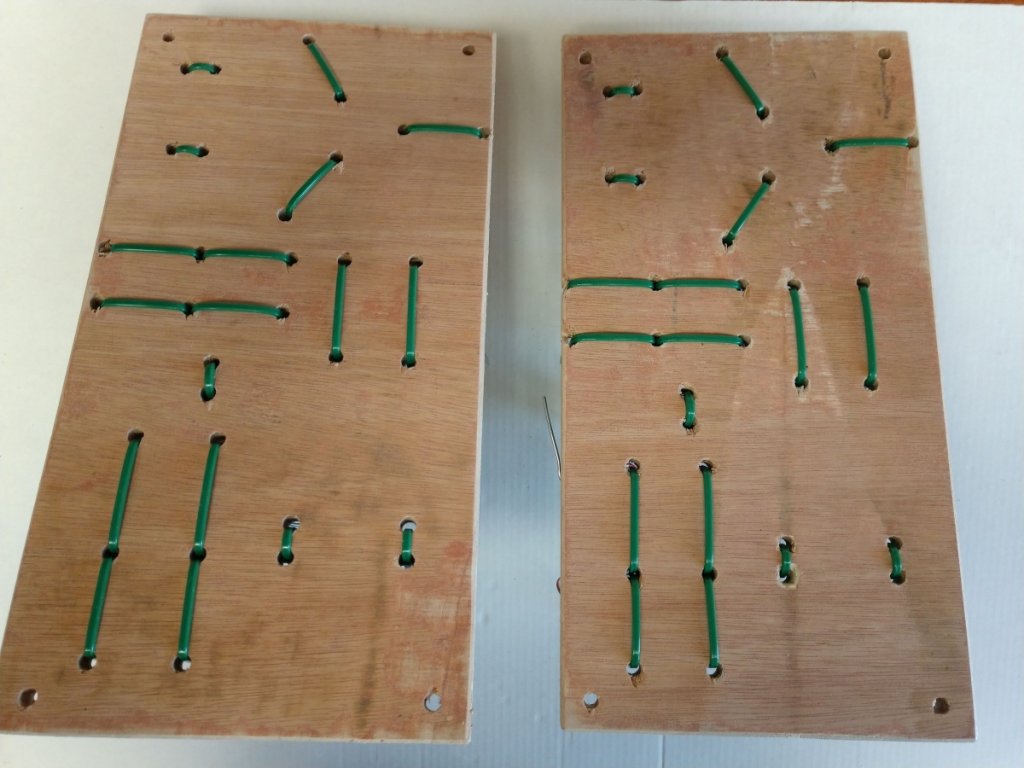
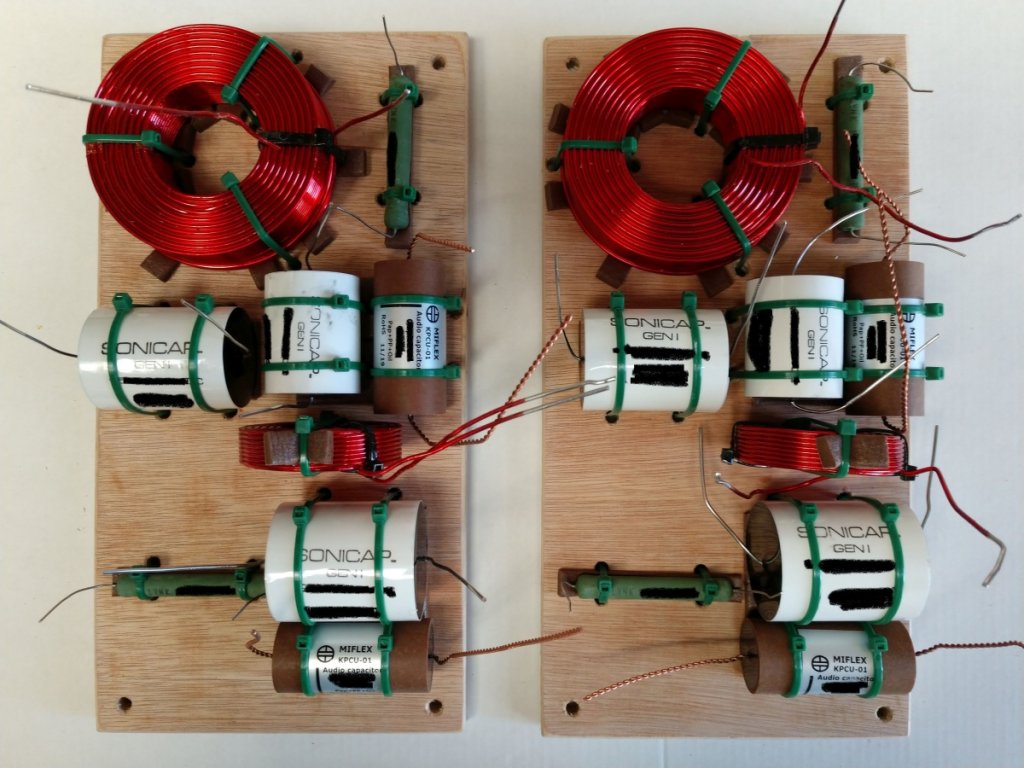
The filters (thanks Danny for your instructions video):


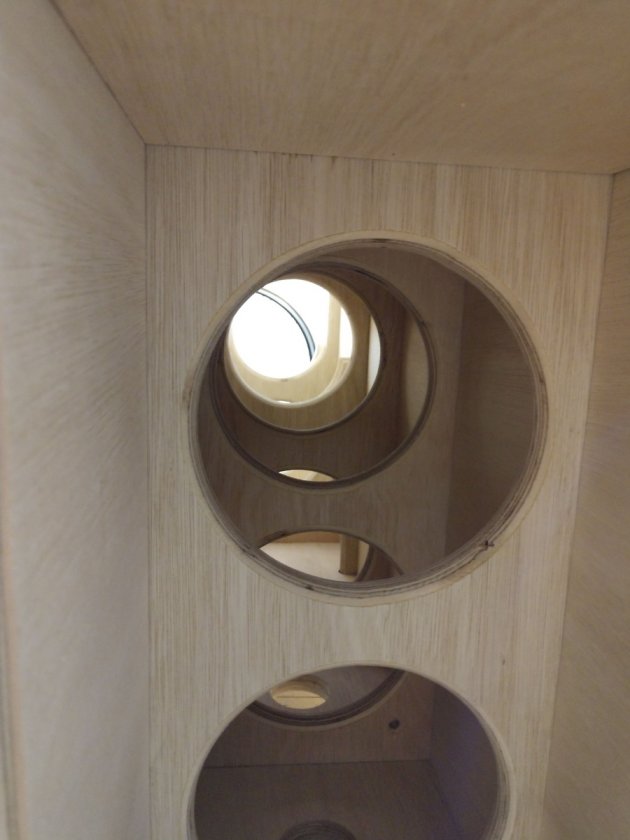
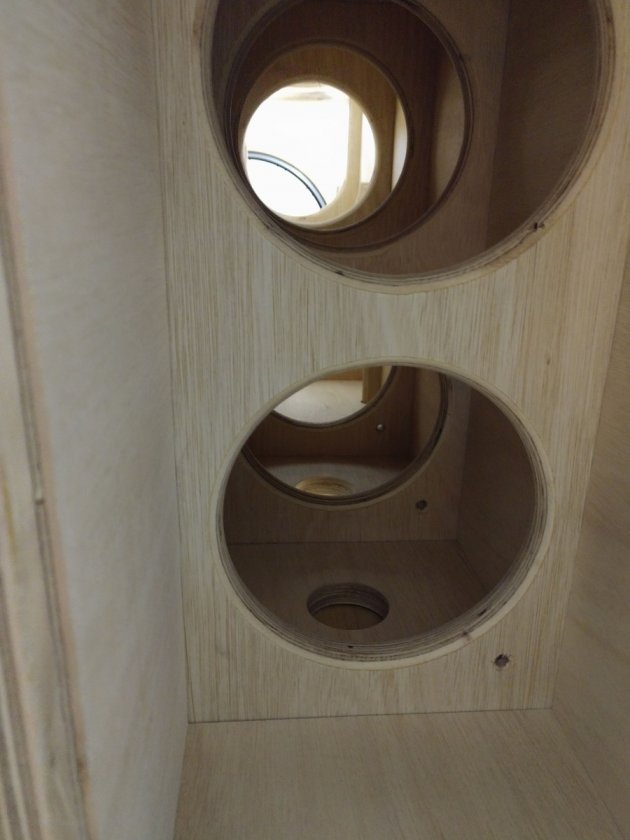
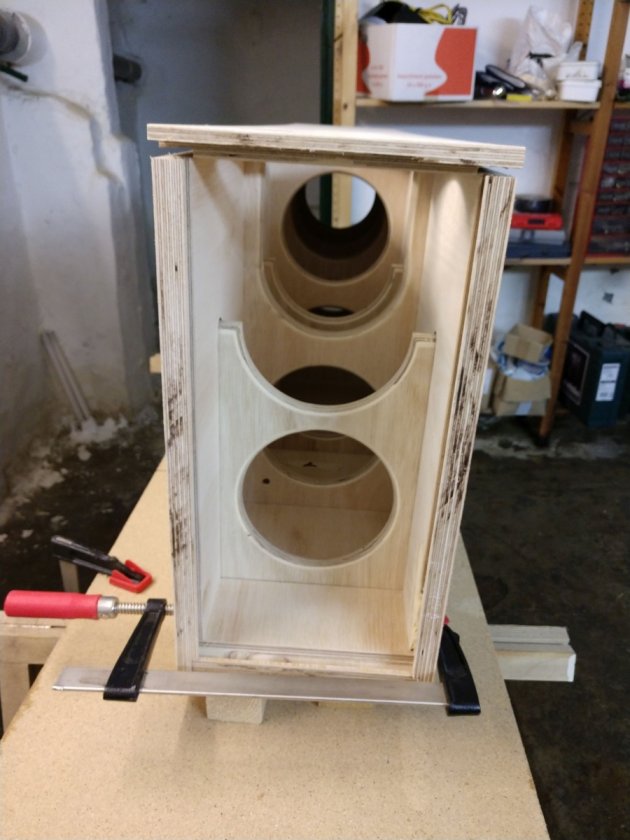
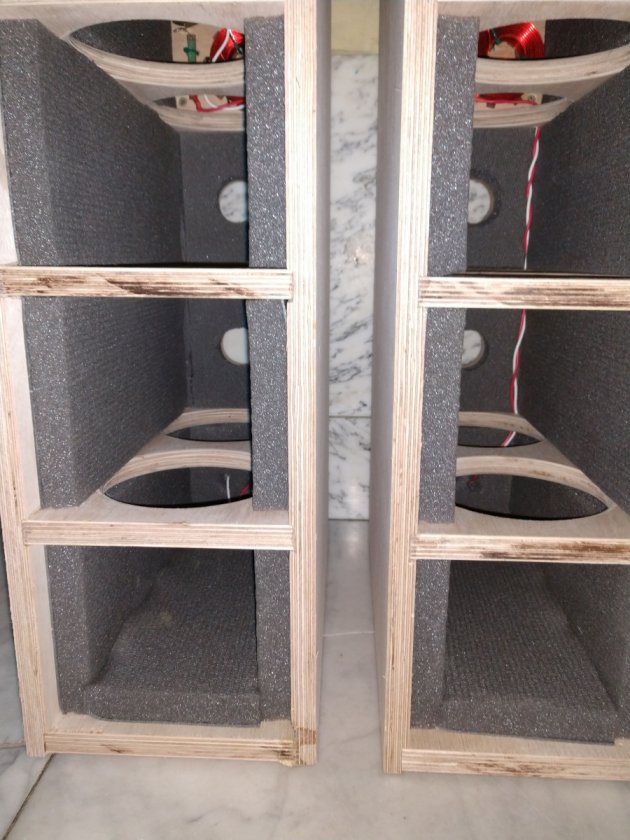
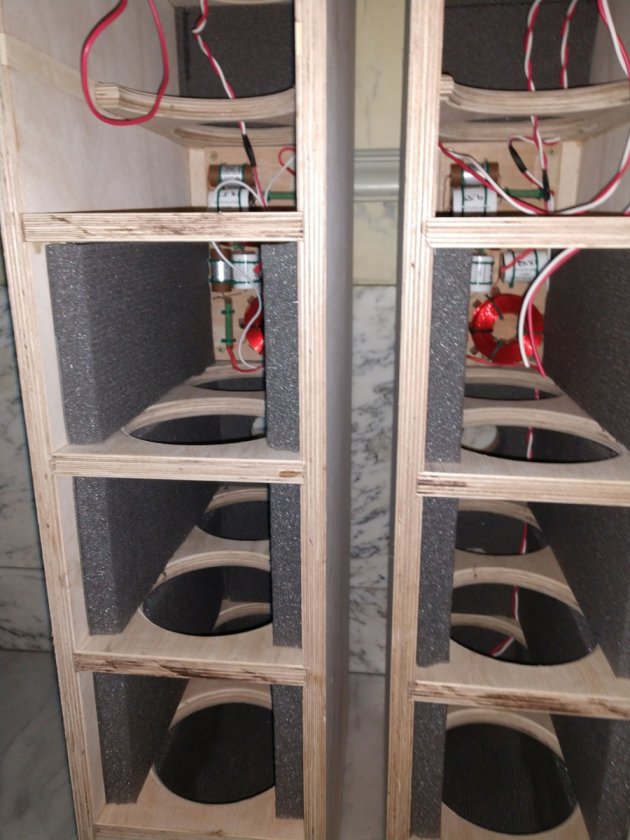
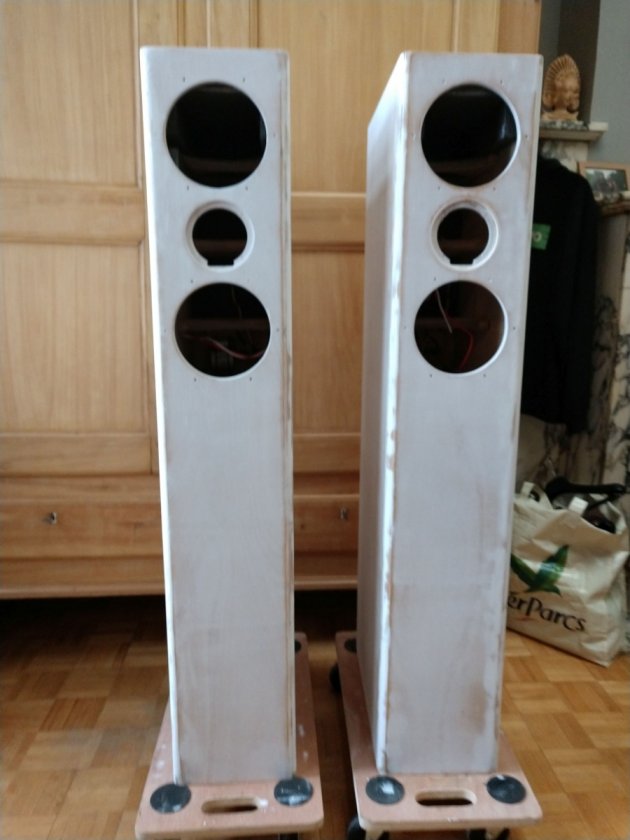
Putting the pieces together:


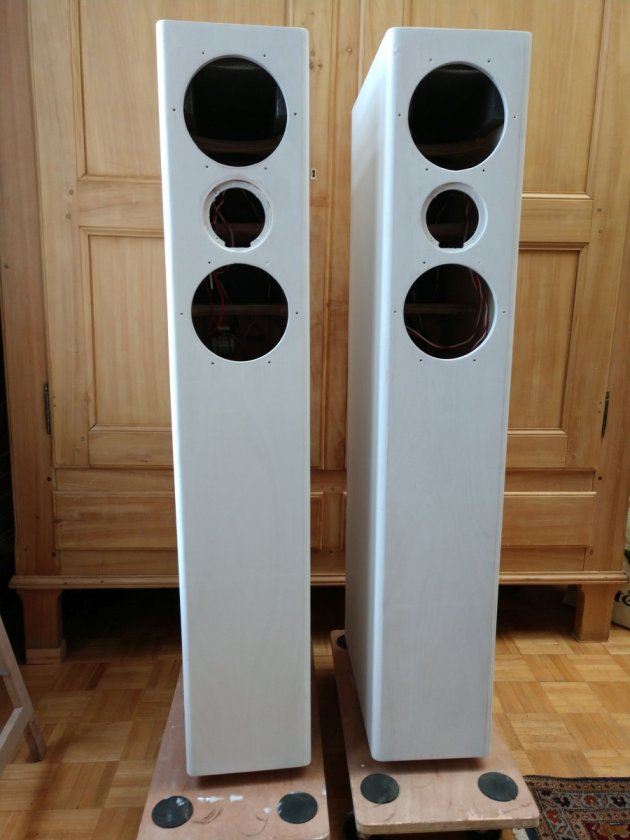
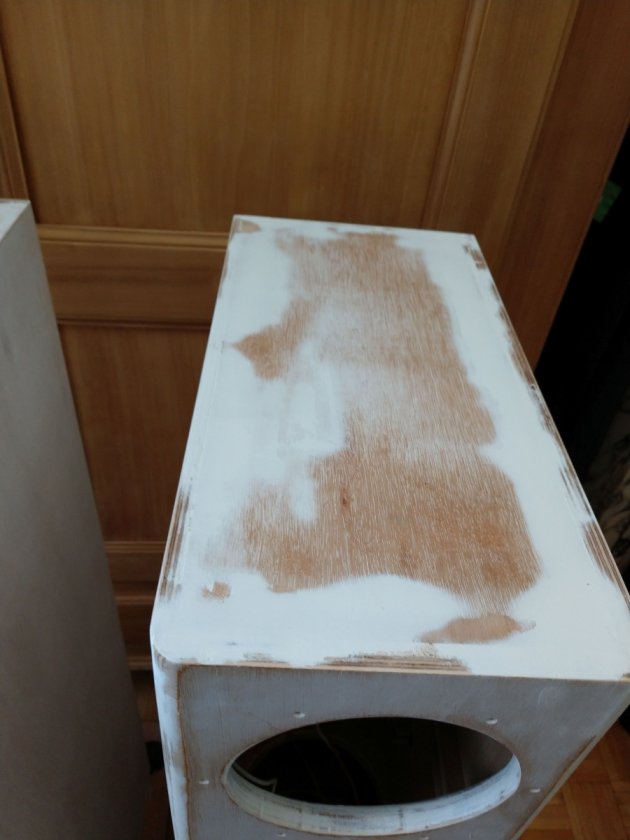
Filling, sanding, painting, filling, sanding, painting, filling, sanding, painting,... 3 layers of primer, 4 layers of high gloss white paint:


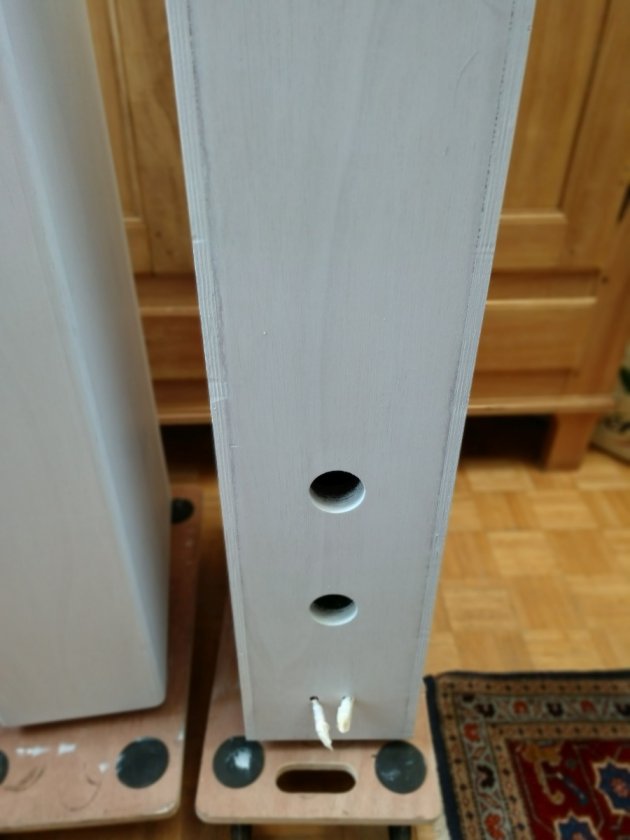
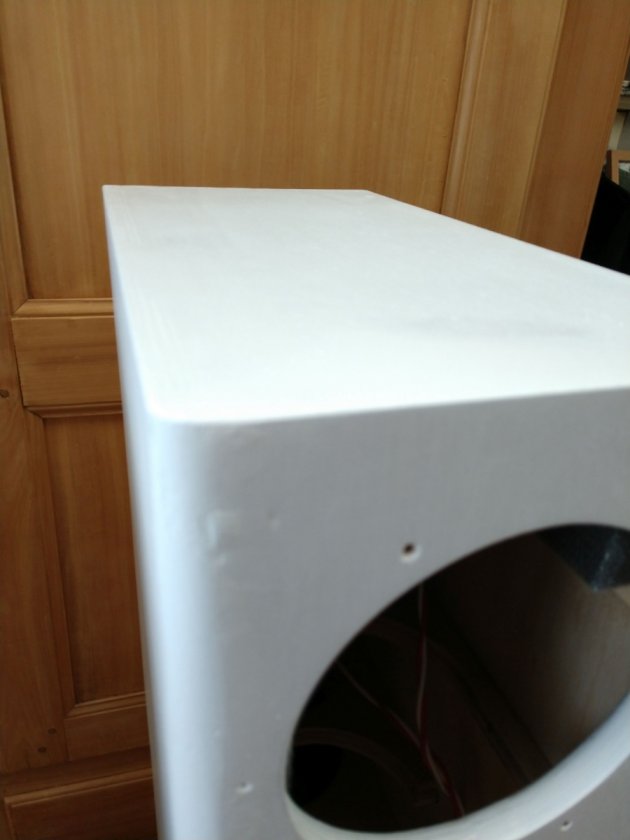
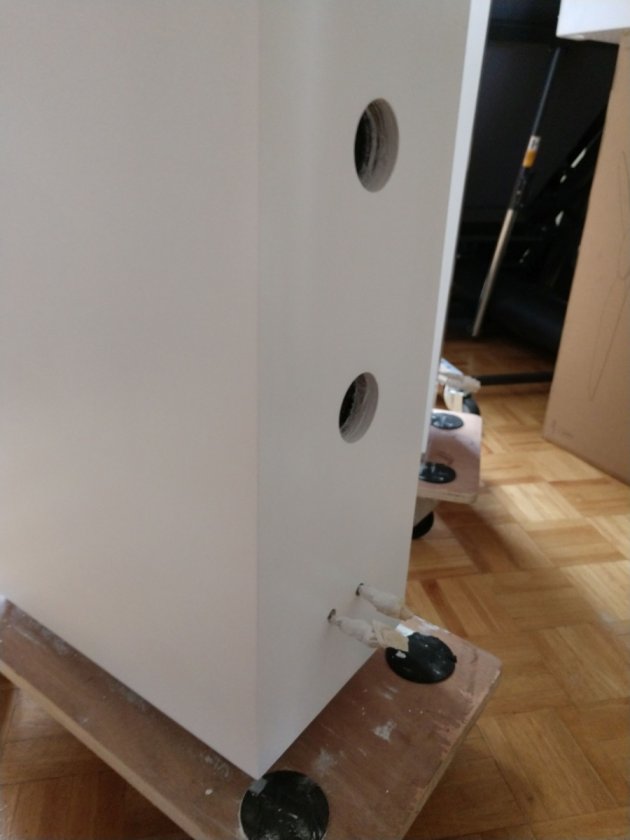
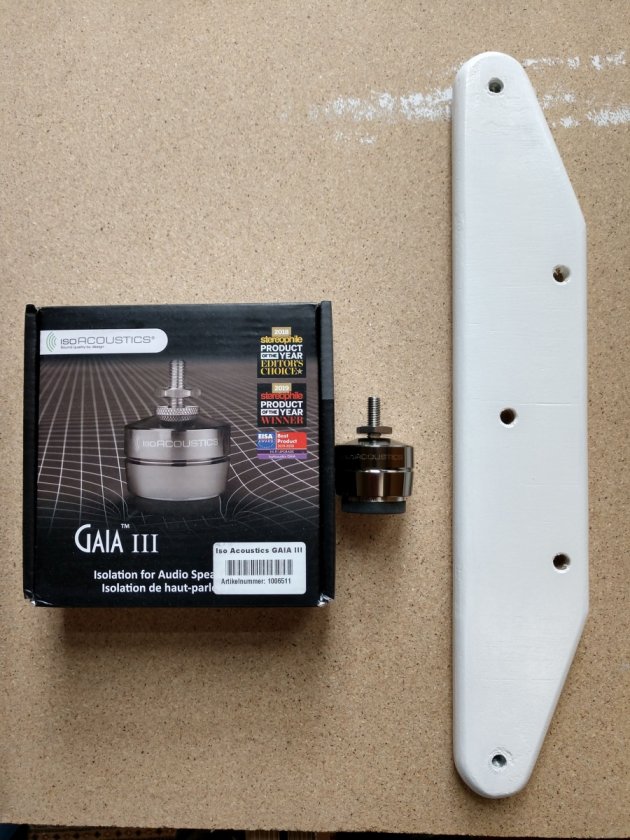
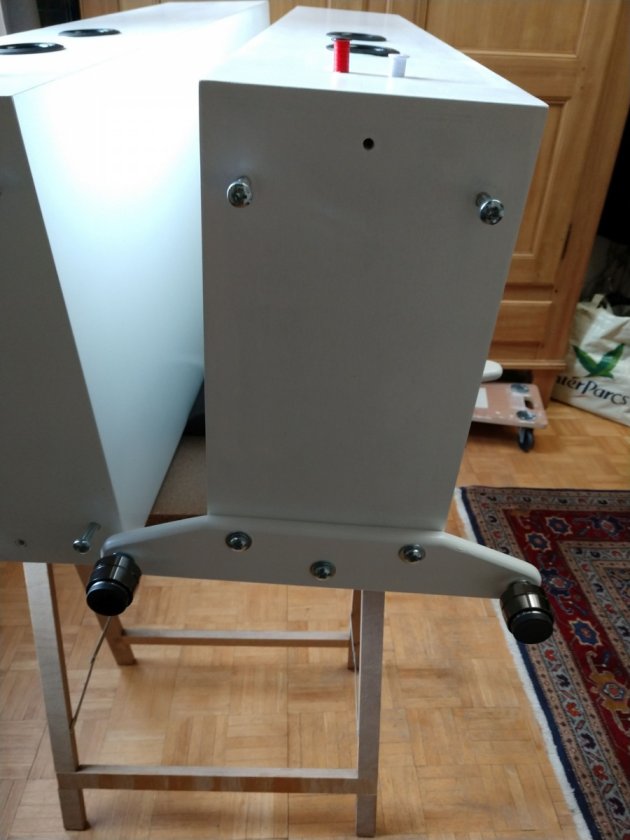
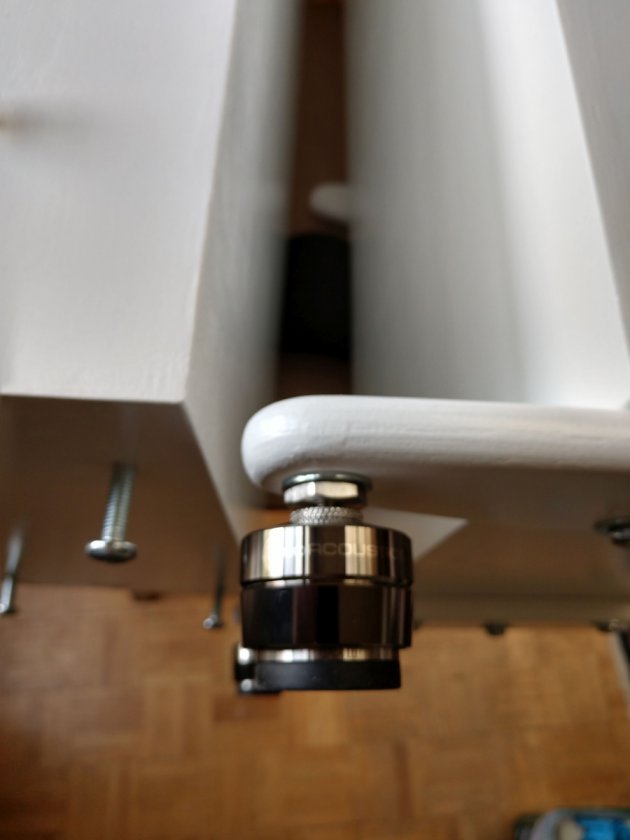
Details of the bottom (feet and dampers are screwed on with M8 bolts in threaded inserts, cut to length to 12 mm to not travers the plywood):


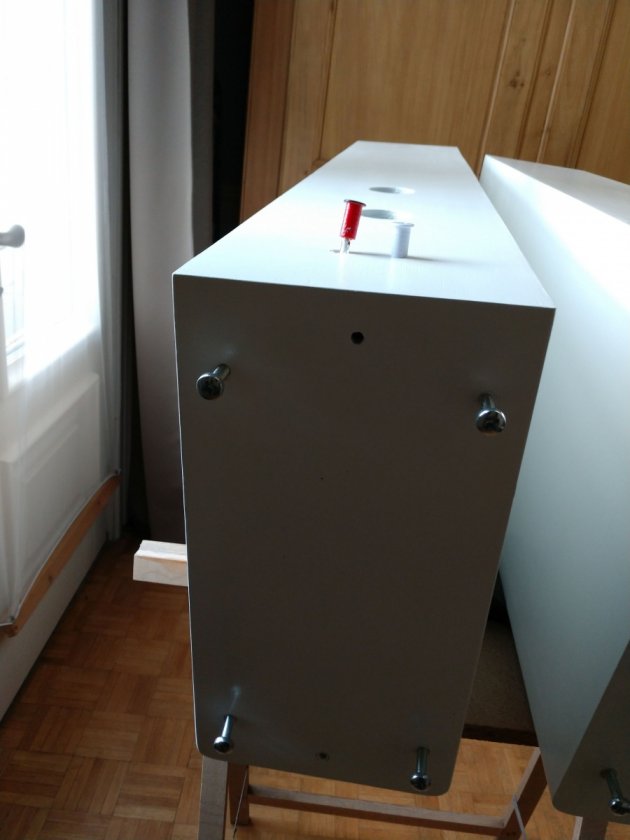
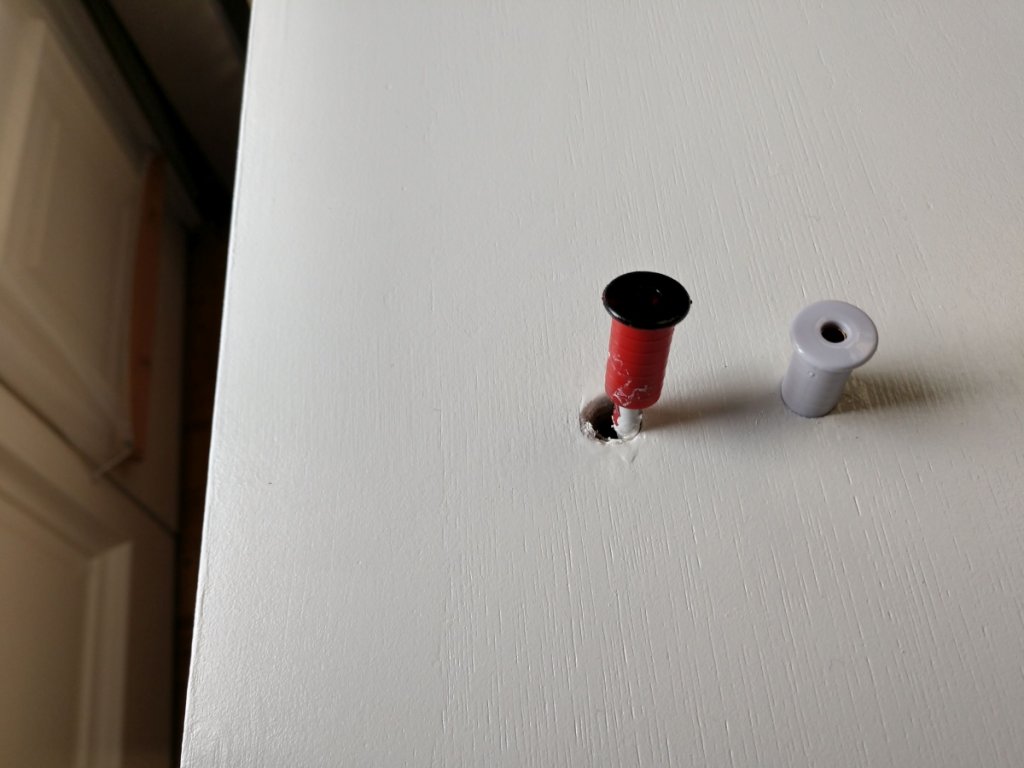
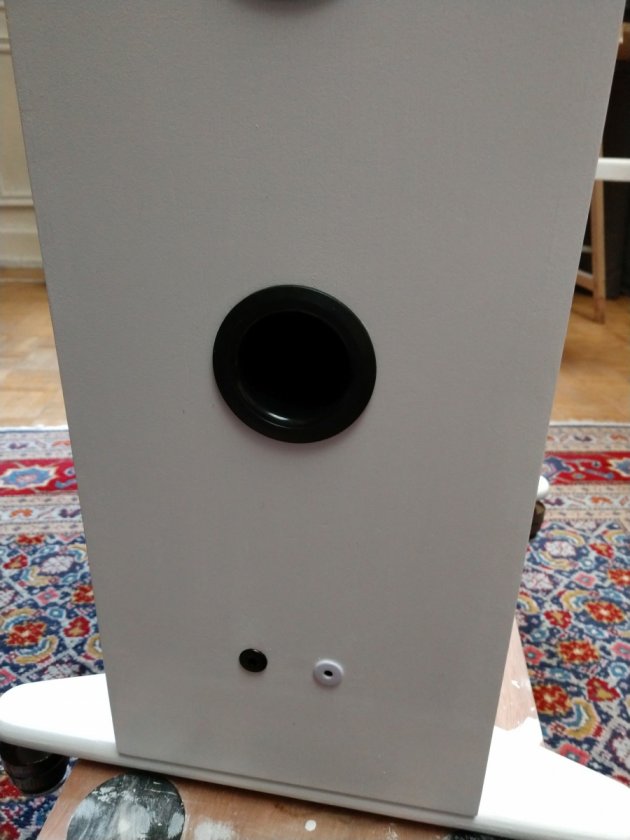
Tube connectors in the black&white theme:
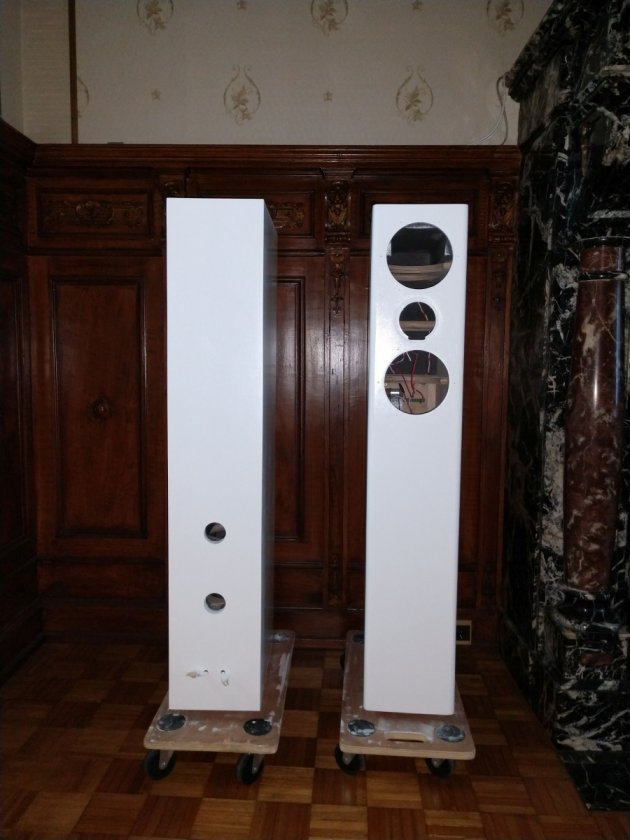
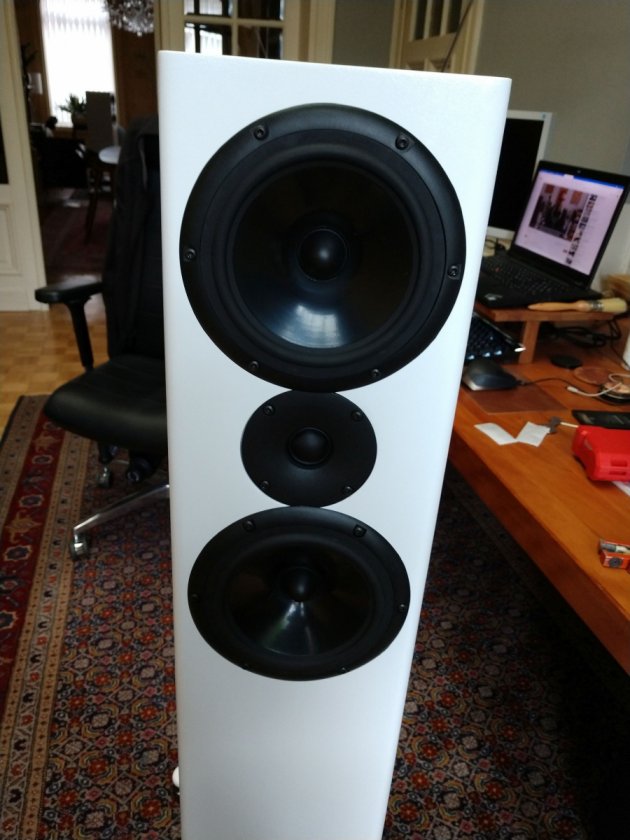
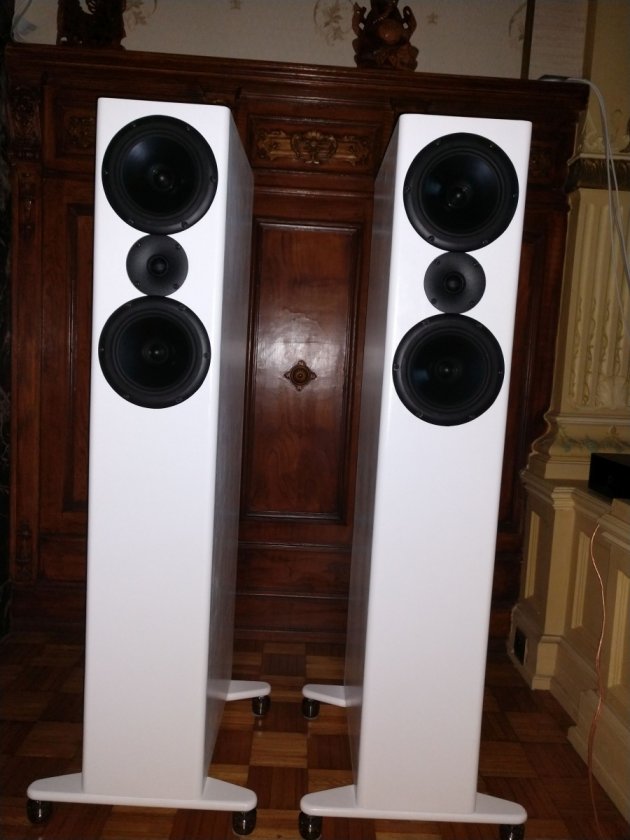
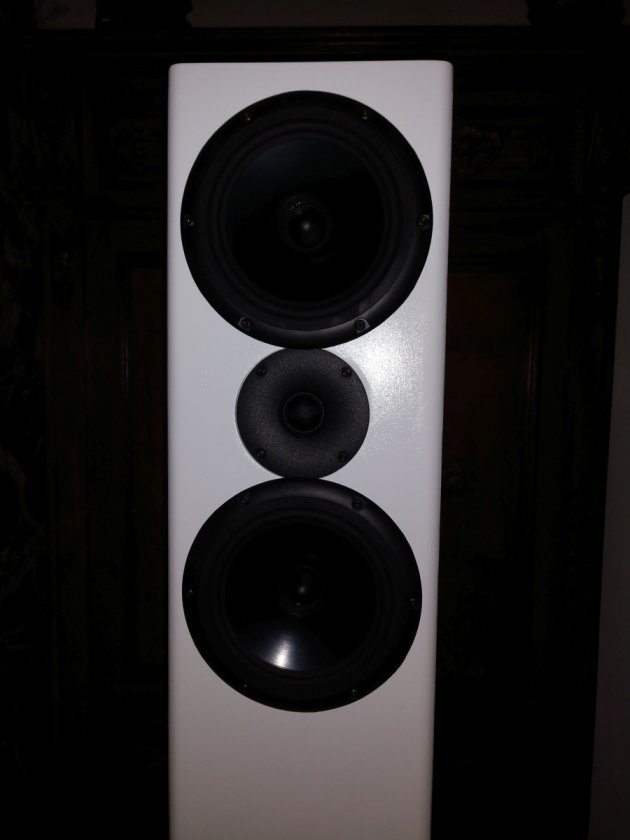

Finally finished:


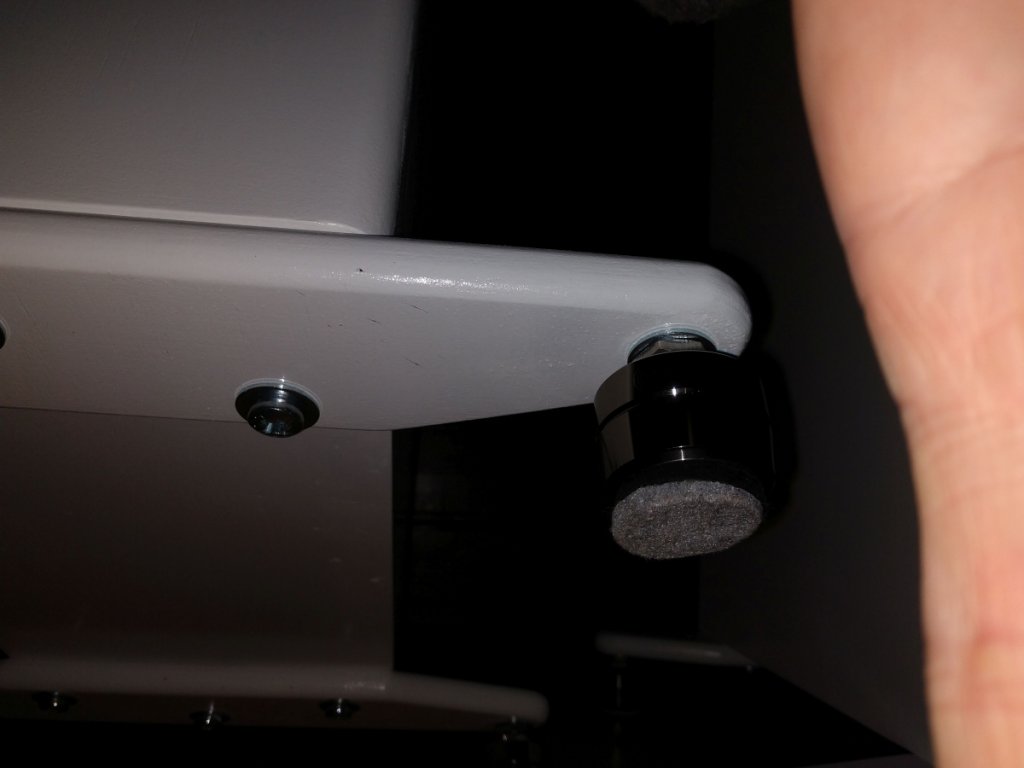
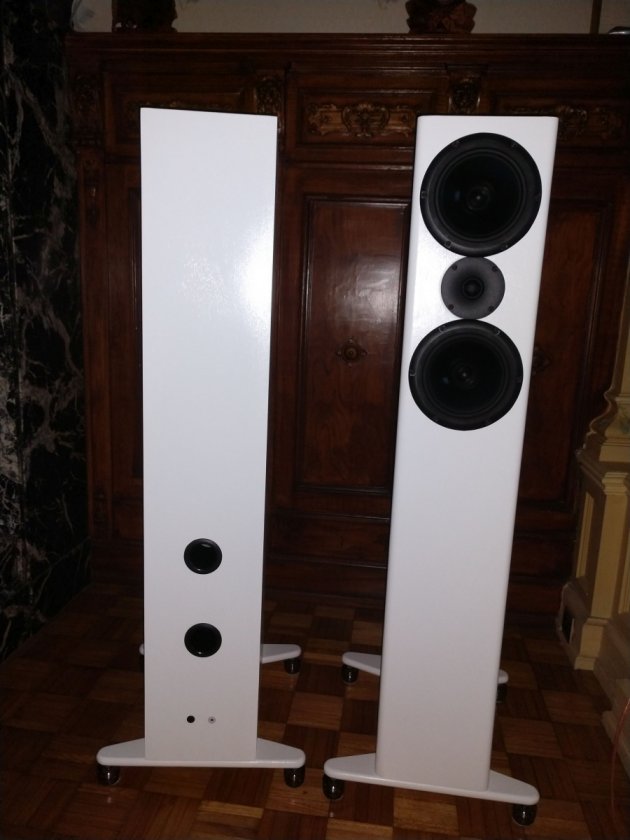
The felt on the dampers allows me to slide the speakers around. I change sitting position quite regularly.

I hope that this story inspires others.

There will be a third Corona project. And that is a new amplifier.
I'm very sensitive to listening fatigue, exaggerated lows and highs put me of after 15 minutes. These speakers are perfectly balanced.
The biggest question is to go for tubes or solid state.
I have kind of set my heart on the Gato AMP 150 (what a design and excellent reviews). The McIntosH MA5300 (but I don't need a DAC) could be an alternative.
Tubes, Elekit TU-8600, …


hawkeyejw

Re: Another build of the X-MTM Encore
« Reply #1 on: 14 Jul 2021, 03:22 pm »
Great post and beautiful work! I recently put together a Rasberry Pi based streamer too with an Allo Boss2 dac hat, it was a fun project and allowed me to move away from using my surface pro as a Roon server and endpoint. It’s great to be able to stream to my system from any phone, tablet, or laptop.

The x series really do sound great, far better than I expected when I first heard them. Welcome to the club.  :thumb:

Tyson

  • Full Member
  • Posts: 11112
  • Audio - It's all a big fake.
Re: Another build of the X-MTM Encore
« Reply #2 on: 14 Jul 2021, 05:23 pm »
Those look super stylish - nice job!!!

RonP

  • Full Member
  • Posts: 407
Re: Another build of the X-MTM Encore
« Reply #3 on: 14 Jul 2021, 05:26 pm »
wow what a post!

also, those look great

kickngas

  • Jr. Member
  • Posts: 51
Re: Another build of the X-MTM Encore
« Reply #4 on: 14 Jul 2021, 10:16 pm »
Very nice build. Inspiring!

Norman Tracy

Re: Another build of the X-MTM Encore
« Reply #5 on: 14 Jul 2021, 10:38 pm »
Fantastic craftsmanship! Enjoy, I know you will.

Hobbsmeerkat

  • Industry Participant
  • Posts: 2543
Re: Another build of the X-MTM Encore
« Reply #6 on: 15 Jul 2021, 01:53 am »
WOW!  :o
Those look spectacular!
Really making me wish I had gone and painted the fronts of my X-Statiks white...  :duh: lol

Im sure they perform ever bit as well as they look!  :thumb:

slmason

  • Jr. Member
  • Posts: 3
Re: Another build of the X-MTM Encore
« Reply #7 on: 15 Jul 2021, 03:15 am »
That is an outstanding set of photos showing the process of your new speaker build.  I'm interested in finding a project like this.

Coreyportelli

  • Jr. Member
  • Posts: 69
Re: Another build of the X-MTM Encore
« Reply #8 on: 16 Jul 2021, 11:02 am »
Can the crossover be installed after the front baffle is fitted or does it need to go in before the front baffle is fitted

Panamarenko

  • Jr. Member
  • Posts: 9
Re: Another build of the X-MTM Encore
« Reply #9 on: 16 Jul 2021, 03:55 pm »
Crossovers have to fitted at the back before you glue the front panel. Otherwise they will never be accessible again in case something breaks.
The plans also explain the location for the filters. Just make sure to solder all the wires to the inlet connecters and speakers before the front panel is installed.
I put the wires for the tube connecters oustide and soldered the connectors, applied painters tape for protection during the paint job.

pinkfloyd4ever

Re: Another build of the X-MTM Encore
« Reply #10 on: 16 Jul 2021, 05:14 pm »
Very nice, Panamarenko!

Of course I'd vote to go for a DIY amp. I've read nothing but good things about Elekit amps, but I've also heard that keeping the tubes fresh on a 300B amp can get expensive over time. But if you have the money, and don't listen super loud, go for it.

I'd also suggest a Pass DIY / FirstWatt clone. If you haven't built one before, go with the Aleph J. It is the best documented Pass clone and according to those who've built all of the Pass clone designs, is among the best sounding amps to most people.  Build it dual-mono with a separate power supply per channel.  This is my ultimate plan, although for some reason I'm planning on building the amp first then the X-MTMs.

https://diyalephj.blogspot.com/
https://www.diyaudio.com/forums/pass-labs/

Panamarenko

  • Jr. Member
  • Posts: 9
Re: Another build of the X-MTM Encore
« Reply #11 on: 17 Jul 2021, 06:15 am »
@ pinkfloyd4ever
https://www.youtube.com/watch?v=MxFOJxIwSac
If you listen to Steve's comments about the AMP 150, it makes me a bit hesitant to go the DIY path. Especially when he compares it with a FirstWatt amplifier at 11:33. I'm more leaning towards the neutrality of the AMP 150. And the design is just wonderful, but that is my personal taste.
But reading the DIY blog, hmm, looks interesting.

mlundy57

  • Industry Participant
  • Posts: 3579
Re: Another build of the X-MTM Encore
« Reply #12 on: 17 Jul 2021, 05:37 pm »
Can the crossover be installed after the front baffle is fitted or does it need to go in before the front baffle is fitted

Yes they can be installed after the baffle is glued on. I never install the crossover until the cabinets are completely finished and ready tor the drivers

Panamarenko

  • Jr. Member
  • Posts: 9
Re: Another build of the X-MTM Encore
« Reply #13 on: 18 Jul 2021, 07:23 am »
@ Coreyportelli & mlundy57
My initial idea was to install the crossovers after finishing the cabinets. But there is a challenge. Access to it through the speaker hole is very narrow to screw the boards. And it will be impossible to solder the wires to the inlets and speakers like Danny shows in his instruction video. You could solder the wires beforehand though. But, another challenge is to feed the wires from the crossovers to the the tube connectors at the bottom of the cabinet. There is no way that you can feed the wires through the braces to the bottom of the cabinet and pull them through the holes. At least I couldn't, I tried. My arm is simply not long and flexible enough.

mlundy57

  • Industry Participant
  • Posts: 3579
Re: Another build of the X-MTM Encore
« Reply #14 on: 18 Jul 2021, 02:42 pm »
@ Coreyportelli & mlundy57
My initial idea was to install the crossovers after finishing the cabinets. But there is a challenge. Access to it through the speaker hole is very narrow to screw the boards. And it will be impossible to solder the wires to the inlets and speakers like Danny shows in his instruction video. You could solder the wires beforehand though. But, another challenge is to feed the wires from the crossovers to the the tube connectors at the bottom of the cabinet. There is no way that you can feed the wires through the braces to the bottom of the cabinet and pull them through the holes. At least I couldn't, I tried. My arm is simply not long and flexible enough.

I use a stiff wire like a coat hanger or a piece of 12ga Romex to fish the wires to the tube connectors/binding post cup when installing the crossovers. I push the wire through the tube connector/binding post opening from the outside. The wire is stiff enough to bend so it doesn’t get caught on the braces far enough to reach from the lower driver opening. Once I grab the wire, I pull it through the cabinet and out the lower driver opening.

I use one fish wire with a binding post cup and two with tube connectors. Next I tape the crossover leads to their respective fish wire then pull the wires through the cabinet as I insert the crossover board.

Speaker Challenged

  • Jr. Member
  • Posts: 161
Re: Another build of the X-MTM Encore
« Reply #15 on: 19 Jul 2021, 03:23 am »
Amazing build thanks for sharing it with us.

SC

Panamarenko

  • Jr. Member
  • Posts: 9
Re: Another build of the X-MTM Encore
« Reply #16 on: 19 Jul 2021, 06:36 am »
@mlundy57
I was thinking about the same method, just didn't want to take the risk.
But that is the goal of this platform, learn from each others experiences.

Anyway, I'm loving these speakers more and more. Looks like the woofers are opening up more and more.
The Gato AMP 150 AE offer of 200 € discount is something I will decide this week.

Coreyportelli

  • Jr. Member
  • Posts: 69
Re: Another build of the X-MTM Encore
« Reply #17 on: 19 Jul 2021, 11:10 am »
I use a stiff wire like a coat hanger or a piece of 12ga Romex to fish the wires to the tube connectors/binding post cup when installing the crossovers. I push the wire through the tube connector/binding post opening from the outside. The wire is stiff enough to bend so it doesn’t get caught on the braces far enough to reach from the lower driver opening. Once I grab the wire, I pull it through the cabinet and out the lower driver opening.

I use one fish wire with a binding post cup and two with tube connectors. Next I tape the crossover leads to their respective fish wire then pull the wires through the cabinet as I insert the crossover board.
Thanks for letting me know, I’m thinking of building a pair of these so I’m looking at other builds and gathering information before I commit to buying the kit.
I recently messaged Danny and there are new models being released soon so I might wait and see what he releases before I order anything,