NX STUDIO BUILD

0 Members and 1 Guest are viewing this topic. Read 13242 times.

mlundy57

  • Industry Participant
  • Posts: 3579
Re: NX STUDIO BUILD
« Reply #40 on: 18 Oct 2021, 11:35 pm »
Mike,
Who's the manufacture's of the equipment you mentioned above. Since I'm getting back into the arena, It is nice to get a idea of what others are using. Especially performs well with the NX Studio's.  This really gives me something to look forward too.

PS Audio. I have the BHK Signature preamp and a pair of the Stellar M1200 monoblocks

NXSTUDIO-DRUMMER

  • Jr. Member
  • Posts: 167
Re: NX STUDIO BUILD
« Reply #41 on: 18 Oct 2021, 11:52 pm »
Crossover / cabinet clips for attachment and removal. I purchased here.

https://www.parts-express.com/Small-Grill-Guides-12-Pair-260-368?quantity=1


« Last Edit: 24 Feb 2023, 04:57 am by NXSTUDIO-DRUMMER »

nlitworld

  • Full Member
  • Posts: 1993
  • Strange things are afoot at the Circle K
Re: NX STUDIO BUILD
« Reply #42 on: 21 Oct 2021, 01:43 pm »
Thank you for the idea on the grill fasteners for the crossover. Just ordered up a set for my build. Simple and elegant solution to make things easy.  :thumb:

NXSTUDIO-DRUMMER

  • Jr. Member
  • Posts: 167
Re: NX STUDIO BUILD
« Reply #43 on: 22 Oct 2021, 10:54 pm »
Trail fit of NoRez and crossover board with inserts installed. Fits through front opening no problem. I cut my NoRez to fit exactly to all cabinet wall sizes. At this stage, I was researching alternative acoustic panel treatments, and found the BXI panels. Realizing I was on to something, I was going to experiement. Later at completion of project, I determined with listening,the BXI panels were going to be my choice of material on top ramp of cabinet. Under no circumstances should you use BXI panels inernally on the speaker box. NoRez is perfect for this application.

I installed my NoRez to all internal walls of cabinet, prior to glueing up and clamping the speaker cabinet. I know some may frown on this step.
I'll say this, if you cut your NoRez panels accurately, and trial fitted cabinet, on dry run and everthing goes together properly, why not move forward glueing and clamping cabinet?  .......Would I assemble using this method again? 100% NO DOUBT!


NOTE: Photo's above and below shown, display NoRez with paper backing still attached on them, as a trail fitting.

Notice how the crossover board slighty compresses the NoRez. I fabricated the crossover board to seat around the four sides of cabinet, by design.


The crossover board detaches easily, by pulling up on knob as seen in photo above. The board also can be removed from cabinet, where my hand is located.


« Last Edit: 5 May 2023, 01:04 am by NXSTUDIO-DRUMMER »

NXSTUDIO-DRUMMER

  • Jr. Member
  • Posts: 167
Re: NX STUDIO BUILD
« Reply #44 on: 22 Oct 2021, 10:59 pm »
NX STUDIO CUSTOM FRONT SPEAKER GRILLS:

If you decide to build and need assistance, I'll be glad to help with consultation on your grill frame build. Just P.M. me.


Take in consideration, this task will benefit the overall appearance of the front baffle significantly.  This task should be completed before attempting to assemble the cabinet, even though I think it's pretty obvious.

1. You will not see these ugly fastners on all 4 corners of your front baffle. Instead, you'll appreciate a smooth clean front baffle, like the rest of the guys with grillless NX Studio speakers. Because you installed the magnets on the rear of baffle! :thumb:

2. Last beneficial consideration, as to why build grills, It will be another form of protection from dust or other unincountered, oh shit moments, that could damage the speaker drivers. Plus it looks very professional, especially with the Gr Research logo tags added. Icing on the cake. IMO

3. You have a option the other guys don't have, they'll claim it interfere's with the acoustics. Easy solution, remove them for critical listening. Based on my listening, with grills on and off? Very minimal difference.
But when not in use, or for non critical listening they compliment your investment $$$.

If someone was selling NX-STUDIO'S with grills, versus without, I guaranteed the NX-STUDIO'S that include grills, will sell faster in the marketplace. Another benefit to consider.


Be conscentious of size of your corner support gussets, so they can be aligned favoribly with front baffle. My corner support gusset dimensions were 1 1/2" at all corners. Build your speaker grill frame completely first. If you need to go with different size gussets, than what I used, it's ok, as long as it meets the objective. But visualize where the magnet postions on both grill frames and baffle will be, then mark the following positions. This will aid in preventing misalignment. If they should be misaligned by 1/32," or even as much as a 1/16", don't sweat it. The magnets will give you some shaking room, later on when you attach grills to the front baffle. You can shift them for alignment, so you'll be ok. I thought about this worst case scenario doing a mock up test with two pieces of wood. Initial experiementing with mock up, I tested various depths, for magnet postion on front baffle and detemined 1 3/8" worked best in the two pieces interaction of magnetic pull forces encountered. I also learned, how much I could shift things around in worst case scenario. Really was benificial, performing this experimental test example.

A trick I did, was clamp both grill frame and speaker front baffle together. Have the speaker front baffle backside, facing upwards, for initial drilling, and the grill frame front resting on surface. This will ensure perfect alignment of Magnets at both locations. The drill bit size I used was a 1/32". This tiny drill process, is just for alignment of final drill points. This will align all the final full size holes perfectly, for installation of all the magnet locations. You can fill in the tiny hole on the front baffle. After seperating the two, now you'll drill both grill frame and Front baffle designated locations accordingly. Keep in mind on Front baffle only drill from the backside of front baffle, 1 3/8" depth. Leaving 1/8" of wood between the front. Don't worry, the magnet pulls through the wood. Afterwords, I drilled full size holes for both pieces and trial fitted all the magnets. Then aligned up the baffle and grill frame. They attached to one another, like a couple doing the deed!  :lol: :thumb:


I can't put enough emphasis, only drill backside of speaker baffle with drill press, otherwise you will ruin the baffle. If you don't have a drill press, but want to proceed, hire a professional to do this specific task. the tolerances of the corners on backside are close, so don't chance it with a hand drill.  :nono:

This will allow for the magnetic force to pull through the wood enough, to hold the front grill frame. Afterwords, you can either glue the magnet or press fit in drilled hole. You can either fill the hole, or glue a wood dowel like I did. Sanded it down flush. Your good to go with the front baffle.


I decided against the custom top grill shown in photo. I came up with another idea.

.

« Last Edit: 17 May 2023, 10:27 pm by NXSTUDIO-DRUMMER »

nlitworld

  • Full Member
  • Posts: 1993
  • Strange things are afoot at the Circle K
Re: NX STUDIO BUILD
« Reply #45 on: 23 Oct 2021, 12:55 am »
Thank you for the idea on the grill fasteners for the crossover. Just ordered up a set for my build. Simple and elegant solution to make things easy.  :thumb:


What are you building? A pair of NX Studio's?

Yup, flatpack just arrived yesterday so I'm going to start in on it this week and hopefully get some glue slapped on there by the weekend. I ordered the smallest speaker grill fasteners just because it won't take much to keep it in place. Once I get the box all set we're going wild with painting it.  8)

NXSTUDIO-DRUMMER

  • Jr. Member
  • Posts: 167
Re: NX STUDIO BUILD
« Reply #46 on: 28 Oct 2021, 11:55 pm »
Utilized this product in between the cabinet bottom and crossover board, to reduce resonance.


.


« Last Edit: 24 Feb 2023, 07:58 pm by NXSTUDIO-DRUMMER »

nlitworld

  • Full Member
  • Posts: 1993
  • Strange things are afoot at the Circle K
Re: NX STUDIO BUILD
« Reply #47 on: 29 Oct 2021, 02:01 pm »
Classic! Dry fit them and glued the ramp together. This weekend I bust the clamps out and make it happen. I need to put the crossover mounts into the base before I get going. Plus I'm still waiting for parts to arrive but that just gives me more time to focus on painting the boxes all wild.

NXSTUDIO-DRUMMER

  • Jr. Member
  • Posts: 167
Re: NX STUDIO BUILD
« Reply #48 on: 15 Nov 2021, 07:28 pm »
Finished CNC process on Stock grills, provided by Jay's NX-STUDIO Flat pack. Notice tiny holes on top. This is where I inserted magnets, to enable easier removal of top grills, if needed.   


« Last Edit: 9 Mar 2023, 08:57 pm by NXSTUDIO-DRUMMER »

NXSTUDIO-DRUMMER

  • Jr. Member
  • Posts: 167
Re: NX STUDIO BUILD
« Reply #49 on: 24 Nov 2021, 01:08 am »
Some of the other finishing products, that are available at home depot, with the exception of the General Finishes product shown.


[/b]

This product is excellent, I highly recommend for finishing.

Here is General Finishes link for reference of materials and How to Video's.

https://generalfinishes.com/video 


« Last Edit: 10 Mar 2023, 02:27 pm by NXSTUDIO-DRUMMER »

NXSTUDIO-DRUMMER

  • Jr. Member
  • Posts: 167
Re: NX STUDIO BUILD
« Reply #50 on: 27 Nov 2021, 10:21 pm »
Getting ready for the veneering process.  Resource for veneer was, https://www.veneersupplies.com/   
They provided excellent customer service. My particular veneer was unbacked, but was packaged up first rate. Impressed :thumb:


Heatlock adheasive glue worked great too. Purchase Heatlock here
https://www.veneersupplies.com/products/Better-Bond-Heat-Lock-Veneer-Glue.html


How to on applying Heat Lock glue link.
https://www.veneersupplies.com/docs/instructions-heatlock.pdf


Absolute best roller to apply HeatLock glue, for your veneer project.  purchase link
https://www.veneersupplies.com/products/Veneer-Glue-Roller.html


« Last Edit: 9 Mar 2023, 09:28 pm by NXSTUDIO-DRUMMER »

nlitworld

  • Full Member
  • Posts: 1993
  • Strange things are afoot at the Circle K
Re: NX STUDIO BUILD
« Reply #51 on: 28 Nov 2021, 12:03 am »
Lookin good!  :thumb: You've definitely made more progress than I have on mine. Keep it up.

Tyson

  • Full Member
  • Posts: 11111
  • Audio - It's all a big fake.
Re: NX STUDIO BUILD
« Reply #52 on: 28 Nov 2021, 12:51 am »
They are shaping up very nicely.

Peter J

  • Full Member
  • Posts: 1876
  • Hmmmm
Re: NX STUDIO BUILD
« Reply #53 on: 28 Nov 2021, 03:40 pm »
 A couple of things to note for builders using this as reference.

1. A down spiral trimmer would be a better all-around choice as it pulls chips and veneer down toward substrate, reducing splintering and chipping.
https://www.whitesiderouterbits.com/collections/flush-trim-spiral-bits/products/rftd2100

2. Two-part epoxy is going to increase "in-clamp" set time considerably. Typically, 12 hours minimum, with 24 hrs. often recommended. The only advantage I can see using epoxy is open time. Would not be worth it to my way of thinking. Both wood glue and epoxy joints exceed the strength of MDF by a huge margin.

NXSTUDIO-DRUMMER

  • Jr. Member
  • Posts: 167
Re: NX STUDIO BUILD
« Reply #54 on: 28 Nov 2021, 09:36 pm »
Peter,
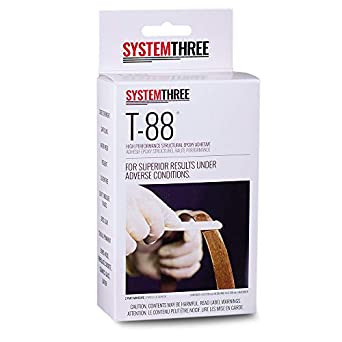
The open time was my point, some people may like having extra time, to set up clamps for alignment. For seasoned builders, it may not appeal to them, because of the longer cure time. However, for a first time builder, they may prefer the extra time for clamping and alignment purposes. Since the NX STUDIO isn't a typical small box speaker build, this is another option adhesive wise. Both adhesives, Titebond Extended & SYTEMTHREE T-88, are good available options.  :thumb:

In regards to the spiral bit, I agree with you peterJ, I was able to use my bit with success, but would encourage others to refer to the link you suggested above. I will be purchaing one, for my next veneering project for sure! Thanks Peter!


https://www.systemthree.com/ 

« Last Edit: 9 Mar 2023, 09:31 pm by NXSTUDIO-DRUMMER »

NXSTUDIO-DRUMMER

  • Jr. Member
  • Posts: 167
Re: NX STUDIO BUILD
« Reply #55 on: 28 Nov 2021, 09:41 pm »


.
« Last Edit: 24 Feb 2023, 08:14 pm by NXSTUDIO-DRUMMER »

NXSTUDIO-DRUMMER

  • Jr. Member
  • Posts: 167
Re: NX STUDIO BUILD
« Reply #56 on: 28 Nov 2021, 09:43 pm »
Lookin good!  :thumb: You've definitely made more progress than I have on mine. Keep it up.

Were you able to fix the corner of your speaker?  It appeared you were working on it, based on your last photo's posted.
Looking forward to seeing your paint job on the STUDIO's.
« Last Edit: 30 Nov 2021, 03:03 am by NXSTUDIO-DRUMMER »

nlitworld

  • Full Member
  • Posts: 1993
  • Strange things are afoot at the Circle K
Re: NX STUDIO BUILD
« Reply #57 on: 29 Nov 2021, 02:30 am »
Were you able to fix the corner of your speaker?  It appeared you were working on it, based on your last photo's posted.
Looking forward to seeing your paint job on the STUIO's.

Yep, fixed up perfectly and just finishing up filling and sanding seams with glazing putty. Should be into primer this week  :D

NXSTUDIO-DRUMMER

  • Jr. Member
  • Posts: 167
Re: NX STUDIO BUILD
« Reply #58 on: 1 Dec 2021, 06:25 pm »


Backside of cabinet, veneered with hondurous rosewood

« Last Edit: 9 Mar 2023, 04:57 pm by NXSTUDIO-DRUMMER »

Tyson

  • Full Member
  • Posts: 11111
  • Audio - It's all a big fake.
Re: NX STUDIO BUILD
« Reply #59 on: 1 Dec 2021, 09:11 pm »
Very clever.