I've got my "maan cave" home theater room in the basement, but now the wife wants hers.
So.....
Here's the story of what I've been up to, the pictures (with captions) will follow. The kitchen was linoleum, the living room, dining room, and family room were builders grade (very cheap) tan carpet. My wife has been wanting wood floors for MANY years. I recall starting a thread here a few years ago asking for comments and suggestions about wood floors. After all these years, we're just now doing something about it.
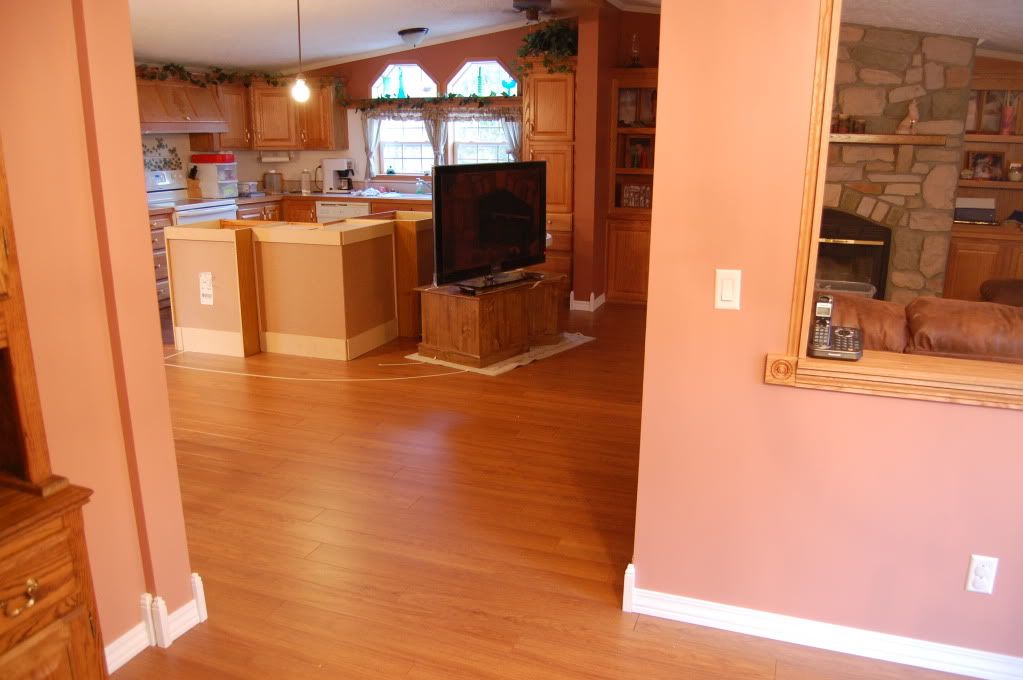
- She now has almost 900 square feet of laminate wood floor.
We had painted the four rooms in two tone colors of light (bland, boring, and very conservative) colors and highlighted them with a wallpaper border that splits the various shades mid point horizontally. Like a chair rail almost.
- She now has very BOLD, very striking colors.
The television was a 53" (4:3 ratio) Sony from 1995. It's seen better days, that's for sure. It's incapable of presenting a picture that doesn't look like it was taken in a fog. It has been a wonderful machine for many years, but it's time to go.
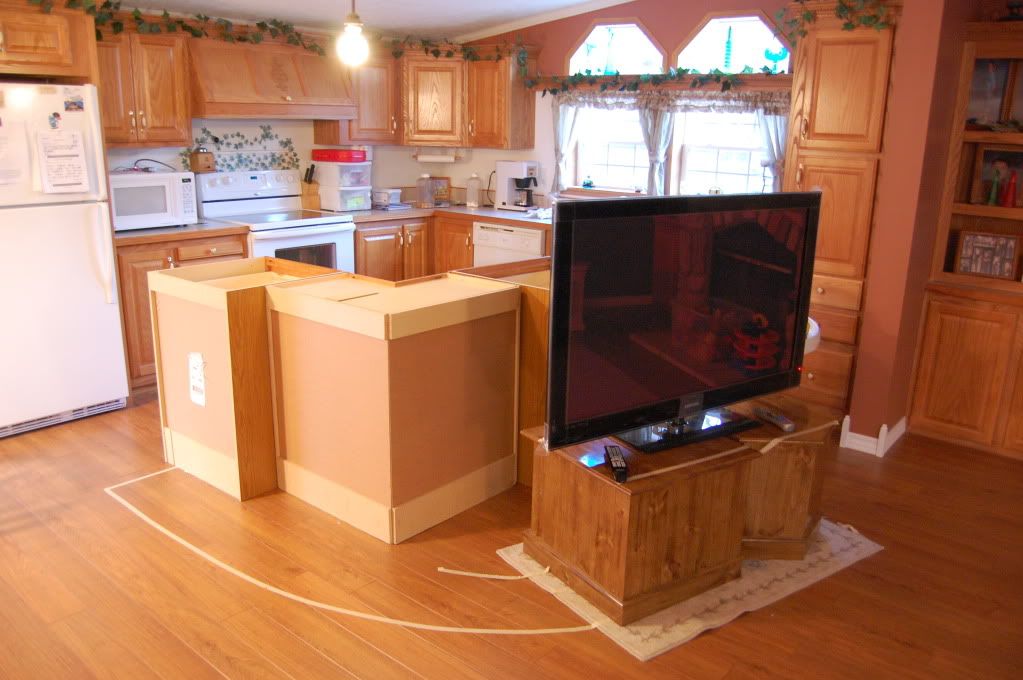
- She now has a 50" (16:9 widescreen) Samsung Plasma
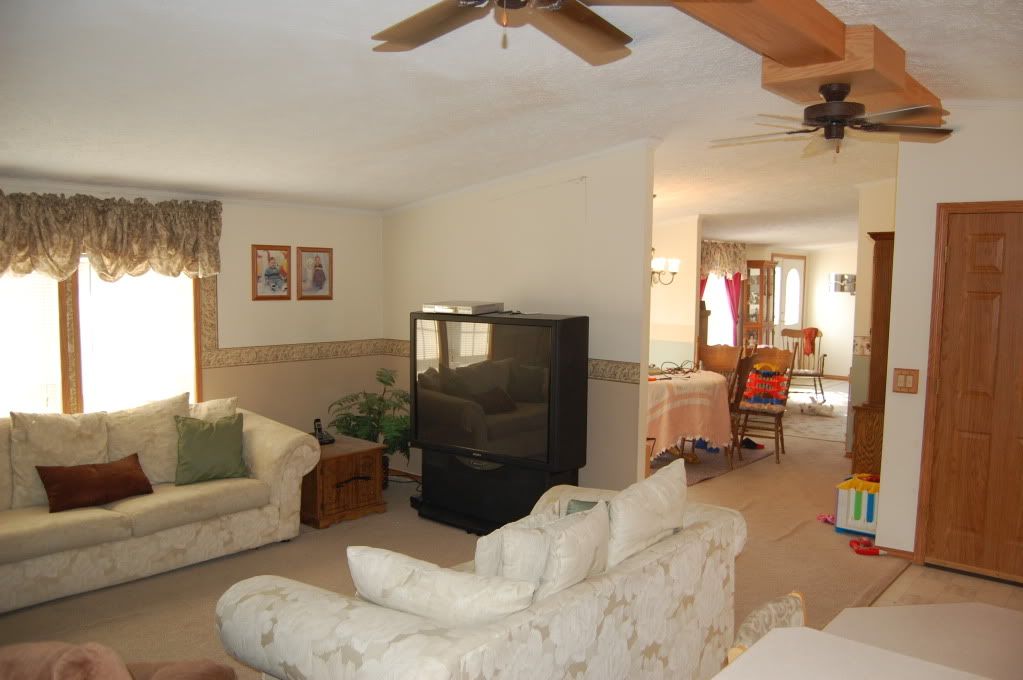
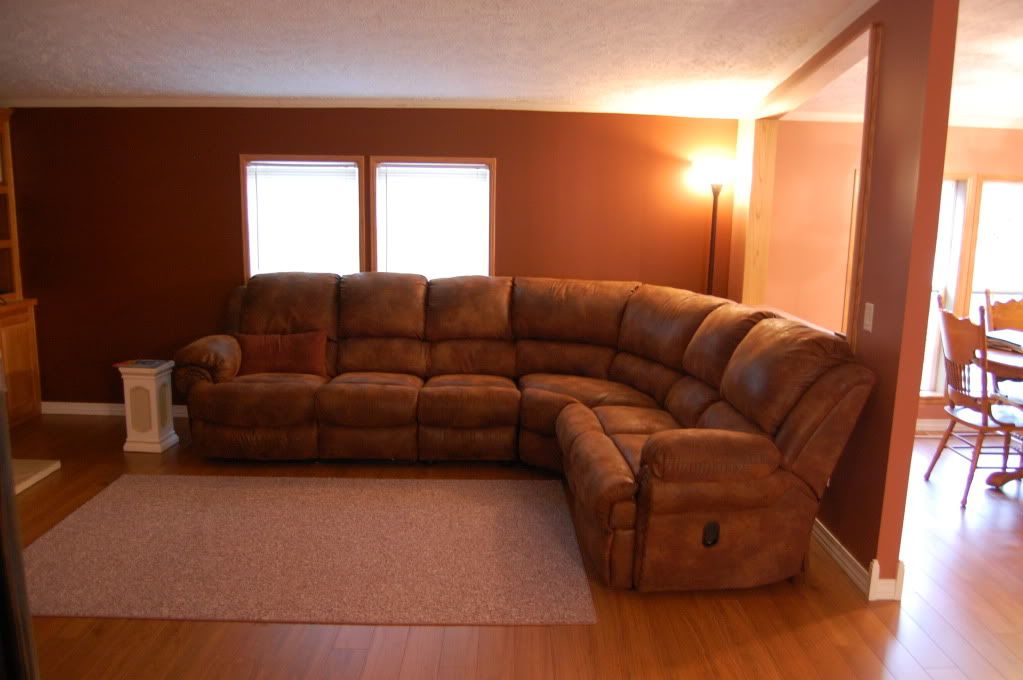
The couch (sofa), loveseat, and two end tables are "hand-me-downs" from over a decade ago. It's time we choose and purchase our own furniture. We deserve it after 20 years of marriage.
- She now has a sectional. Complete with two recliners and seating for several people.
The kitchen stove/range had two burners incapable of boiling water. That is, if you're wanting hot water in the next couple of hours.
- She now has a glasstop.......I'm actually very impressed with this unit. Much more user friendly than the electric burner unit we've had.
The kitchen island, although a very nice size, was shaped inappropriately for those of us that actually like to
COOK.
- Remedy......
And I really LOVE this one........ Demolish and rebuild the kitchen island, complete with a built in 50" plasma.

This can now be seen from the other three rooms previously mentioned. Before the remodel, the TV could only be seen from one room.
By some bizarre act of stupidity (twice), we've managed to heat glassware on the range top (stove top) to the point of explosion. This has caused small shards of glassware to melt into the vinyl linoleum flooring. My wife has been most successful in faux painting the charred areas, but you could still tell.
-Remedied by the near 900 SF of laminate wood floor I've installed.
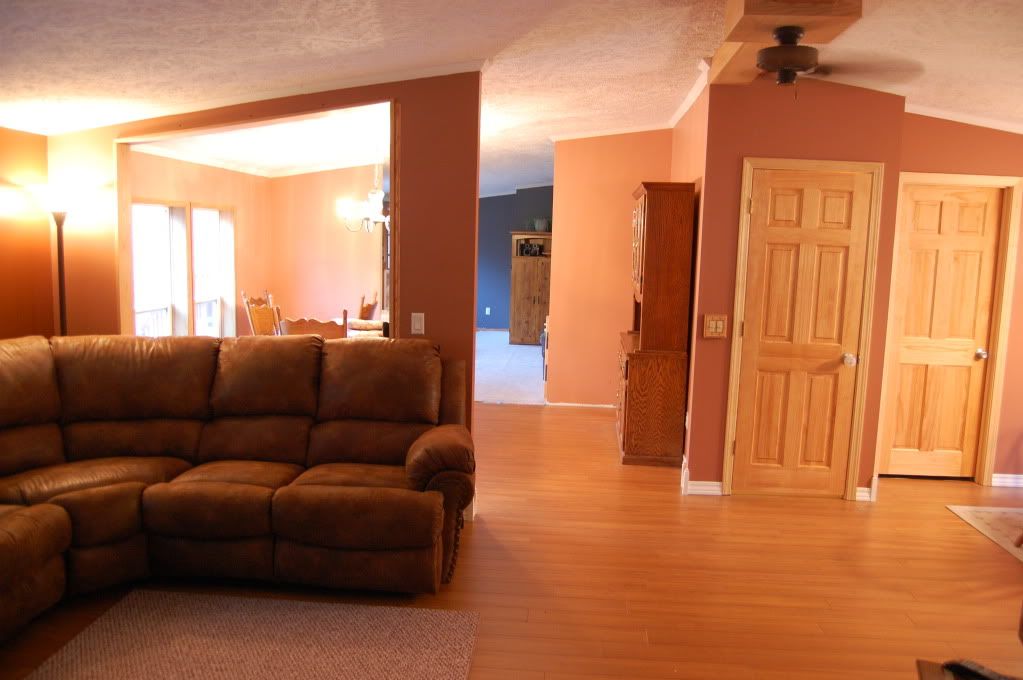
The house was definitively divided into three sections; The cooking area, the seating area, and the sleeping area. With this remodel, we have made it two sections. Essentially turning it into "bedrooms" (individually private) and the rest of the house (public, open and airy).
- Remedied by me cutting a hole approximately 30 square feet in size. This, in essence, has opened up the house to the point where you can almost see "anything from anywhere". This was the wifes idea. I'm surprised at how much of an improvement this made opening things up. She starts the process with a sledgehammer.

The trimwork and casework was MDF (medium density fiberboard / "particle board") with a vinyl "woodgrain" appearance.
Need I say more?

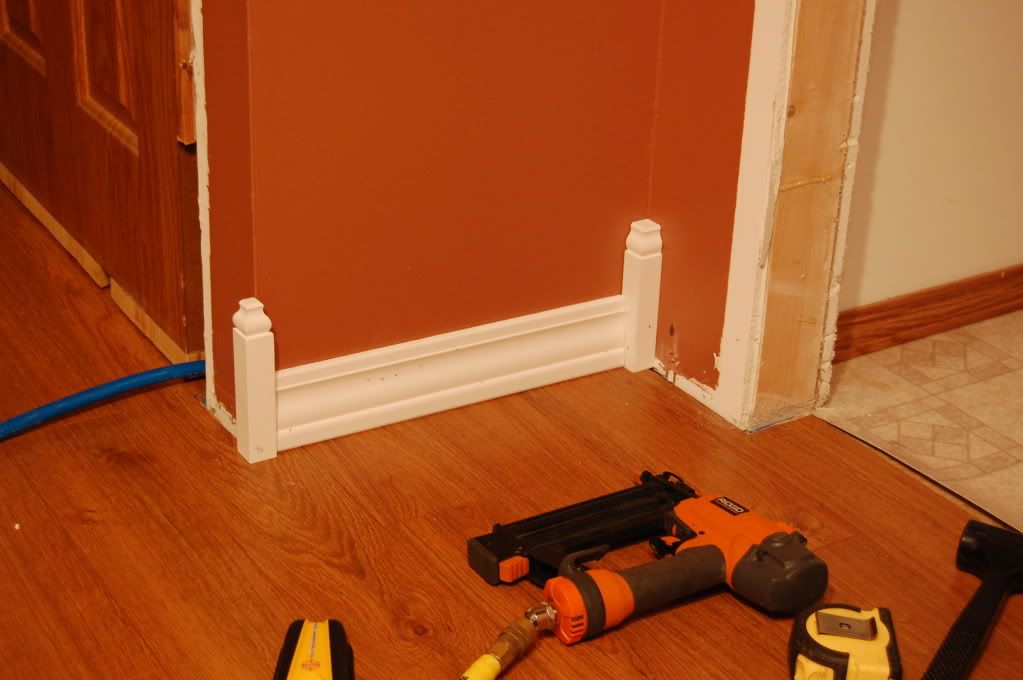
- Ok....Well ..... I'm still using MDF, but the baseboard is now painted white. Nothing I despise more than a cheap looking plastic "woodgrain". At least the white paint looks better than the plastic "wood".
One last comment..... As much as I hate "fake", in any aspect of life....I've decided to use a laminate wood flooring. For those that are unaware of the true definition of "laminate", it's essentially an MDF core with a vinyl (Formica?) coating. I put a solid oak flooring sample through it's paces and it just can't stand up to the rigors of several children (my wife babysits other peoples kids). It's purely amazing how much of a beating this flooring can take.
So....
Here we go with the before and after:
This is the wall from the perspective of the dining room. The old TV was directly on the other side of this wall. I gave the wife the small sledgehammer and told her to "open a can of whoop-ass".
-Note;
The light colored walls.
The dining room table covered for future use as a workbench.
The wrinkled cheapo carpet
The thin, cheap baseboard
White 15 year old, second hand loveseat
You can barely see the kitchen island on the left
"That's just
WRONG"......The wife didn't like beating on the walls with a sledgehammer as much as I thought she would. I honestly can say I've never seen that look on her face in 20 plus years.
-Note;
The Sony TV that will be gone soon.
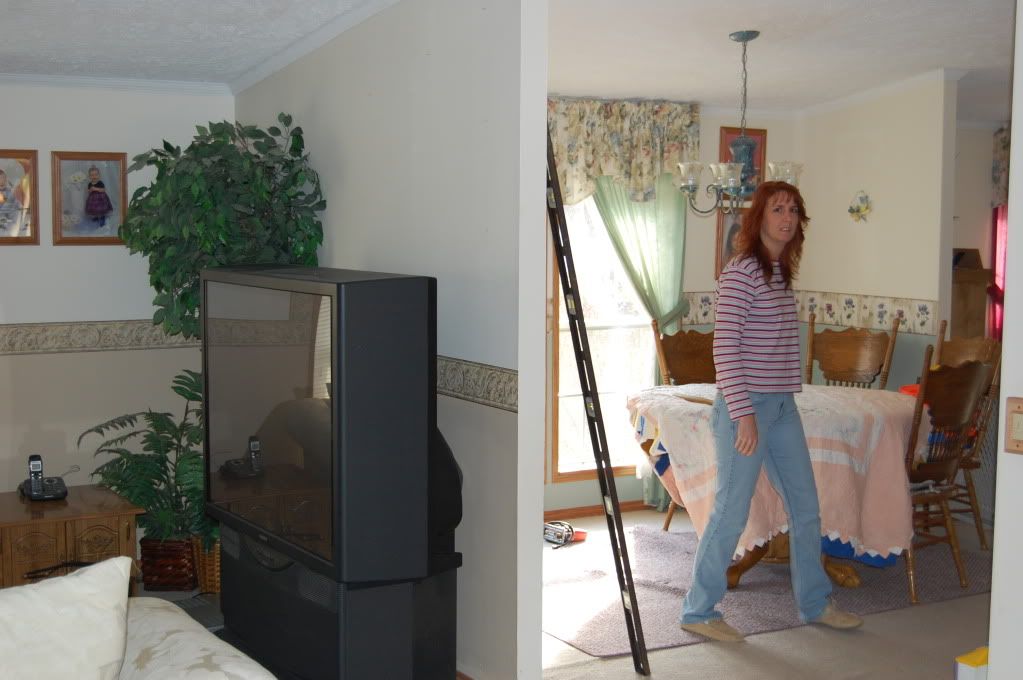
I'm standing in the kitchen. The island can barely be seen on the lower right of the picture.
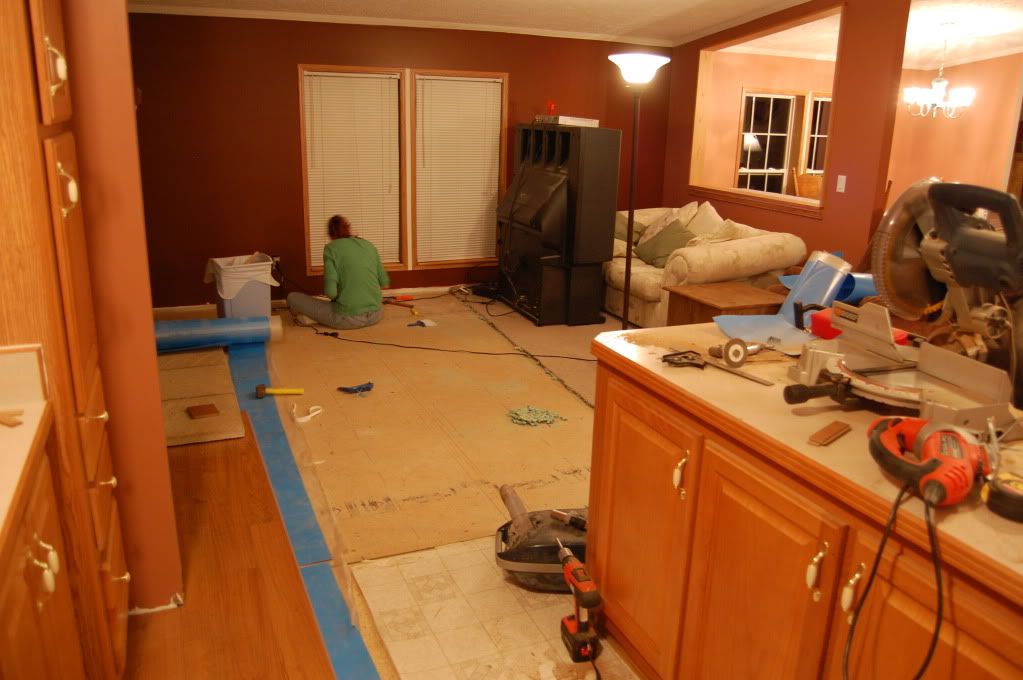
A good overall image of the four rooms being modified.
-Note;
The wall behind the TV. Most of that wall will be gone soon. Look closely and you can see the pencil marks in the drywall. The 6' level seen in the last couple photos was used as a guide.
Also (again) note the light (boring) color of the walls. That will change (drastically) very soon.
The six panel door on the right. That's another plastic version of "real" wood. That will change soon as well.
Big Mess!!
Note;
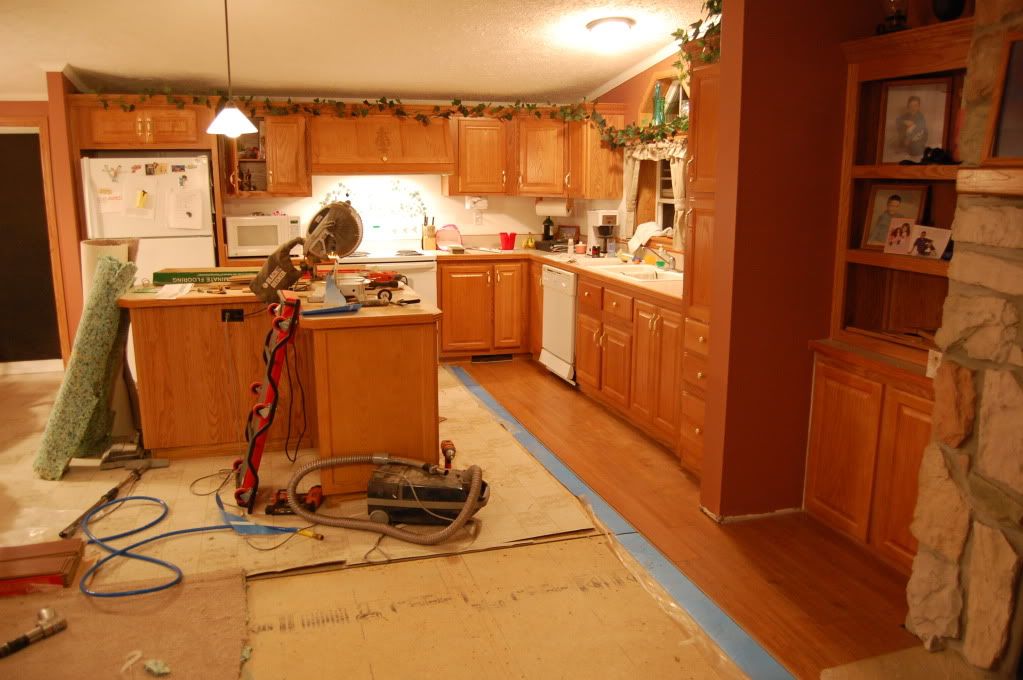
The new wood flooring on the far left.
The linoleum kitchen flooring on the foreground, bare subfloor in the aftground.
The wife is a real trooper. She removed ALL 900 feet of the linoleum, carpet and tackstrip!

Kitchen island on the right (now a workbench)
The "hole" I made in the wall behind where the TV was. This made a HUGE difference in opening up the house.
Very bold colors
Another shot of the mess
The kitchen island being dismantled
-Note;
The walls are a dark paint now.
The two doors on the right are still plastic (the left one goes downstairs to the basement, the right one is the laundry/utility room.
Half shattered pendant lighting fixture hanging above the kitchen island. Wasn't planning on changing that, but plans change....ya' know?

Linoleum flooring, still there....
More mess.
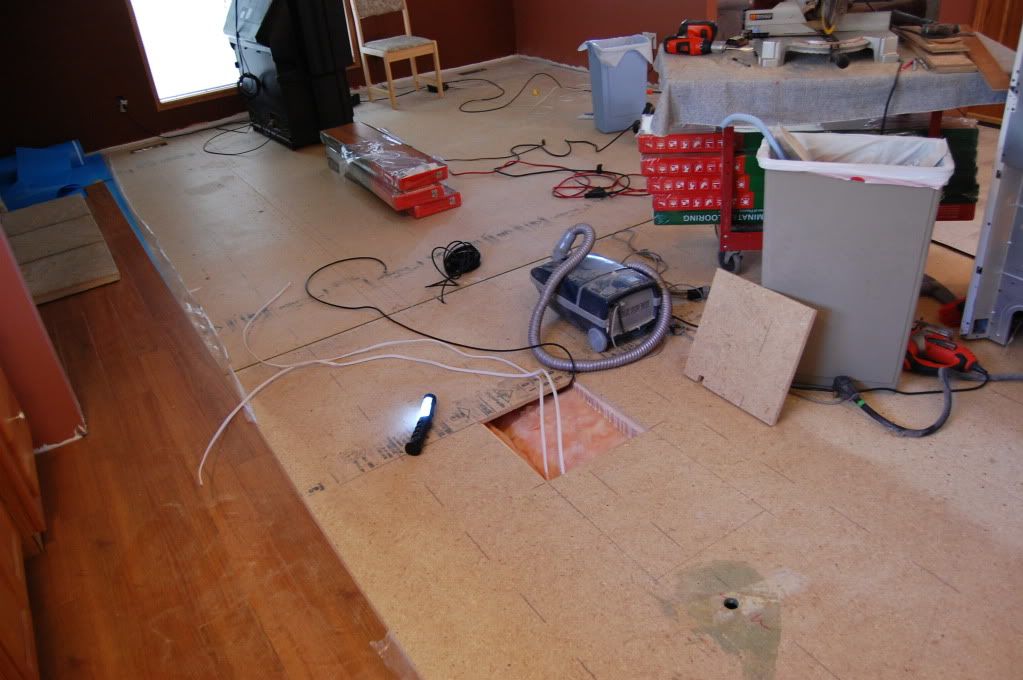
Note;
The small hole in the floor, foreground right side. Was where the 120Voltage came through the floor to power the outlets on the kitchen island. I've since moved the location of the 120 (two white wires) to the large square I've cut in the sub-floor. Also note the addition of RG-6 cable (black wire) to supply video signal to the new plasma TV.
Small amount of new flooring on the left.
Nap time.
Note;
Two rooms have new flooring (I'm standing one one to take the picture so you can't see it)
Two different wall colors
Wife doing nothing (I told her I was going to blackmail her with this picture)
The large hole I cut in the wall. Now has a small bit of red oak trim surrounding the cut out.
The TV has shrunk into a 21"
We sold the couch, loveseat, and TV. They're now GONE!!!


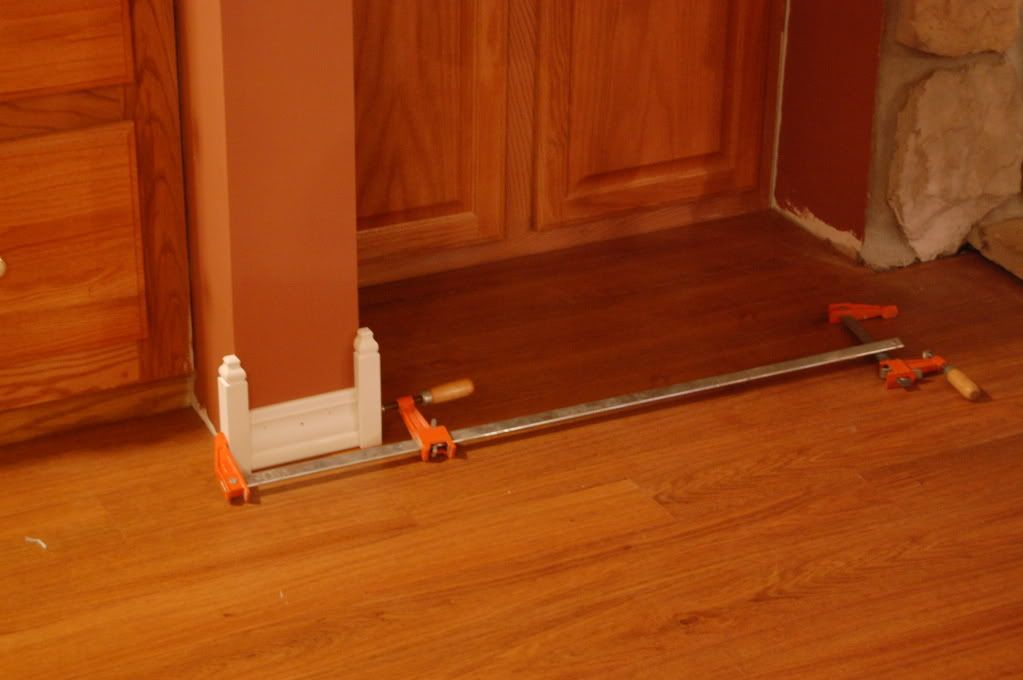
God is in the details;
Note;
These little pieces seemed cheap enough at the time. So I decided to use them throughout the remodel. I've used just a touch of Gorilla Glue and a few 2" pneumatic nails since they're located on the outside of the wall corners. This exposes them to the numerous children that have chosen my home as the one they want to destroy. The glue is the last line of defense I suppose.
We're now impressed with ourselves.
Note;
The new 50" Samsung Plasma is now sitting in the floor (also note the DishNetwork Blues station playing)

Three rooms now have new flooring
Trim (casement) has been removed from the two plastic doors. One door is now gone. Yea....please ignore the nasty mess in the laundry room. I dare you to photograph yours.


A couple pieces of new baseboard can be seen.
A real mess.......
Note;
This is the forth and final room to be finished. Unfortunately, this is also the room that has accumulated all of the crap (and childrens toys) from the other three rooms. Call it a 'dumping ground', if you will.
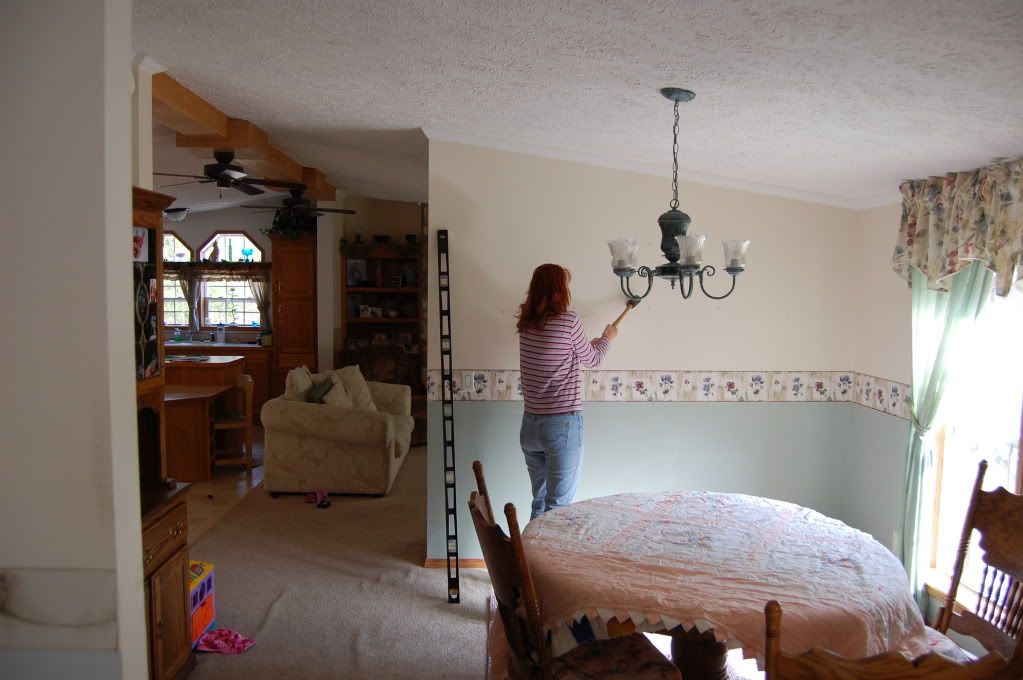
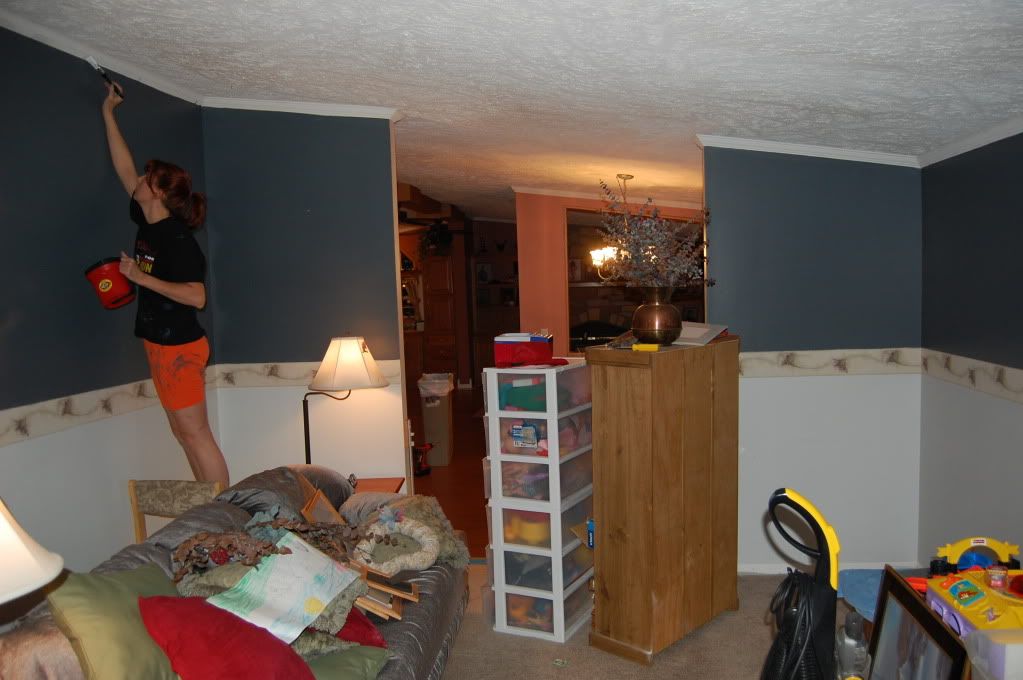
The wife is painting. Much to my surprise, she dug out my several year old gray paint that was used to color my home theater room. To say that I was in shock when I saw her using this color would be a severe understatement.
The other three rooms under construction are in the background of this photo.
More detail.
Note;
My favorite part....The cool stuff. Not sure what these are called, but I've bought a few dozen of them. Hand painting them was more of a pain that I could have ever imagined, but worth the effort.
On the left we still have a plastic door, the right, a door is still missing.
Getting better
Notes;
Cabinets for the kitchen island are in place.
Plasma TV is in
approximate location where it will live it's life.
I'm standing where the dining room table would be. China cabinet slightly on the left of image.
Also note, I've now totally broken the light fixture above the island. All that's remaining is a pole and a light bulb.
Closer
Note;
Close up of the future island/TV area.
The masking tape on the floor is roughly where the new island will be.
New stovetop can be seen in the background
Reflection in the TV screen is the fireplace stone surround (with a couple toys)
.
OHHhhhh BABYYyyyyyyy.....!!!!!!
The wife has a new toy!
Note;
New paint. New baseboard. New flooring, and....The sectional. Need I say more?
This is where the wife (and family) will sit when watching a movie.
Yea.
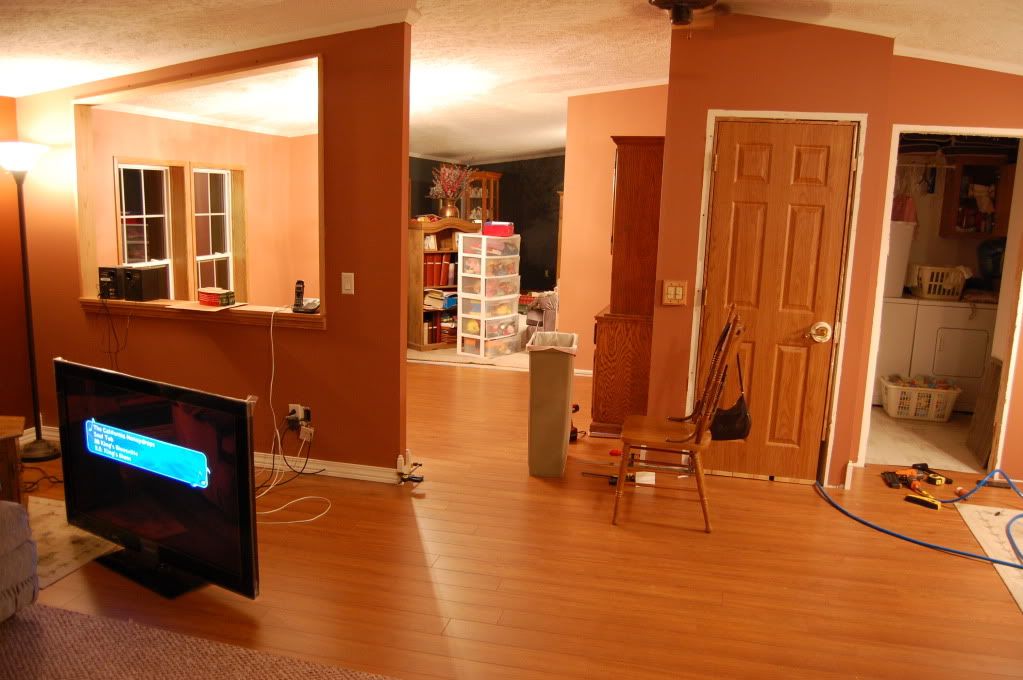
Note;
The kitchen on the right
The dining room on the far left
Sectional in foreground left. (also note, that's the 'hole' I made in the wall above the sectional)
Two new wooden doors on the right.
Carpet in background will soon be replaced.
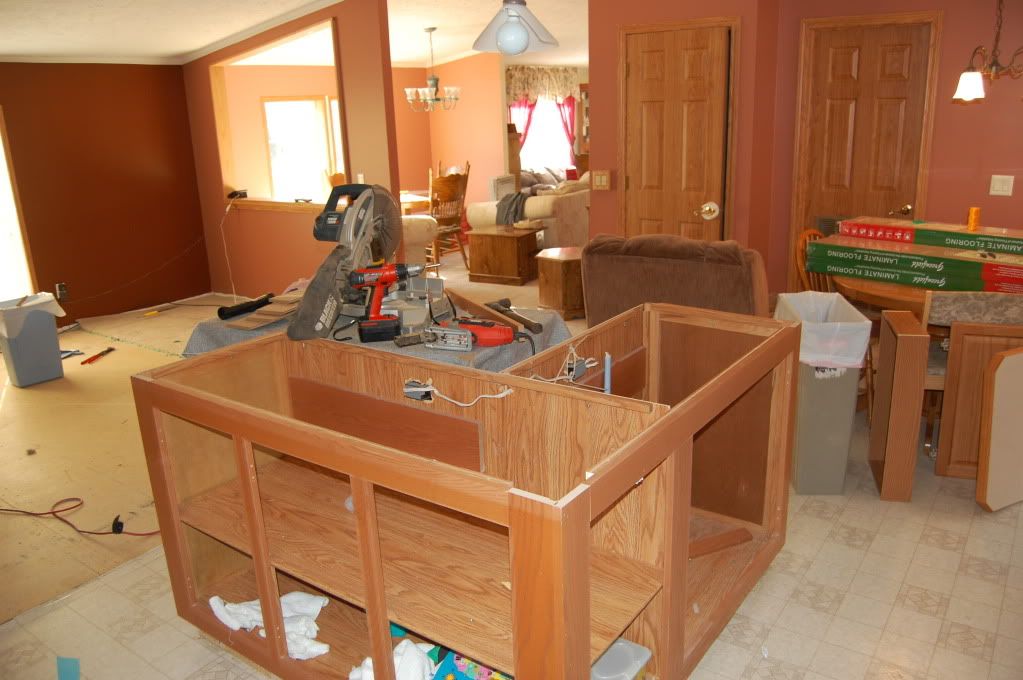
Time to use my creativity and imagination....
I told my wife to have faith in me.....
.....That I could design and create a new kitchen island that could house a large TV. Now's the time to get it done.
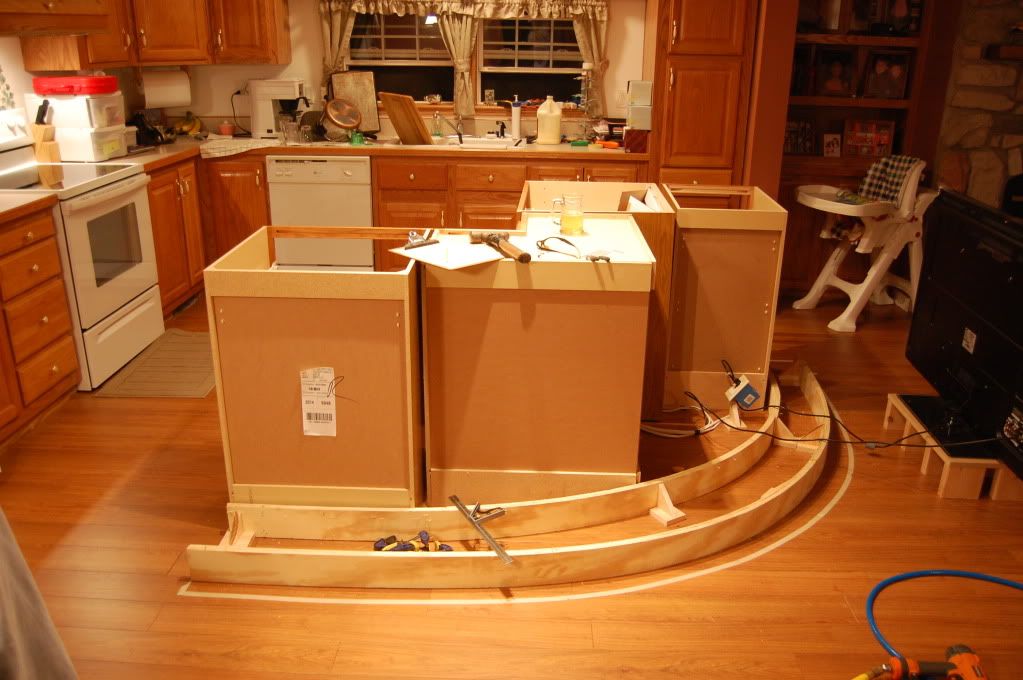
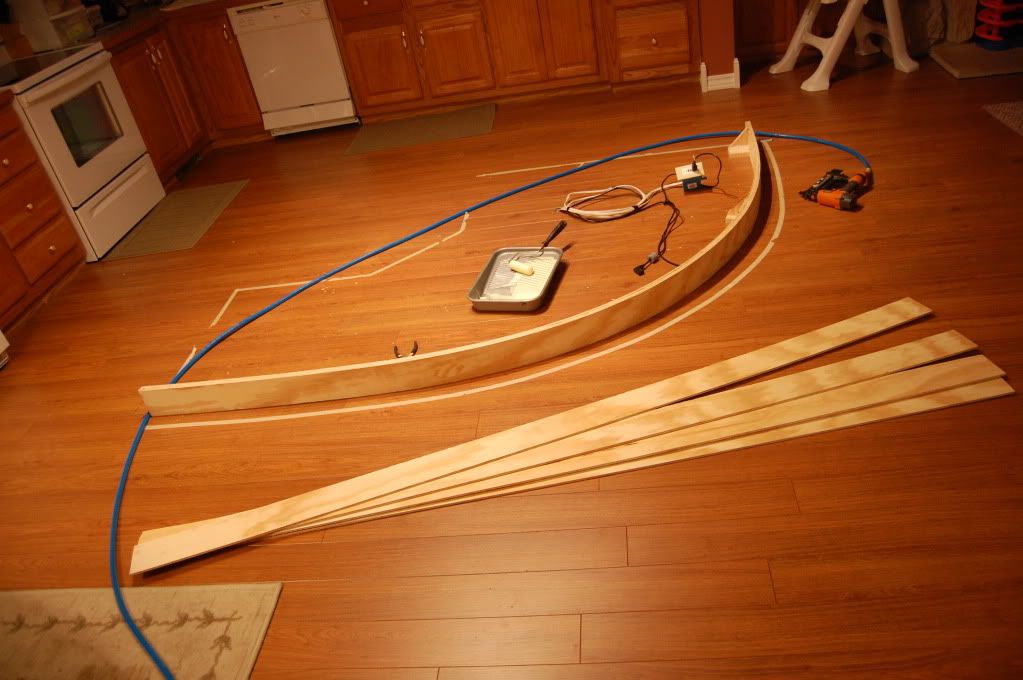
Note;
I stapled several blocks to the floor (under the area where the island will be) in a large, sweeping arc.
Then stapled 4.5" tall lengths of 1/4" plywood to these blocks. This will be the front of the toe-kick.
The masking tape on the floor will be the outer perimeter of the arc of the island.
Also note the paint tray and small roller to spread the wood glue. I'm using three layers of 1/4" plywood to form the base of the island. This requires a LOT of glue!!
Ohhh!!
Note;
The cabinet pieces have been put back in place. Mainly to ensure my measurements are correct.
Inner layers of laminate to hold the base. This base will not only form the foundation of the cabinet area above, but will also determine the height of the base of the plasma TV.
Also note, the kitchen countertops have been overrun with items normally housed inside the previous island. Cooking a meal with not only a diminished counter top area, but also an island that's now non-existant has become a bit of a challenge.
Another note; The frozen mug of beer. There have been a LOT of these used during the construction.