Amateur Build of the X-MTM Encore

0 Members and 1 Guest are viewing this topic. Read 28969 times.

hawkeyejw

Re: Amateur Build of the X-MTM Encore
« Reply #200 on: 25 Oct 2020, 03:59 pm »
Those crossovers look really nice Jon and a very neat job on the wiring. Looking good!

What are you thinking about doing for a finish?

jonsk2514

Re: Amateur Build of the X-MTM Encore
« Reply #201 on: 25 Oct 2020, 07:21 pm »
Thanks!

I owe a bit of that to Danny’s video on building the crossovers and to what other people showed in their posts.

For the finish I have been practicing on scraps and my test box.  I have done this sort of finish before, on other projects I have done.


This is an oil wood stain directly on the MDF with a top coat of semigloss poly.  They are a bit more burgundy than the pictures show and there is a bit of texture, which is hard to see in the pictures, to the finish that goes with the MDFl. It is like the texture of the grain in real wood coming through a finish.  The “end grain” of the MDF on the box is sealed with amber shellac; just the end grain, not the surface.  Actually, there are some lighter streaks on the sides where the shellac ran.  This gave me a visual of one vs the other.  I will need to do something to prevent runs.  Painter’s tape will likely work, so only the end grain gets sealed.

hawkeyejw

Re: Amateur Build of the X-MTM Encore
« Reply #202 on: 26 Oct 2020, 01:58 am »
I’ve never seen a finish like that before, looks like a challenge to get a consistent finish but a cool effect if you get it right. That color tone is nice and rich.

jonsk2514

Re: Amateur Build of the X-MTM Encore
« Reply #203 on: 26 Oct 2020, 04:36 pm »
Thanks!
It is unusual.  And it has a real old school look to it, which I like.

I stumbled across it while experimenting with finishes on something else I made, but wasn’t liking what I was getting.  It is pretty simple to do, but takes several days, maybe a week or more to do.  The time is in drying.  It is very tolerant of application; those samples were done with paper towels (I was too lazy to clean a brush  :roll:).  That is a mahogany oil stain layered up in 2 to 3 layers and let dry between layer; no buffing, just lay it on.  Each layer will take a day or 2 to dry.  Then it is sanded.  I suppose it could be lightly sanded between layers to take out unwanted high spots that would become unwanted light spots if only sanding the last coat.  It will ball up and gum up sand paper, but I only knock off the high spots.  Then I cover it with 3 coats of poly.  The first coat is sanded pretty well.  The next is steel wool-ed or sanded (depending on how I feel) and then a final coat.  On those samples I left the texture that came through as I wasn’t looking to get a piano finish, and the sanding was pretty light.  I like how that looked so that is what I plan for the cabinets.

One thing that took some effort was to figure out how to seal the end grain of the MDF and yet still get a consistent stain across the piece.  I first tired linseed oil, but that never sealed it.  I then tried the shellac.  I had amber on hand, not really caring if the color mattered as I was just trying to understand how well it would seal, but still allow the stain to lay on and soak in.  The box test piece had 2 coat of shellac on the end grain.  It turns out that the amber worked well with the stain.  The other thing I found out was that I don’t want to seal any of the face of the MDF.  The stain needs to be able to soak in a little.  And, the drips I had didn’t fully wipe off with alcohol, so I will need to take care to prevent them.  I did look at the list of ingredients on the shellac can for anything that sounded like it might be wax and found none. 

Right now I am in the process of cutting and fitting the No-Rez.  I still need to cut the driver and port holes in the front baffle and the binding plate hole in the back.  Then I have to glue on the front, trim the excess on the edges and round the edges.  That is the other thing I was practicing on my practice box; rounding the edges.  The plan there is to round the front and top edges.  I haven’t figured out how to put on a grill cloth.  So, for now it will just be uncovered.  As for the port holes in the front... These will be up against a wall.  Not the best, I know.

I have a ways to go before getting to the finish.  As with the rest of this build, when I get there I plan to show it in more detail.

jonsk2514

Re: Amateur Build of the X-MTM Encore
« Reply #204 on: 5 Nov 2020, 04:51 pm »
I have been plugging away.  The No-Rez has been cutup and installed in the cabinets.  The kit Danny sent me included 4 sheets of No-Rez and there was little left over, even with the added quarter round I included in the build and took up space the No-Rez would have filled.  Not sure if I did things right, but it seems right.

I went the route suggested by Danny, which was to cut it on a table saw.  Easy, just like he said.  I did read somewhere that someone saw sparks when cutting this stuff on a band saw.  To me, that says part of it is pretty abrasive.  I changed out the blade on my table saw to an older blade that I wasn’t worried about damaging.  I also found that a pair of tin snips worked really well to trim a slightly oversize piece (not that I mis-measured or anything like that...  :duh:)

The No-Rez has a bit of a curl to it and I used a piece of plywood to hold it flat while pushing it through the saw.
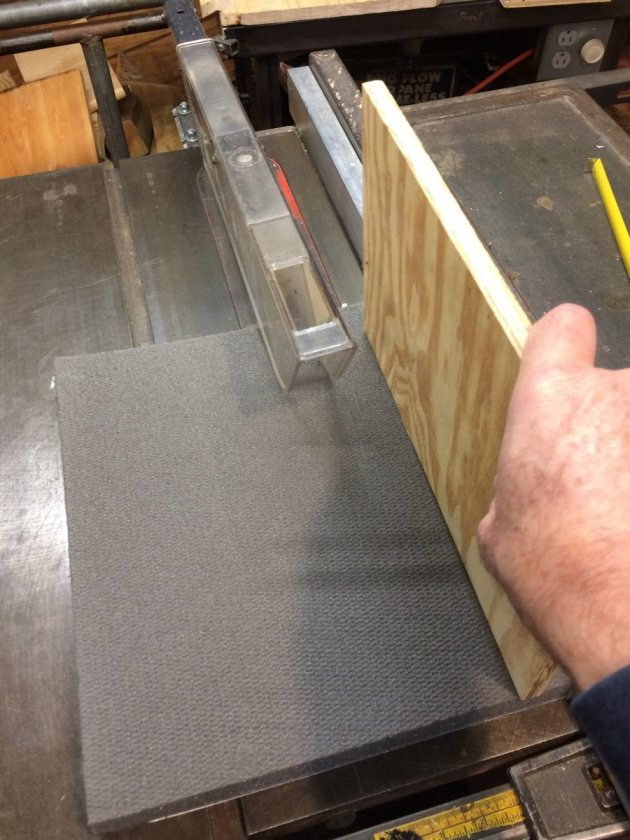


Given the symmetry of the cabinets, I cut all of the side pieces and bundled them together so they wouldn’t get mixed up.
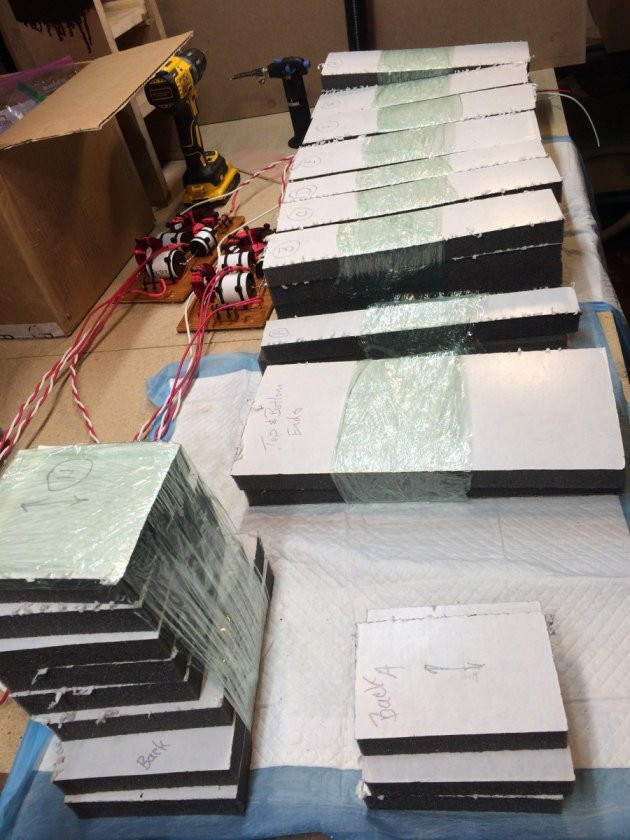


Because of the size of these speakers, the only way I could figure as to how to do any of the internal work was with the front baffle off.  I started with the No-Rez for the back side first.  As it turned out, I probably should have cut these pieces a bit larger (about 1/2” larger).  But, there was little excess, so maybe this was the best.  A little larger would have looked better, though, as it would have fully tucked under the side pieces. :roll:

Next came the top and bottom ends, followed by the sides of those chambers.    I had a section of a shelving unit that I used to have the cabinet a lower height than my workbench, which made installing the No-Rez a little more comfortable to do.
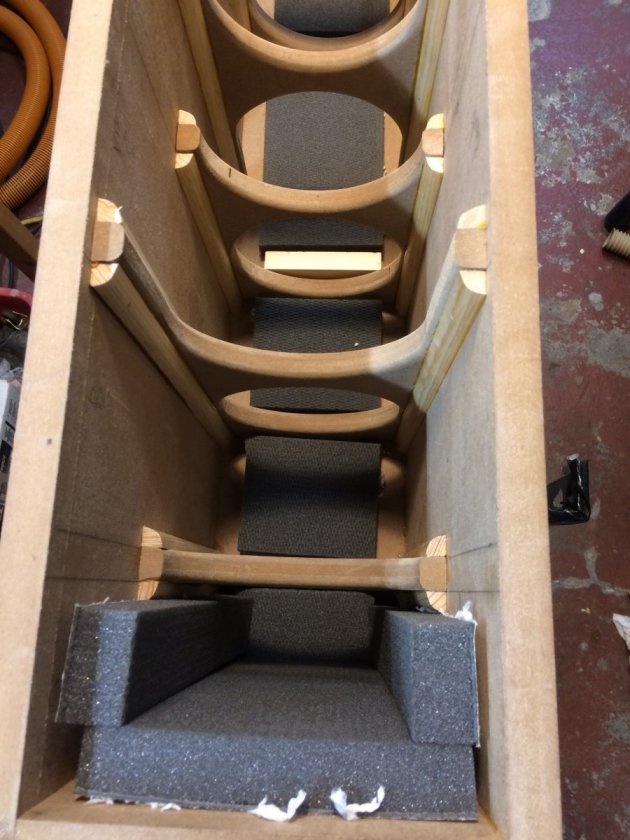


The No-Rez sticks like crazy.  I had seen suggestions to seal the insides with shellac, but in the builds Peter R showed in his videos, he just stuck them to the bare MDF, which is what I did.  I did wipe the insides down with a little alcohol on a paper towel just to get any dust off.  It dries fast and that seemed to work well.  I also made sure that there were no glue drips that would cause the No-Rez to stand off the MDF and not stick fully.

Lining up the No-Rez before pressuring it in place is really important because, once it touches the MDF more than a just a little bit, it is stuck for good.  Oh, I also followed Peter’s suggestion to cut the No-Rez with a gap to what ever it is adjacent to.  I think he said 3/8”.  I was about at this width, and in some cases less.  To his point, close is good enough.  This made it easy to fit the pieces in.

This all took a while to do, between the measuring, cutting, wiping and sticking it in place.   To complete the job, I installed the crossover unit and got the wires all in place.
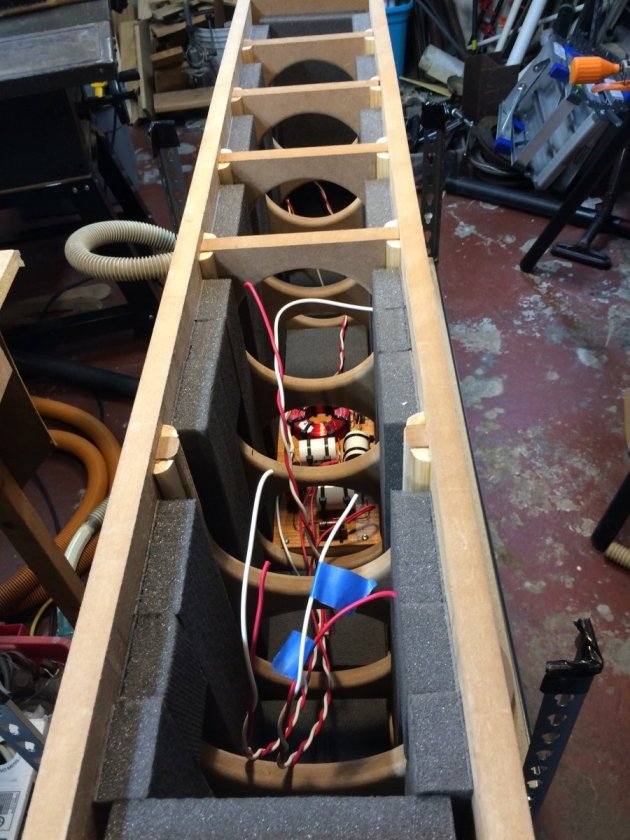


I cut the hole in the back baffle for the binding posts before putting the No-Rez in.  The idea is to have the No-Rez cover the hole while I finish the cabinet.  This way I don’t have to worry about dust or drips of some sort getting inside where it will be darn near impossible to get out.  I did this on a practice piece I found that I could use a 1/8” drill bit in my Dremel to cut the hard part of the No-Rez and then a really sharp knife to cut the foam.  I plan to do this on the front baffle for the ports.  I will cover the driver holes in the front baffle with tape before I glue the front baffle into places.
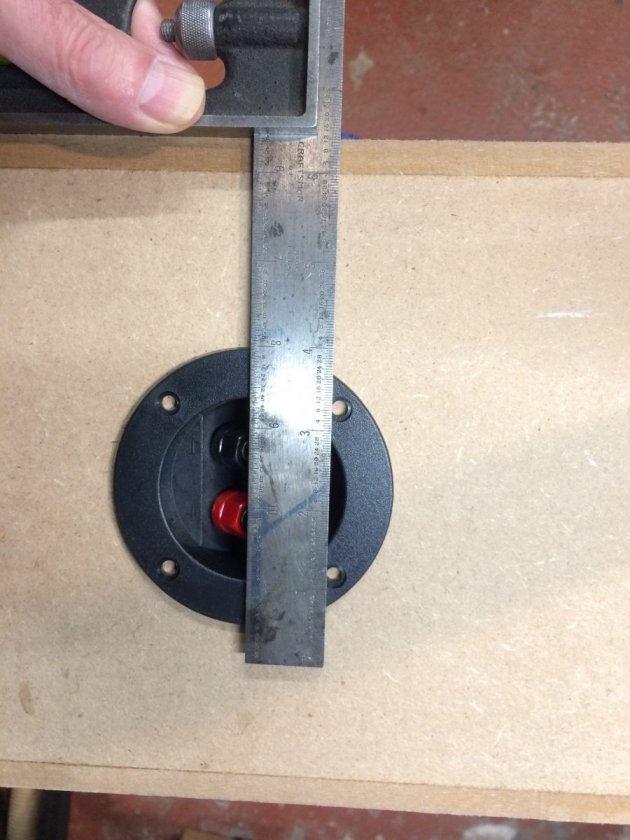


I lined up and marked the holes for the mounting screws, which is what I will do for the drivers also.  Things need to look good, even if they are out of sight, most of the time.  It shows you care.

I am getting close to having these things done.  I took my time cutting the holes in the front baffle for the drivers.

I did practice cuts for all of these holes on scrap pieces and made sure the drivers fit the resulting holes.  I also recorded all of the pin hole locations for the hole jig for the router.  For the actual cuts, I first drew out each hole on the front baffle before doing any cutting.  This way I would know if I had selected the correct pin location on the hole cutting jig.
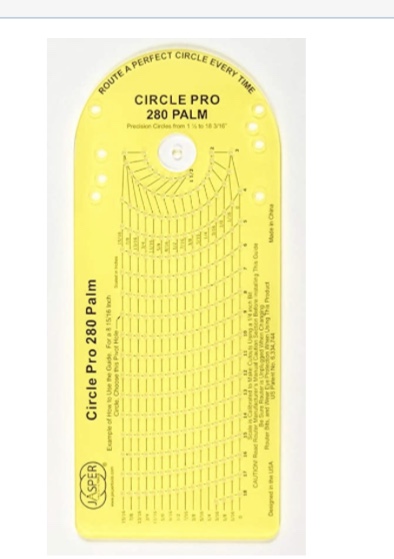


I am using a 1/8” cutting bit for the cutting and all of the pin hole locations on the hole cutting jig are marked for using a 1/4” cutter, so with using that jig all of pin locations had to be adjusted accordingly to get the proper hole diameter.  For example, to cut a 5-1/8” dia hole, I had to use the 5-1/4” pin location.

I also found on my test piece that I had not cut the depth for the tweeter deep enough.  I found this when I was doing a triple check of my setup before cutting the front baffle.  I used the test piece to make adjustments to the blunge depth a little to get the tweeter flush with the baffle face, before actually cutting on the front baffle.  It was good I did the checking as that would not have been an easy correction, if I have finished the hole cut before finding this out.
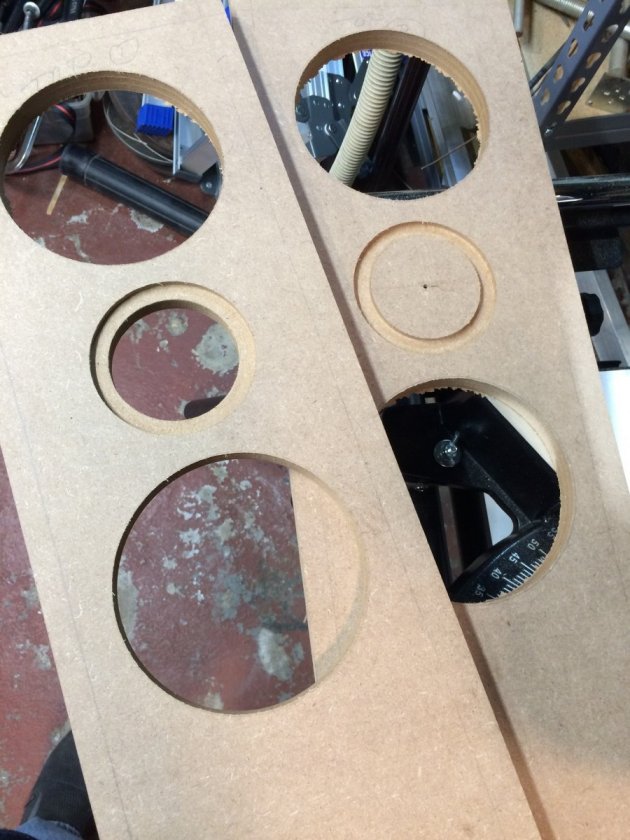


I first cut the recess for the tweeters, then I cut the hole, and then added the cutout for the wiring posts on the tweeters.

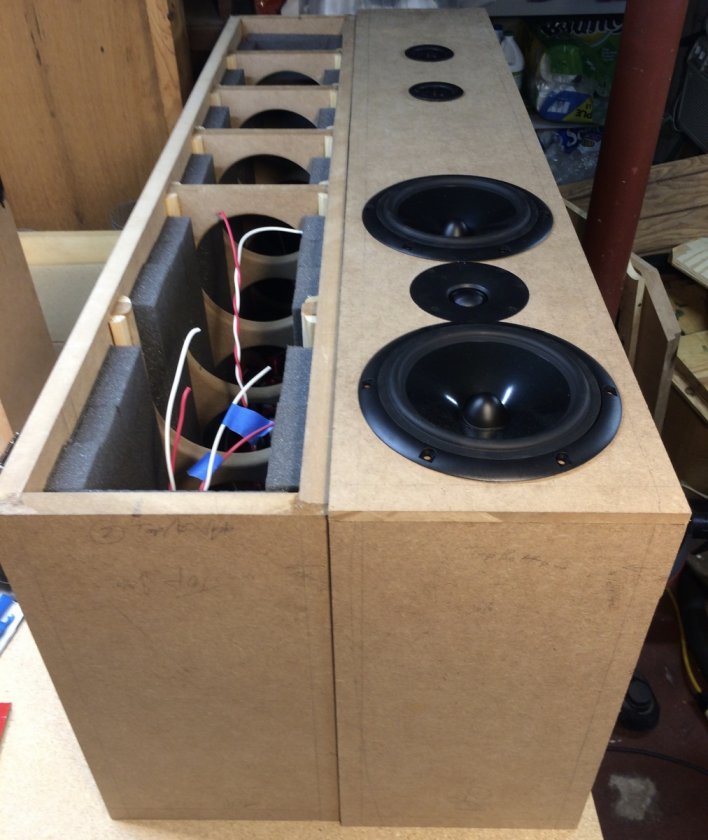
It is starting to look like a speaker.


Hobbsmeerkat

  • Industry Participant
  • Posts: 2543
Re: Amateur Build of the X-MTM Encore
« Reply #205 on: 5 Nov 2020, 05:02 pm »
These are coming along great!  :thumb:
I see you're also going with front mounted ports?

jonsk2514

Re: Amateur Build of the X-MTM Encore
« Reply #206 on: 5 Nov 2020, 09:03 pm »
Thanks.  :D

It has taken some time, with planning and care to get to this point.  It is actually exciting to see them at this point and know that soon I will be able to listen to them.  I will be doing a sound check on them as my next step.  I want to make sure everything works before I glue on the front baffle.  After I glue on the front baffle it will be really hard to fix anything inside of these.

And, yes, front ports.  There is just no room in the room to have these any distance from the wall.  In fact they have to be right up against the wall.  So, a compromise...  :?

jonsk2514

Re: Amateur Build of the X-MTM Encore
« Reply #207 on: 13 Nov 2020, 09:55 pm »
Before I went any further, I thought it would be a good idea to do a sound check.  I would hate to glue on the front baffle only to find out that I had some wires crossed somewhere or the like and had to go dig out the crossover and fix it at that point.


Yes, that would be tough to fix after the front is on...  Where are you?  Definitely not getting 2 hands in there.

The sound check would entail setting the front baffle in place, along with drivers, and then wiring everything up with an amplifier and iPhone.  Nothing would be actually fixed in place.  Then I dug out my really old, extremely high end audio amplifier (circa: older than dirt).  It was on a shelf, behind a stack of books in the attic... 


Then wiring it up with nothing but the best of connectors.


I think in Danny’s latest video he mentioned something about selling his kits to college kid who had no money but really liked really good audio.  Well that was me.  I just couldn’t afford “really good”.   :duh:

Then wiring up the drivers with the best high end bent wire connections I could muster.


More of the same to wire the speakers to the amplifier.


Then it was off to listen to some tunes...
Pandora...
Hmmmm.  A little underwhelming.  That was disappointing.  But, hey, maybe the amplifier wasn’t up to what it used to be.  And only one speaker was hooked up.  What can I say... I got done with one and was excited to hear it. 

It was late and I did what my mother-in-law used to say to her kids... Sleep on it.  Things will look (hear?) different in the morning.

Next day... Wired up the other speaker.  Powered up the amp.  Hmmmm....  No sound from the right speaker.  Switch wires from one speaker to the other...  Hmmmm.... no sound from the left speaker.   Twist the right/left channel knob back and forth a few times...  Crackle, crackle, scratch, crackle....  Oh, there we go, sound out of both speakers.  Now, go find something to play.  Try YouTube this time.  Maybe the quality is better than Pandora.  Tiffany Poon (concert pianist).  Ok, sounds good, but a little hard to tell much given the speakers are on their backs and it is hard to get into the proper listening position (ie: suspended from the ceiling ...  :lol:).  Cream...  You know - Eric Clapton, Jack Bruce and Ginger Baker?  How about the reunion concert in the Royal Albert Hall a few years back, and they look about the way I look now?

After about the 4th song, including Toad with that, what, 4 hour long Baker drum solo, the wife comes down into the basement mumbling something about “You can turn that down now”.  What?  It didn’t seem that loud down there, but I guess it could be heard in the rest of the house.

Yup, that will do.  And yes, they did sound much better with both hooked up and playing, and playing something of better quality than what Pandora had.  And I did check that both bass drivers were playing in unison as you could see their movement with a good bass note, of which there were plenty.  Highs were going to the tweeter, too.  Sound check finished.

Now, to get them finished.

jonsk2514

Re: Amateur Build of the X-MTM Encore
« Reply #208 on: 27 Nov 2020, 05:30 pm »
I hope everyone had a Happy Thanksgiving!   :thumb:

We did...  :green:

I even progressed a little further on the speakers.

I have been pondering what to do for stands for these, and still have not got it quite figured out.  The kit includes floor spikes, but I hesitated to use them on hardwood floors.  But, while I consider that, I knew I needed to include something on the bottom of the speakers to attach whatever I come up with for a stand.

The easiest thing to do (at least for me) is to install insert nuts (I think that is what they are called).  These are 3/4” long, 1/4x20 threaded metal pieces that screw into a hole in a wood piece.  My original plan was to drill these holes in the bottom before I installed the No-Rez, so the No-Rez would cover and seal the holes.  It  would also be simple as I could just drill through holes and it would be easy to clean up the mess.

Well, the best laid plans of mice and men...
The installation of the No-Rez took my attention away from my planned assembly sequence and that went in first.  Now the hole drilling got a little more difficult as I didn’t want to drill through the No-Rez.  This actually went well and all of the holes are done.  It just too a bit of time and care to do.

I made a template that is 1.5” thick to guide the drill perpendicular to the base.  It has a top rest to ensure it is lined up.  This will also serve to be the template for whatever I come up with for a stand.


When I finished drilling the holes I beveled them a little so the insert nut fits flush with the bottom.  My plan is to do the finish on the cabinets before putting in the nuts.  The back and bottom will done in flat black paint, first, then I will concentrate on finishing the rest of it.


I have also finished installing the No-Rez on the front baffles and taped over the openings to facilitate the finishing process (rounding the corners, sanding and the actual finish).


These are now ready to be glued on...  This will be the last chance to fix anything internally (not that I think anything is wrong) before gluing these on.  Once that is done, there will be no going back...  :o

I have watched enough of Danny’s videos to know that he very much dislikes having anything magnetic in the signal path and that any upgrade he does works to remove any that is found.  While going through the parts I received in the kit, I notice bright, shiny, silver colored parts in the binding posts...


Yup, magnetic.  :cry:
And the “brass” looking spacer washer is clearly not brass as it, too, is magnetic.
The rest of the parts are non magnetic.

I also noticed the signal path is from the threaded post, into the nut and through a very little lock washer before it gets to where the internal wire connects.  Not much surface contact area with that.


So I created my own little upgrade for the binding posts.  I know the binding post are less than ideal, but I figure that any improvement here is still an improvement.  Fastenal is great for things like this and I found the washers, lock washers and nuts all in some form of brass or bronze.  The nuts are M4-0.7 metric brass, the lock washer is a #8 silicon bronze and the washers are #10 silicon bronze.  The washers are used as a flange on the outside of the binding post and 2 replacement washers are needed for each post to replace the magnetic spacer that was there.  I also changed the arrangement to have 2 nuts, one each side of the piece that connects to the wire.  I figure this will greatly increase the contact area between these parts, which should improve the signal path.


The binding posts with and without the magnetic parts.


Danny Richie

Re: Amateur Build of the X-MTM Encore
« Reply #209 on: 29 Nov 2020, 02:14 pm »
Nice job upgrading the nuts and washers.

This video might help too: https://www.youtube.com/watch?v=mVcOWx7hQiQ&t=127s

jonsk2514

Re: Amateur Build of the X-MTM Encore
« Reply #210 on: 29 Nov 2020, 04:27 pm »
Nice job upgrading the nuts and washers.

This video might help too: https://www.youtube.com/watch?v=mVcOWx7hQiQ&t=127s

Thanks!
I checked all of the pieces in the binding posts for being magnetic.  I was surprised that the brass looking washer was weakly magnetic, so maybe some amount of iron in it, which is why I decided to replace it.  The post itself and the terminal piece were both non magnetic, so I left those.

Your videos are really good, and helpful.  I have watched that one and the one for soldering the crossover.  The reminder is good, though, as I will soon be getting to that last step of soldering the drivers.

Speaker Challenged

  • Jr. Member
  • Posts: 161
Re: Amateur Build of the X-MTM Encore
« Reply #211 on: 30 Nov 2020, 02:14 am »
Thanks!
I checked all of the pieces in the binding posts for being magnetic.  I was surprised that the brass looking washer was weakly magnetic, so maybe some amount of iron in it, which is why I decided to replace it.  The post itself and the terminal piece were both non magnetic, so I left those.

Your videos are really good, and helpful.  I have watched that one and the one for soldering the crossover.  The reminder is good, though, as I will soon be getting to that last step of soldering the drivers.

Trust me go for the tube connectors before you button up the speakers and it's too late! I trialled ebay connectors crimped with spade connectors etc to the crossover wires and soldered tube connectors. Night and day difference.:)

jonsk2514

Re: Amateur Build of the X-MTM Encore
« Reply #212 on: 30 Nov 2020, 05:03 pm »
Trust me go for the tube connectors before you button up the speakers and it's too late! I trialled ebay connectors crimped with spade connectors etc to the crossover wires and soldered tube connectors. Night and day difference.:)

Thanks for the suggestion.  :thumb:

At this point, all bottomed up as of a couple of days ago when the front baffles were glued into place.  So little little access to where the binding posts are located and where tube connectors would go.  However, I have options, even in that area, to retrofit tube connectors at a later point in time.  The binding post cup will be removable and I could retrofit them through that if need be.

It is a good suggestion and one that I considered when I bought the kit.  I do understand the benefits of the tube connectors.  When I purchased the kit, I corresponded with Danny about what would work for me given the level of equipment I have.  Based on that I made the choice for the binding post.  Tube connectors remain an option should I upgrade.

jonsk2514

Re: Amateur Build of the X-MTM Encore
« Reply #213 on: 12 Dec 2020, 12:24 am »
I have sanded the back and bottom of each cabinet in preparation for painting them flat black before doing the rest of the finishing.


Yup, I made some mistakes doing the flush routing of the sides to the back.  It seems that my hands are not as steady as they used to be.

With that done, the backs and bottoms were painted.


That would allow me to set the cabinets on their backs without having to worry about “messing” them up.

With that done it was time to round the corners.


The edge guide is to allow the router to run off beyond the end of the cabinet without needing to do that by hand.  I used a 1/2” round router bit with the bearing to follow the sides.

I was not thrilled with the router bit I used.  It was an inexpensive bit (Skill brand).  First, it didn’t make a good tangent with the sides, even on the bearing end of the bit.  On the router end, if I lowered the router to the point the tangent was reasonable, I ran the risk of having a ridge from going too deep.  The second problem I had was that the cutter gummed up.  This was a carbide bit, but still acted as if it was dull.  Looking back on it, I would have saved myself a lot of sanding time (to get the tangents better) if I had a better quality bit.  I wasn’t being cheap.  I had this bit from a while back, as part of a set and didn’t even think it would be a problem.  Lesson learned, get good quality bits for this work.

With the corners all rounded:


The tops, sides and fronts were all sanded smooth with 120 then 220 grit paper.  The cordless, random orbit sander worked really well for this.

I then sealed all of the end grain edges of the MDF with amber shellac.  The amber, being a bit darker, did better to match the stain I planned to use.  It should be noted that once sealed with the shellac the end grain areas do not absorb stain as readily as the face of the MDF.  This made the staining a little more difficult to get an even coat.  Then again, it made the rounded corners stand out a little from the rest of the cabinet.  Embrace the difference...   :green:


Yah, at this point the finish looks pretty ugly.  The cabinet in the forefront has 2 coats of stain on it, still wet in the picture, and the cabinet in the back has one coat.  But this will be improved.

After hand rubbing the 12+ hr dried stain with a cloth and then, about 8 hrs later, with a fine Scotchbright pad it is looking better already.


Hobbsmeerkat

  • Industry Participant
  • Posts: 2543
Re: Amateur Build of the X-MTM Encore
« Reply #214 on: 12 Dec 2020, 01:35 am »
These are coming along great!

hawkeyejw

Re: Amateur Build of the X-MTM Encore
« Reply #215 on: 12 Dec 2020, 02:21 pm »
Looking really good Jon!

jonsk2514

Re: Amateur Build of the X-MTM Encore
« Reply #216 on: 12 Dec 2020, 03:36 pm »
Thanks, and Thanks...  :thumb:

It is nice to be on the finishing stretch...  (every pun intend...   :lol:)

I am very curious as to how this finish will turn out.  From what I see right now, the two cabinets are looking different from each other.  I am finding that once the stain goes on, it has a mind of its own and it isn’t until it sets up a bit that I get to see what it will look like.  Definitely these will be a study in imperfection.  :wink:

jonsk2514

Re: Amateur Build of the X-MTM Encore
« Reply #217 on: 14 Dec 2020, 07:33 pm »
Third time is a charm.


I appear to be a victim of my own recollection.  I have done this finish several times in the past few years, but it has been so infrequent that the details of the steps I have figured out in the past escaped me for this effort.   I had a myriad of thin coverage areas, missed spots and runs to deal with.  Finally, with the third coat, I recalled how I did the coating in the past and I was able to get the thin coverage areas and missed spots covered.  The runs took a bit of buffing to eliminate them. I am pleased with the result.  Now it needs to sit, untouched, so it can dry.  This will take 3 or 4 days to dry enough to allow it to be rubbed down with a fine Scotchbright pad.  Then comes the varnish.

As it turns out my problems resulted from the lighting and use of a brush to apply the stain.  I find that no matter how much artificial light I use, it is never enough to see details.  The LED lights also don’t help if they are the wrong warmth; not enough red in them.  It is a red-ish stain, so with little or no red in the light, what shows up is black-ish with no detail.  I was also using a brush to apply the stain.  It seemed that, with the brush, it was easy for me to miss spots or get an uneven coat or get it on too thick which would run.  Recollection then kick in...  In the past I have used a rag to apply the stain.  The perfect rag for this was an old athletic sock, turned inside out, so the terry cloth part is exposed.  With my hand protected with a rubber glove and the sock slipped over the hand, it was short work to get the final coat right.

And as for a Scotchbright pad vs steel wool, I tried both with this and have settled on the pad.  The stain, even reasonably well dried, still has enough tackiness to pull apart the steel wool.  Then I worried about some of those shreds, some how, getting inside the cabinet, where I could never get them out.  The pad has its issues too.  Even the fine version will tend to unevenly scratch the very soft dried stain.  But with care it can be made to work.  In that respect, I like the steel wool over the pad.  It is easier for me to evenly and uniformly buff a finish.  Just not on the stain if it is at all tacky.

As with any stain, this is translucent and some of the “grain” of the MDF, which shows up as random bits of darker and light pieces, shows through, but only if one looks closely at it.  There is also a bit of color variation between the surface of the MDF and the edge of the MDF, that I sealed with the shellac.  This also adds an interesting look to it.  I did leave one area at the bottom unsealed, just to see how that would turn out.  It turned out well.  Where the sealed end grain tends to be lighter, the unsealed end gain tends to be darker.  I could see doing this finish either way, if I were to do it again.

I figure another week or 2 of finishing time to complete these.  With other things happening, including the holidays, it will likely be a week or 2 beyond that.  Once they are done, I will see if I can get them outside for some natural light pictures.  Of course that would be if old man winter cooperates...   :roll:

hawkeyejw

Re: Amateur Build of the X-MTM Encore
« Reply #218 on: 15 Dec 2020, 02:46 am »
Nicely done! Maybe listening to them by Christmas?

jonsk2514

Re: Amateur Build of the X-MTM Encore
« Reply #219 on: 15 Dec 2020, 02:21 pm »
Thanks  :thumb:

We shall see.  That would be a nice “present” if I could do that.  :xmas:  I checked the stain today and it is about dry.  I am committed to other things over the next few days, including a prediction of 11 to 13 inches of snow and I have yet to pull the snow blower out of storage...  :duh:  Maybe this weekend for the first coat of varnish?  I even bought a new brush for it.    :green: