***X-Otica Main & Sub Build***

0 Members and 2 Guests are viewing this topic. Read 76335 times.

Captainhemo

Re: ***X-Otica Main & Sub Build***
« Reply #200 on: 11 Sep 2016, 03:38 pm »

And some late afternoon sun vanity shots


Wow, beautful Peter, the sun shots did it for me
Your "Christmas morning" is fast approaching   :beer;

One of the easiest ways to remember the sub wiring is  ,  no matter what  # of drivers  are used the driver coils are all wired in parallel, the servo coils are  all wired in series. If any  driver is reversed in the cabinet,  it's wired out of phase (reverse the polarity)

HAL

  • Industry Contributor
  • Posts: 5200
Re: ***X-Otica Main & Sub Build***
« Reply #201 on: 11 Sep 2016, 03:47 pm »
A trick I used wiring the servo subs was to wire the amps to the wiring as if they were all front facing and just reverse the wire colors on the rear facing drivers.  Much easier for me to remember.

Peter J

  • Full Member
  • Posts: 1876
  • Hmmmm
Re: ***X-Otica Main & Sub Build***
« Reply #202 on: 11 Sep 2016, 03:51 pm »
Thanks all. That's really helpful. For whatever reason, this is hard for me to conceptually grasp, but this makes it easier.

Peter J

  • Full Member
  • Posts: 1876
  • Hmmmm
Re: ***X-Otica Main & Sub Build***
« Reply #203 on: 21 Sep 2016, 03:04 am »
Beginning assembly. Paying work has been gettin' in the way of my speaker building! Grrrrr. While I'm thinking of it, I'll finish subs before mains and may put in existing system 'cuz I'm anxious to hear them. I know it's been discussed before, but for my benefit do y'all have some beginning settings for the sub amps so I'm not completely wingin' it? Would be appreciated.

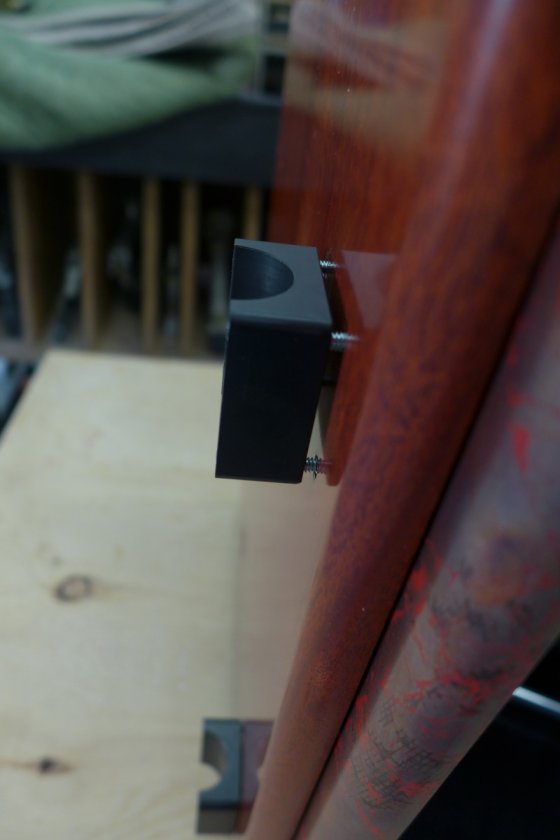
The strap bases I had made needed to be set up for 6/32 machine screws coming from both sides so I drilled the straps for clearance and tapped the bases through


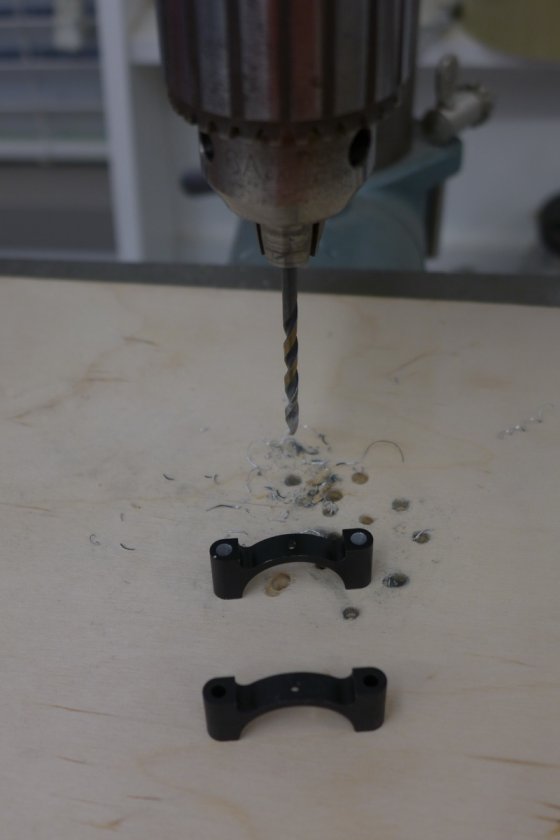
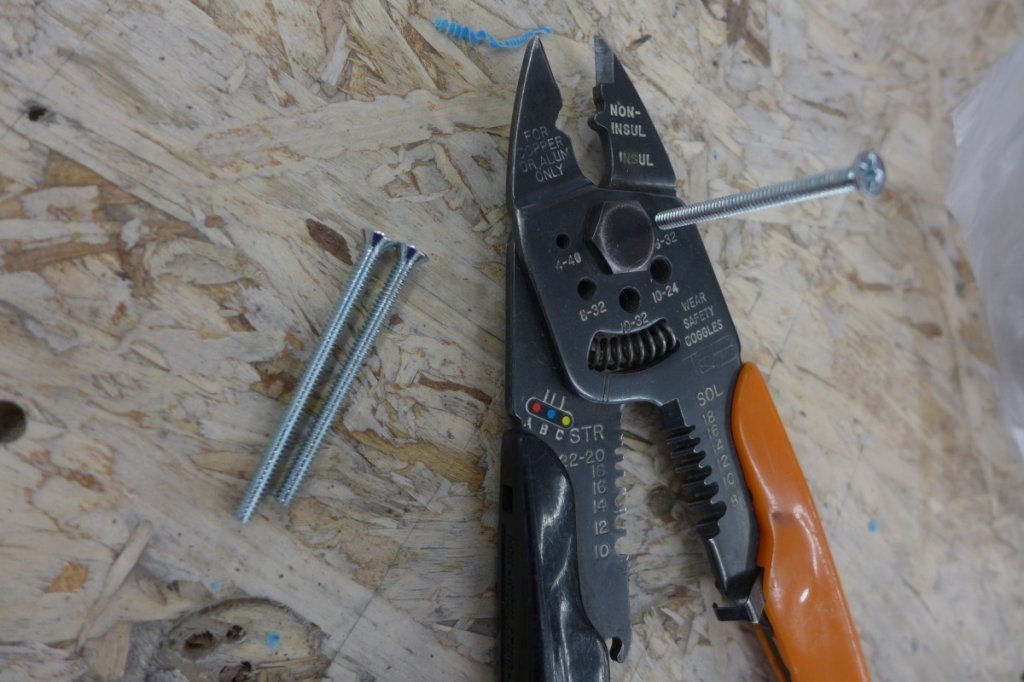
Needed to do a little customizing on screw length so they don't interfere with each other in the middle of base
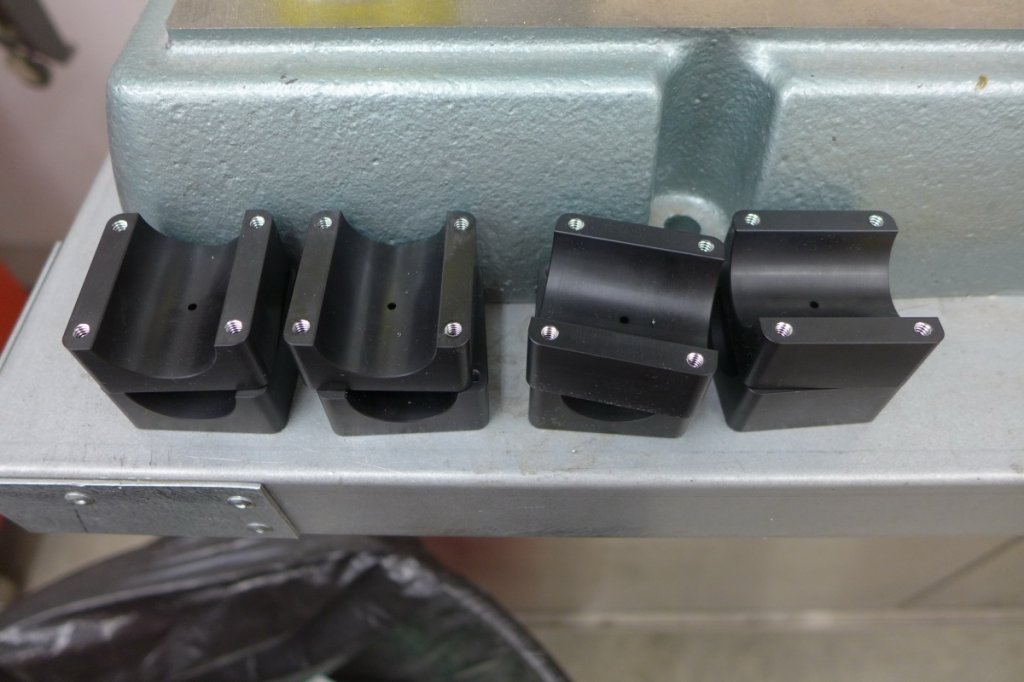
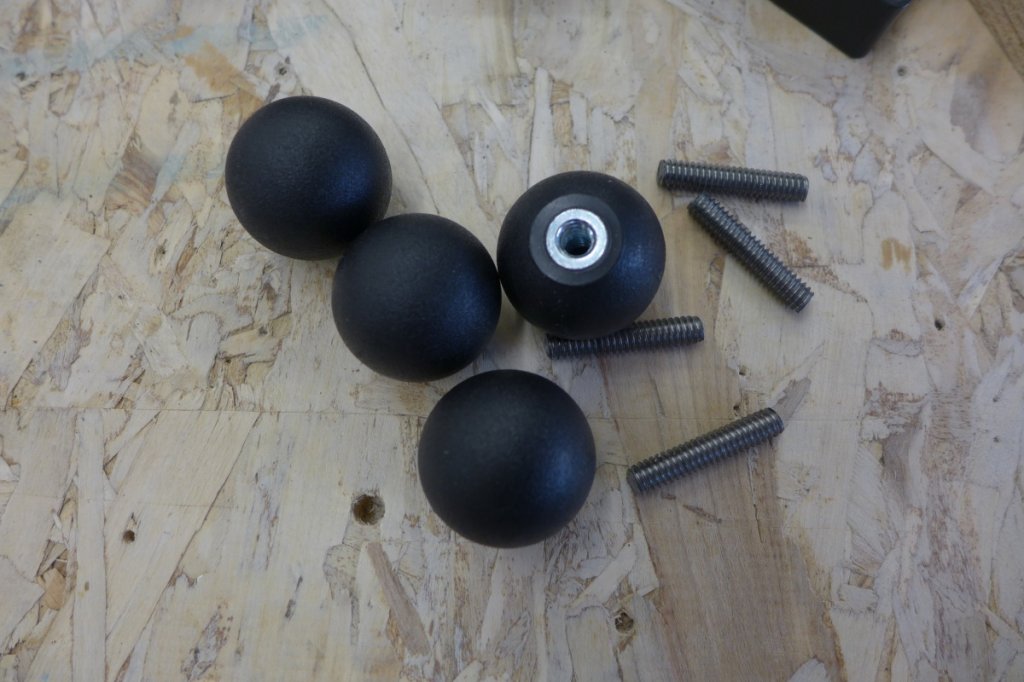


Then


 Balls and studs


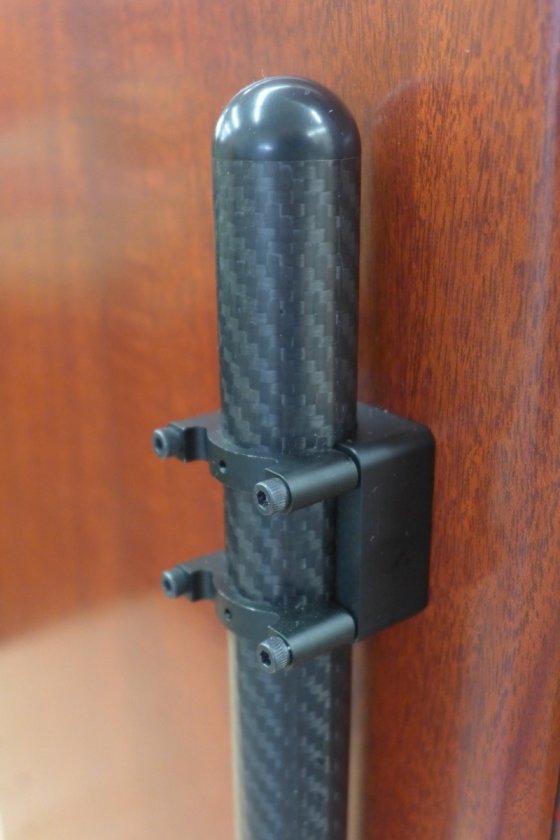
And the end result...woo-hoo!


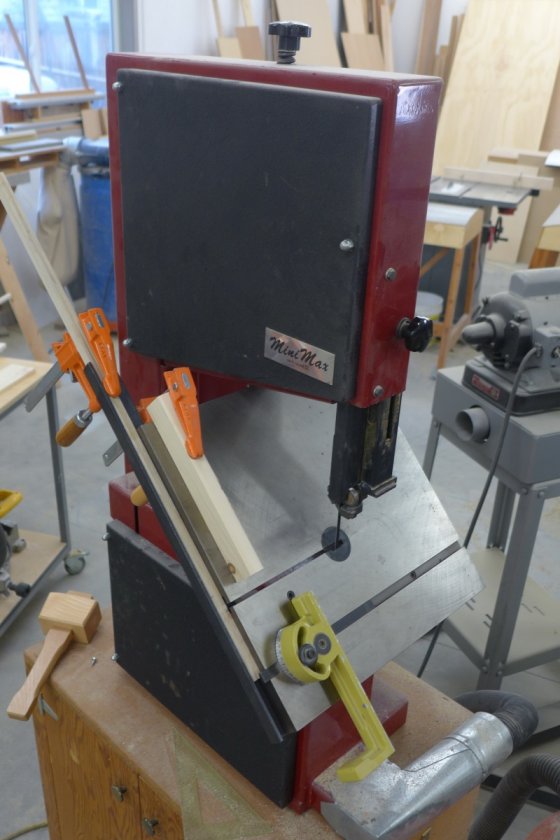
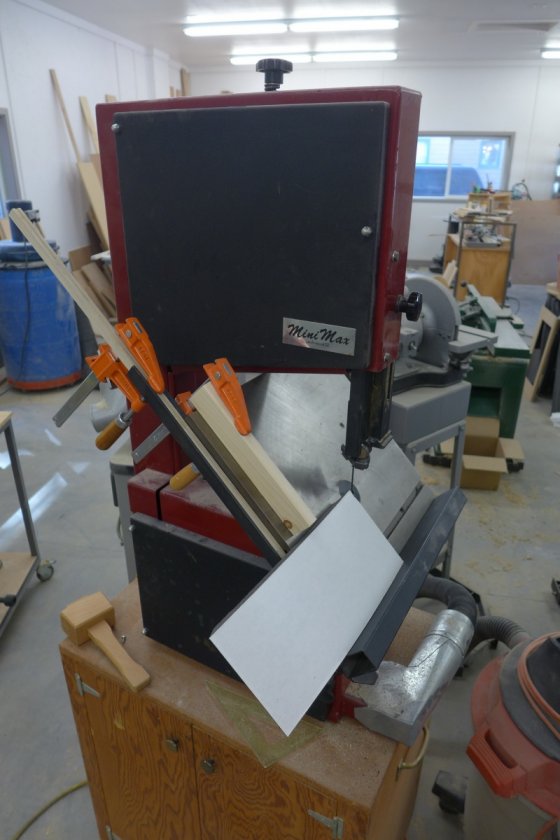
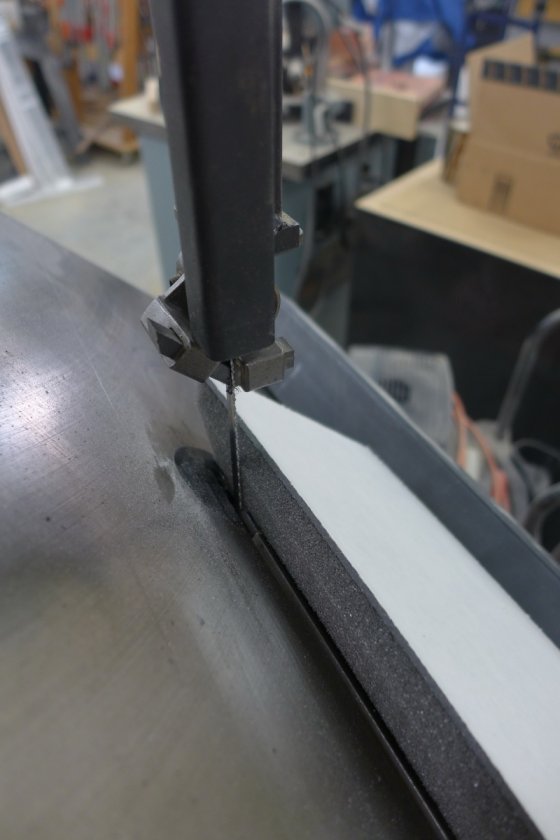
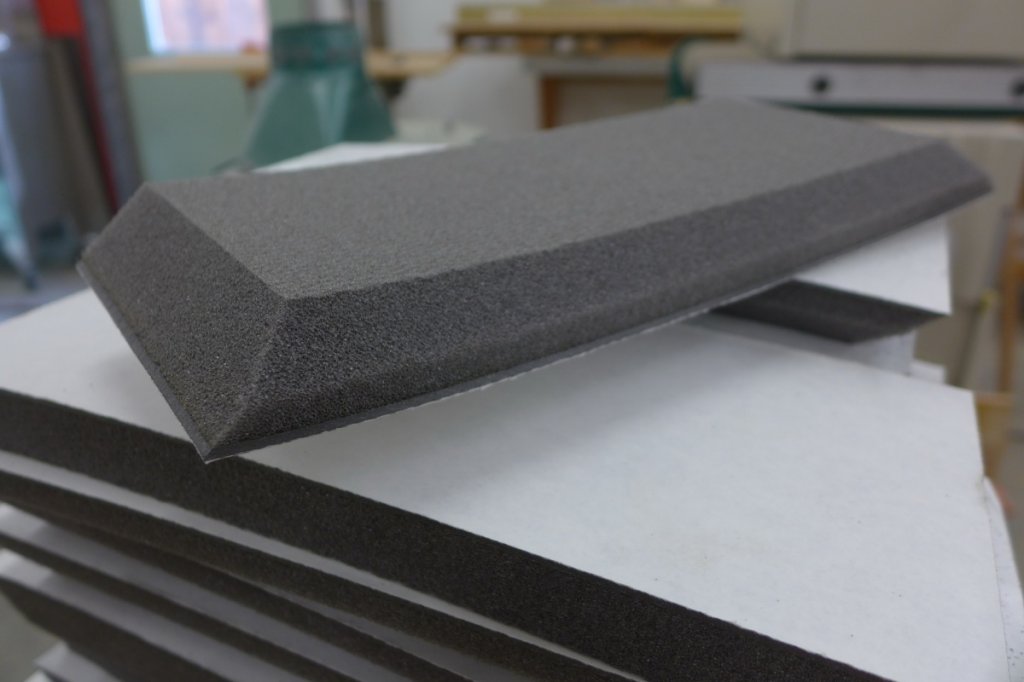
Because I am who I am and this build is about minutia, I can't just cut the No-Rez square ended and be done....so I mitered the ends.

Setup on bandsaw. As an interesting aside, I'm thinkin' that backing on No-Rez has some significant mineral content. I could see little sparks come off as I cut. I was willing to sacrifice the blade though so I pressed on...


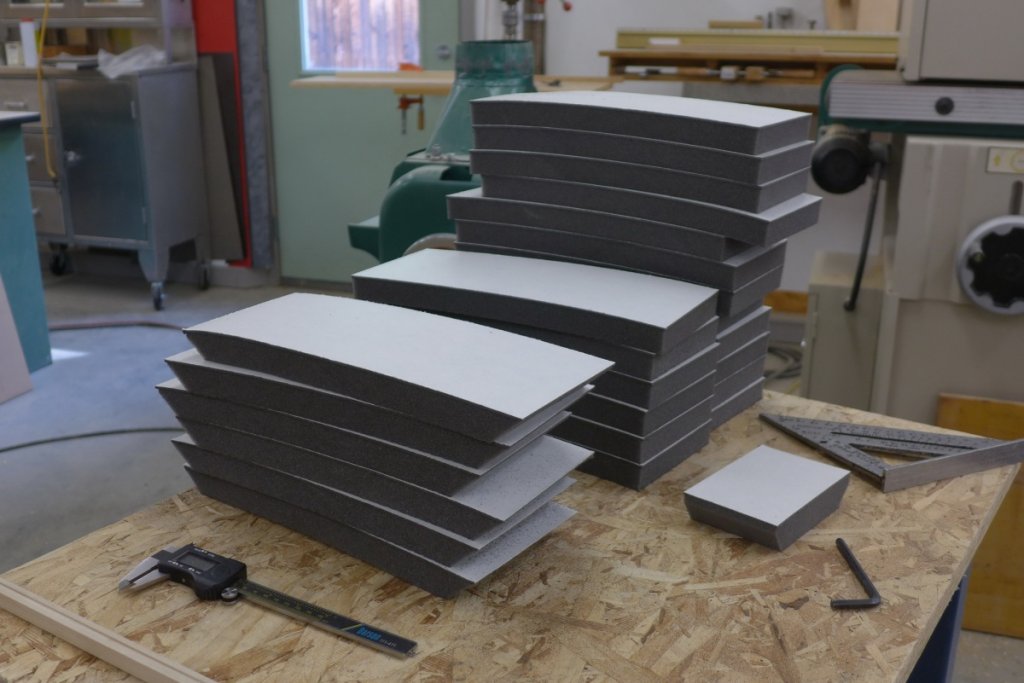
Midstream in the miters I thought it might look cool to bevel the front edge of foam


Final result


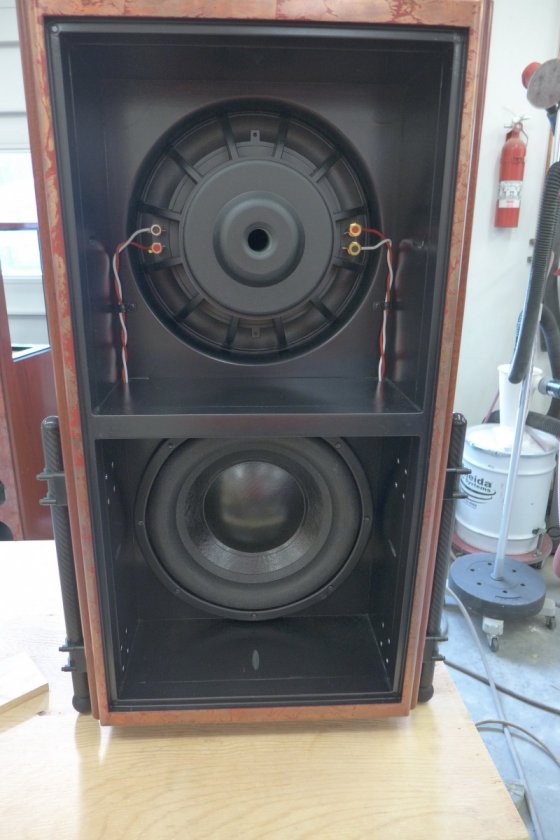
Moving on to box lining. Some knuckle rapping on box before and after the No-Rez makes the difference really apparent. I submit that No-Rez probably has Fairy Dust on it. How cool is that?


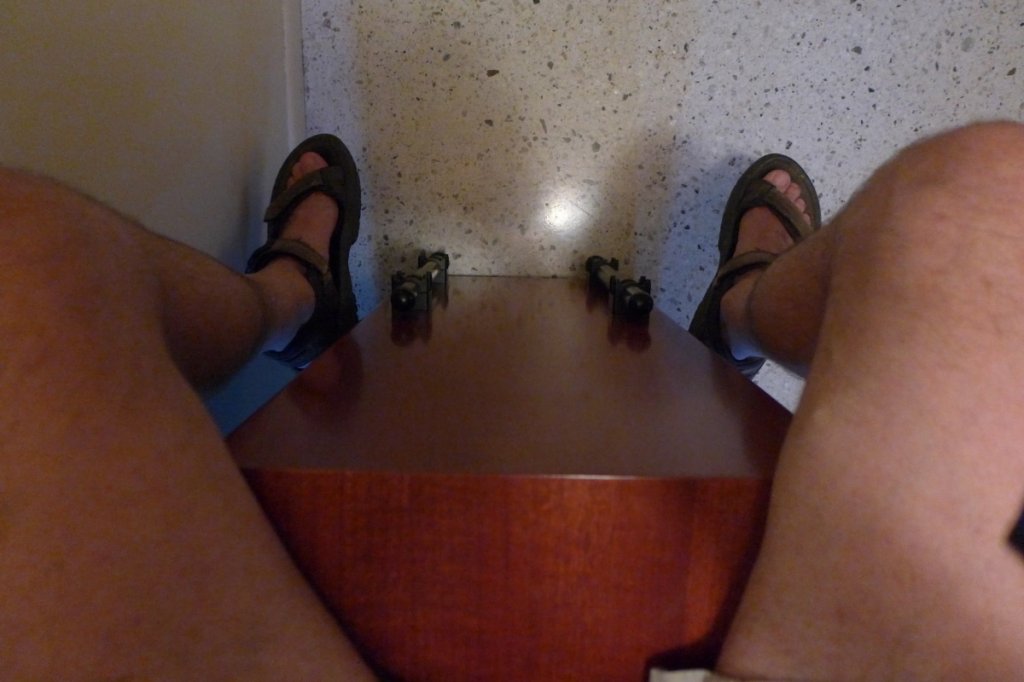
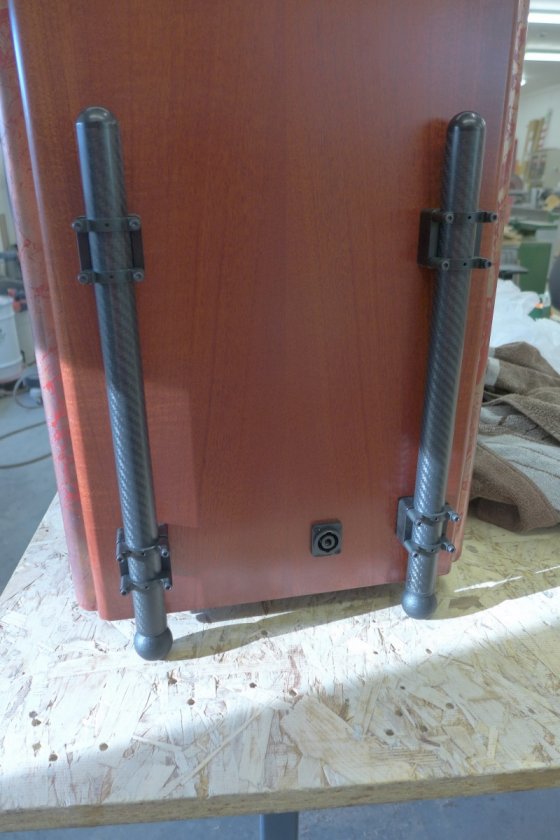
And just in case you're wondering about the holding ability of the strap bases and shear strength of those little #6 screws I sat on it. Speaker must weight around 80#, plus me at about 175#....I think we're good, not a hint of movement. No jokes about my bird legs, it was an impromptu test...


mlundy57

  • Industry Participant
  • Posts: 3579
Re: ***X-Otica Main & Sub Build***
« Reply #204 on: 21 Sep 2016, 03:16 am »
 :dance: :banana piano: :bowdown: 

Folsom

Re: ***X-Otica Main & Sub Build***
« Reply #205 on: 21 Sep 2016, 03:22 am »
Nice work.

corndog71

  • Full Member
  • Posts: 1672
  • Some people call me Rob.
Re: ***X-Otica Main & Sub Build***
« Reply #206 on: 21 Sep 2016, 05:59 pm »
Looks fantastic!  I still have to add No Rez to my cabinets.
« Last Edit: 21 Sep 2016, 07:34 pm by corndog71 »

ebag4

Re: ***X-Otica Main & Sub Build***
« Reply #207 on: 21 Sep 2016, 06:01 pm »
Peter, your attention to detail is second to none.  I love the way you trimmed the no rez, it turned a functional item into an accent.  Well done.  I was uncertain how the legs would turn out, but those look great as well.

Best,
Ed
« Last Edit: 21 Sep 2016, 07:06 pm by ebag4 »

Danny Richie

Re: ***X-Otica Main & Sub Build***
« Reply #208 on: 21 Sep 2016, 06:22 pm »
Man, I love what you did with the No Rez too. Nice job!

aldcoll

  • Full Member
  • Posts: 759
  • Champagne Taste on a Water Budget
Re: ***X-Otica Main & Sub Build***
« Reply #209 on: 21 Sep 2016, 07:26 pm »
Stunning work there.  And the No Rez bevel work is stunning in it's self.  No detail to small has been left out. :flame:

Alan

Captainhemo

Re: ***X-Otica Main & Sub Build***
« Reply #210 on: 21 Sep 2016, 11:07 pm »
Nicely done  Peter, I've considered doing 45'd conrners a few times  but always feel i'll come up short on  no-rez . Withthe 13" x 13" opening,  you can cut the no rez  into 27 x 13  and 27 x 11 strips then cut to lenght (13's go horozonaally, 11's go vertically)... if you  do 45's, they all need to be  13.  I guess with hte shorter span due to  he grill frame (5.5" instead of 6.5") , you can still get enough.pieces.. I'll have to try that next time  :thumb:

Try this for starting with the A370's
PEQ - OFF  (first row of dials  won't be in use)
Phase  -  180
C/O - as needed
volume - as needed

Slope - 12/AVR (if you want a steeper slope, use either 24/50 or 24/80,  you get 12 db/octave at either 50 or 80 hz and another 12 at  dial setting)
Rumble filter - Off
Extension - 14 hz
Damping  - Low

That should get you going

jay
« Last Edit: 22 Sep 2016, 05:31 am by Captainhemo »

NeilT

Re: ***X-Otica Main & Sub Build***
« Reply #211 on: 22 Sep 2016, 01:45 pm »
Peter, your attention to detail is second to none.  I love the way you trimmed the no rez, it turned a functional item into an accent.  Well done.  I was uncertain how the legs would turn out, but those look great as well.

Best,
Ed

Well said ED, but what legs are you talking about, his or the sub's?  :)

Neil

brother love

Re: ***X-Otica Main & Sub Build***
« Reply #212 on: 22 Sep 2016, 02:15 pm »
Peter, your attention to detail is second to none.  I love the way you trimmed the no rez, it turned a functional item into an accent.  Well done.  I was uncertain how the legs would turn out, but those look great as well.

Best,
Ed

I agree 100% with Ed & Danny. The mitered/ beveled No Rez really adds to the beautiful fit & finish of the cabinets. Top notch work!

I must admit though that the gold plated connections & wiring stand out, seems like they should be painted black or hidden with a cover plate somehow.  That's what happens when you make something so beautiful, it makes the small warts stand out !  :lol:

bdp24

  • Full Member
  • Posts: 884
Re: ***X-Otica Main & Sub Build***
« Reply #213 on: 22 Sep 2016, 09:26 pm »
I agree 100% with Ed & Danny. The mitered/ beveled No Rez really adds to the beautiful fit & finish of the cabinets. Top notch work!

I must admit though that the gold plated connections & wiring stand out, seems like they should be painted black or hidden with a cover plate somehow.  That's what happens when you make something so beautiful, it makes the small warts stand out !  :lol:

I assumed the connectors would be hidden by grill cloth, but maybe grill cloth is not planned?

Peter J

  • Full Member
  • Posts: 1876
  • Hmmmm
Re: ***X-Otica Main & Sub Build***
« Reply #214 on: 22 Sep 2016, 11:51 pm »
Hmmm, I hadn't really considered disguising the connectors and wiring, but you got me thinkin' now. These will have grills, but they're the sheer and sexy ones shown earlier in thread so we'll see if that tones down the look some. If not, it may be time to put on my thinking cap...

The mitered No-Rez was a little bit of a booger getting the last piece in. Once the release paper is removed, the adhesive almost leaps to anything it gets near. I ended up flexing it in a shallow U shape and sorta popping it into place. It wasn't without it's frustration but at that point I was committed...no turning back! That adhesive is just wicked stuff.


gregfisk

  • Restricted
  • Posts: 1349
  • Us alone in the universe? sure is a waste of SPACE
Re: ***X-Otica Main & Sub Build***
« Reply #215 on: 23 Sep 2016, 12:29 am »

Once the release paper is removed, the adhesive almost leaps to anything it gets near. I ended up flexing it in a shallow U shape and sorta popping it into place. It wasn't without it's frustration but at that point I was committed...no turning back! That adhesive is just wicked stuff.

 :lol: This just cracked me up Peter, that's exactly how I felt when I was putting on, by myself I might add. As soon as you take the blindfold off of that stuff it jumps to the first thing it sees :lol:

Peter J

  • Full Member
  • Posts: 1876
  • Hmmmm
Re: ***X-Otica Main & Sub Build***
« Reply #216 on: 3 Oct 2016, 02:52 am »
Progressing slowly right now, in the midst of a to-the-studs bathroom remodel for client and just seems like there's lot's of things demanding my attention. Did get some licks in today and nearing the home stretch.

I had to get the subs in the house after getting them completed and installing dedicated outlets for sub amps and Ncores... just couldn't wait to hear the open baffle bass I see talked about so much.

Here's a pic with and without sheer and sexy grills. The earlier post about the terminals had me wondering. I can live with it, in fact, I like that it ties it with the somewhat industrial vibe of the legs. Also had an idea to have amp house live on top, but that'll have to wait for another time...would require some forethought on wiring.


Placed in their home and hooked up


Right angle AC and RCAs to accommodate grill. I've never used the Speakons before. They are elegantly made little connectors. If you should use them, I'd suggest investing in a #1 Posidrive screwdriver or tip which is what the jamb screws are.


A view from the other side. Mains will replace what you see. I plugged the ports temporarily, the subs just do a better job down low


Got all the grills covered and had one crossover yet to solder. I'm really liking the No-See-Um netting for grills...I'm sure I'll use again.


The bases on the mains attach a little differently than subs because of shelf brace and other obstructions


Wiring and No-Rez on the horizon...probably next weekend. I'm almost giddy!

Peter J

  • Full Member
  • Posts: 1876
  • Hmmmm
Re: ***X-Otica Main & Sub Build***
« Reply #217 on: 6 Oct 2016, 02:07 am »
I got to cutting No-Rez for the mains tonight and hit an impasse...would appreciate input.

I assumed I would cut the bevel to kinda look like the subs, but mocking it up I'm not sure it has the same visual impact without the corner miters. Following photos show both with and without grills and a couple different angles.

What do y'all think?


gregfisk

  • Restricted
  • Posts: 1349
  • Us alone in the universe? sure is a waste of SPACE
Re: ***X-Otica Main & Sub Build***
« Reply #218 on: 6 Oct 2016, 03:37 am »
I'm about as picky as it gets but I really don't think anyone will notice the detail differences. The Reason is that you are using the same materials on both and that is what most people will notice and nothing more.

I go crazy making everything perfect, but what I have learned is very few people, if any will actually see any difference.

Just my opinion from my experience designing and making things...

Greg

BK_856er

  • Jr. Member
  • Posts: 86
Re: ***X-Otica Main & Sub Build***
« Reply #219 on: 6 Oct 2016, 05:56 am »
gregfisk has a good point.  But YOU will look at them, no?  That said, I like your beveled edge.  The extra level of detail goes nicely with the "over the top construction" theme.   :thumb:

BK