Mike's GR Research OB H frame Triple Build

0 Members and 1 Guest are viewing this topic. Read 2801 times.

mscetal

Mike's GR Research OB H frame Triple Build
« on: 22 Aug 2021, 03:45 pm »


I recently completed my GR Research Open Baffle triple subwoofer build and want to share with the group.  I could not be happier with the sound of my system with the new subs and matching with my Magnepan 3.7 has been fantastic!  I owe special thanks to others on this forum and I'd like to recognize them up front and I hope I don't forget anyone. First, my wife for putting up with me! Danny Richie for his design and product service.  Jay (Captainhemo) for his help in sorting out the best cabinet design for my goals and his advice on veneering and for getting on the phone with a guy who had no clue.  Dave (Dagoods) for his inspiration to do the veneering and finishing myself and help with foam and for just generally being a good guy. MLundy57 for recommending the triples w/ Magnepan 3.7 saying it would be a better match. RockBall for his build and advocating for strong clamps and making sure to plan well. And to Peter J videos of the OB build on YouTube which I watched several times before I started the build to get the necessary perspective.

Thanks one and all and if you have any questions, I would love to help inspire others the way the people above inspired me.

Mike

mscetal

Re: Mike's GR Research OB H frame Triple Build
« Reply #1 on: 22 Aug 2021, 03:57 pm »
After speaking with Jay, I decided to purchase the OB triple to match with my Magnepan 3.7.  There was a couple week wait time, but the 2 98lb. boxes arrived from Canada in great condition.  Jay made sure I knew to keep the parts from each box together and not to mix them.  First order of business was the dry fit. Everything went together perfectly.  It also gave me an idea of how I would be gluing things together.  I wanted to veneer the cabinets in Red Oak to match the finish of my Maggies which meant veneering and gluing would be in stages. 


subsonic1050

Re: Mike's GR Research OB H frame Triple Build
« Reply #2 on: 22 Aug 2021, 04:03 pm »
Those look great Mike! I've never heard the 3.7's, but I've owned the 1.7's for awhile now - I bet they sound absolutely stunning. My triple servo's pair with the 1.7's extremely well and I imagine they pair even better with the 3.7's. Enjoy!

mscetal

Re: Mike's GR Research OB H frame Triple Build
« Reply #3 on: 22 Aug 2021, 04:21 pm »
Then came the first bit of the build, gluing up the amp box and ensuring they were square.  Per Peter J, I purchased parallel clamps off Amazon.  Gluing everything was easy, I just needed to make sure it was all square and measuring the diagonals measured exactly the same allowed me to be sure that I had a nice square box for the amps.  I used a flat piece of plywood to make sure the boxes were flat on bottom and used 3 clamps each to ensure they held together tightly while the glue dried.

Glue used: Titebond Extend
Clamps used:  Bessy K Body REVO Junior (6 clamps total 18"version)

So far, so good.


mscetal

Re: Mike's GR Research OB H frame Triple Build
« Reply #4 on: 22 Aug 2021, 04:39 pm »
Next up was gluing up the H frame.  Per Peter's video, I built them upside down with the top of cabinet on the floor.  My goal of veneering the meant that I had to build in stages with veneering in between.  Once the H frame was built, take the top and base off and start the veneering process.

Using the dry dowel method, I used the top as a way to ensure the frame fit together tightly.  then I glued up the dadoes making sure not to get glue within 1" of the top edge.  Next put in the braces and then using dry dowels put on the base to hold it together while I clamped everything.  Because I saw RockBall's pics I worked quickly and made sure to get all clamps tight.  I only have 6 18" clamps which meant I could only glue one cabinet at a time.  You can see I put clamps across the braces through the speaker holes and clamps on the outsides of the cabinets across the H frame.  It was a little nerve wracking because I had never done this before, but it went together and made a nice tight fit.


mscetal

Re: Mike's GR Research OB H frame Triple Build
« Reply #5 on: 22 Aug 2021, 04:50 pm »
Gluing the H frames

Note the hammer and wood for making things fit!  When glue is drying and things are not going together, a little nudge became necessary!  Even with the Air conditioning going, this step made me a little sweaty.  I was worried about glue setting before everything had gone together properly.  Fortunately, it all went together with a little encouragement!


mscetal

Re: Mike's GR Research OB H frame Triple Build
« Reply #6 on: 22 Aug 2021, 05:13 pm »
Here's the part I spent a lot time worrying about, the veneering.  Gluing and screwing together didn't make me as nervous as veneering and making them look nice!  I watched another of Peter J's video on veneering the cabinet and trim cutting the veneer.  I used Peter's suggestion of HeatLock and and old iron.  I figured I could practice a bit on the amp boxes without much penalty, since they wouldn't be as visible.  I had never used a router before and bought a bit to do the flush trim.  I will tell you, I screwed up the first trim because I had the bit too far extended and the bearings weren't riding on the surface of the cabinet which meant the bit just dug in deep on the amp box cabinet.  Fixed that issue, and trimming was a breeze after that.  Just watch videos on YouTube and it is pretty straight forward.

Router:  Makita RT0701C 1.25HP compact router
Bit:  Infinity Cutting Tools Spiral Flush Trim Downcut Router Bit (Sku 85-120)
Veneer:  Oakwood Veneer Company, Red Oak 4'x8' BFV, 22mil. (Paper backed veneer)
Veneer Glue:  Better Bond HeatLock from Veneersupplies.com
Veneer Roller and Super Soft 2 Veneer Softener & Conditioner from Veneersupplies.com


mscetal

Re: Mike's GR Research OB H frame Triple Build
« Reply #7 on: 22 Aug 2021, 05:31 pm »
Once I had a small clue what to do with veneering, I started veneering the H frames.  Again, this made me nervous since is not a flat wood surface like the amp boxes.  Because the sides of the H frame have a nice radius going around the edges was not bad at all.  Trimming the excess veneer and glue left a nice edge and any excess glue was removable with a flat file. 

Note that I had to veneer the outside of the H frame before gluing the top and base to the H frame.  In addition, I veneered the top and base before gluing to the H frame.  I did not veneer the underside of the top piece or the underside of the base.  I also decided that the inside of the cabinets would be painted black, so no need to veneer inside the H frames.


Early B.

Re: Mike's GR Research OB H frame Triple Build
« Reply #8 on: 22 Aug 2021, 05:40 pm »
Oh, wow -- looks fantastic!!!

mscetal

Re: Mike's GR Research OB H frame Triple Build
« Reply #9 on: 22 Aug 2021, 06:01 pm »
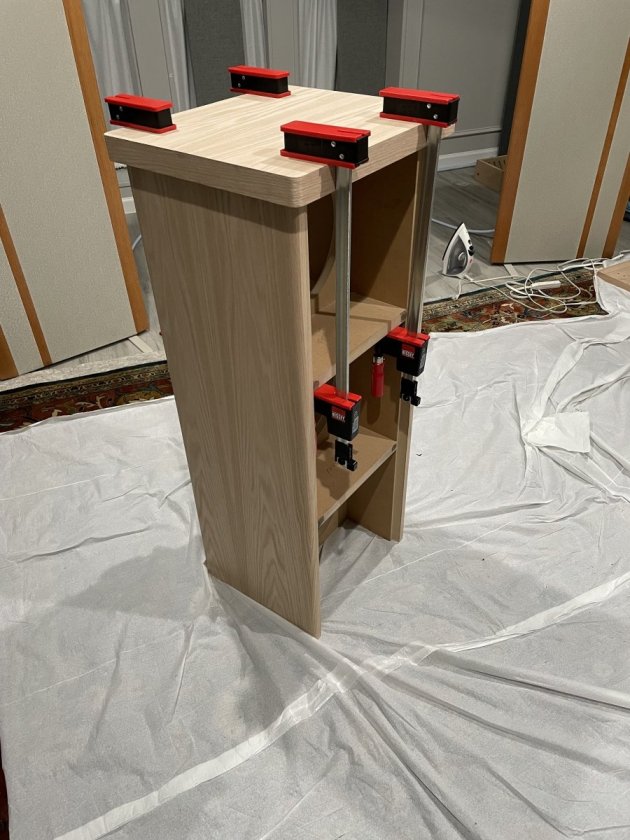
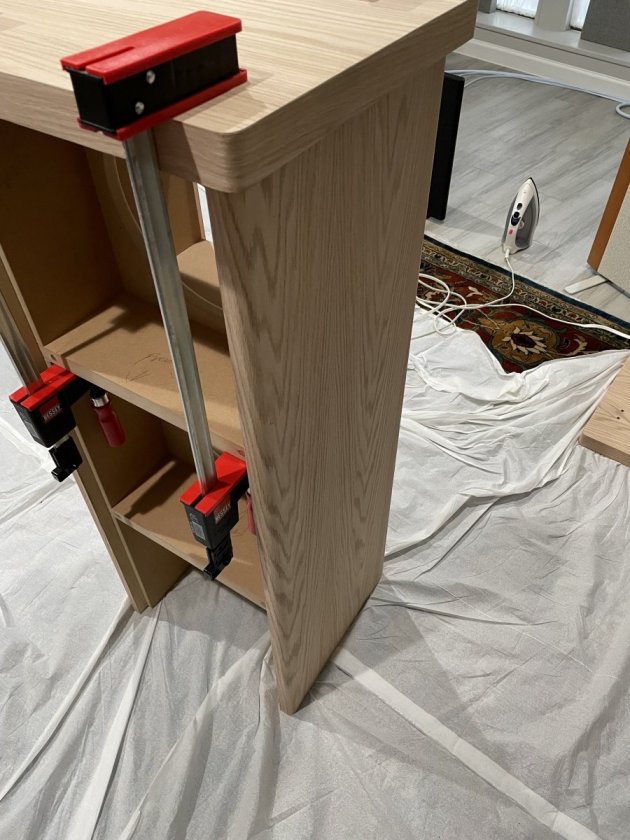
So with the top and base of the cabinet veneered and with the sides of the H frame veneered, it was time to glue the top and base to the H frame.  This was exciting because it meant the cabinet would be built and then it all came down to putting the finish on the the cabinets.  So to make sure everything went together well, I glued one top at a time with 4 of my 6 clamps to hold the top on tight for 4+ hours while the glue set.  Here I did do one thing that Jay doesn't recommend and that is put a clamp on a veneered surface.  I understand why you wouldn't want to do that, but I tried to be careful and make sure the surface of the clamps were clean before I clamped them in place to not press anything in to the unfinished veneer.  One other thing I know real wood workers wouldn't do was glue the H frame to a veneered surface (the base would have a veneer to mdf glue joint, but I spoke to Jay and we felt that because the base is also screwed together and if I did a decent job with veneer glue, it should be fine.)

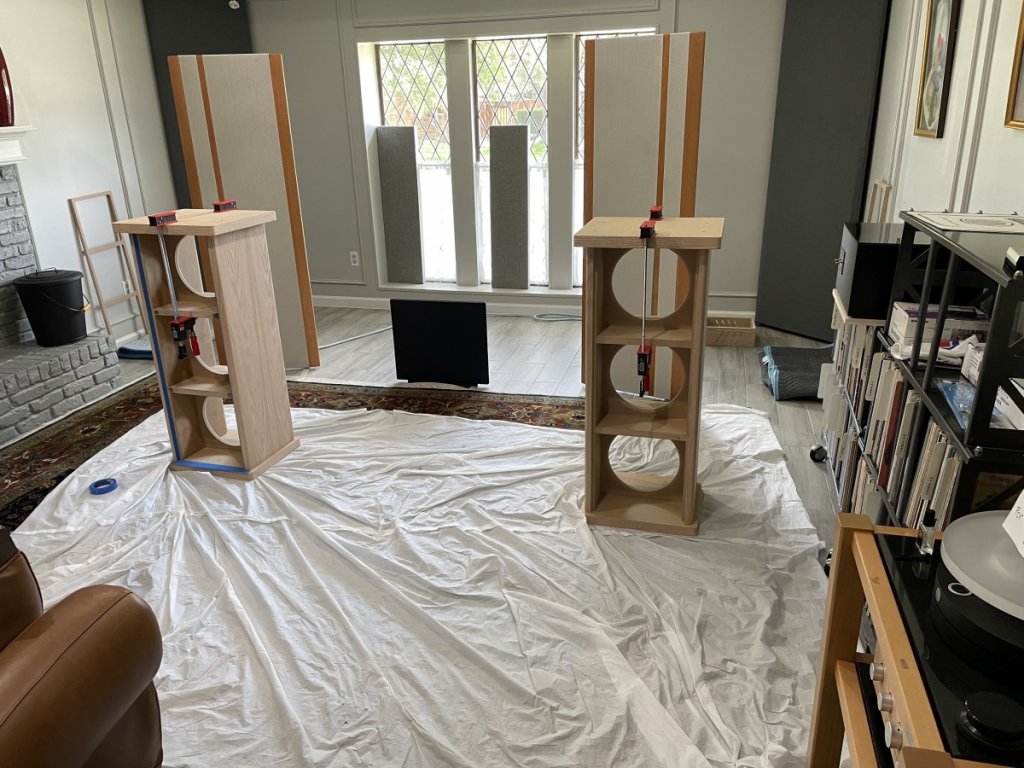
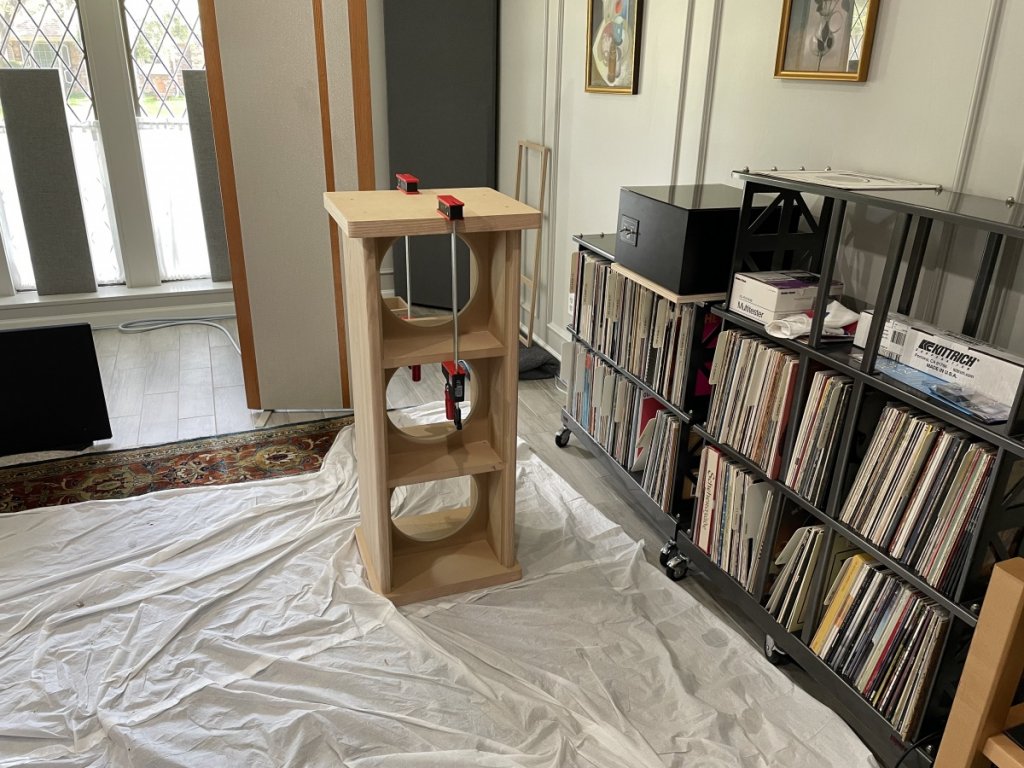
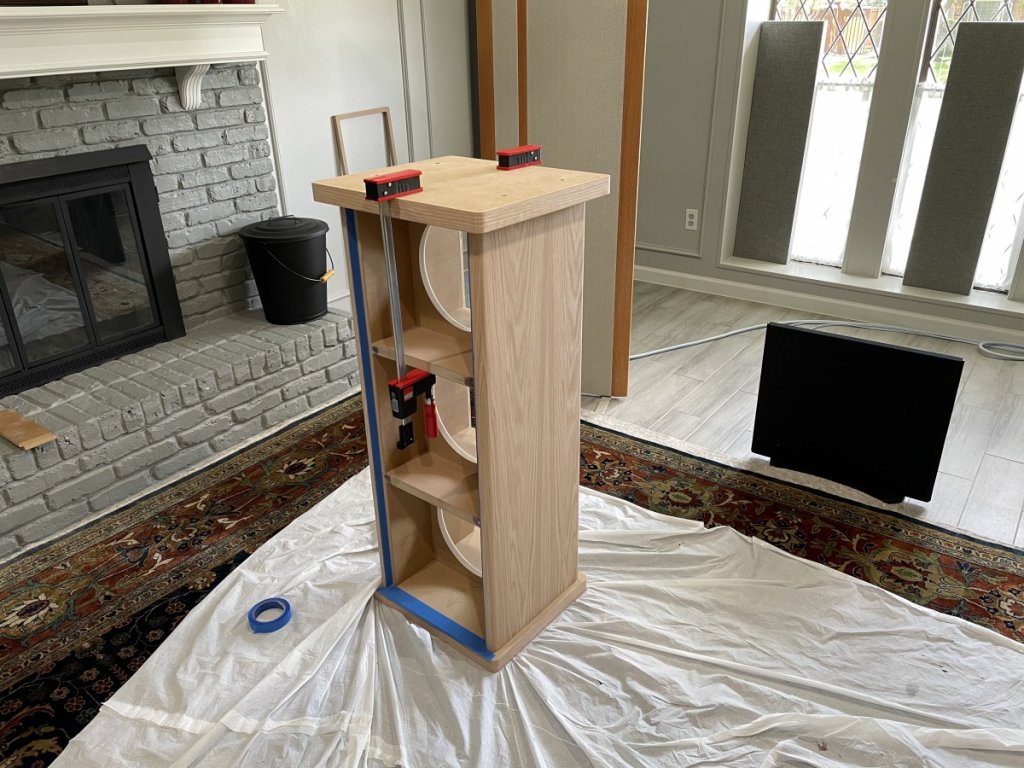
So it was glue on one top, clamp, wait 4 hours.  Glue on the other top, clamp wait 4 hours.  Carefully, turn the cabinets over and then do the glue the bases.  Here is another time I almost screwed up my build.  I was not paying close attention and I nearly glued the base of one of the speakers on backwards!   I was marveling at my work and realized that I had too much overhang on the front of the cabinet.  Ah, PANIC!  Remove the base, wipe of the glue off the veneer, put it on the correct way and put it back together and clamp it.  Crisis averted! 

You can tell I was excited by this stage as I have more pics of this stage!


mscetal

Re: Mike's GR Research OB H frame Triple Build
« Reply #10 on: 22 Aug 2021, 06:17 pm »
I wanted these subs to match my Magnepan's white and oak finish.  I purchased the grill fabric from Magnepan directly.  Here is a pic of the fabric with the Maggies.  I was concerned that the whites would be different, but I was assured by Gary at Magnepan that once it was stretched over the grill frame the colors would match and that was true.  Just me worrying...again :lol:

In addition, here I painted the inside of the cabinets with a matte black from Home Depot.  Two coats was enough to do the job, first coat with a brush, second coat with a small roller to get a decent finish.  The nice part is this covered the magnets Jay installs in the braces to hold the grill in place.  One regret is that I did not paint the grill frame in the same black so the grills would disappear behind the grill fabric.  Small detail.


Peter J

  • Full Member
  • Posts: 1876
  • Hmmmm
Re: Mike's GR Research OB H frame Triple Build
« Reply #11 on: 22 Aug 2021, 06:38 pm »
You know, it really makes me smile to see someone new to this kind of thing jump in and end up with something they're proud to have in their home. Kudos to you for persevering! They look terrific.

mscetal

Re: Mike's GR Research OB H frame Triple Build
« Reply #12 on: 22 Aug 2021, 07:11 pm »


mscetal

Re: Mike's GR Research OB H frame Triple Build
« Reply #13 on: 22 Aug 2021, 07:35 pm »
Since I had worked out how I would finish things on the amp boxes, I moved on to the main event, the subs.  After masking off the black and edges I started the finish on the cabinets.  I used pre-stain everywhere, then stained with the Summer Oak color.  Once that was done, it was three coats of polyurethane with a light sanding with 220 grit sanding sponge after the polyurethane dried.  I made sure that the polyurethane had a minimum of 12-24 hours to dry before I sanded.  We were having warm weather here in Texas and this was done in the garage because of the fumes from oil based polyurethane so it was in the evenings and in the mornings.  Not an easy task and I was so tempted to short cut the 3 coats, but figured I better follow Varathane's guidance.  I wanted this finish to last and look right.  The encouraging part was after each coat of polyurethane finished, it looked better than the last.  It is worth noting that you do not want to skimp on the brushes used to do the finish and follow the instructions on the cans.  Don't ever shake the polyurethane to mix it, only stir it thoroughly.  Your end project will show if you take short cuts.

That is enough details.  On to more pics.


AlexH

Re: Mike's GR Research OB H frame Triple Build
« Reply #14 on: 22 Aug 2021, 08:04 pm »
Three thumbs up. :thumb: :thumb: :thumb:

thanks for sharing

mscetal

Re: Mike's GR Research OB H frame Triple Build
« Reply #15 on: 22 Aug 2021, 08:06 pm »
On to assembling the finished cabinets and testing that everything works properly.  Not much to say here except that I have to tell you how well everything goes together.  Jay's cabinets make the process super easy to build and during the assembly process the pilot holes for the drivers are right on.  I love how easy this part was.  The build was very straight forward.  The GR Research drivers and amps have a great fit and finish and go together seamlessly with the cabinets.

One thing that I had not seen in other builds is how the Speakon connect is used.  I guess there are multiple ways to do this, but the way that made the most sense to me is mount the bulk head of the Speakon on the amp box and connect the driver wires from the plate amp to connections 1+ and 1- and then connect the servo control wires from the amp to 2+ and 2-.  Then on the subwoofer cabinet side, have the wires from the driver side connect to 1+ and 1- in connector with the silver latch and the servo control connect to 2+ and 2-.  I hope that makes sense.  Jay's wiring drawings are super clear for wiring the subs, it is just a question of how to connect all that wiring to the Speakon connector and to the amp.

Here some more pics during the initial testing of the amps.

BTW, I connect the subs using speaker level inputs from my amps output.  So I have speaker cables running from my amps to the Magnepan 3.7 and another set of speaker cables from amp outputs to the amp level inputs on the sub's amps.  I do this for two reasons, I already have the speaker cable that I used for the Magnepan DWM and I don't have two preamp outputs on my preamp.


mscetal

Re: Mike's GR Research OB H frame Triple Build
« Reply #16 on: 22 Aug 2021, 08:25 pm »
Next I completed the grills. I used the Magnepan grill fabric purchased from Magnepan.  I used contact cement to glue the fabric down and bought some white leather strip from Amazon to create a tab to pull off the grills and glued and stapled the leather strips in place.  These tabs make it easy to remove the grills and are not very noticeable.  Once the testing was done that everything was connected properly, I twisted the wiring pairs on the drive and servo side.  I also used cable ties to ensure the wiring did not move due to vibration of the cabinet and it acts as a strain relief for the wires if they get tugged.


mscetal

Re: Mike's GR Research OB H frame Triple Build
« Reply #17 on: 22 Aug 2021, 08:46 pm »
The last piece to finish was the No Rez.  I initially cut it with a large utility knife, but could not get the clean edges I was hoping for and the knife would dull after one cut and it would tear the foam instead of cutting.  I don't own a table saw so I chose a coping saw with a tight blade.  It was not great and left saw marks.  Then Dave (Dagoods) offered to help and bring his table saw to clean up my cuts.  That was generous of him, so on a Saturday morning, we spent a couple hours hanging out and cleaning up my foam and listening to my system. That is the nice part about this hobby and especially Dave is generosity with their time. 

I could not have completed this build without the generosity of others.  People sharing their stories and their advice and their time has made all the difference in the world and I a forever grateful.  So if you I want to say thanks to all who have helped along the way.  Thanks to my wife, Dave (Dagoods), Danny Richie, Jay (Captainhemo), MLundy57, RockBall and Peter J for all the things you have done to help someone you didn't know enjoy the hobby a little more.

Last pics for now.


mscetal

Re: Mike's GR Research OB H frame Triple Build
« Reply #18 on: 22 Aug 2021, 08:52 pm »
Those look great Mike! I've never heard the 3.7's, but I've owned the 1.7's for awhile now - I bet they sound absolutely stunning. My triple servo's pair with the 1.7's extremely well and I imagine they pair even better with the 3.7's. Enjoy!

Thank you, Subsonic!  I do love the combination with the 3.7.  I am glad you are enjoying the combination of triples with the 1.7.  I cannot believe how much music I was missing before I added that bass foundation with these subs!

mscetal

Re: Mike's GR Research OB H frame Triple Build
« Reply #19 on: 22 Aug 2021, 08:56 pm »
You know, it really makes me smile to see someone new to this kind of thing jump in and end up with something they're proud to have in their home. Kudos to you for persevering! They look terrific.

Thanks for your your kind words and videos, Peter!  Like I said, I watched the videos a couple times before I built.  I am not a wood worker, but with your videos and Jay's kits, I didn't have to be!  Thank you!