NX-Otica build thread.

0 Members and 1 Guest are viewing this topic. Read 54240 times.

NeilT

Re: NX-Otica build thread.
« Reply #80 on: 20 Jan 2017, 03:02 pm »
I finished a pair of the MTM NX-Oticas.  I have no where near the woodworking talent of some folks on this board so no in process build pics.  Its a no brainer flat pack so you are not missing anything really. 

Here is one side next to a one of my Super Vs.


These ended up being much taller than I thought they would be.  IIRC I last measured them at 54 inches tall.  I sit about 11.5~12 feet away from my speakers so I decided to angle the MTMs forward a bit (1/2 inch higher in the rear) and they are on speaker spikes.  The Super Vs look smaller than they really are as they are set back a bit in the photo. 

They, being the NX-Oticas, sound phenomenal.  Until I heard the NX-Oticas the only speakers I would have traded the Super Vs without much thought for were these http://www.audiocircle.com/index.php?topic=138878.msg1478779#msg1478779.  The Hawthorne OB 8s (crossover by Danny) are detail monsters.  I would encourage folks to hear them but Early B might be the only person to ever own a pair now that Hawthorne audio is gone.  The MTMs are equal to the OB 8s.  The OB 8s have a more detailed extended treble region but the NX-Otica's MTM config may give it a edge in the midrange.  (I havent heard the OB 8s since the last time I was over Early B's place a few months ago so TIFWIW).  In any event, the two sound way more alike than different.

The NX-Oticas have a rich and super detailed midrange and a very extended yet smooth treble region.  In comparison the Super Vs midrange is rich and robust but lacks the clarity of the MTMs.  The Super Vs treble is smooth and for the most part unoffensive but does not extend anywhere close to the open back Neo 3s. 

The Super Vs are not totally outclassed though.  There is just something special about them that I can't put a finger on.  It may just be due to the Coaxial configuration which immediately integrates the sound from the mid and tweeter.  You never get the sense that you are listening to two drivers.  This especially comes in handy for those of us with smaller rooms.  The Super Vs hit very hard and are a very addictive listen.

Anyway, the NX-Oticas are the new king in my house, but I am keeping the Super Vs.  I may build a table top version of the Super Vs so I can switch the pairs out whenever I get an itch for something different.

Of course a big thank you to Captainhemo for the great flat pack.

A couple more shots.


Paint the woofer magnet black. Sticks out like a sore thumb.  :thumb:
Beautiful speakers, great job on the build and flat packs.

Neil

Ric Schultz

Re: NX-Otica build thread.
« Reply #81 on: 20 Jan 2017, 05:36 pm »
Better yet? would be to turn the lower woofer around.  Probably better sound, as well.  One person turned around the backwards one on the three stack and said it sounded better.  Doing the same to a two stack would make more difference......one out of two is more important than one out of three.  Anyone game?

rockdrummer

  • Full Member
  • Posts: 392
Re: NX-Otica build thread.
« Reply #82 on: 20 Jan 2017, 05:52 pm »
I don't want this thread to change direction, but I'm looking for the thread where the forward facing/alternating woofer idea was debated.  I really like the aesthetic look of all woofers facing front, but have absolutely no experience or facts to back up either opinion.  Could someone direct me to that thread?

Thanks
Ben

Captainhemo

Re: NX-Otica build thread.
« Reply #83 on: 21 Jan 2017, 12:58 am »
Ben, it's discussed briefly in   our OB H-Frame thread  as well as a  thread ric started  (can't reacll which one)
Post 108,  I quoted abit from that other thread  as we moved the disussion 
http://www.audiocircle.com/index.php?topic=139480.100

Not sure that's what you're after but...

And ric,  we'm  just  finishing a pair of duals (sloped) with both drivers facing forwards for a  cutomer, have sent  out a fwew pairs of triples like that now
jay

AKLegal

  • Full Member
  • Posts: 329
Re: NX-Otica build thread.
« Reply #84 on: 26 Jan 2017, 07:29 pm »
These things continue to get more impressive as they break in.  Increasing the volume only makes the sound bigger and they seem to simply ignore the room because no frequencies come close to loading the room.  The super Vs could load my room at particular low midrange frequencies at very loud volumes.


Switch the speakers back and forth so that the long wing is on the inside/outside and see which option you prefer.


With the wings on the outside I got decreased soundstage width but a stronger center image and they sound ever so slightly more dynamic when I swapped them.  I'm not sure which configuration I like better.


Paint the woofer magnet black. Sticks out like a sore thumb.  :thumb:
Beautiful speakers, great job on the build and flat packs.

Neil

Its not as bad as it looks in the picture.  I had an overhead light and a fairly bright lamp on and then on top of that I used a flash.  Under normal conditions you can still see them a little but its no where near what they look like in the picture.

**UPDATE** I definitely prefer the side wings to the inside.  I take back what I wrote earlier (pycho-acoustics maybe?).  The midrange is just loads better with the wings to the inside.
« Last Edit: 26 Jan 2017, 09:04 pm by AKLegal »

Philistine

Re: NX-Otica build thread.
« Reply #85 on: 7 Feb 2017, 02:20 pm »
Delete - wrong thread.

Captainhemo

Re: NX-Otica build thread.
« Reply #86 on: 11 Feb 2017, 02:43 am »
There's a bunch of Ottica threads  now  so figured here's as good a plcae as any

Mike from Mivera Audio was by  today.  He brought over   his digital stack and new  Pure Volume  (based on  4  Bent Audio  slaglaformers) and   nothing but in the signal path.  Everthing  is  upsampled to  DSD 256 via a separate server/upsamler based on the  Intel i7 6700. It's passed on to to  a hub/router then  via  fiber cable to the  Super Stream, and finally on to  the  DSD 256 optimized Pure Stream DAC via USB.  We drove   the   speakers with a sample of the new ICE   100wpc amp. 
Wow,  sounded    good :)  (excuse the mess, always   swapping   gear in and out ).   This  particular  version of   the Mivera Pure Volume only had one set of ins and one set of outs so we went subless  this afternoon...I was surprised at just how much bass the Otticas produced on their own 
The Mivera front end is impressive !


jay

Captainhemo

Re: NX-Otica build thread.
« Reply #87 on: 7 Mar 2017, 11:28 pm »
Jeff,  I apologize but could yo uplease re-send that email yo  sent me this am ?

jay

Captainhemo

Re: NX-Otica build thread.
« Reply #88 on: 14 Mar 2017, 01:22 am »
uhhhm,   a picture speaks a thousand words,    no, thats not ours (


Cudos Steve,  amazing   :thumb:

jay

ebag4

Re: NX-Otica build thread.
« Reply #89 on: 14 Mar 2017, 01:38 am »
uhhhm,   a picture speaks a thousand words,    no, thats not ours (


Cudos Steve,  amazing   :thumb:

jay
Agreed! Very nice.  I hope we get to see the rest of the build!

Best,
Ed

Captainhemo

Re: NX-Otica build thread.
« Reply #90 on: 14 Mar 2017, 02:35 am »
I'll get him to post some pics Ed  !   He's  building out a set of Otticas and sloped triple  12's

jay

Captainhemo

Re: NX-Otica build thread.
« Reply #91 on: 22 May 2017, 01:23 am »
We moved the NX-Ottica/triple 12 combo up to  Don's place for a bit (until  current build is done ).   Amazing how much better they sound in a  larger room   :thumb:  I'm not saying they sound bad in my room but they do like open space
finally got some  grill frames wrapped for the subs too  !


jay

sledwards

Re: NX-Otica build thread.
« Reply #92 on: 31 May 2017, 05:18 pm »
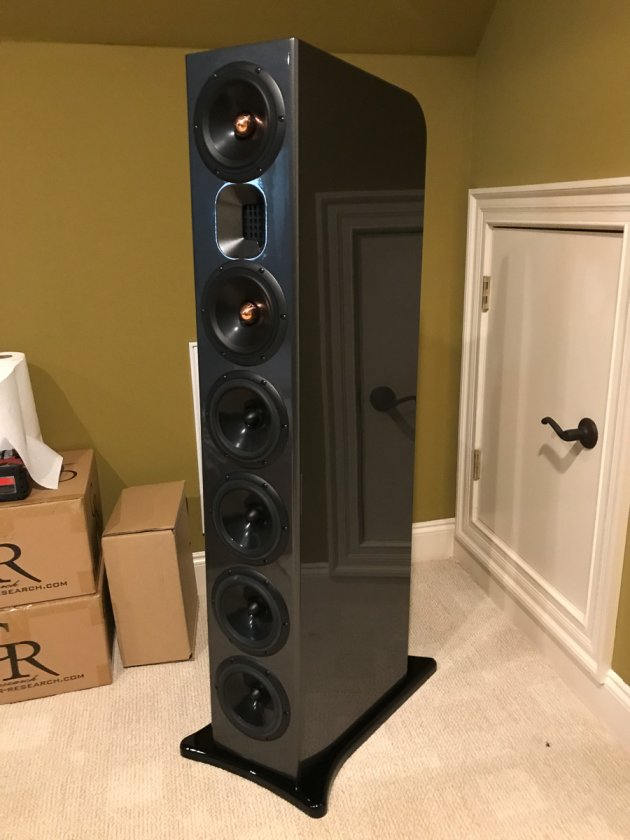
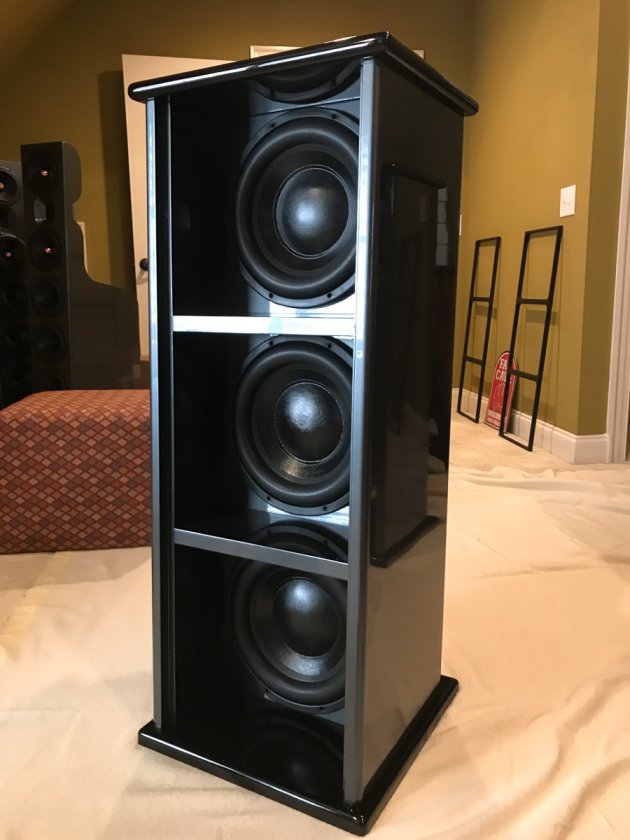
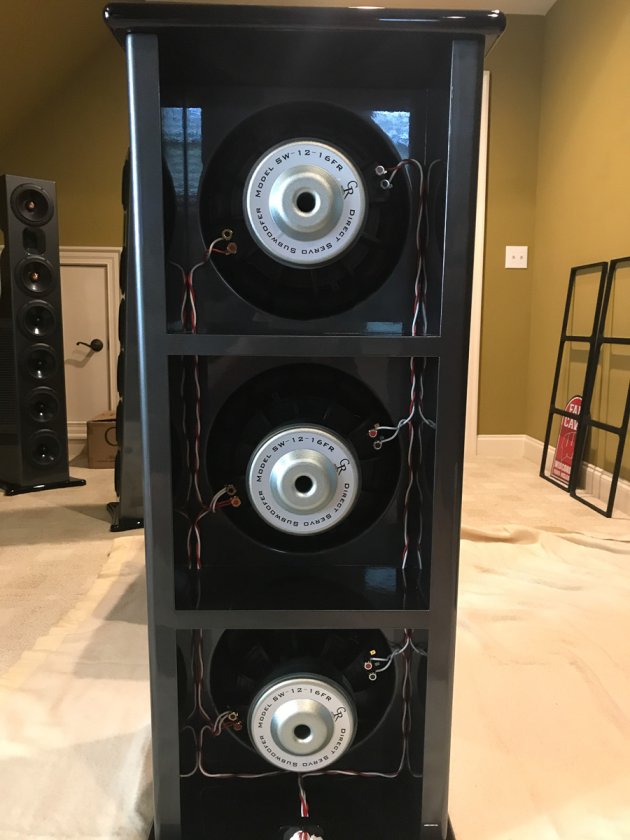
It’s time I finally get around to posting the results of my NX-Otica build using Jay’s wonderful flat packs. I decided to go with triple H-frame subs, all drivers facing forward, with a 3 degree tilt to match the mains.  I did not photo document each step of the build, but did manage to get enough pics to show the highlights.

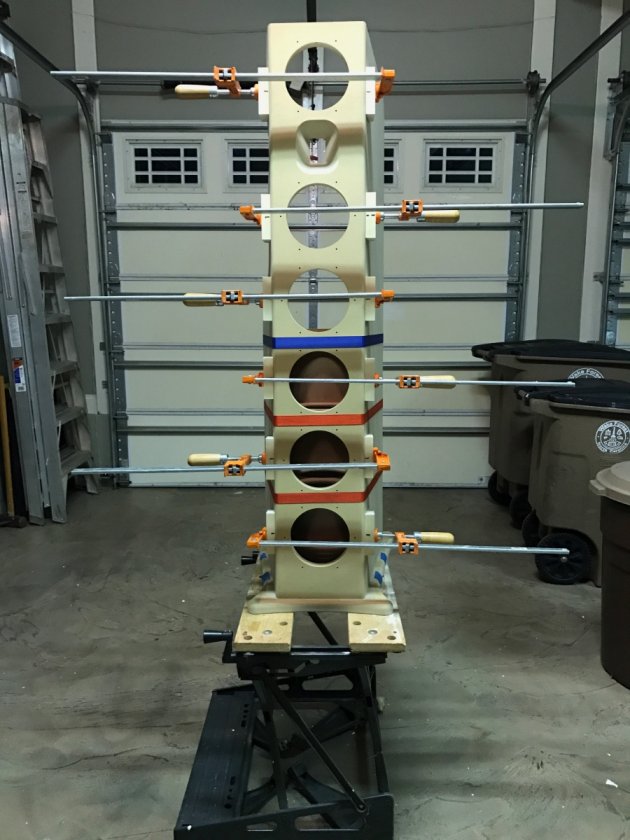
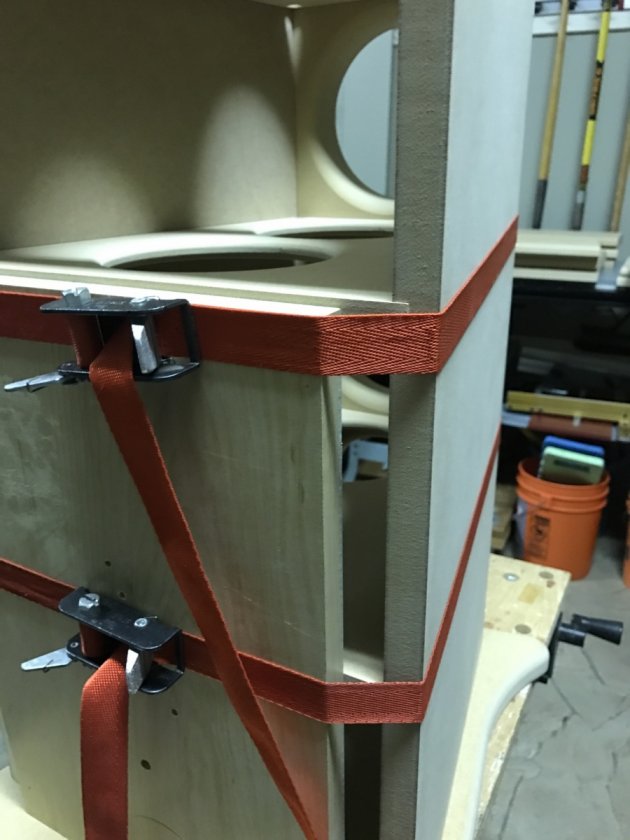
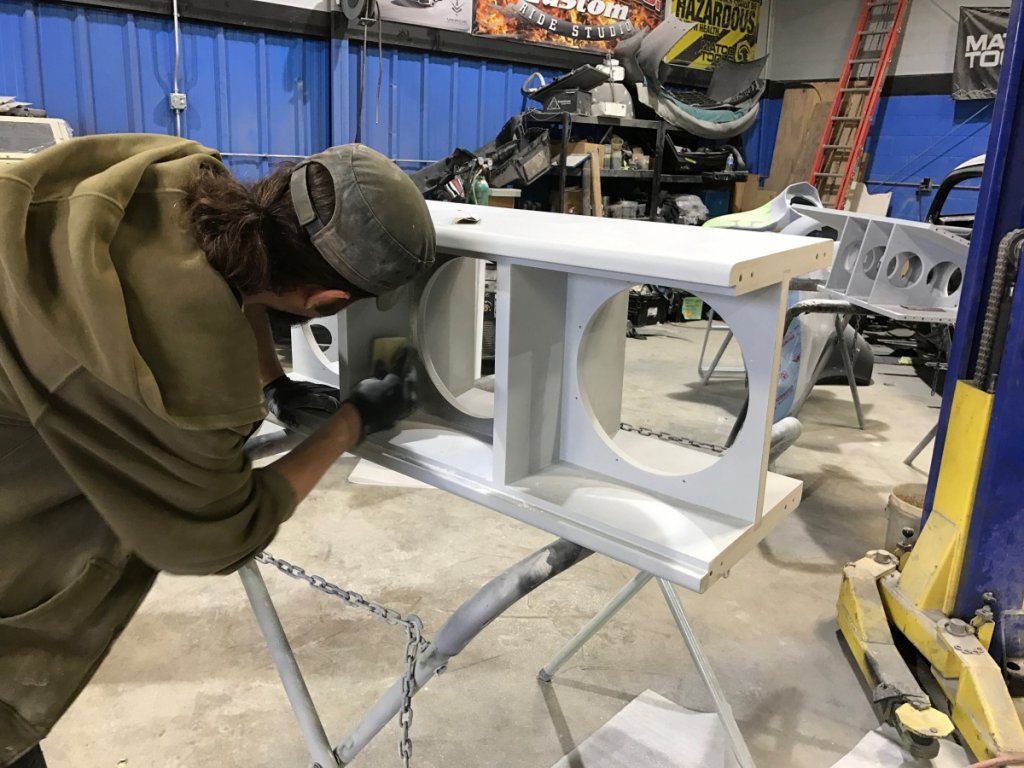
These first shots show the clamp-up scheme I used on the cabinets. For the mains, I used small blocks of wood under the clamps cut with a 10 degree taper to match the wing angles. I stuck each block to the wing using a thin double-sided carpet tape to keep the blocks from sliding.  The three band straps were used to set the cross braces into the baffle and wings.  A scrap piece of wood cut to the width of the cross braces was place at the rear to apply forward pressure to the cross braces.  I should mention that I decided to not to permanently attach the bases during glue-up since they would be painted a different color than the cabinets.   


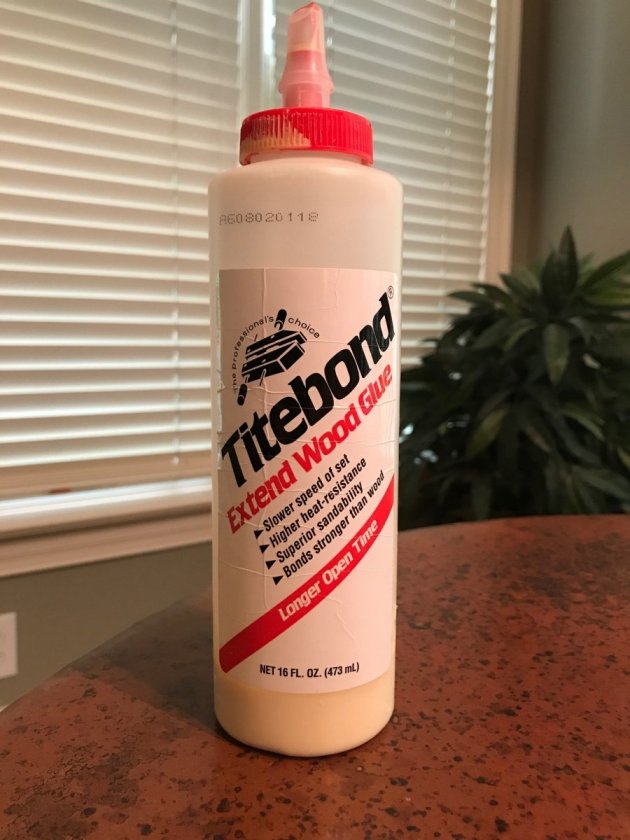
Working alone, my main concern was the working time required to apply glue to all the joints and set the clamps.  I found that this version of Tite Bond glue does provide extra working time as advertised.


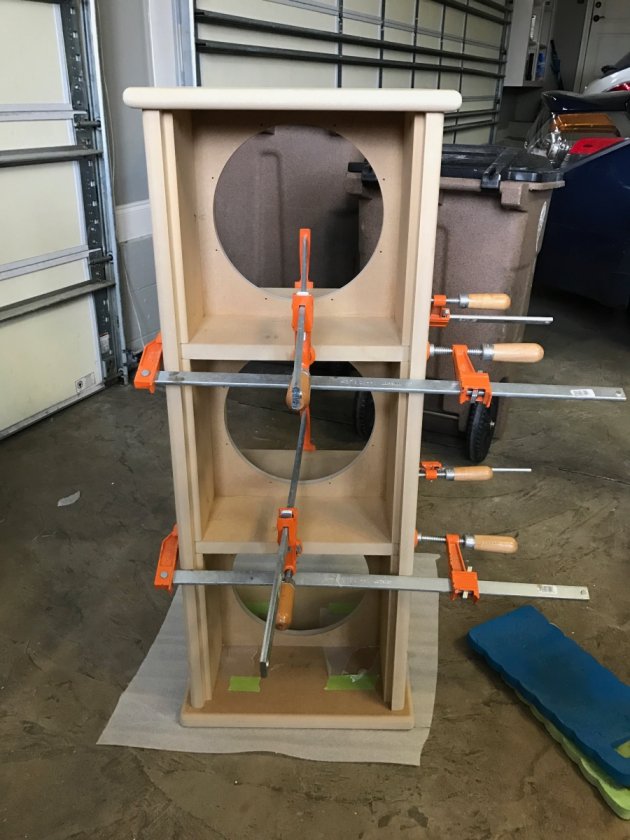
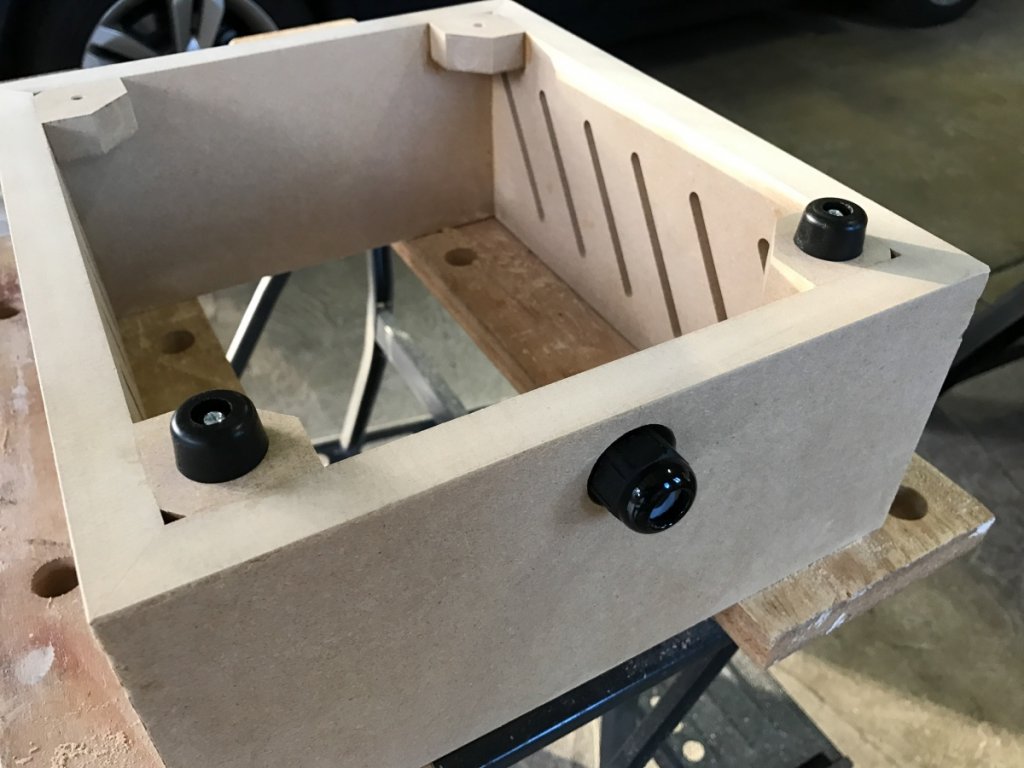
The subs were a bit easier to assemble since all of the clamped parts were at 90-degree angles to each other. Again, the removable base and top were used as fixturing during the glue-up.


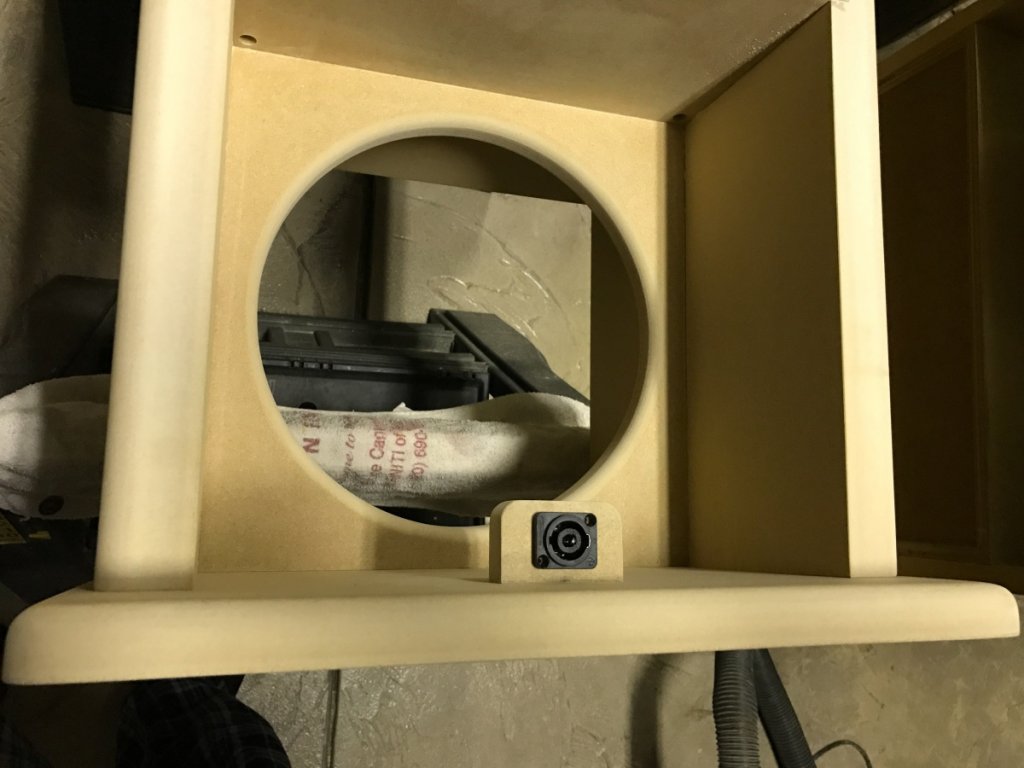
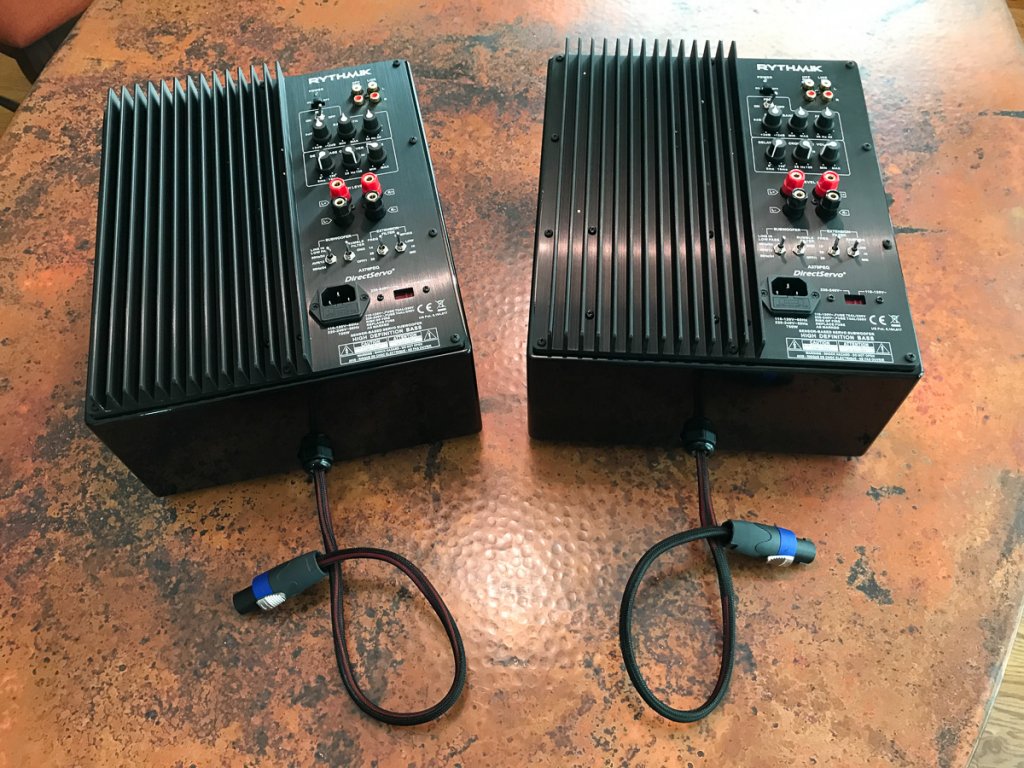
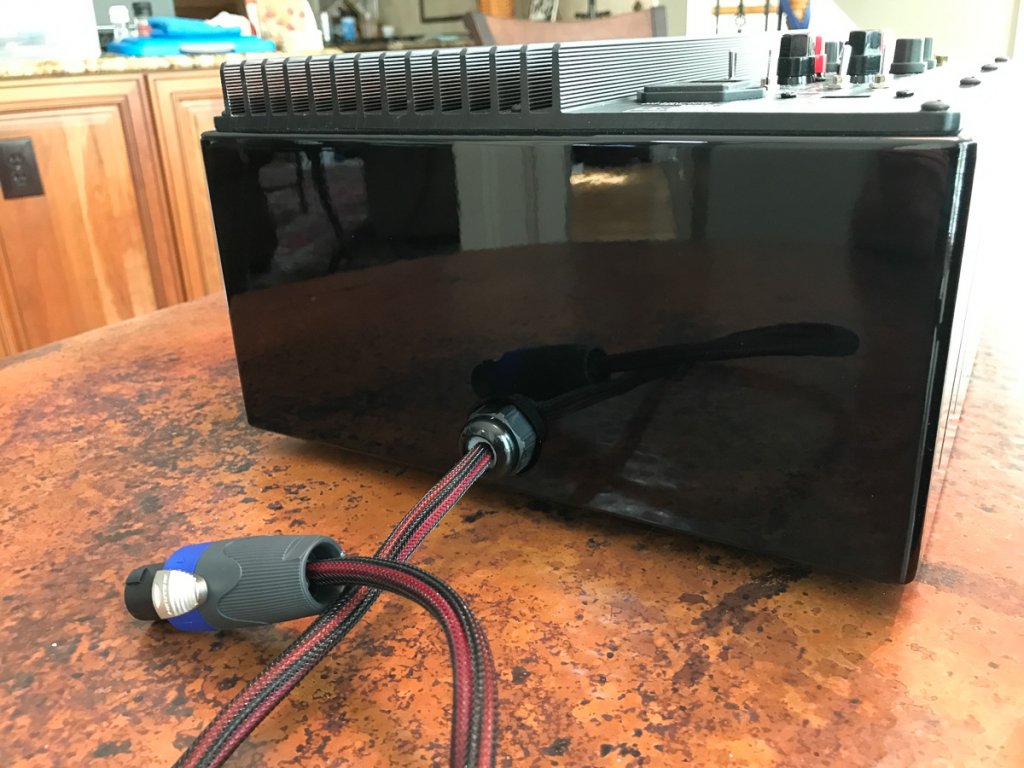
Shown here are the amp enclosures and SpeakOn connector mount for the sub. I added small corner blocks to amp boxes to accommodate the mounting feet I selected.  I fabricated a small connector mounting block and located it central on the sub base, aligned with the backside edge of the H-frame.


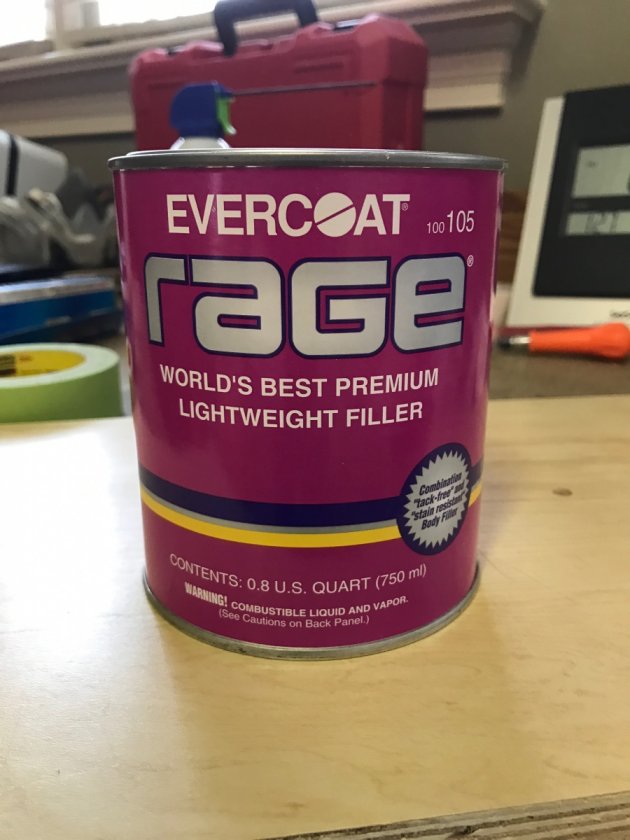
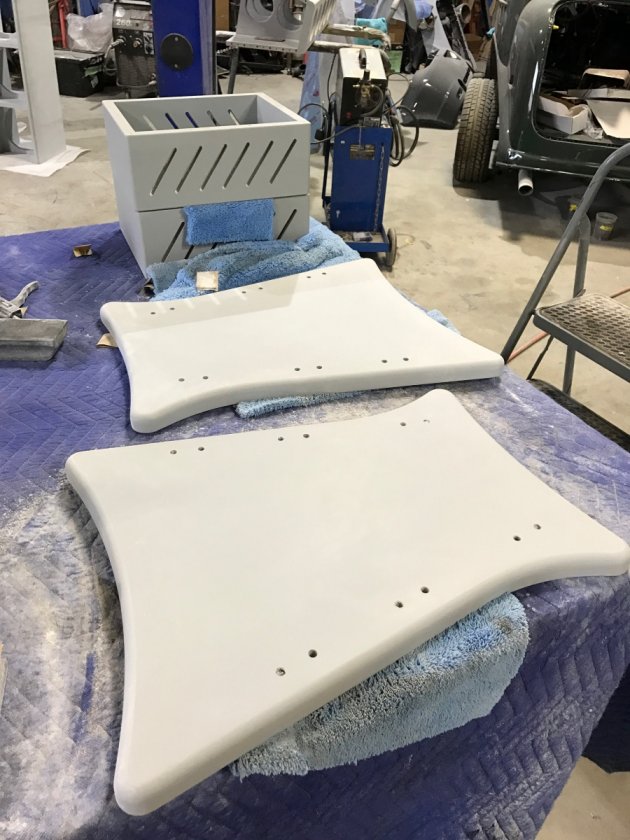
Prior to finish sanding, I filled any slight edge mismatches.  In the past I have used Bondo as a joint filler for MDF.  This time around I decided to try Evercoat Rage.  I found it to apply and sand much easier than traditional Bondo and highly recommend it.


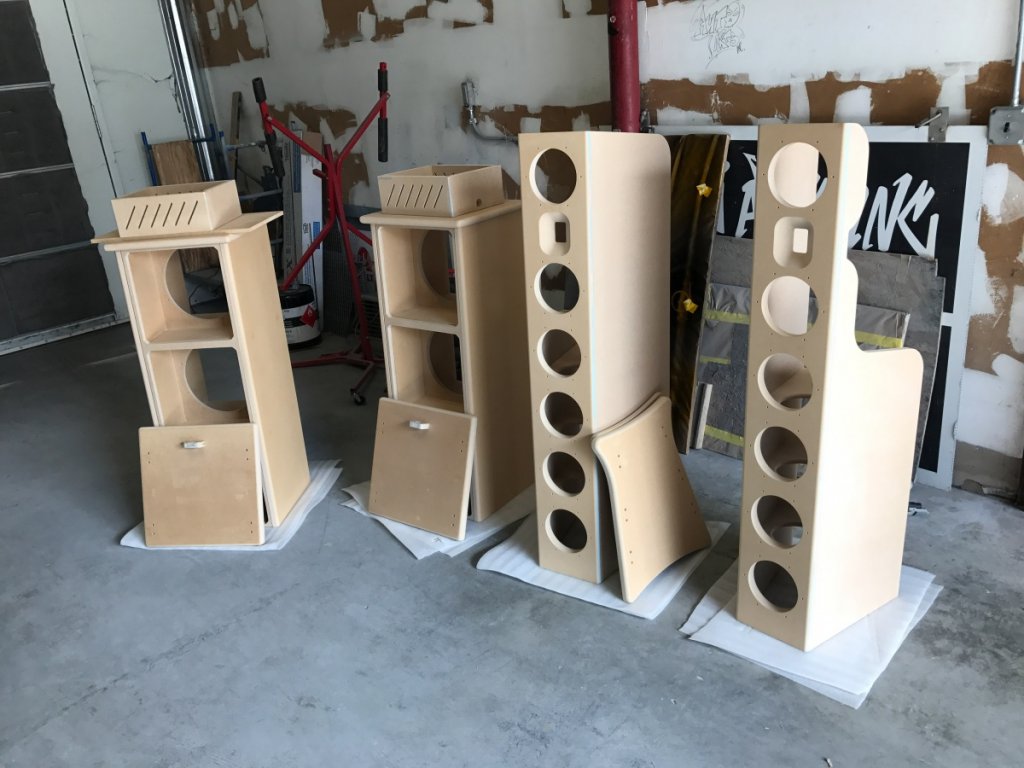
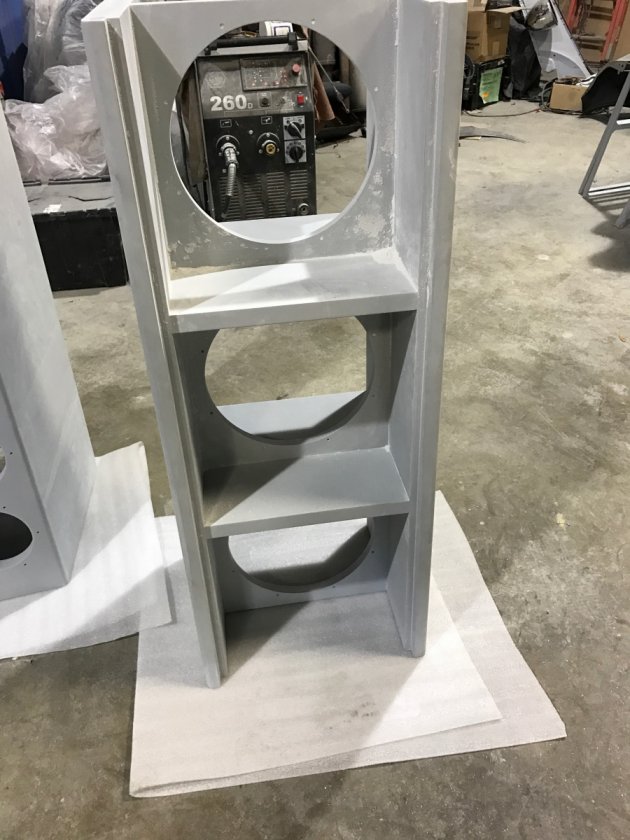
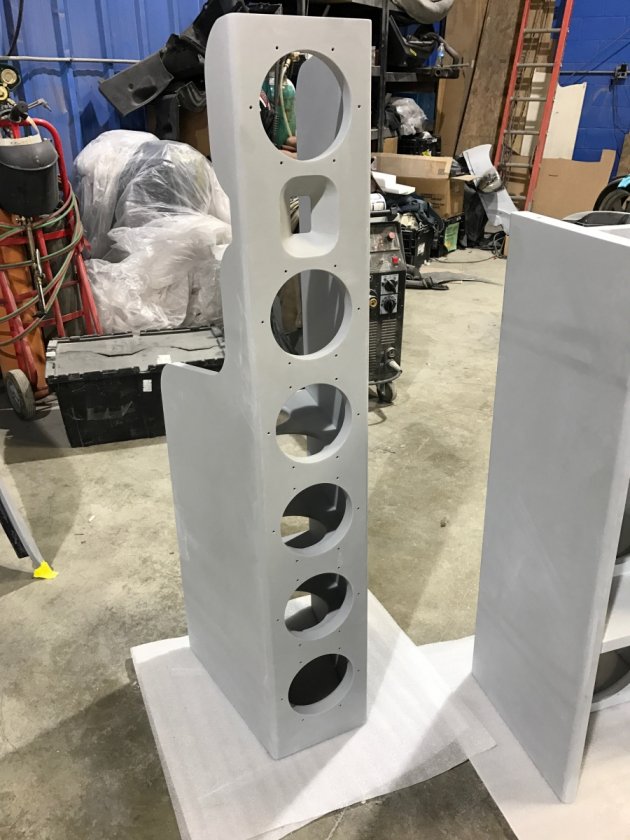
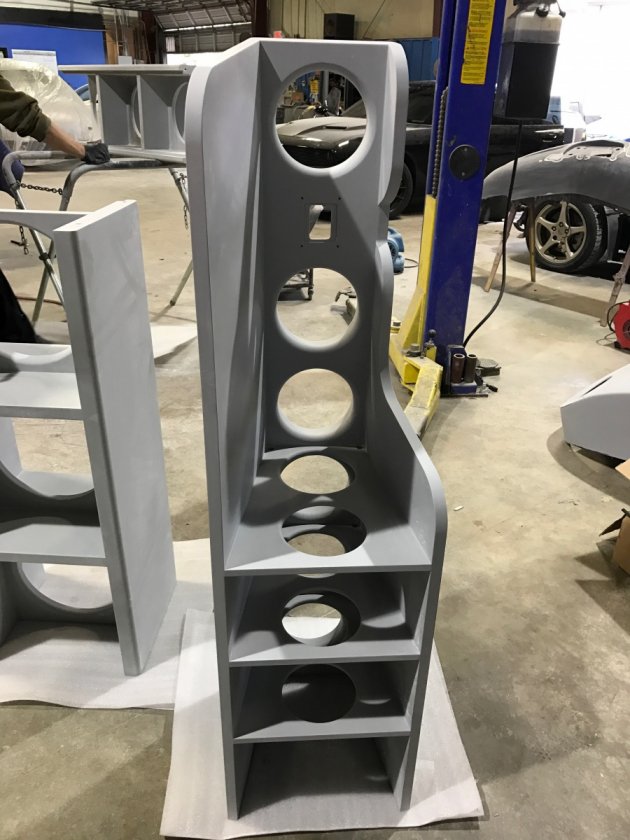
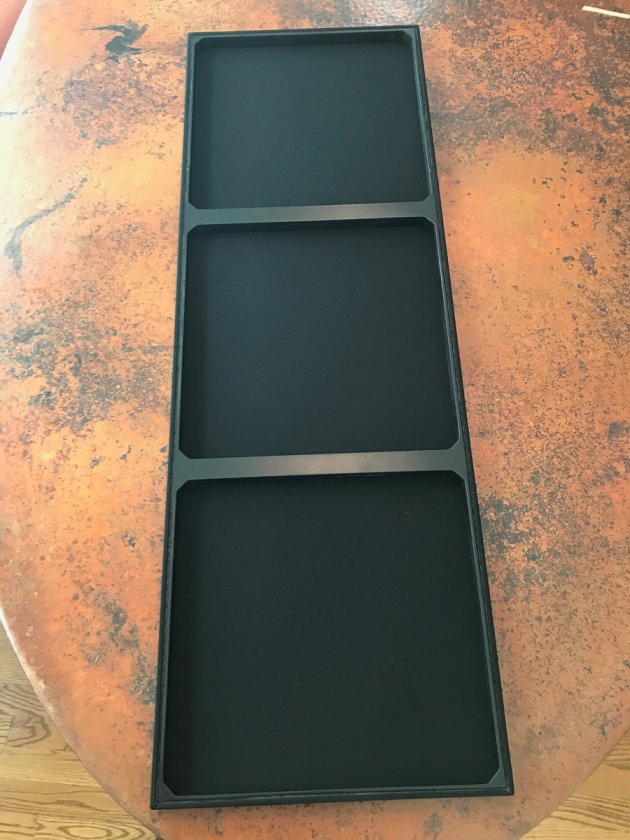
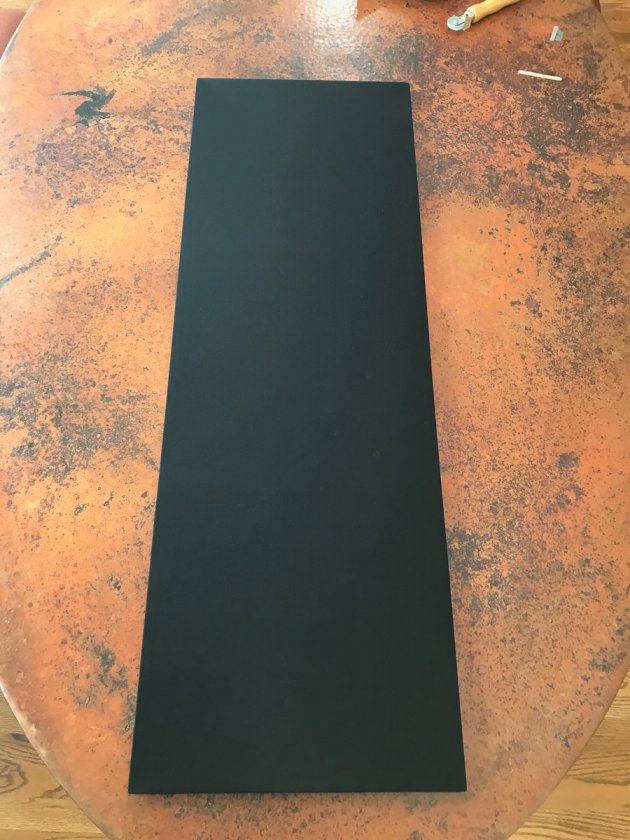
So now, with all the parts sanded using 220-grit paper, it was painting time. Here is where we deviate from the DIY world on this project. In a nutshell, I suck at painting. Doesn’t matter if it’s a rattle can, roller or spray gun set-up, I am just too impatient to get a nice finish. I looked into local cabinet/furniture shops and none were really interested in my project. Then I stumbled upon a custom auto paint shop for the job. The owner was very knowledgeable and most important, had painted MDF before and willing to take on the job. So here are all the pieces at the painter, ready for him to work his magic.


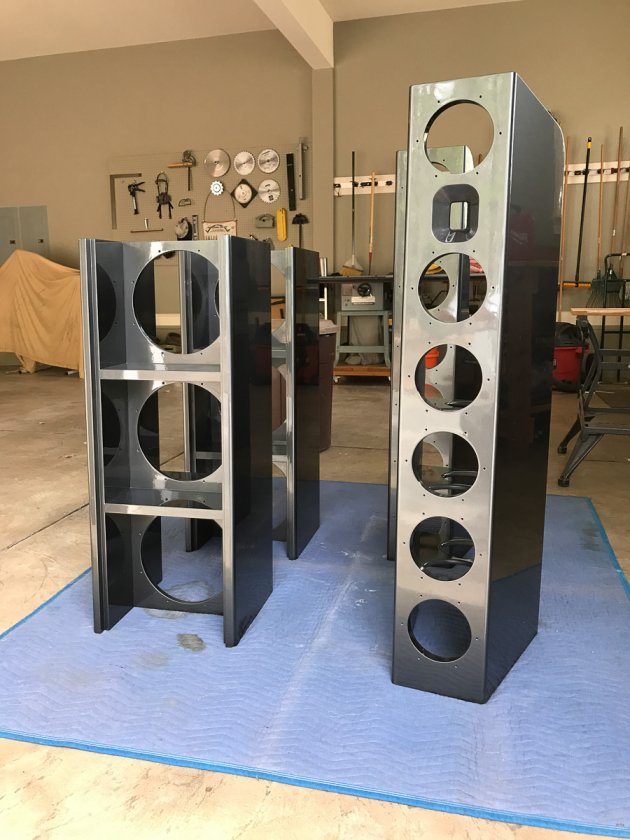
The following images are various stages of primer and sanding. The primer he used is another Evercoat product called “Slick Sand” It is a high solids, high build polyester primer. At this point I should mention that this is the expensive part of the process. Very labor intensive sanding it down to the desired surface finish. As you would expect, auto painters have a different standard for “smooth” than I do. I got 800-grit finish on just about all surfaces. I explained to the guys that I really didn’t need that grade of finish inside and showed them where I would be applying NoRez to cover their car-like finish. In hindsight, I could have applied the Slick Sand by roller and brush and done all the sanding to my standards. Would have saved a bunch of money.


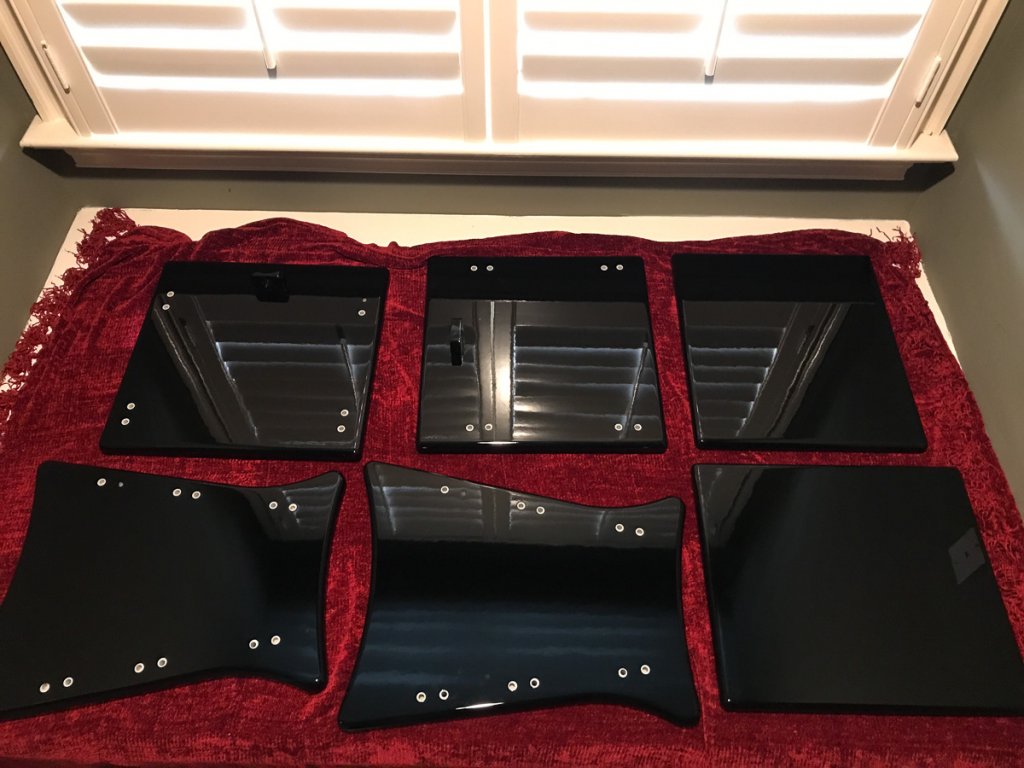
Time to choose the colors. Too many choices browsing the auto paint books. I decided to try a few combinations before I settled on the final color. He painted up large samples, clear coat finished for evaluation. In the end I settled on two Honda/Acura colors:  A dark gray metallic called Modern Steel Effect for the enclosures and a metallic black called Crystal Black Effect for the tops, bases and amp boxes. I was more than pleased with the final results


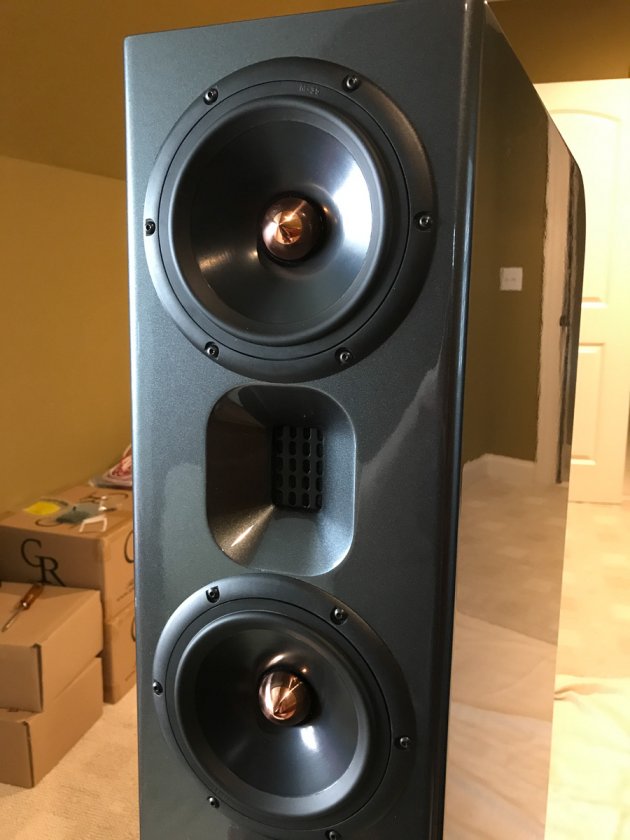
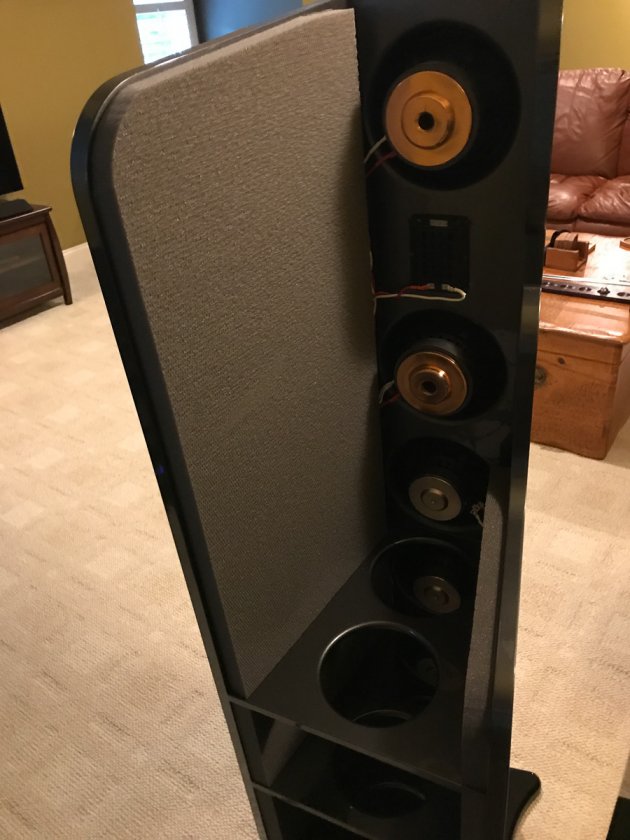
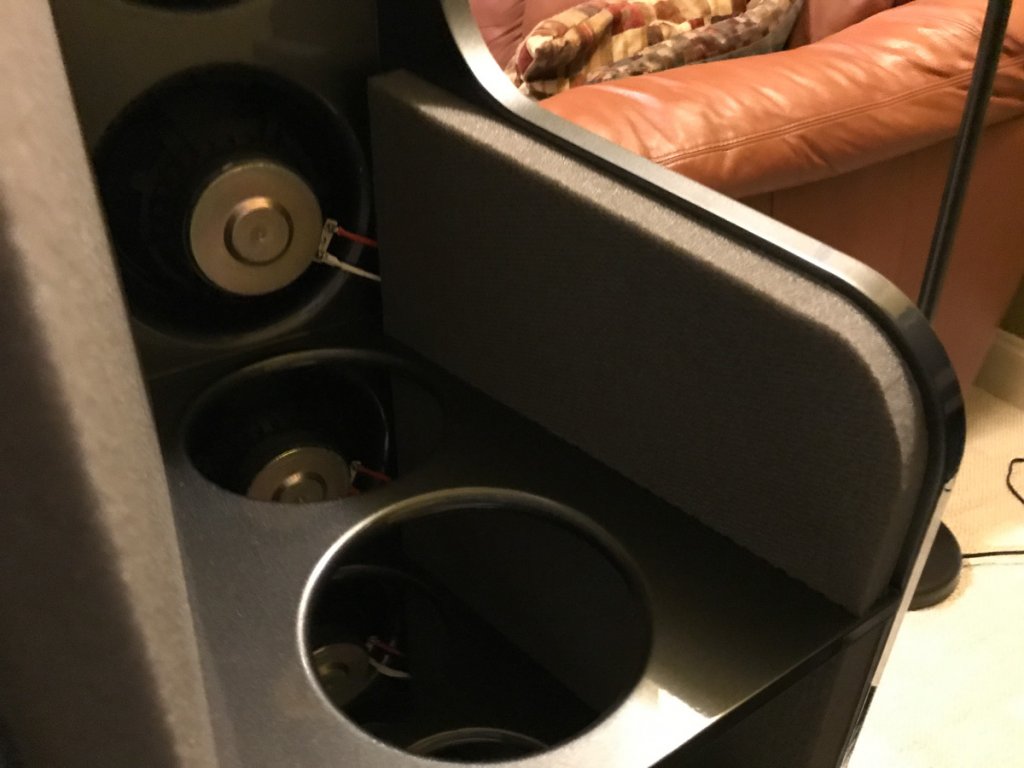
The next series of photos are assembled with drivers and wiring. The accuracy of the pilot hole in the CNC flat packs made driver attachment a breeze. Since the tops and bases were fully painted (except the dowel holes) I decided to use a high quality silicon RTV to attach the to the cabinets. My only concern here was joint strength for the tops, since they were to be held on only with adhesive. When the RTV cured, I gave the tops my version of a “pull test”. No way was I going to detach or for that matter lift the 160 lb sub off of the floor.


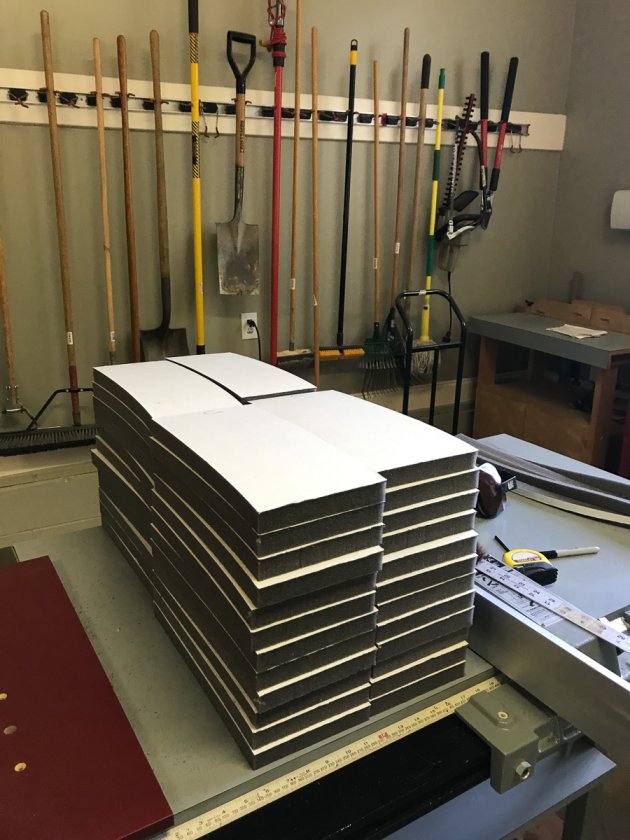
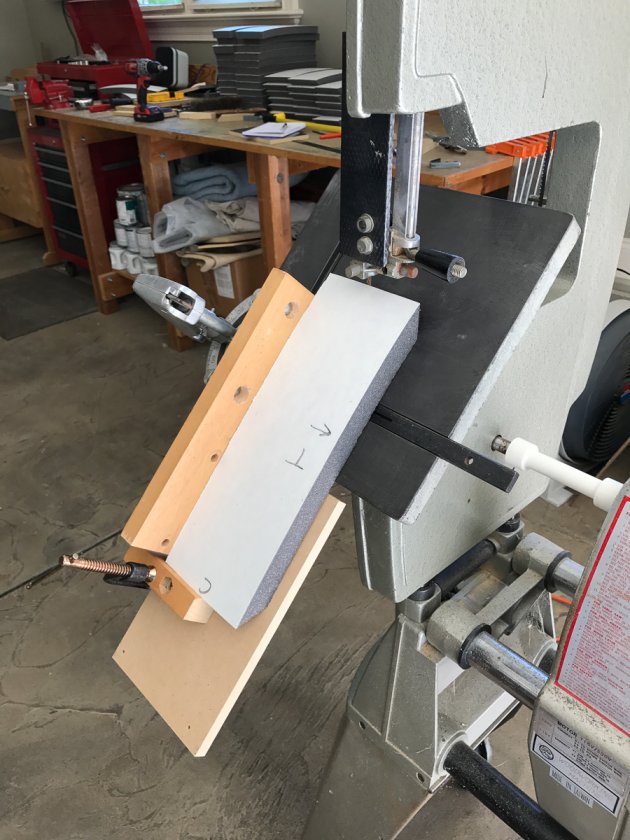
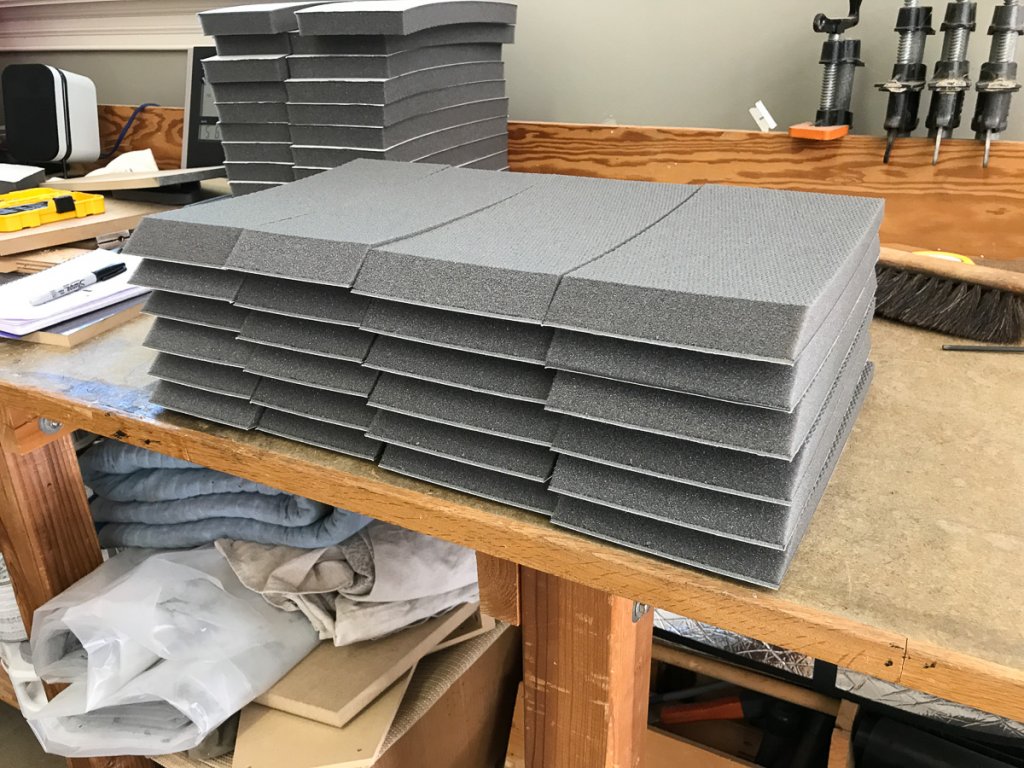
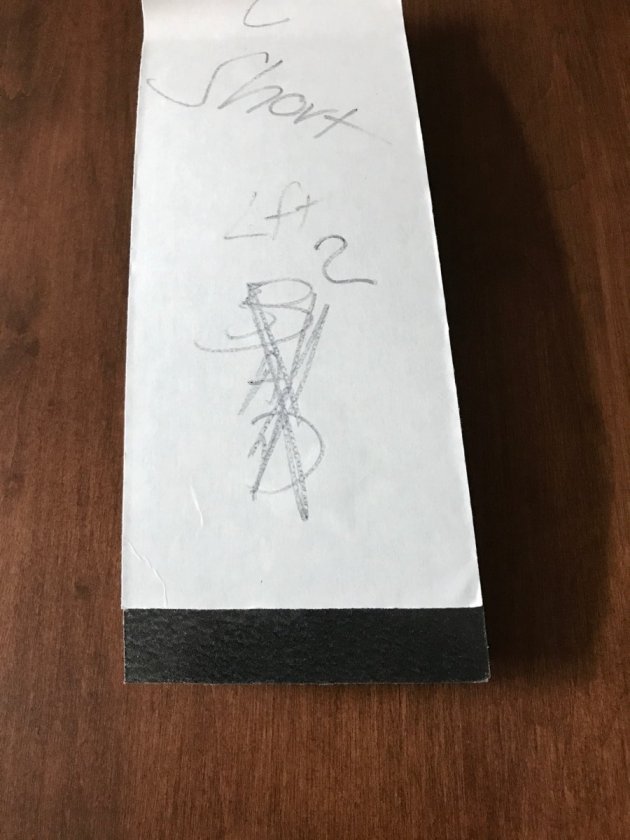
Next up was NoRez installation.  After admiring the 45-degree miters of Peter J, I decided that was the way to go. I first pre-cut all of the pieces to rough size on my table saw.  I then set up my bandsaw to cut the miters. Since my subs were tilted 3-degrees, the end cuts on the NoRez turned out to be compound angles. The final width of each piece was 1 inch less than the sub cavity depth.


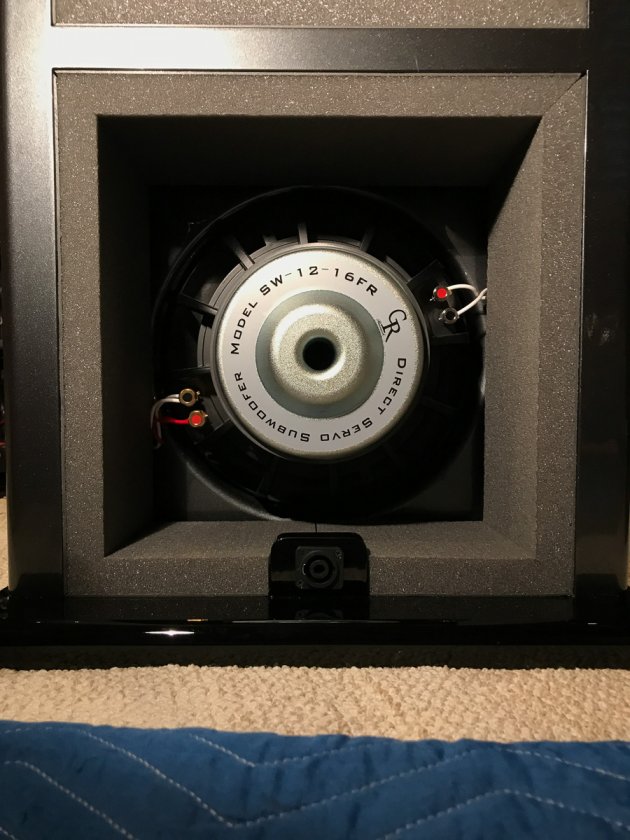
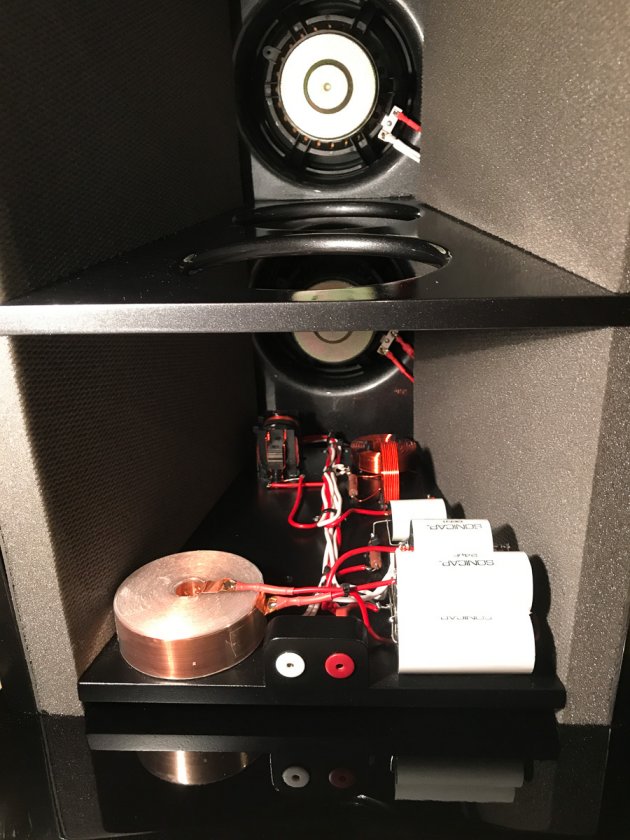
The next set of photos show the NoRez installed in the mains and subs. Splitting the most bottom piece of NoRez in the subs severed to nicely hide the wiring to the SpeakOn connector.


Here is a tip that really helped align the NoRez before letting it stick to its final resting place. After you have checked for proper fit, completely remove the paper backing and reposition it about ¾ to 1 inch from an end. Now you can fit the piece into position and align it properly with a little wiggle room, since only a minimum amount of adhesive is exposed. When your happy with alignment, press hard on the exposed end to anchor it in place. Now, while holding the unstuck portion away from the surface, simply peel back the paper, starting from the free end. Pull slightly towards you and it will “uncurl” off. Now just let the piece stick to the surface, working from the adhered end to the free end.


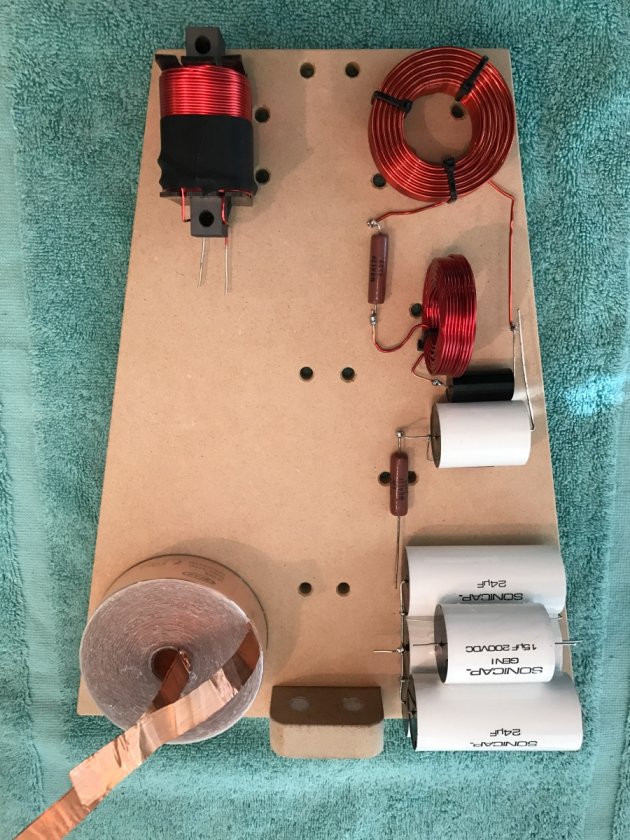
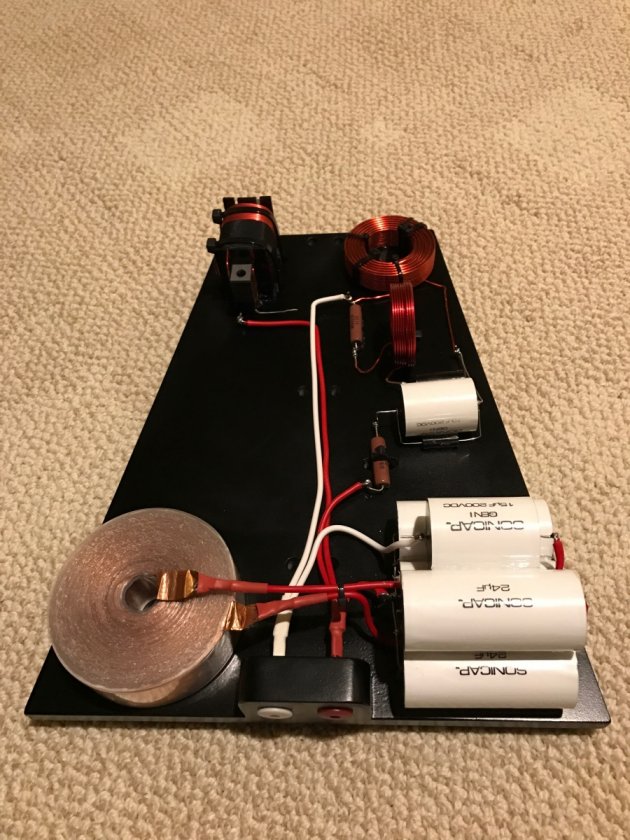
I built the cross overs while the speakers were at the painter. Believe me, I had plenty of time. Cars are their primary business, and my speakers were worked on as time permitted.  Here are photos of the rough layout, finished cross over, and installed in the NX-Otica. I preferred to have the connectors located in the center, rather than the corners as supplied in the flat pack.  I decided to just cut new bases and connector mounting blocks for this purpose. Parts are primarily attached using RTV, wire ties as required.


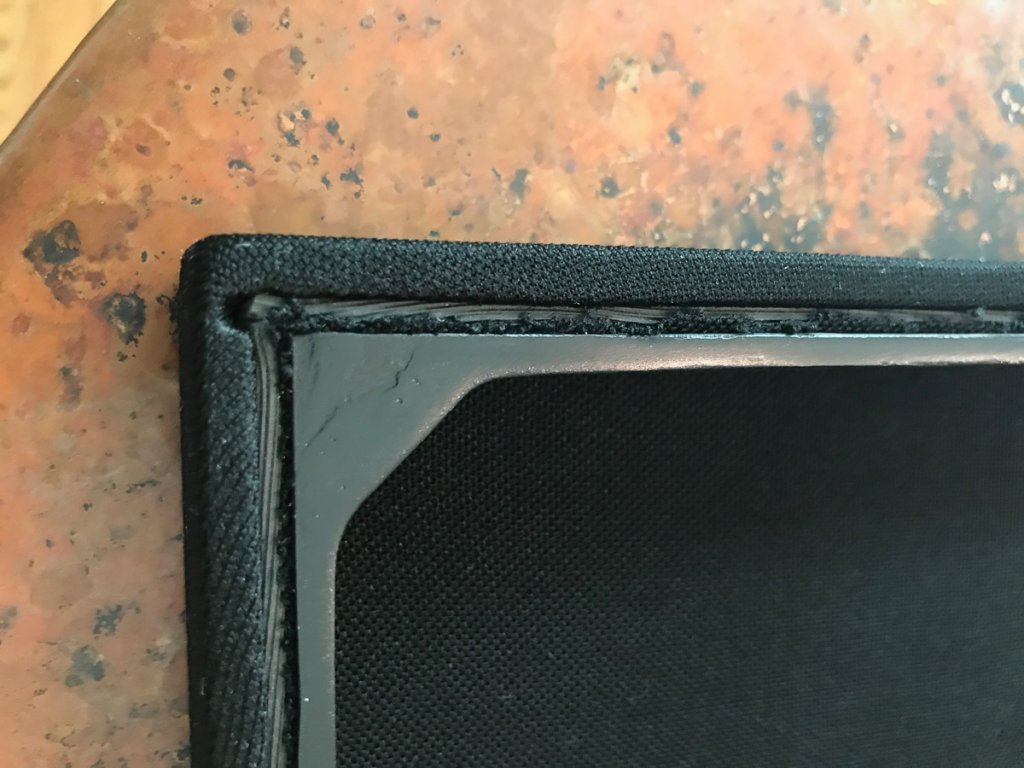
All that remained was to apply grill cloth for the sub grills and assembly the amp boxes.  To attach the grill cloth, I used a method found some years ago on the web. Rather than dealing with glue and/or staples, build them like window screens and use a rubber screen spline to secure the cloth. Before painting, I routed a 1/8-inch wide by about 3/16-in deep groove around the perimeter of the grill frame. I purchased 1/8-in black rubber spline from Ace Hardware and used a roller wheel installation tool to set the spline.  Started with the short ends and did sides last.  Great thing about this method is that you can easily correct mistakes and adjust the cloth tension.  Use a single-edge razor blade to trim the excess cloth and your done.


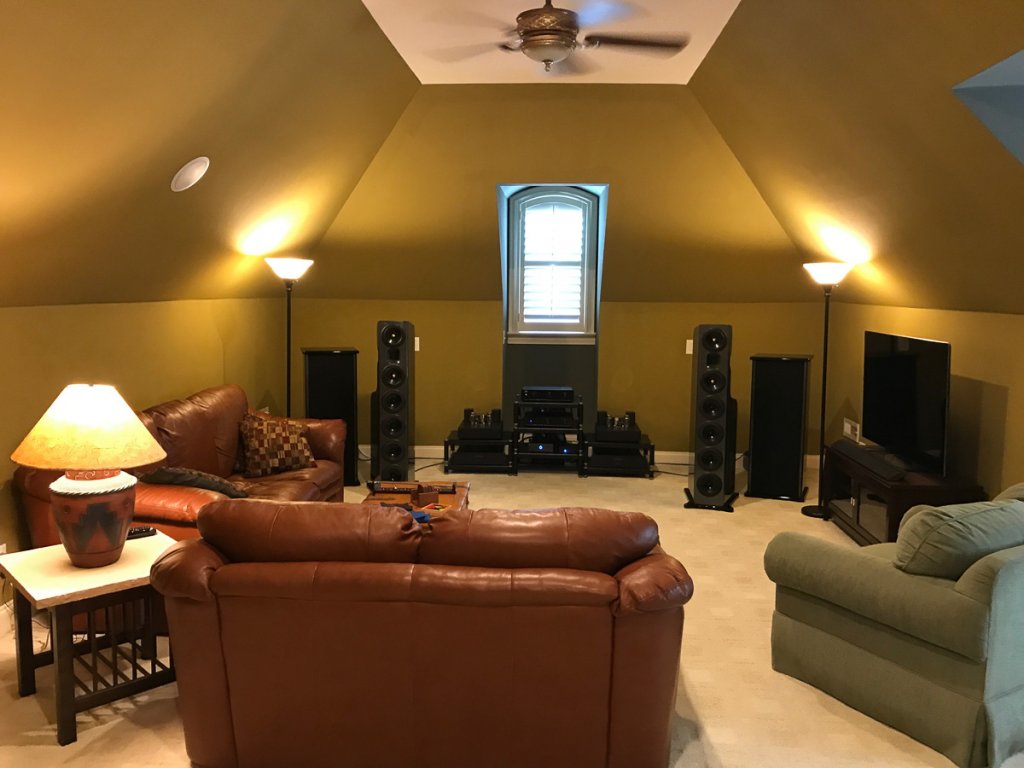
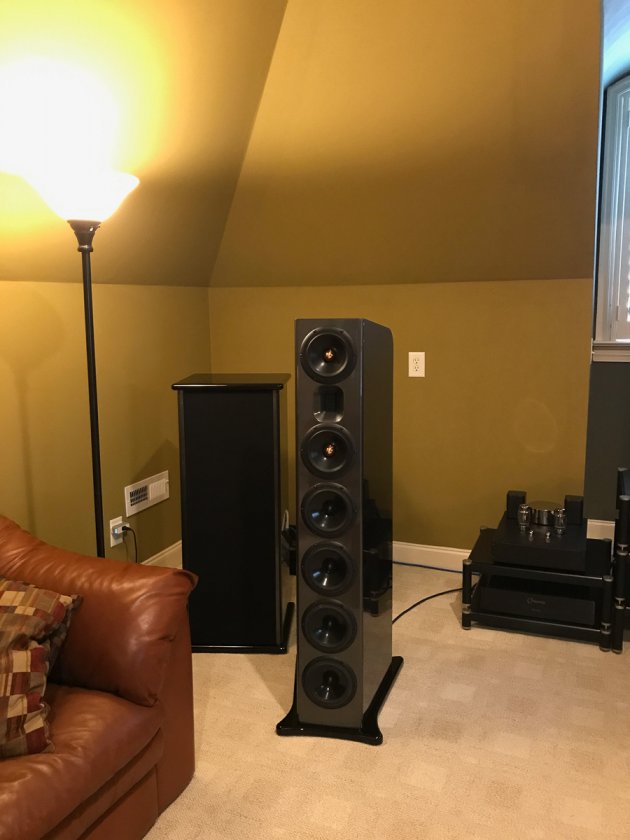
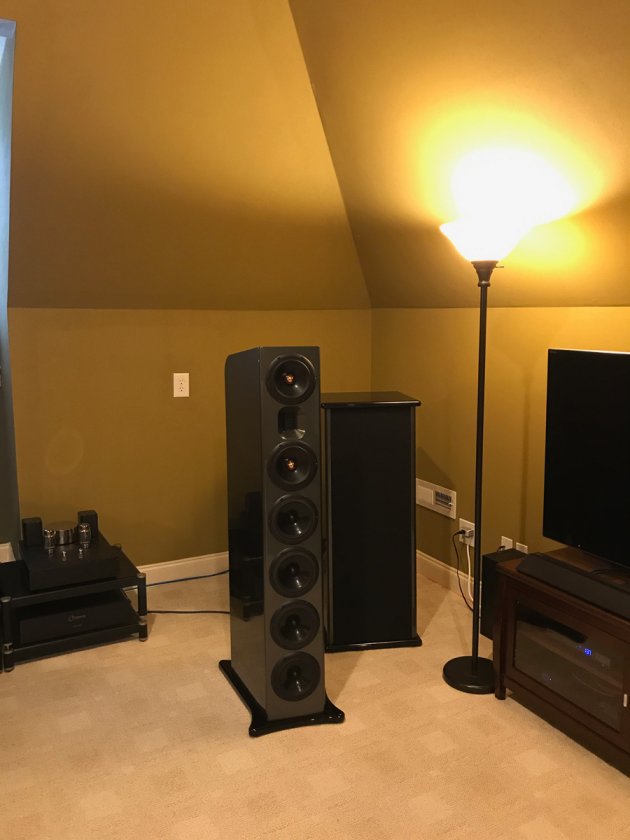
When first audition time arrived, I didn’t have to move the speakers far because I had decided to all of the final assembly in the rear part of my listening room.  Good decision because I was not equipped to move those subs up a long flight of stairs.  Here are a few photos of where the speakers are located. The room is 16 by 31, with a 10-foot “barn house “ ceiling. The long sidewalls and front wall break vertical at 5 feet above the floor and slope upwards at a 45-degree angle to the 10 foot flat ceiling.


First Impressions and Measurement

Since I don’t speak or think well using flowery audio lingo, I will relate what I have heard so far to what I have previously owned, and that is a pair of X-Staiks I owned for a number of years. I used a pair of Rythmik 12-inch sealed subs with them. So being very familiar with the sound of Danny’s open baffle creation paired with good bass, simply put, the NX-Otica/Triple H-frame combo is like X-Staiks on steroids. Everything is bigger…just more presence and clarity. Imaging much like I remember, now coupled with more refined bass than I know what to do with. I admit I pestered Danny with multiple questions before pulling the trigger on these, but I wouldn’t have gone wrong if all he said was “Trust me, you’ll love them”.

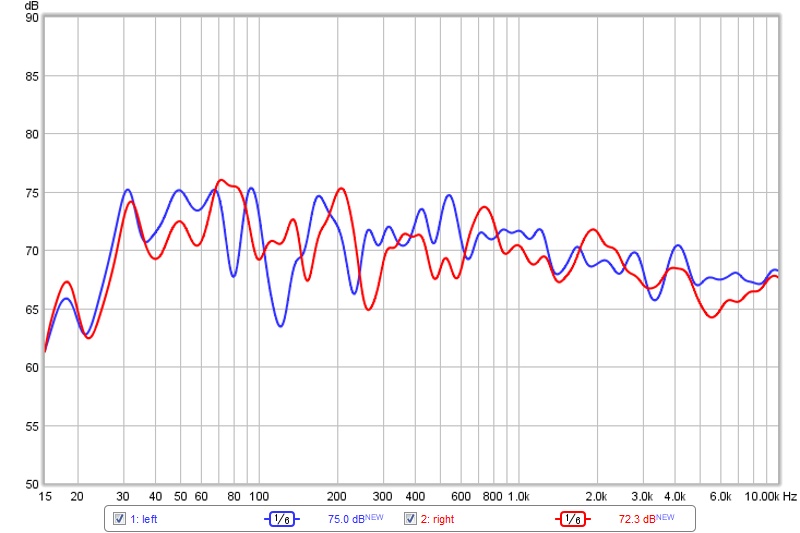
They now have about 100 hours on them and have really begun to settle in. The first hour was crazy, hearing differences (good ones) each time I came into the room.  So here is a one of many response plots recently took using REW and the UMIK-1 USB microphone.  I ended up using the PEQ on the amps to suppress a fairly large 32 Hz room mode.  Doing this did significantly effect the frequency response on each side of the filter. Since the room is non-symmetric due to the furniture and TV placement, left and right channel responses differ. I actually ended up dialing in slightly different cross over frequencies on the plate amps, 50 and 80 Hz as I remember.  Currently, I am selecting a room treatment scheme to help control the bass a bit and refine imaging by diffusing front wall reflections.


I hope this is not too long for a reply in an existing post, but I was trying to keep the number of NX-Otica build threads down and just add to what is there.


Steve
« Last Edit: 1 Jun 2017, 09:18 pm by sledwards »

Early B.

Re: NX-Otica build thread.
« Reply #93 on: 31 May 2017, 05:39 pm »
Those speakers are on a ridiculous level of awesomeness.

Captainhemo

Re: NX-Otica build thread.
« Reply #94 on: 31 May 2017, 05:49 pm »
Awesome Steve  :thumb: 
Been lots of fun chatting   etc throufhout your  build   
Nice room too.... I see the K&K touch peeking through in a couple pics  ...cool

jay

Danny Richie

Re: NX-Otica build thread.
« Reply #95 on: 31 May 2017, 05:50 pm »
Nice work. They look great.

ebag4

Re: NX-Otica build thread.
« Reply #96 on: 31 May 2017, 05:51 pm »
Gorgeous speakers Steve, WOW.  I may have to "borrow" your grill cloth spline idea, very slick  :thumb:.  Thanks for sharing.

Best,
Ed

danvprod

Re: NX-Otica build thread.
« Reply #97 on: 31 May 2017, 05:53 pm »
So impressed, especially with the fit and finish. I bet they sound amazing.

sledwards

Re: NX-Otica build thread.
« Reply #98 on: 31 May 2017, 08:41 pm »
Thanks to all for the kind words. I think I will be enjoying these speakers for years to come.

Steve

mlundy57

  • Industry Participant
  • Posts: 3579
Re: NX-Otica build thread.
« Reply #99 on: 31 May 2017, 09:44 pm »
Very nice.

Having got a price quote in the past from an auto body shop for a pair of Wedgies and the small wedge shaped bases that go with them I don't even want to know what those paint jobs set you back

Mike