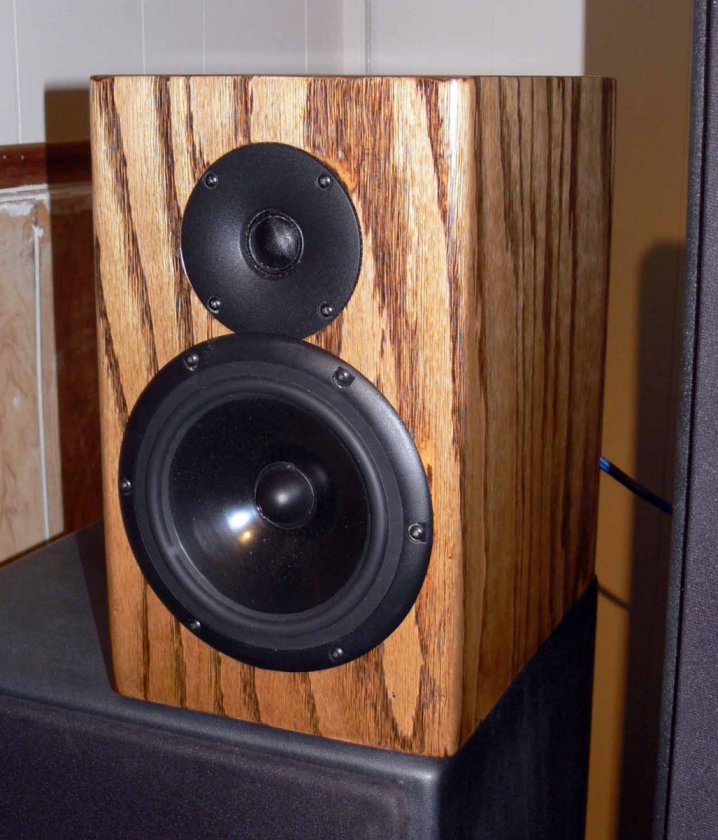
First Veneer Project: X LS Encores

0 Members and 1 Guest are viewing this topic. Read 12639 times.

Scott Trebble

  • Jr. Member
  • Posts: 35
Re: First Veneer Project: X LS Encores
« Reply #20 on: 19 Nov 2014, 04:33 pm »
For trimming veneer around the tweeter rabit, I used a Dremmel with a drywall type bit. This bit has no cutting flutes at the end, to let it follow around electrical boxes.  I had to grind down the non-cutting part a bit as it was too long.  It worked out very well, with a nice clean cut.  It sounds like your bit from China might be the ticket though.

Captainhemo

Re: First Veneer Project: X LS Encores
« Reply #21 on: 22 Nov 2014, 01:08 am »
Flush trimmer would work for thru-holes, but what about the tweeter rabbet? Someone has suggested a really skinny bottomed self guided trimmer, but I've never used it.

I was just thinkin' you'd wanna have those cut out before finishing...no?

Peter,  I'm glad you  suggested this when you did..... I ened up scratching the baffle when I trimmed  the  cutouts out.  Not really sure how as   rear cutouts and the  woofer cutout worked fine,  only  happend with the tweeter cutout..  No,  I didn't take any pics, I was too PO'd .
first issue I had was the flush trim bit with the  1/8" bearing didn't work.  I didn't have a drywall bit on hand  so I made a plug to fit inthe  through hole Once I had the plug,  I  just used it as a center and used a straight cut bit inthe router, but that is when   I scratched the bafffle :(

Anyway,   I sanded the scratches out, actually  just  sanded the entire baffle down and started over with the oil. 
Since then  I have  wet sanded  the cabinets with the oil,  they are coming along


-jay

mlundy57

  • Industry Participant
  • Posts: 3577
Re: First Veneer Project: X LS Encores
« Reply #22 on: 22 Nov 2014, 01:51 am »
Looking good Jay. I find it interesting that flat cut veneer is usually less expensive than other types of cuts (rift, quarter, etc) but has more interesting grain patterns.

Mike

Captainhemo

Re: First Veneer Project: X LS Encores
« Reply #23 on: 22 Nov 2014, 02:25 am »
Looking good Jay. I find it interesting that flat cut veneer is usually less expensive than other types of cuts (rift, quarter, etc) but has more interesting grain patterns.

Mike

Thanks Mike. 
I have a few nicks on the edges that I'm not overly happy with  but  being my first attempt at this,  I guess it was to be expected.  Next time, I will not  use that veneer trimmer  to cut  cross grain, I'll either get a veneer saw as you suggested or use the flush trim bit.
I also wouldn't cut the tweeter uintil after the veneer is  in place... live and learn.   I should have listened to  Ron .

I was also surprised to see  this veneer at a  cheaper price, that is what made me decide to  try this whole process out using this particular veneer. The piece used on the other speaker (side view shown above) isn't near as unique, it is more of  your typical oak look.  I'm  hoping that once the drivers are installed, it won't llok too unbalanced or "weird".  I'll get  some more pics soon

-jay

mresseguie

  • Full Member
  • Posts: 4711
  • SW1X DAC+ D Sachs 300b + Daedalus Apollos = Heaven
Re: First Veneer Project: X LS Encores
« Reply #24 on: 22 Nov 2014, 03:05 am »
Jay,

These are coming along nicely! This might sound odd, but I'm glad you experienced a couple bumps in the road....to let me know what I can expect once I'm finally ready to begin veneering. I'll practice on a couple pretend speakers before I do it for real. I'm thinking my LGKs will be my first real project. They've got two coats of Duratex-like paint on them now.

Keep up the good work!  :thumb:

Michael


BK_856er

  • Jr. Member
  • Posts: 86
Re: First Veneer Project: X LS Encores
« Reply #25 on: 22 Nov 2014, 04:07 am »
Looking good!  :thumb:

I used the trim bit shown below for my LGK driver openings.  Worked great and gave a clean edge even on my brittle exotic veneer.

BK


mlundy57

  • Industry Participant
  • Posts: 3577
Re: First Veneer Project: X LS Encores
« Reply #26 on: 22 Nov 2014, 04:56 am »
Looking good!  :thumb:

I used the trim bit shown below for my LGK driver openings.  Worked great and gave a clean edge even on my brittle exotic veneer.

BK


Where did you find one that was cut off on the bottom? The one I found was too long and I have had a devil of a time trying to grind down the hardened steel.

Mike

Captainhemo

Re: First Veneer Project: X LS Encores
« Reply #27 on: 22 Nov 2014, 06:47 am »
Thanks for the comments Michael & BK.

BK,  that  looks like a cool little bit, it would have worked well. 

Michael,  I haven't  played with the  Duratex , how hard will it be to sand it off or at least smooth ?   Like I mentioned previously,  the venner trimmers work well  for "ripping" but definitely leave a bit to be desired for cross cutting. Be sure you have an alternative.  The flush trim bit I used in my router did a  really nice job of the  3 other holes in each cabinet , the only issue was the tweeter rabit due to its shallow depth.  I wouldn't hesitate to use the flush trim bit  for trimming next time with a bit of frog tape  for the bearing to ride on
Although I  had no issue with curling or  wrinkling, I would also  use  Mike's suggestion  of taping down the piece of veneer while applying the glue  next time.  Better safe than sorry
This may be obvious too but remember,  roundovers on only the verticle edge,  not   both  or you'll be in trouble

It's actually been easier than I had first thought,  just a few little  "hicups" along the way 

-jay
-jay

BK_856er

  • Jr. Member
  • Posts: 86
Re: First Veneer Project: X LS Encores
« Reply #28 on: 22 Nov 2014, 07:13 am »
Where did you find one that was cut off on the bottom? The one I found was too long and I have had a devil of a time trying to grind down the hardened steel.

Mike

Yeah, that hardened steel is almost impossible to grind.

The bit is a Whiteside SC28C.  Only like $7 and works great.

BK

mlundy57

  • Industry Participant
  • Posts: 3577
Re: First Veneer Project: X LS Encores
« Reply #29 on: 22 Nov 2014, 02:19 pm »
Yeah, that hardened steel is almost impossible to grind.

The bit is a Whiteside SC28C.  Only like $7 and works great.

BK

Thanks BK.  Just ordered a couple.

ebag4

Re: First Veneer Project: X LS Encores
« Reply #30 on: 22 Nov 2014, 03:57 pm »
Those are looking great Jay, good job!

lacro

  • Full Member
  • Posts: 602
Re: First Veneer Project: X LS Encores
« Reply #31 on: 22 Nov 2014, 05:13 pm »
Jay, The cabinets are looking great! What's the deal with wet sanding with oil? What grit? Are you going to upgrade the cross-overs?

Larry

Captainhemo

Re: First Veneer Project: X LS Encores
« Reply #32 on: 22 Nov 2014, 06:30 pm »
hey Larry
A shop teacher way back in high school originally showed me the wet sanding method of applying  the finish..   He said to always apply stain or  oil using  this method.  It helps to smoothen out the surface and fill any open  grain./pores with the  actual wood from the  piece .  I use  600 *you can go finer on subsequent coats)  and work in   a circluar  motion.   The stain or oil will thicken as you  sand so keep adding finish a bit  at a time to keep it from drying out,  you do want it to thicken up somewhat.    Wipe off the excess  across the grain sofltly  Once its all dry,  you can leave it natural, polish, or top coat.  Try differnt ways of finishing it on a test board

-jay

Captainhemo

Re: First Veneer Project: X LS Encores
« Reply #33 on: 28 Nov 2014, 06:22 am »
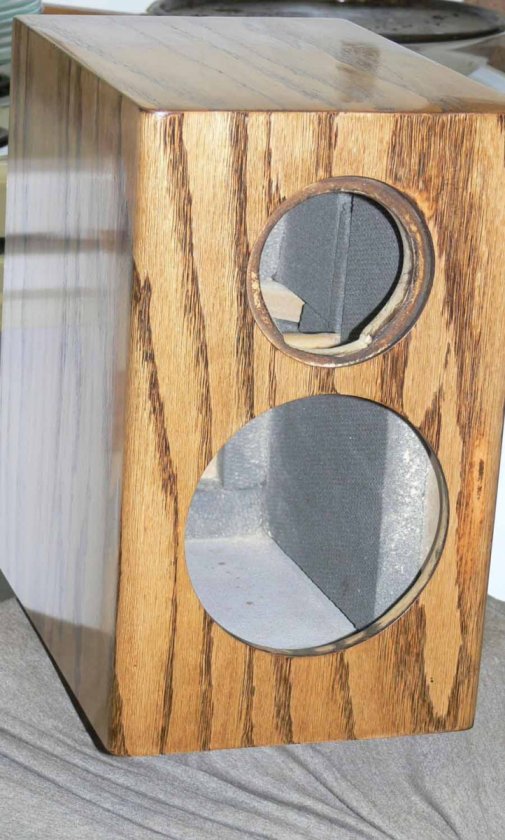
Just  a couople  pics showing  the finish after the intial 30 minute oil soak and  2  wet sanding with the oil sessions ( hard to get  good pics of the surface).


There were still  some areas I wasn't happy with so  another wet sanding session   took place this evening.  Hopefully  I'm  happy this time and can get going on the  Poly in a few days

jay
« Last Edit: 4 Dec 2014, 06:05 pm by Captainhemo »

Ron

Re: First Veneer Project: X LS Encores
« Reply #34 on: 28 Nov 2014, 03:03 pm »
   Looking great Jay! The veneer finish looks very smooth and professionally done.  Anxious to see how they look with multiple coats of the satin poly finish.

Ron

gregfisk

  • Restricted
  • Posts: 1349
  • Us alone in the universe? sure is a waste of SPACE
Re: First Veneer Project: X LS Encores
« Reply #35 on: 29 Nov 2014, 05:38 pm »
Geez Jay,

I'm gone for a few days and you go and put holes in your speaker boxes, they looked so nice before :lol:

Looking really good Jay, can't wait to see them finished.

Greg

Captainhemo

Re: First Veneer Project: X LS Encores
« Reply #36 on: 4 Dec 2014, 06:04 pm »
LOL,  you're a fuinny guy Greg  ...

An update on these cabinets

After I let the Danish Oil  dry for 5 or 6 days, I started applying the wipe on Poly. I'm using  Minwax "Wipe On Poly" , the name kind of suits it   :lol:.   
 For anyone who hasn't  applied this stuff and wants to try,  it is  about as easy as it gets.   i'm  just wiping it on woith a  stain applicator very thinly, letting it dry and sanding  lightly between coasts with   800.    With the oil finish underneath, it really builds fast. 

Here is a shot of each cabinet  after 3 coats


I'm  going to do another 800 grit sanding  then apply another really thin coat , maybe 2.  Will finish up with  some 1000 or finer paper and a good rub.

While I do like the   poly finish and  it will definitely add  a significant amount of "protection",  it does take away from  tha natural  look of the oil finish some .  You do end up with that coated look,  not necessarilly a bad thing  ,  just different.

-jay

Captainhemo

Re: First Veneer Project: X LS Encores
« Reply #37 on: 23 Dec 2014, 04:24 am »
Finally got  to finishing up on these cabinets.   After  I posted those  last couple pics,  I  wasn't happy with a few spots and tried sanding a few scrtches out of a couple  areas .... bad move as I went  through the poly and into the oil finish lightening up  some spots..  I quickly found the only  real way to fix it was to completely sand off the poly frm the baffles and side panels on each cabinet,  I  just couldn't get an  even  color  doing it any  other way.   So, thjat is what I did and needless to say, it really wasn't much fun.  Took a long time doing it all by hand but  I eventually got all the  poly off and was able to apply  another couple   coating of   the oil and get the color even again.  After  letting it dry  for  a few days again,  I started re-applying the poly. 
These  two pics will be very similar to the above but they are different,  they are  the  cabinets after  reoiling and re applying the  poly
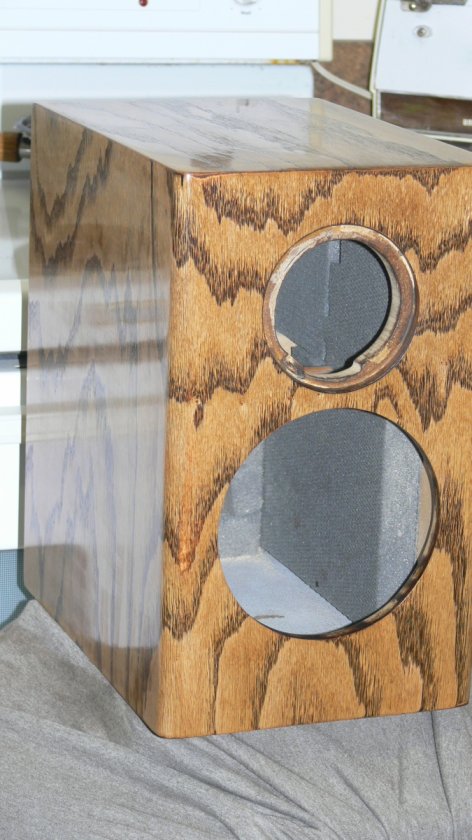


Not sure  if it's really noticable in the pcutres, but I am  really glad I  went to the extra trouble of doing this.   I was able to fix the  edges up much better and get rid of the   few scratches that were  really bugging me..  The issue with the edges was caused  from  using the veneer trimmer while trimming across the grain, caused little tear outs  and chips.

These were assembled using the stock cross overs ,  I did add a .1 uF Vishay Roderstein bypass cap to the  woofer circuit and lined the cabinets with no rez.  The tweeter cutouts did not come out perfect due to the issue with the  flush trimming  of the veneer over the precut tweeter rabits. I won't do it this way again, lesson learned.   I actually thought the issue was going to be worse than it was
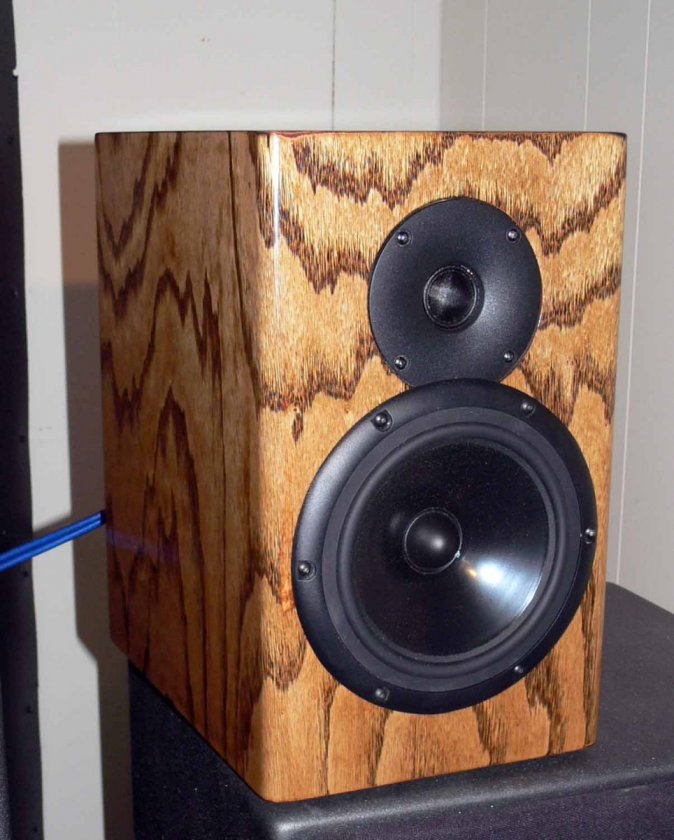


Again, as with the first pair of these I built for my neice  ,  I was  very impressed with these.  Not sure if it   is the  extra bypass caps, the no rez,   or a combination of the  2,  but the bass is definitely cleaner and I'd say faster I also used a bit more acusta stuf in these cabinets... went   with 1.5 oz in each cabinet instead of 1 oz  which I used in the  previous pair.
As many others  have said, these things are a steal at the  price  Danny is selling them at.   With a sheet of norez and the  couple Vishay caps,  the parts total   was only $214.  My room is  18x12 (approx) and  my amp is  pushing out  about 34wpc  where my tubes are biased, and these little guys easily fill the room, Ihaven't even tried them with the  subs yet .  .  I  just listened to   Double Vision  (Bob James/David Sanborn) and  the sound  was  really  nice. When you sit there and listen and think of the price,  it kind of makes you scratch your head a bit.
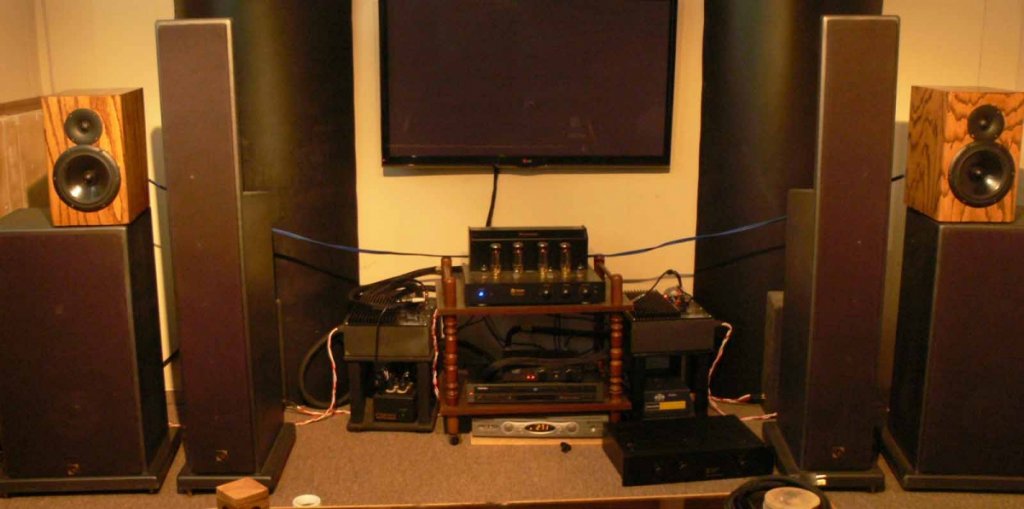


For anyone wanting to try veneering for the first time here are a few  things I  learned that may  prove useful

It isn't overly diffuclit,  just take your time and read lots.
I was worried about  using the  PVA as an adhesive  but it worked  fine. No adhesiion issues,  just  coat both  the  substrate and the veneer, let it dry,  then   iron it on  with a  clean  cotton  piece between the two.
A veneer trimmer works great when trimming  with the grain but  not so well cross cutting.  Next time I'll  use  some frog tape and  flush trim bit in my router (run the bearing on the tape, thanks Mike).
Wipe on Poly  works  well    but if you use  any  color under it, be extra careful  not to  sand through or you'll have a really tough time getting the colr back  even which was why I ened up sanding back to  the 90 degree corners at the back  edge  of each side panel.
Don't precut any rabits unless they are  very deep as  a flush tim bit  , even with a thin bearing,  won't  work to trim them out after applying the veneer..  You can get some bits  with a thin shoulder instead of a bearing  that some guys have usied, but  I'd  just cut these   holes after the veneer has been applied.   Plain cut outs are fine as you end up with a  decent surface to run the bearing on,  just be careful  of those shallow rabits.


When I disconnect them and  pull them  off the H-frames, I'll  grab a couple more shot  including the rear of each  cabinet.

Was a fun project and now I'm not scared to veneer anymore   :D
-jay
« Last Edit: 23 Dec 2014, 07:27 am by Captainhemo »

Danny Richie

Re: First Veneer Project: X LS Encores
« Reply #38 on: 23 Dec 2014, 04:08 pm »
Nice job man.  :thumb:

mlundy57

  • Industry Participant
  • Posts: 3577
Re: First Veneer Project: X LS Encores
« Reply #39 on: 23 Dec 2014, 04:27 pm »
Way to go Jay.

And you found out the reason I prefer shellack to poly or lacquer. Even though poly/lacquer is tougher, if you have a problem, it gets damaged, whatever you can't blend in a repair. You have to sand it completely off and start the whole side (sides if you put a round over on the front edges) from scratch. With shellack you can just repair the damaged area and it will blend in.

Of course the down side of shellack is is that it gets damaged easier than either poly or lacquer. And then there is that pesky, tiny little issue with shellack, it takes a lot longer and a whole lot more elbow grease to apply in the first place.

So, on the MTM's, the pair going to the nephew and his wife (no kids) is getting a French Polish shellack finish (low gloss) while the pair going to the niece and her family (three kids) is getting Armor Seal (oil/poly mix).

Again, good work.

Mike